FIDO2 MDS Server (UI)
- Admin role permissions in Control Center
- Familiar with the FIDO2 MDS Server overview
Accessing the MDS Server Page
- Click Settings in the left navigation pane
- Select the FIDO2 MDS Server tab
The page displays two tabs: FIDO2 Metadata Statements and Management.
FIDO2 Metadata Statements Tab
This tab provides a searchable, filterable table of all metadata entries known to your HYPR deployment — both FIDO Alliance-sourced and manually uploaded.

A status banner at the top shows when the MDS was last successfully synced from the FIDO Alliance.
Table Columns
| Column | Description |
|---|---|
| Icon | Authenticator icon (falls back to HYPR logo if unavailable) |
| Authenticator | Friendly name and AAGUID |
| Status | FIDO certification level (e.g., FIDO_CERTIFIED, FIDO_CERTIFIED_L1) |
| UVM | User verification methods (e.g., fingerprint, passcode, presence) |
| Transports | Supported transports (e.g., USB, NFC, BLE, internal, hybrid) |
| Actions | View JSON button to inspect the full metadata statement |
Additional columns can be toggled via the Columns button:
| Column | Description |
|---|---|
| Attachment | Authenticator attachment type (internal, external, etc.) |
| Key Protection | Key protection mechanism (hardware, software, TEE, secure element) |
| Algorithms | Supported cryptographic algorithms |
Search and Filters
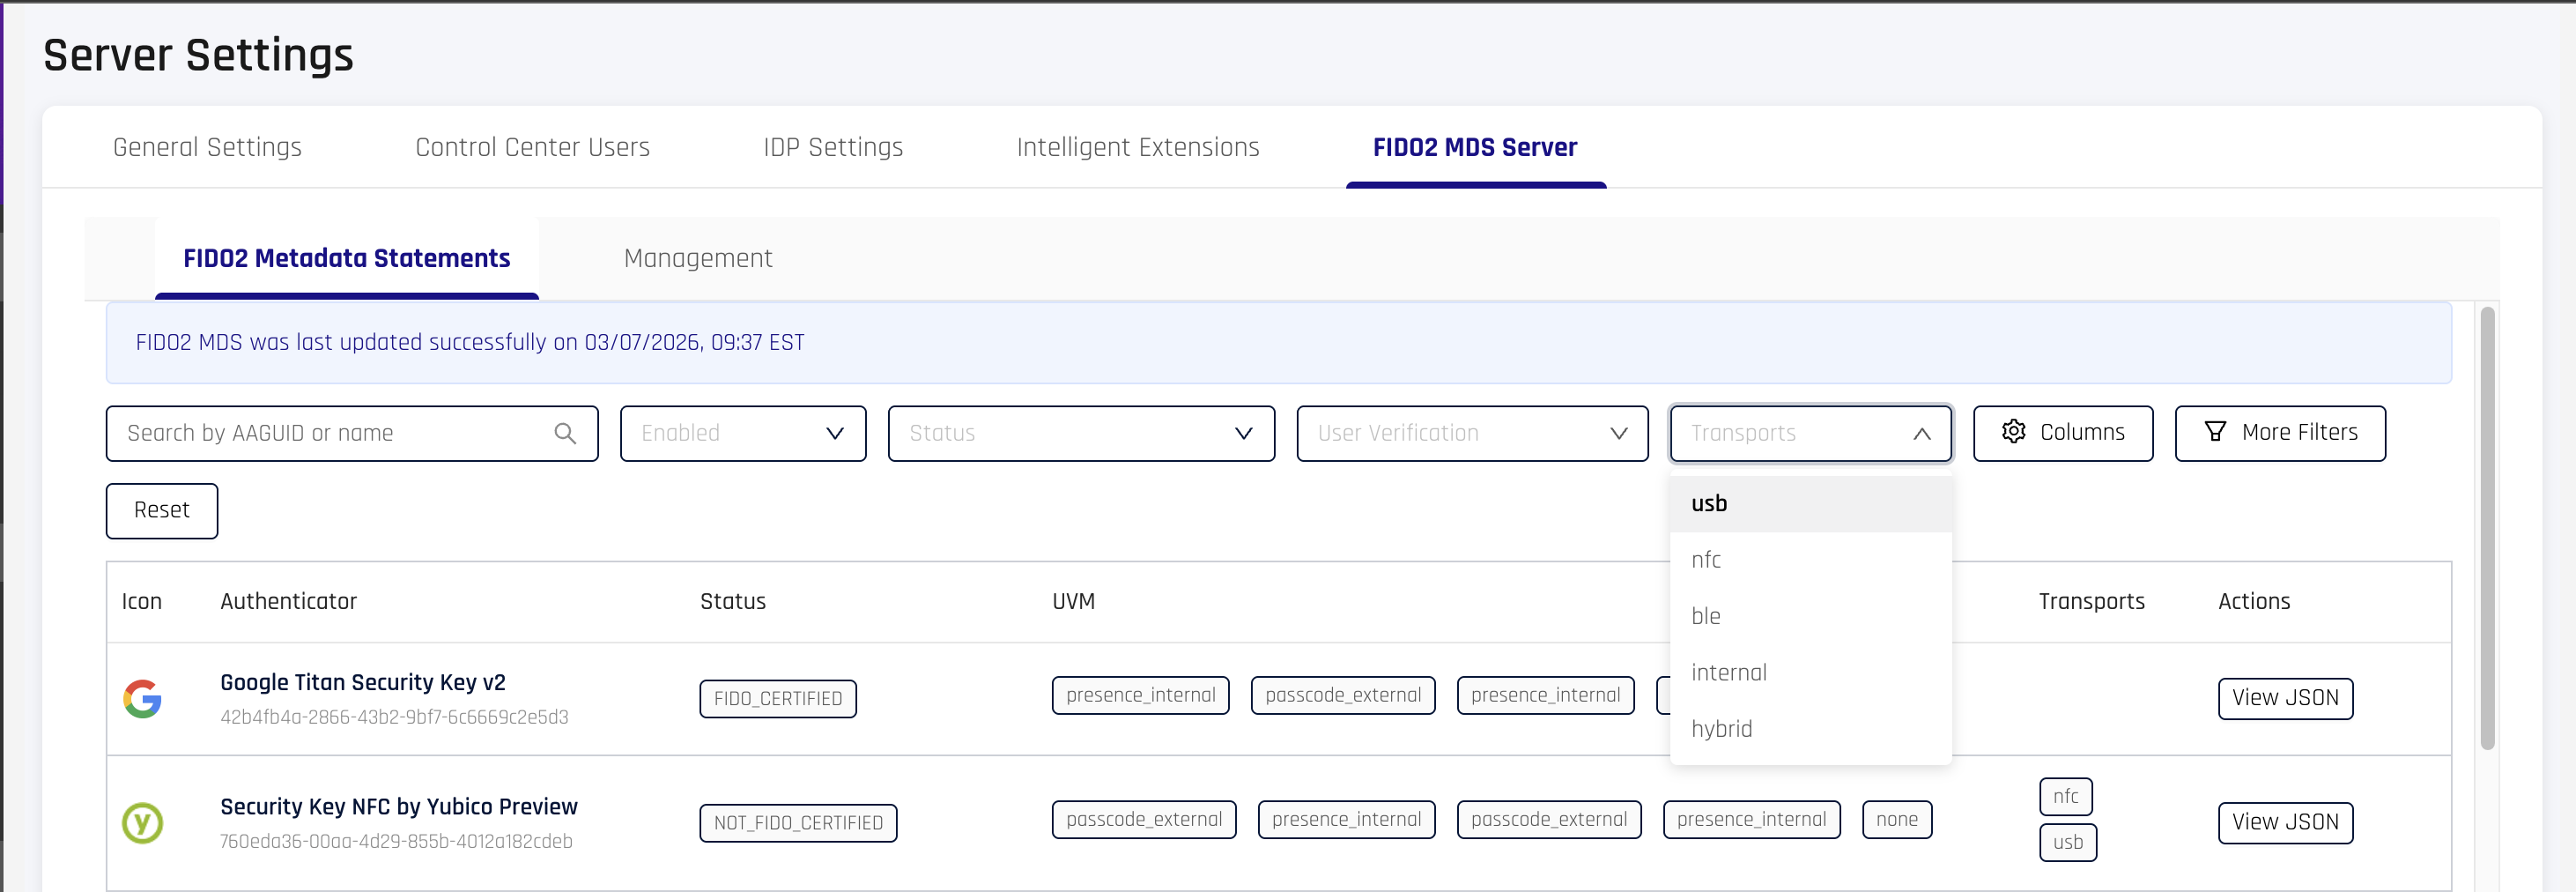
| Filter | Type | Description |
|---|---|---|
| Search | Free text | Searches against AAGUID and authenticator name |
| Enabled | Dropdown | Filter by enabled or disabled status |
| Status | Dropdown | Filter by FIDO certification level |
| User Verification | Multi-select | Filter by user verification methods (OR match) |
| Transports | Multi-select | Filter by supported transport protocols |
Click More Filters to access additional filters:
| Filter | Values |
|---|---|
| Attachment | internal, external, wired, wireless, NFC, Bluetooth |
| Key Protection | hardware, software, TEE, secure element, remote handle |
| Algorithms | secp256r1, ed25519, RSA PKCS v1.5, RSA PSS, and others |
Click Reset to clear all active filters.
Viewing Metadata Details
Click View JSON on any row to open a modal with the full metadata statement.

The modal displays:
- The authenticator's AAGUID (copyable)
- A Copy JSON button for the complete metadata statement
- Pretty-printed JSON of all metadata fields
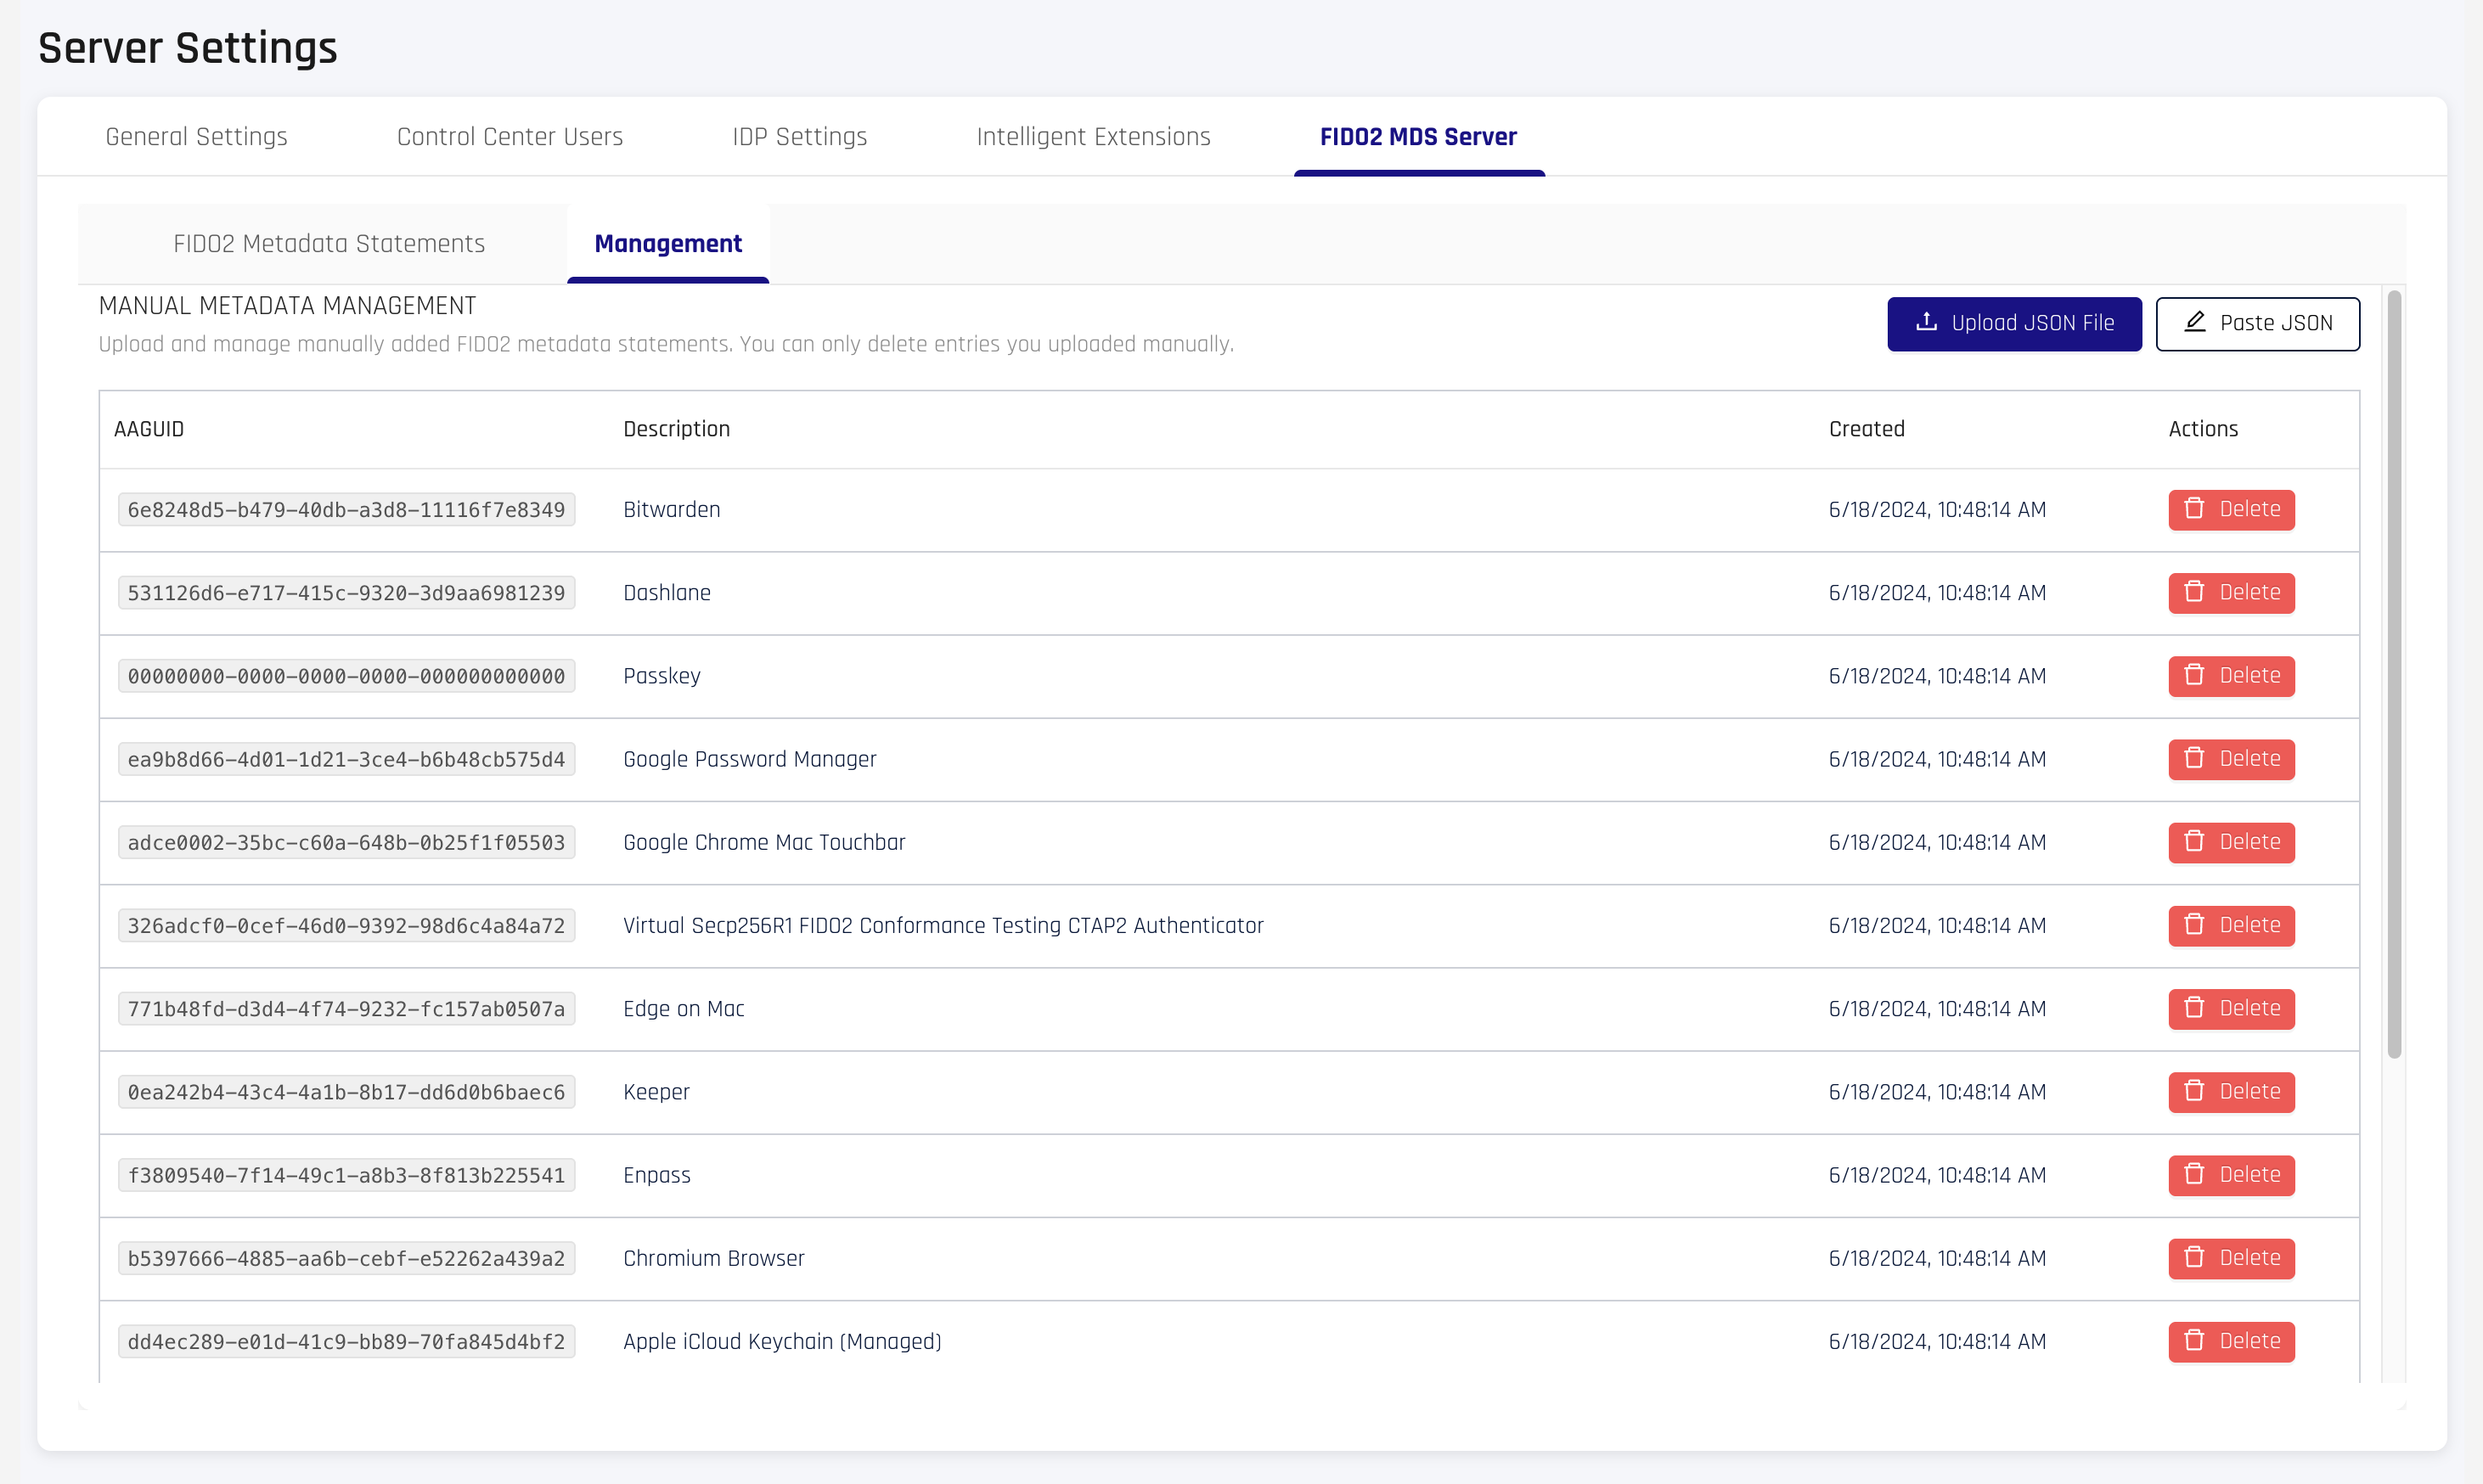
Management Tab
The Management tab allows administrators to upload custom metadata statements and manage manually added entries.
Uploading Custom Metadata
Two methods are available:
Upload JSON File
- Click Upload JSON File
- Select a
.jsonfile containing a valid FIDO2MetadataStatement(max 1 MB) - The entry appears in the table upon successful upload
Paste JSON
- Click Paste JSON
- Paste a valid
MetadataStatementJSON into the text area (max 1 MB) - Click Submit
Uploaded metadata must conform to the FIDO2 MetadataStatement schema. Invalid JSON or missing required fields will be rejected.
Managing Manual Entries
The table displays all manually uploaded entries with the following columns:
| Column | Description |
|---|---|
| AAGUID | The authenticator's unique identifier |
| Description | Friendly name from the metadata statement |
| Created | Upload timestamp |
| Actions | Delete button with confirmation prompt |
Only manually uploaded entries appear in this tab. Entries synced from the FIDO Alliance MDS cannot be deleted from the UI — they are managed automatically by the MDS sync process.
Permissions Required
Admin role required. The following permission scopes apply:
| Action | Required Permission |
|---|---|
| View metadata table and entries | RP_APP_CONFIG_VIEW or RP_APP_CONFIG_MODIFY |
| Upload or delete manual entries | RP_APP_CONFIG_MODIFY |
Related Information
- FIDO2 MDS Server (API) - Programmatic metadata access
- FIDO2 Authenticators Granular Control - Per-application AAGUID policies
- FIDO2 Settings - Per-application FIDO2 configuration
- Audit Trail Events - Track metadata changes