Configure Okta As an OIDC Provider for Control Center
The Control Center portion of this functionality must be configured using CC's Advanced Mode.
This page covers Okta SSO for the HYPR Control Center application (HYPR_* role names). The Affirm Helpdesk portal uses a separate Okta application, different role names (AFFIRM_HELPDESK_*), and a different role claim (affirm_helpdesk_role). See Okta: OIDC Integration for HYPR Affirm Helpdesk for that procedure. Re-using the CC setup with CC role names causes an "Access not allowed — you do not have the required role to access this application" error on the Helpdesk portal.
Sign in to HYPR Control Center (CC) with Okta using Role-based Access Control (RBAC) and Just-in-time (JIT) provisioning.
If your HYPR Control Center users are part of your Okta organization, you can integrate the Control Center into your Okta single sign-on. This is a two step-process:
-
Add the CC Application to Okta
-
Configure CC to use Okta Single Sign-on (SSO)
The Control Center portion of this functionality must be configured using CC's Advanced Mode, which can be accessed using the toggle on CC Home page.
Overview
HYPR Control Center (CC) access occurs via the HYPR login page, which combines a username with a passwordless authenticator.
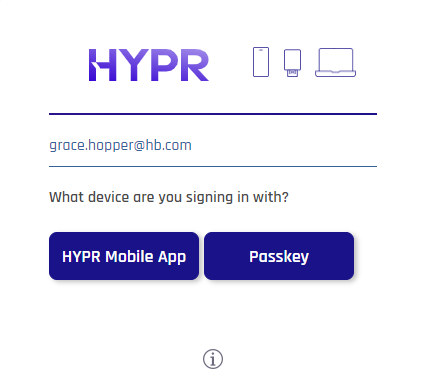
Using existing Okta accounts and the OpenID Connect (OIDC) SSO protocol, Okta acts as the OIDC provider and HYPR as an OIDC relying party (RP), allowing Okta-regulated login to CC.
During the sign-on process Okta sends a username, and HYPR automatically creates the account in the HYPR CC if the account does not already exist. By default, the account will be created with Viewer privileges, but if the hypr_role claim is included, HYPR will use the value sent with hypr_role as the assigned administrative role for that account. Please see Control Center Users and Roles for more on HYPR CC role-based access control.
Configuring Okta
Follow the steps in this section to prepare the side of the communication.
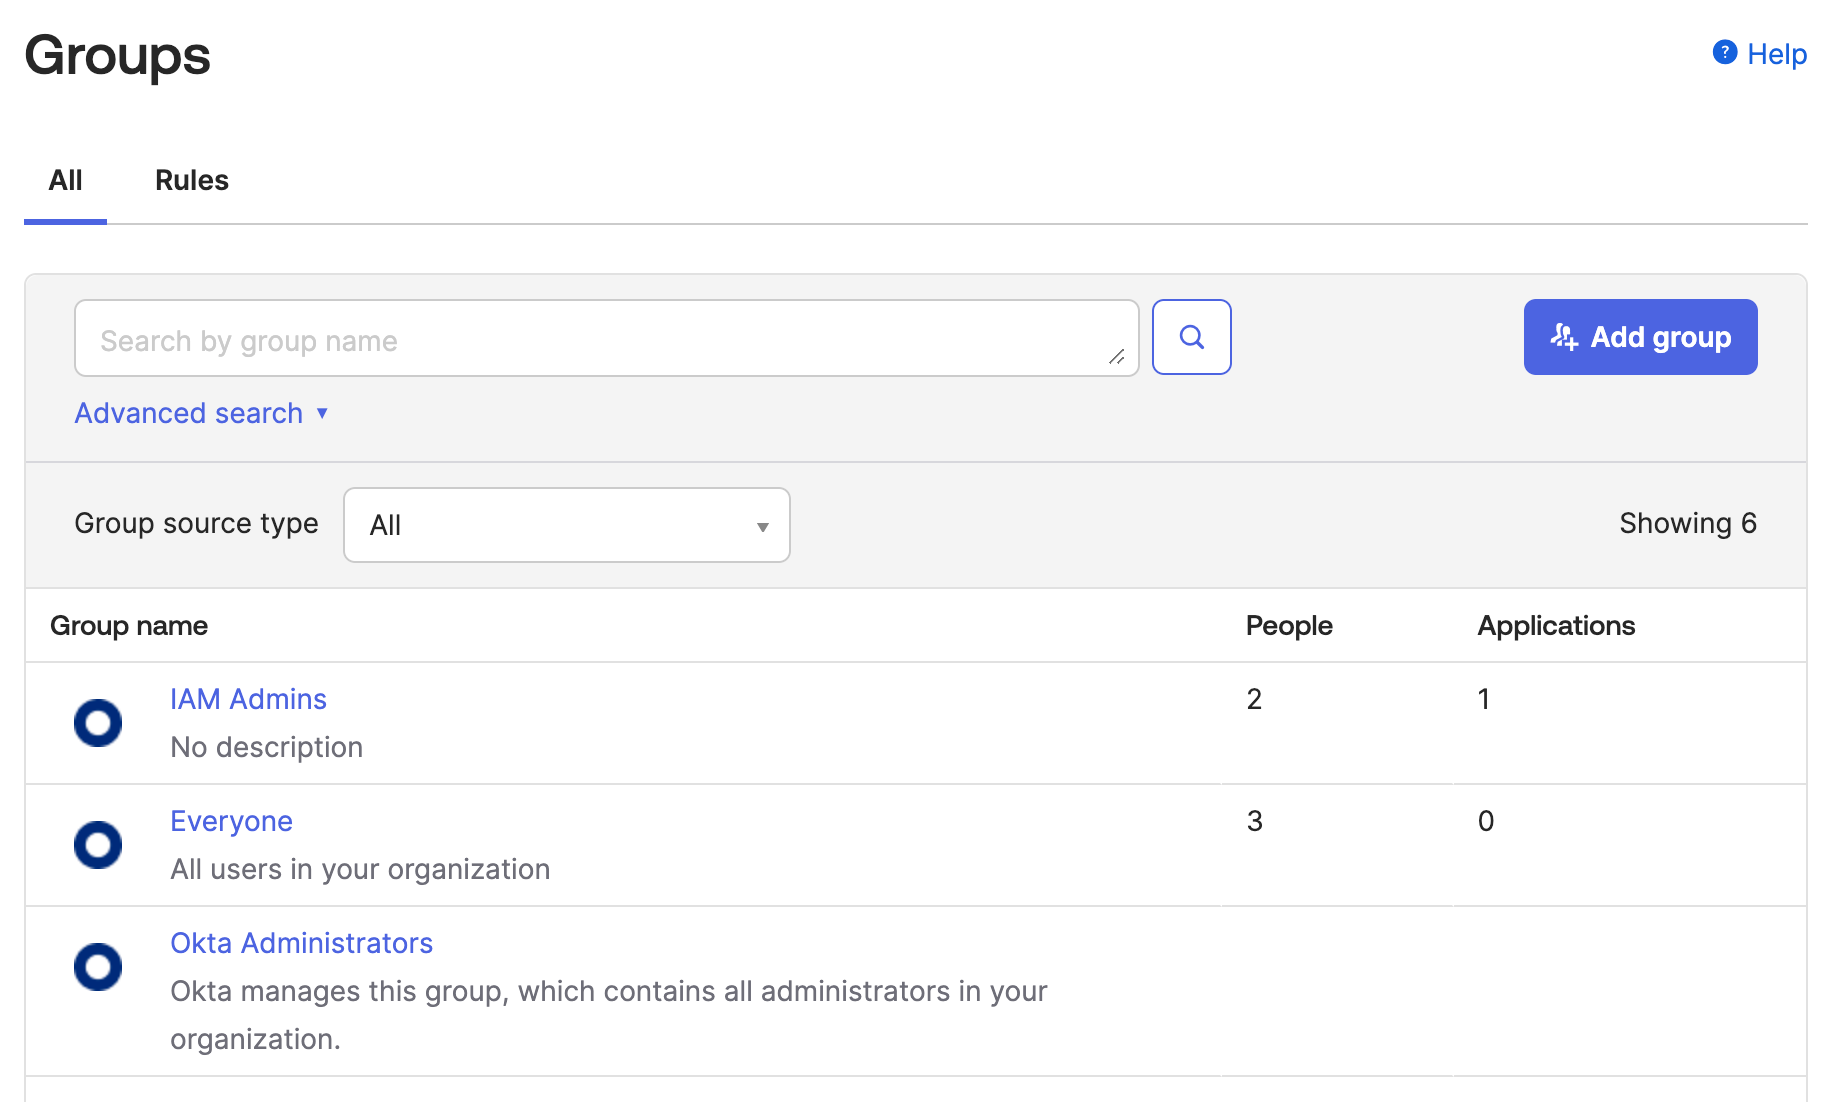
Verify Necessary Okta Groups
The HYPR Control Center defines five roles, which have different levels of access. When using Okta to sign into the Control Center, you need to decide which roles align with your business case. You may choose to use any number of the roles, but for each role you would like to use, you will need an associated group. The available roles are listed in the table below:
| Role | Description |
|---|---|
| HYPR_USER_MANAGER | Account recovery and magic link access |
| HYPR_ADMIN | Read and write access to all resources |
| HYPR_LOG_AUDITOR | Access to audit logs |
| HYPR_APP_MANAGER | Integration setup access |
| HYPR_VIEWER | View-only access |
Verify the existing Okta groups—some may already be suitable for HYPR roles that you want to assign to your users. For example, you may already have a group called IAM Admins that could be assigned the HYPR_ADMIN role. If new ones are indeed required, create them.
Create a New Application
Creating a new application in Okta allows Okta to initiate the OIDC protocol for the HYPR CC.
-
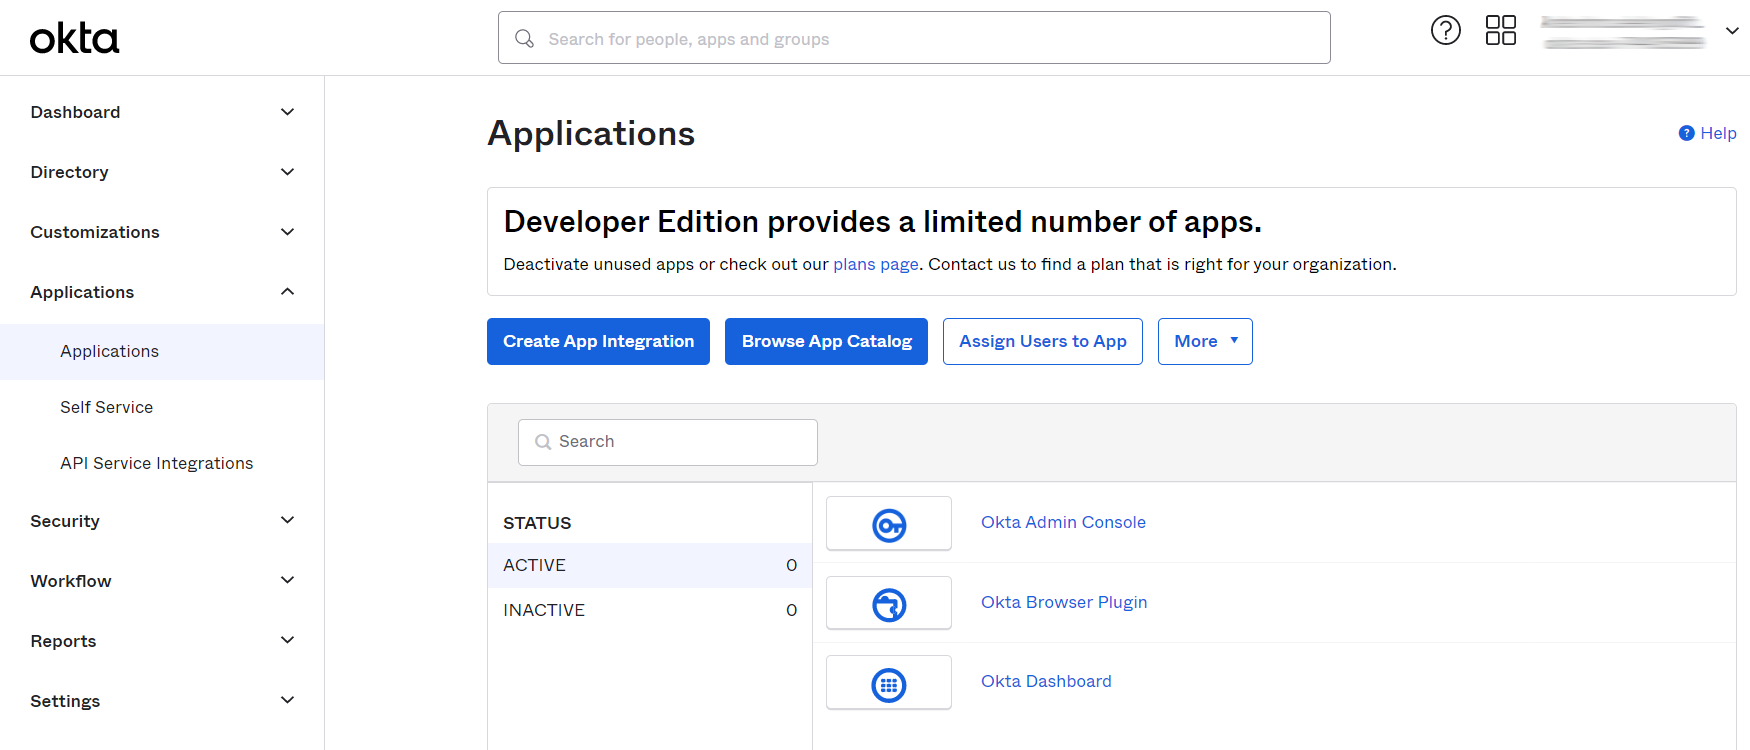
Login to Okta administration console.
-
Go to Applications → Applications. Click Create App Integration.
-
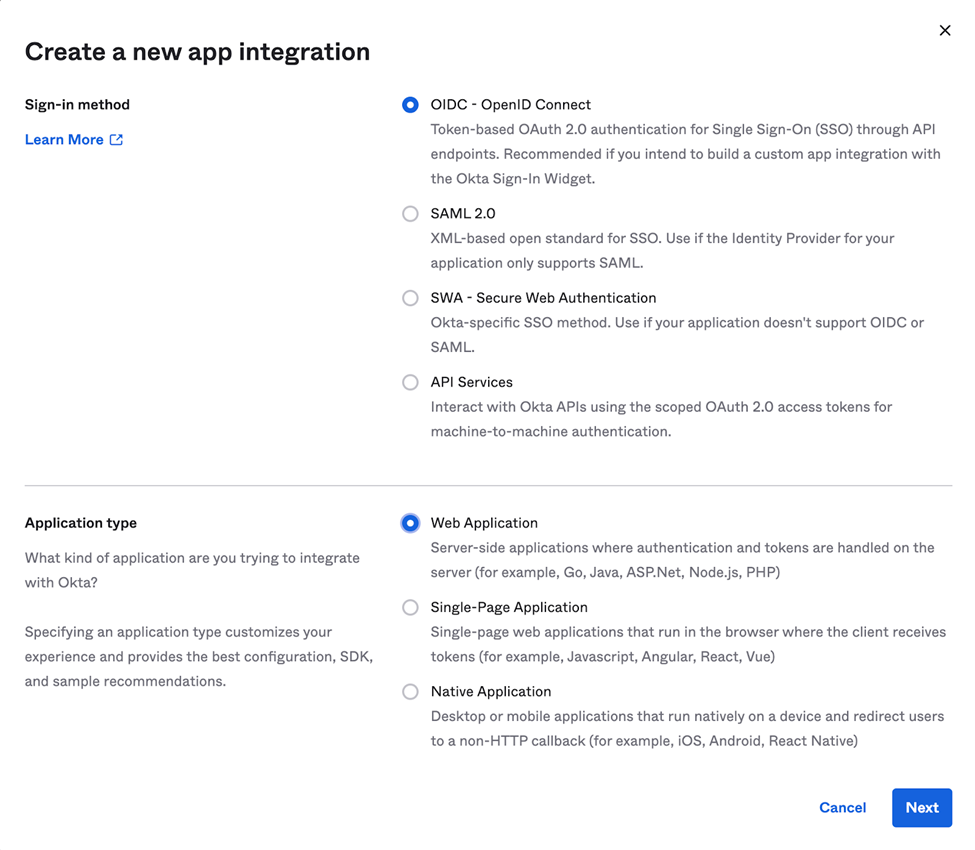
Choose the OIDC and Web Application radio buttons. Click Next.
-
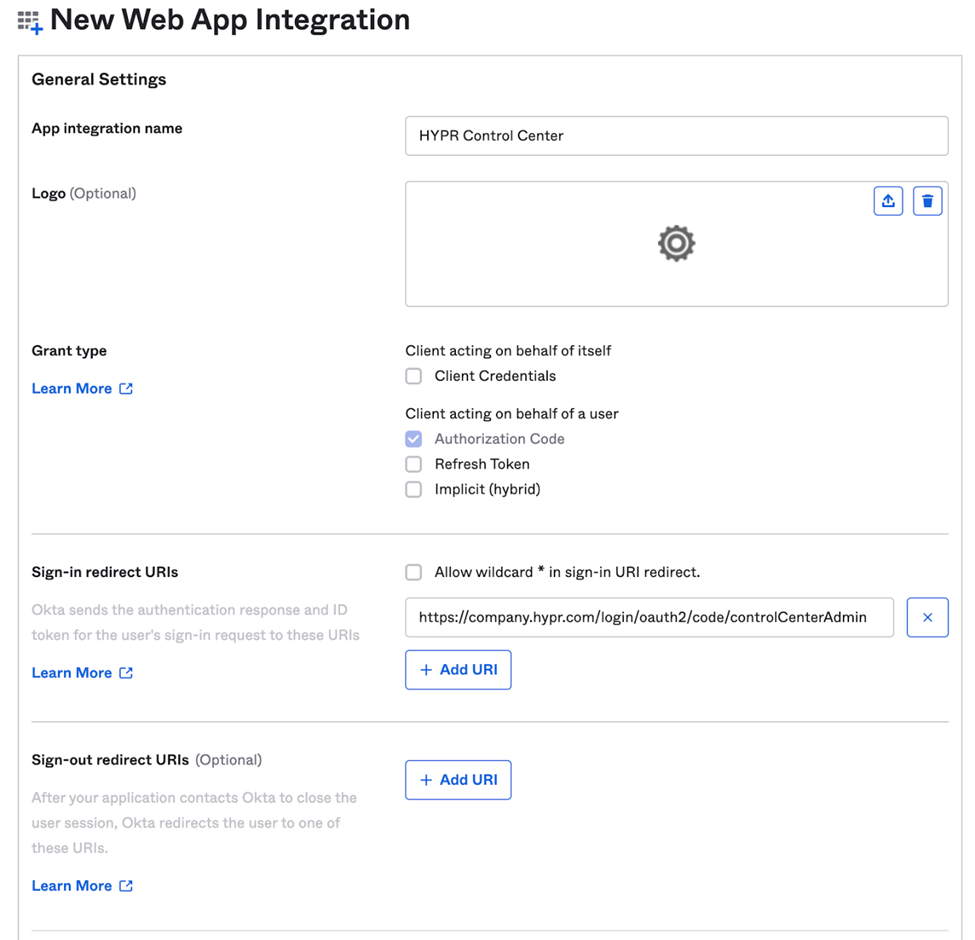
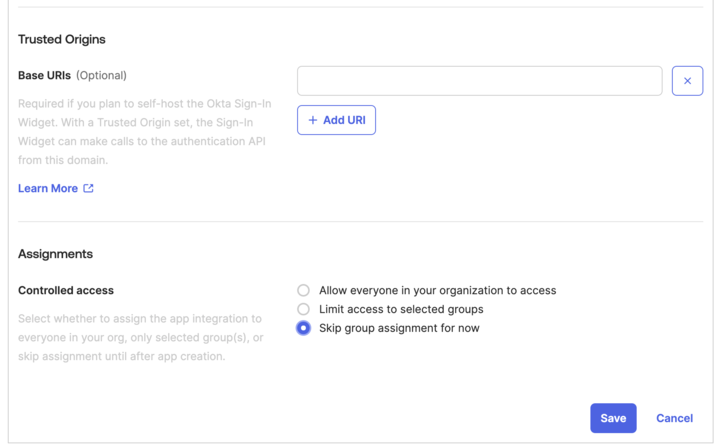
The New Web App Integration dialog opens. Complete the form using the values shown below, and click Save when you are finished.
Field Name Value App integration name Choose a name; e.g., HYPR CC. Grant type Authorization Code Sign-in redirect URIs https://<your HYPR tenant>/login/oauth2/code/controlCenterAdminSign-out redirect URIs Leave blank. Controlled access Select Limit access to selected groups, then add the HYPR groups created in the previous step. Enable immediate access Enable immediate access with Federation Broker Mode.
-
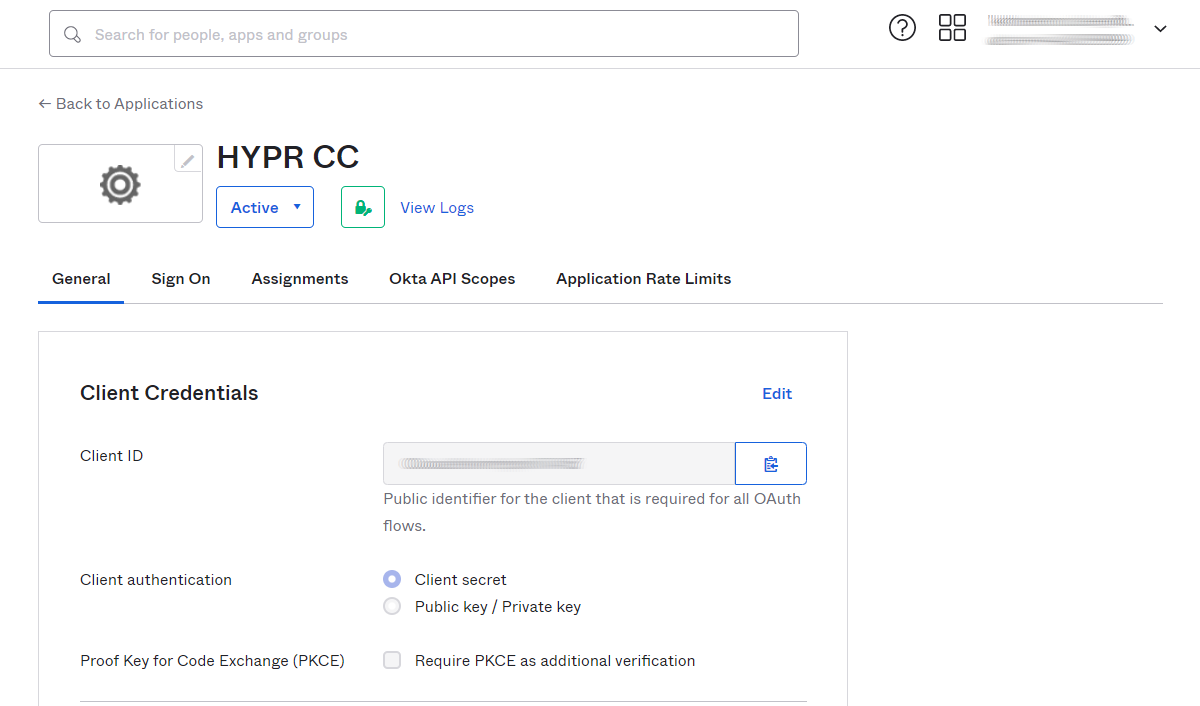
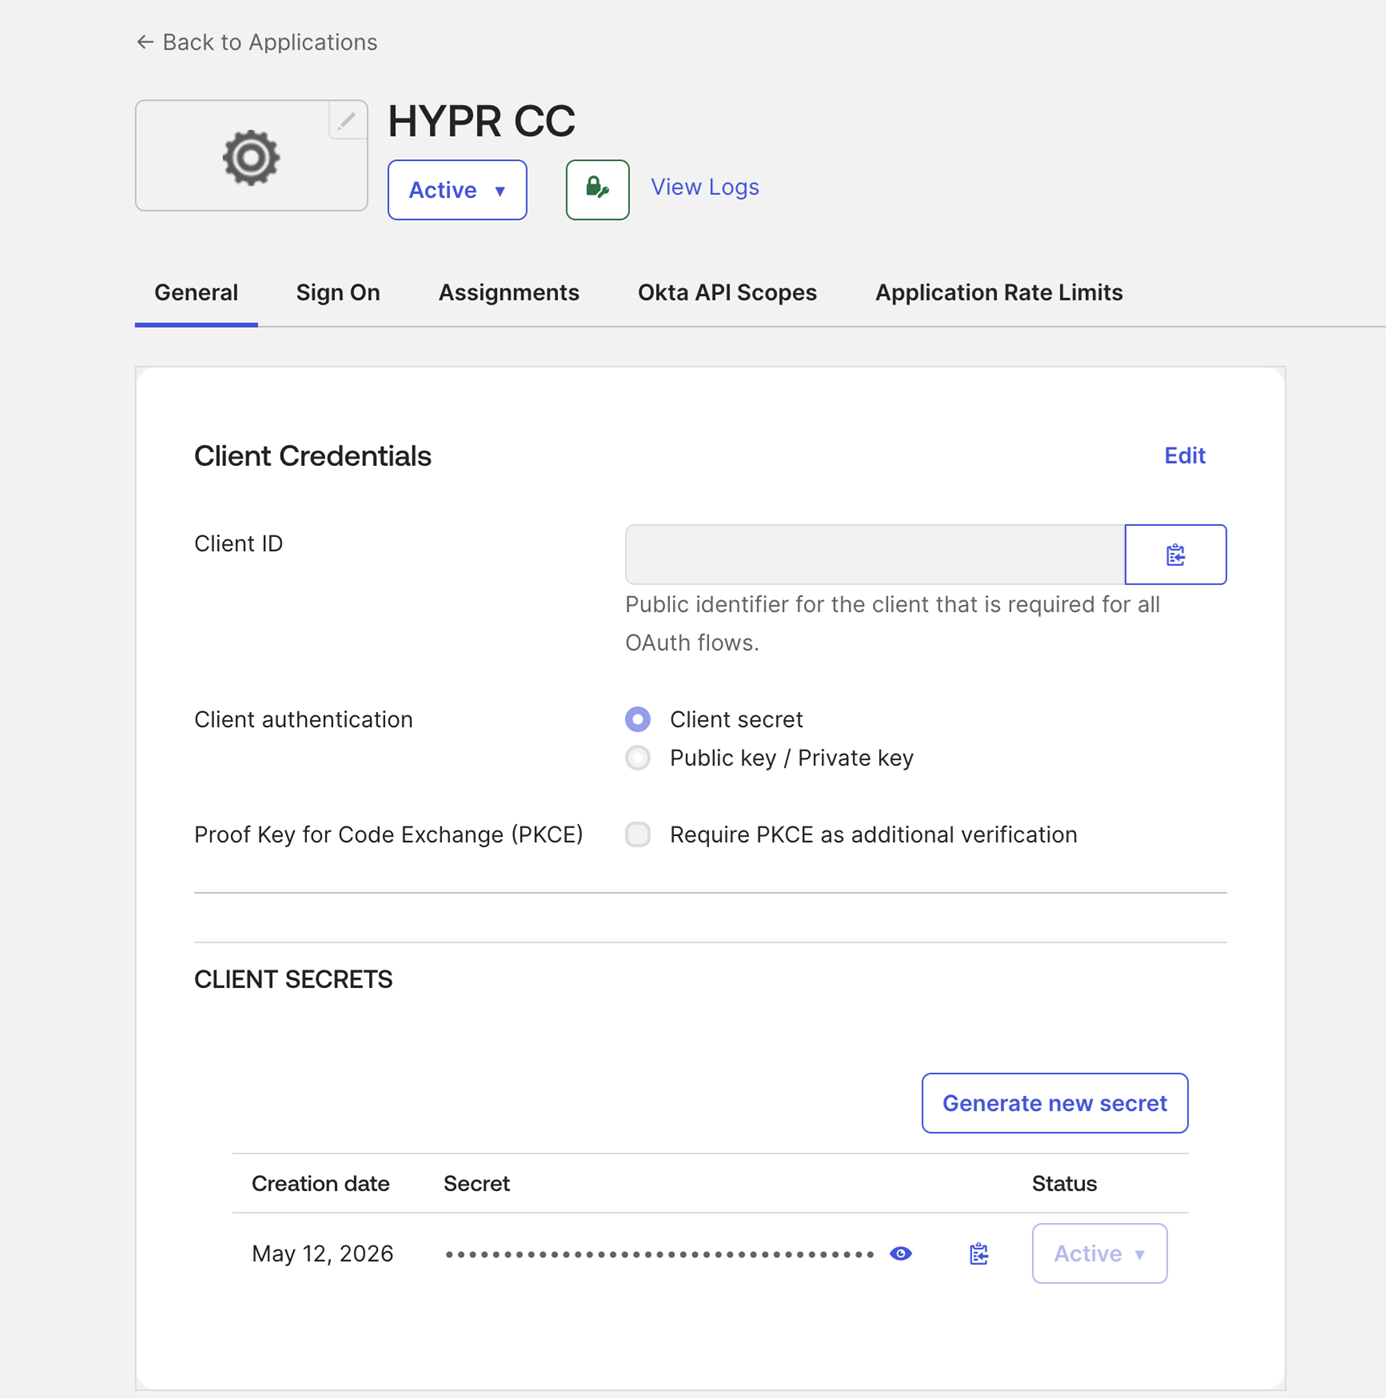
After saving the integration, Okta displays the page containing the integration's properties. Store the Client ID and Client Secret in a password manager or otherwise secure location. These values will be used in the HYPR CC configuration.
Add a Custom Profile Field
-
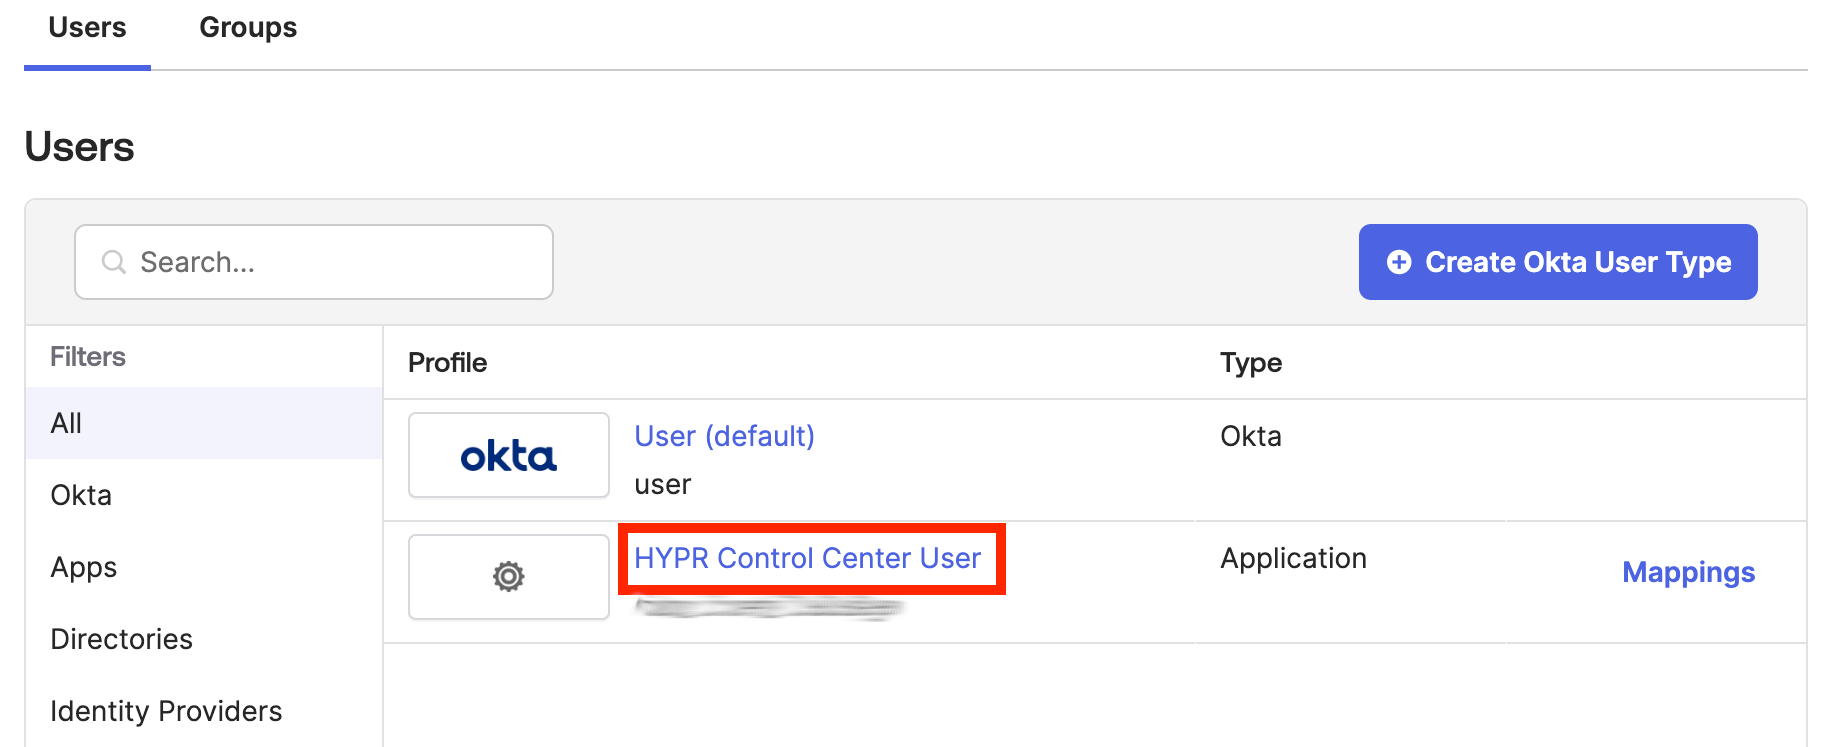
Navigate to Directory → Profile Editor. In the Users tab, click the user profile that represents the CC application created above.
-
Under Attributes, click Add Attribute.
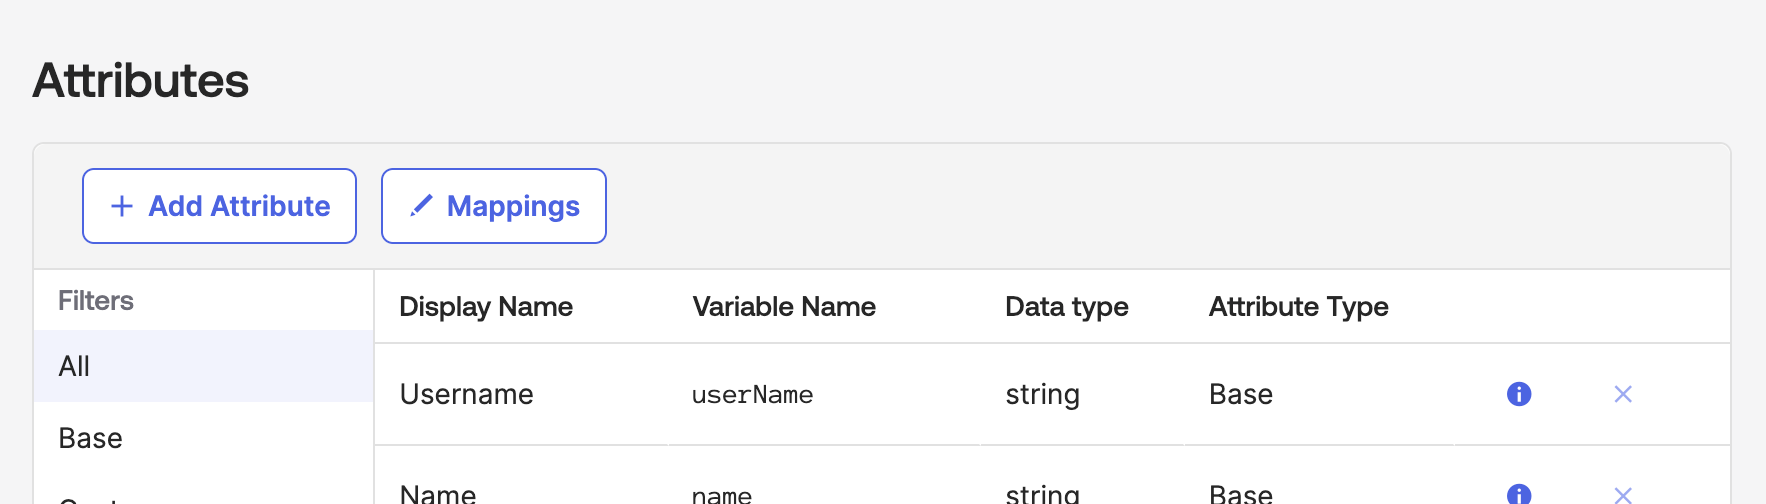
-
Complete the Add Attribute fields as follows. Click Save when you are finished.
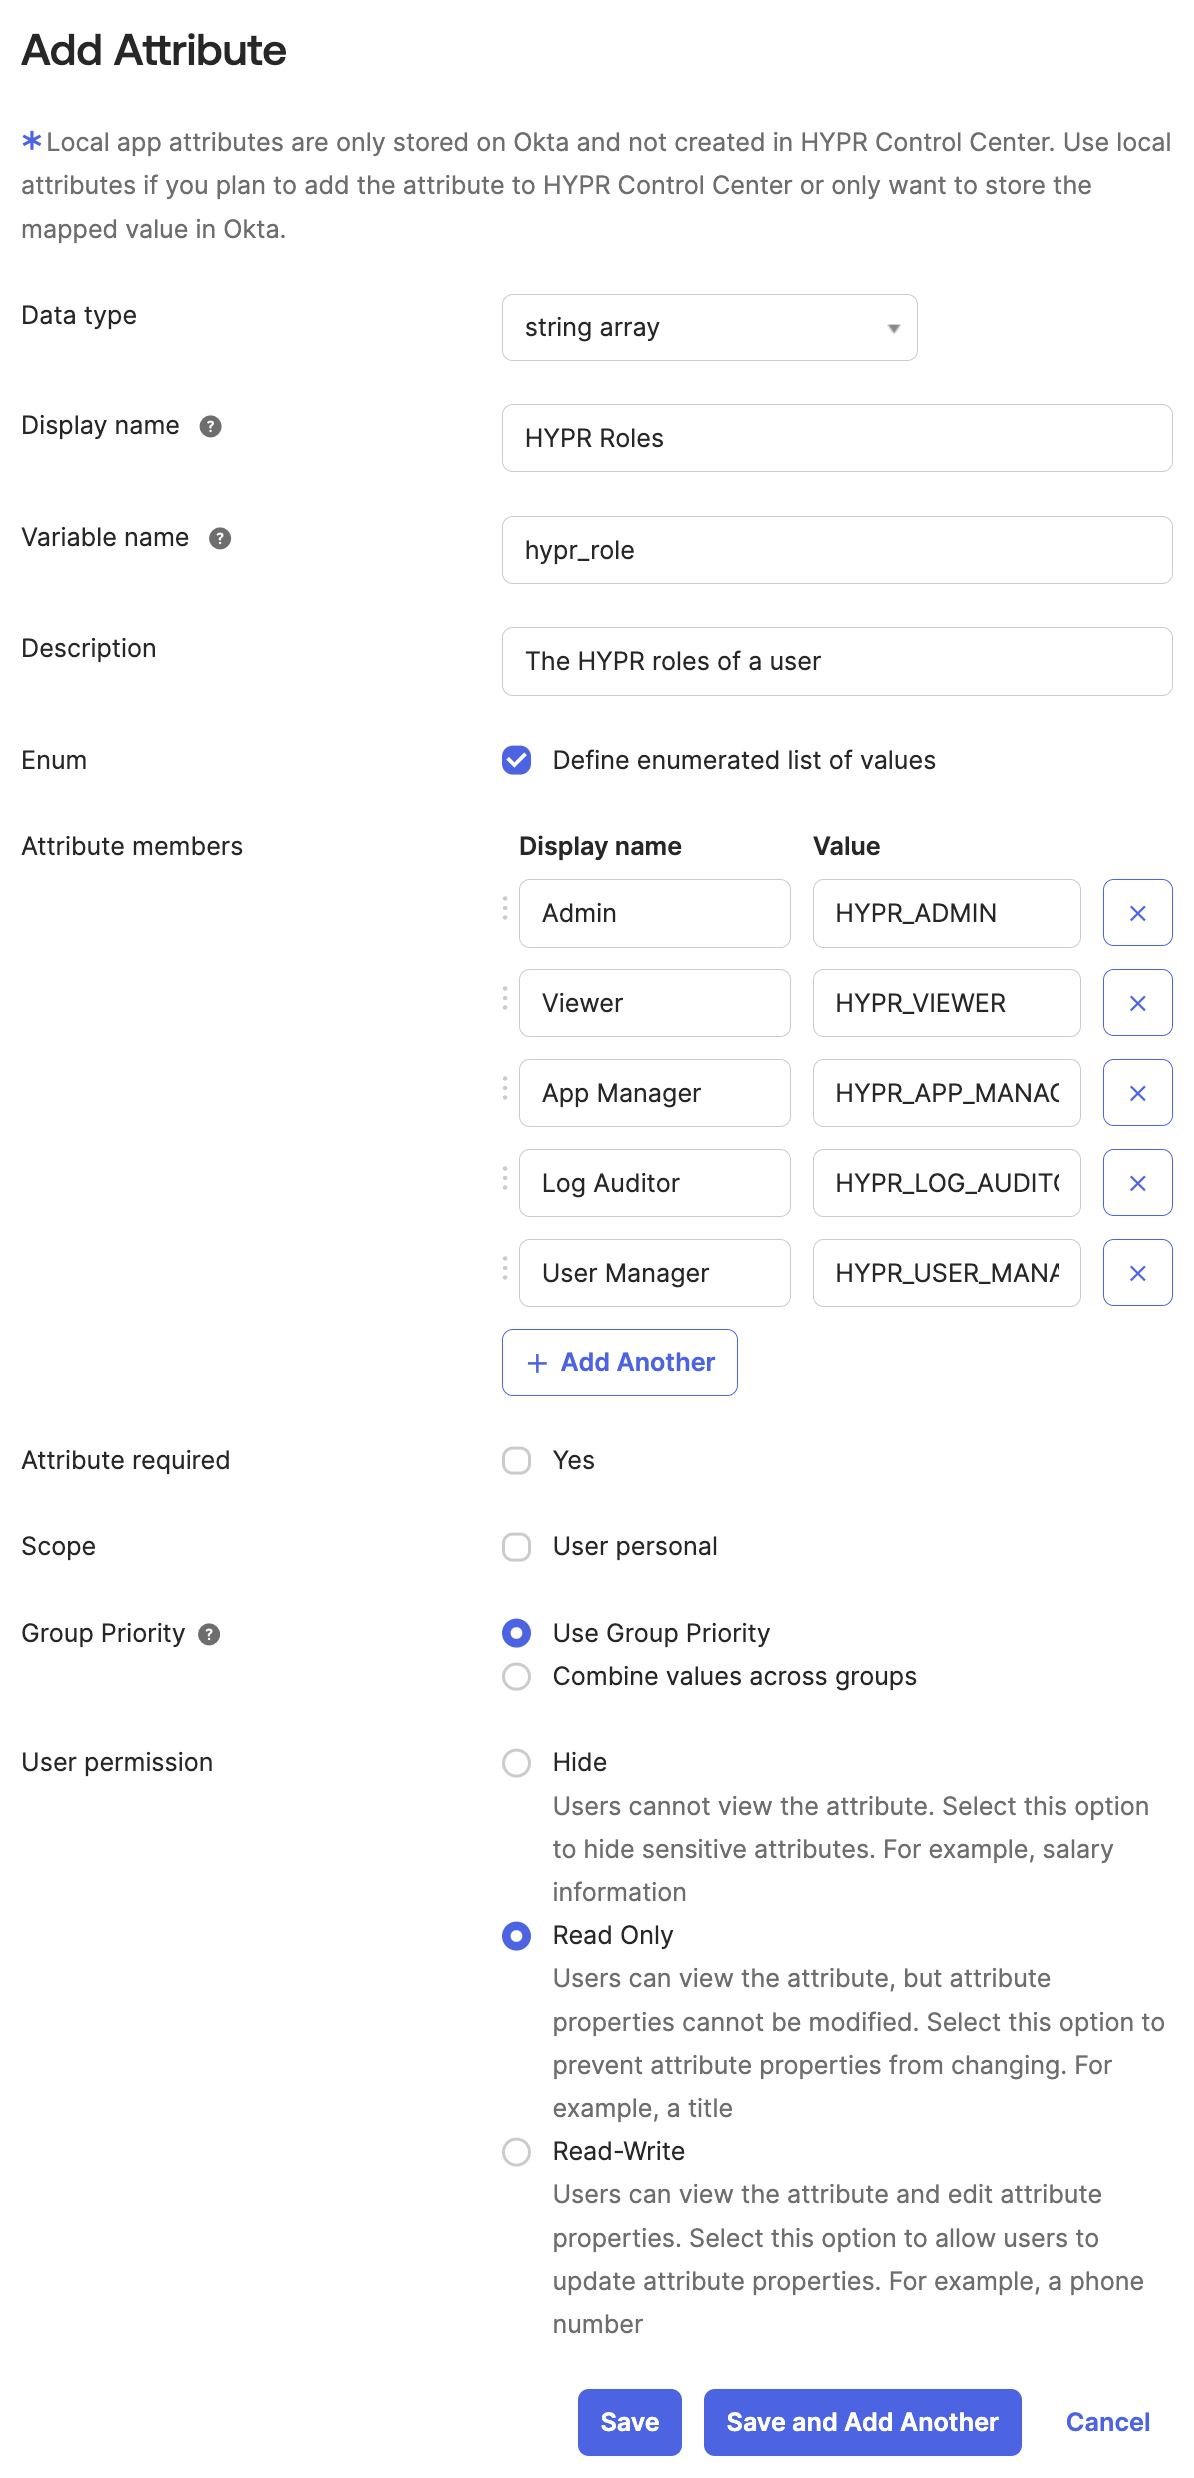
Field [Display name] Value Data Type stringarrayDisplay name HYPR Roles Description The HYPR roles of a user Enum Checked Attribute members Admin HYPR_ADMINViewer HYPR_VIEWERApp Manager HYPR_APP_MANAGERLog Auditor HYPR_LOG_AUDITORUser Manager HYPR_USER_MANAGER
Assign Groups to the HYPR Control Center App
For each group you associated with a HYPR role, perform the following steps:
-
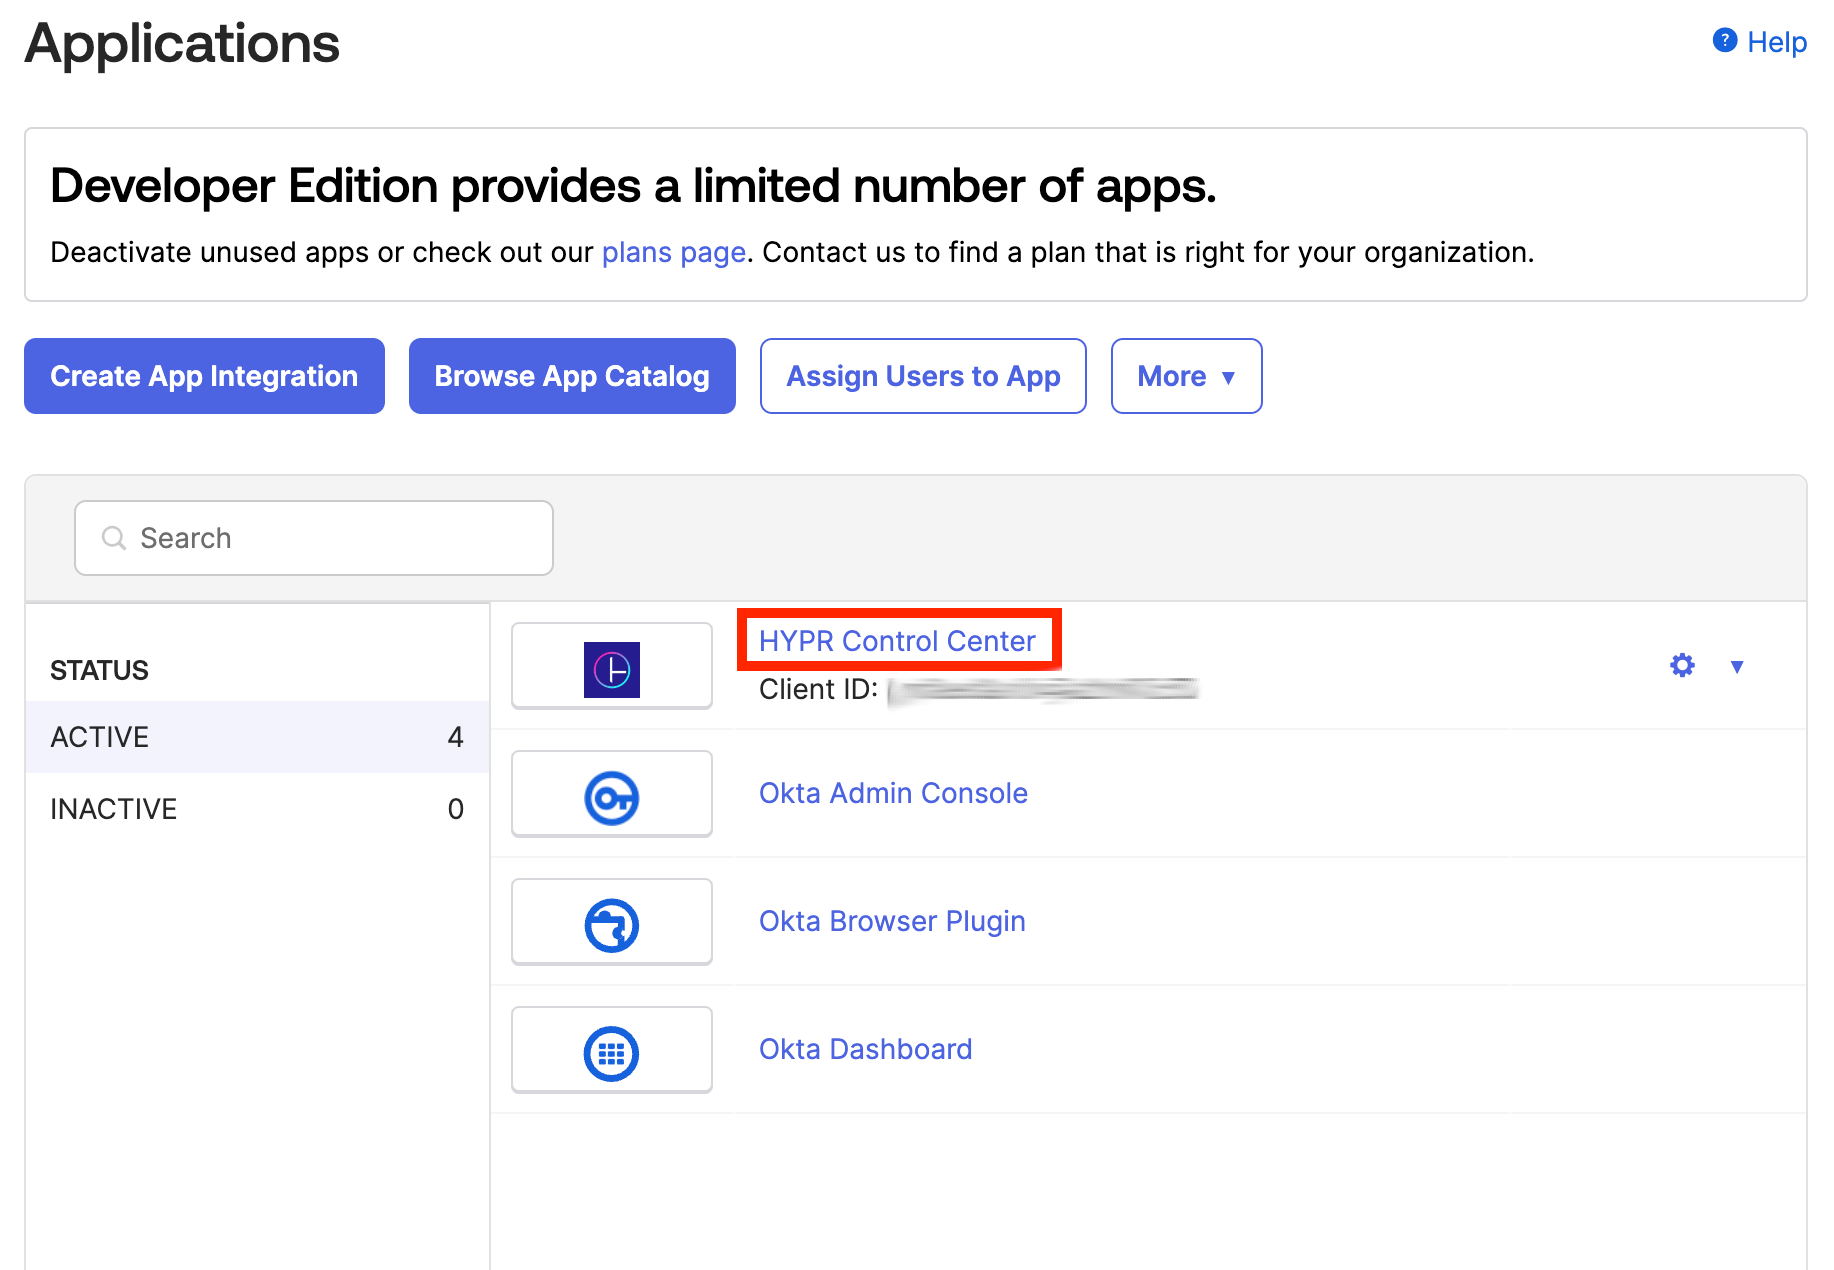
Navigate to Applications → Applications. Click on the application that represents the CC app created earlier.
-
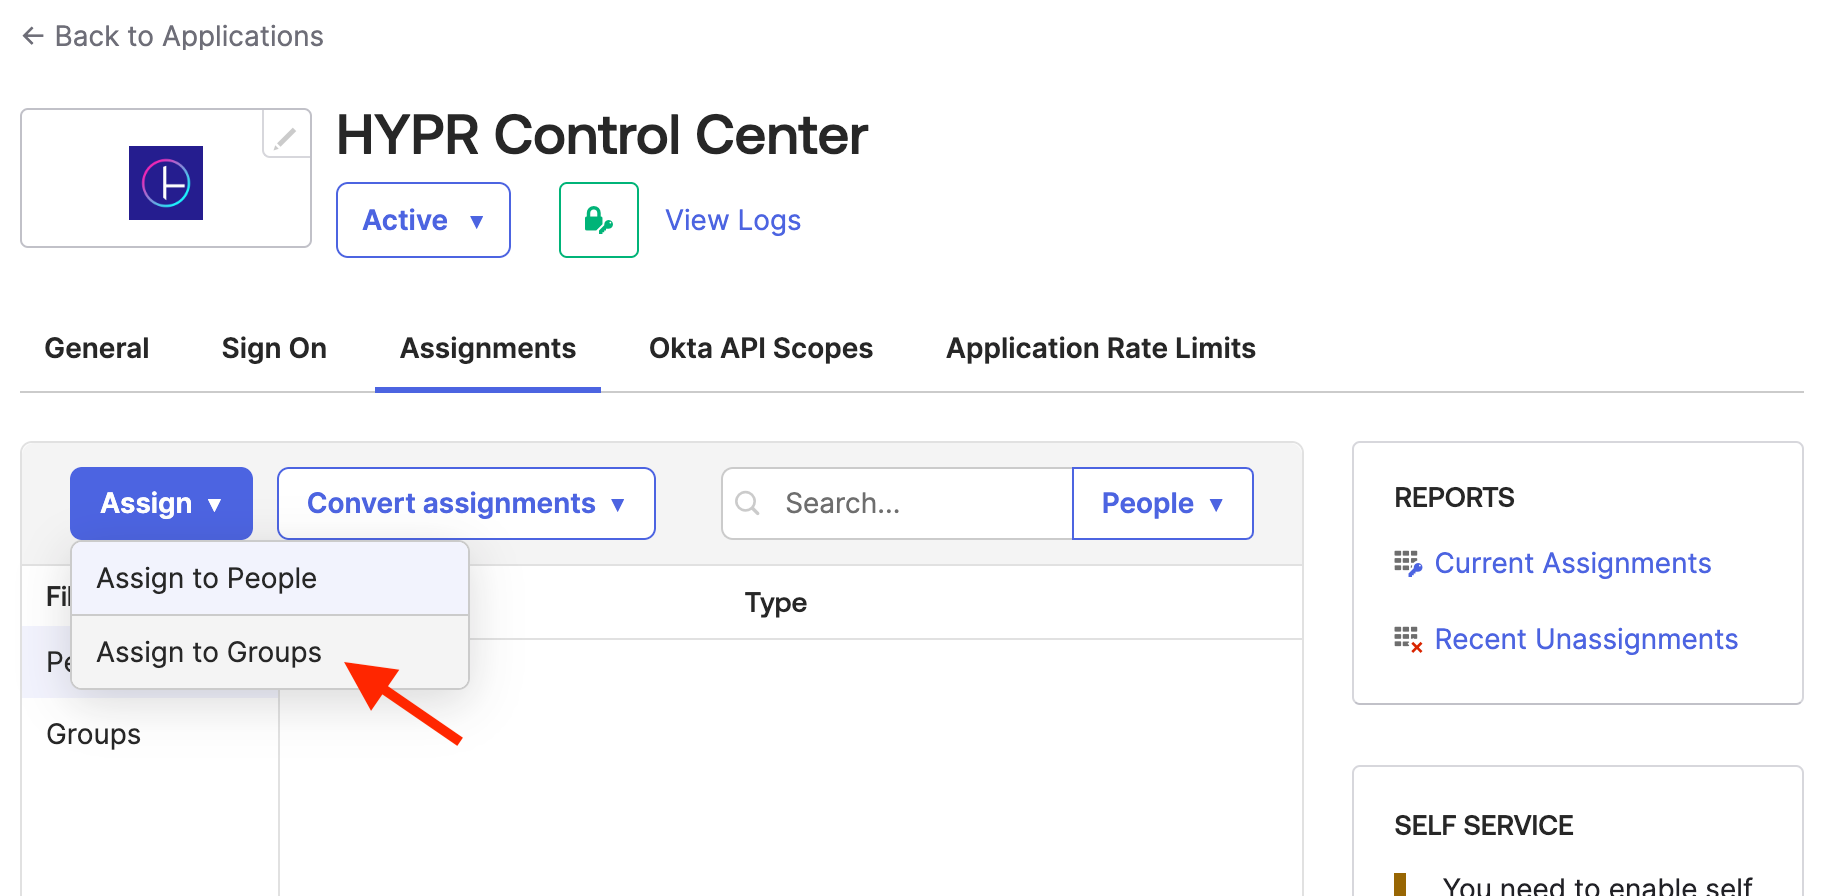
Drop down the Assignments menu. Click Assign, then Assign to Groups.
-
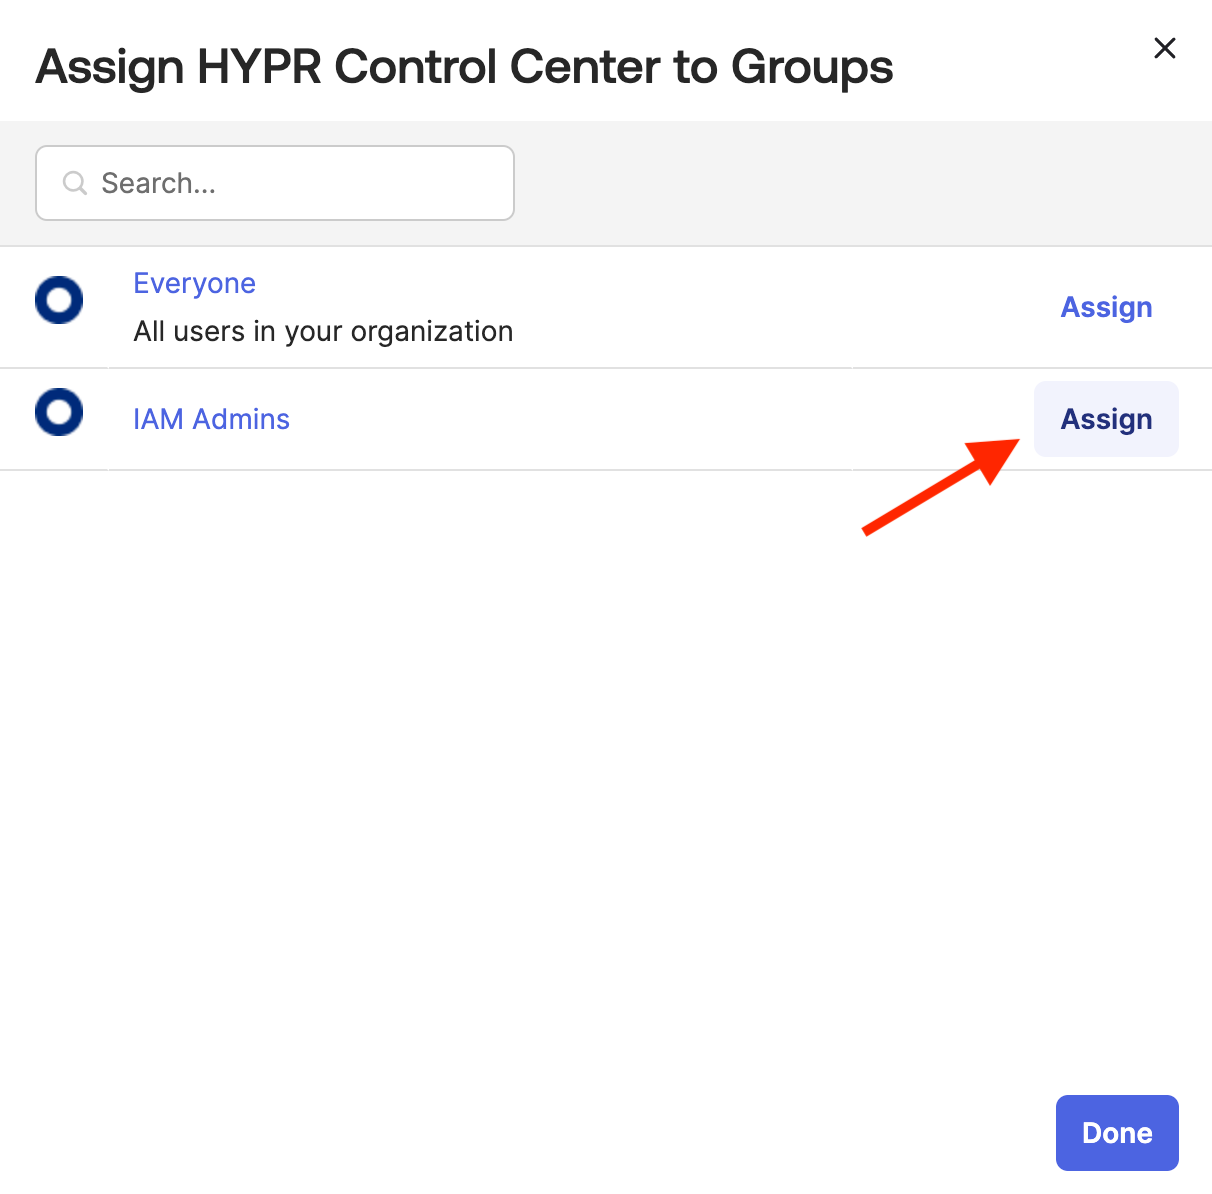
In the Assign dialog, click Assign next to the group you wish to assign.
-
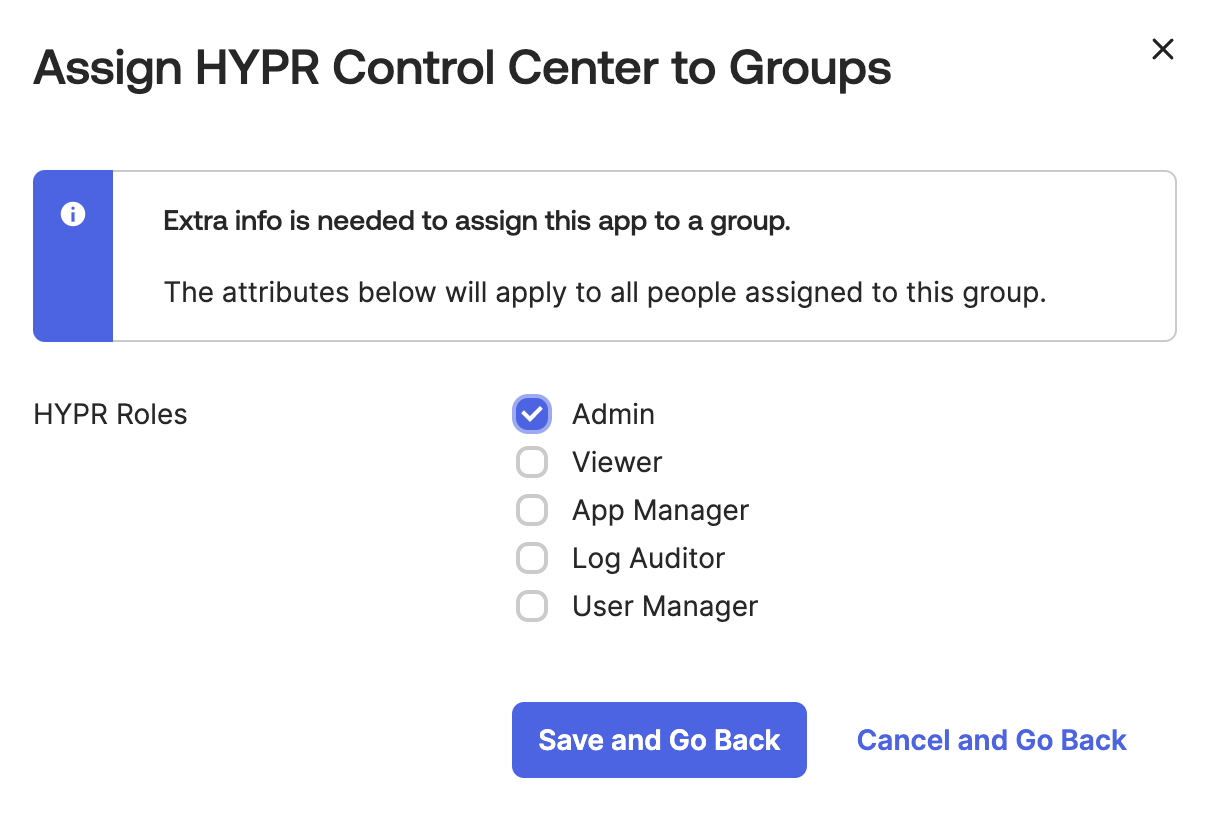
Select which HYPR roles should be associated with the group. Then click Save and Go Back.
-
Click Done to close the Assign dialog.
Configuring the HYPR Control Center
Before configuring the HYPR CC to use Okta as the OIDC provider, please review Control Center Users and Roles for details on how HYPR implements role-based access control. Without proper setup it is possible to lock yourself out of the Control Center after enabling the IDP setting.
Default Behavior for Role-less IdP Users
Set the default role for new users using SSO without the hypr_role claim.
-
In CC, at the bottom of the left nav menu, click the Settings (gear) icon to open the Global Settings menu.
-
Click Control Center Users, then select the Roles tab.
-
Under Access Level for Role-less IdP Assigned Users, the current default Access Level is displayed. Click the Edit button.
-
Select the access level you prefer for role-less users, and click Update.
This process is detailed more fully in Control Center Users: Setting Default Roles.
Configure OIDC Setting
-
Sign in to HYPR Control Center. From the Home page, switch to Advanced Mode using the toggle in the top right.
-
Open the Global Settings menu (gear icon at the bottom of the left nav), then navigate to Server Settings → IDP Settings.
-
Locate your Okta OpenID Connect Well-Known URL endpoints. The URL follows the pattern
https://<your-okta-domain>/.well-known/openid-configuration— for example,https://integrator-6240993-admin.okta.com/.well-known/openid-configuration. For details on how to find this URL, see Okta's How to Find the Okta Well-Known URL article. Open the URL in a browser to view the JSON payload, then copy the endpoint values (such asauthorization_endpoint,token_endpoint,userinfo_endpoint,jwks_uri, andend_session_endpoint) into the matching fields on the IDP Settings page.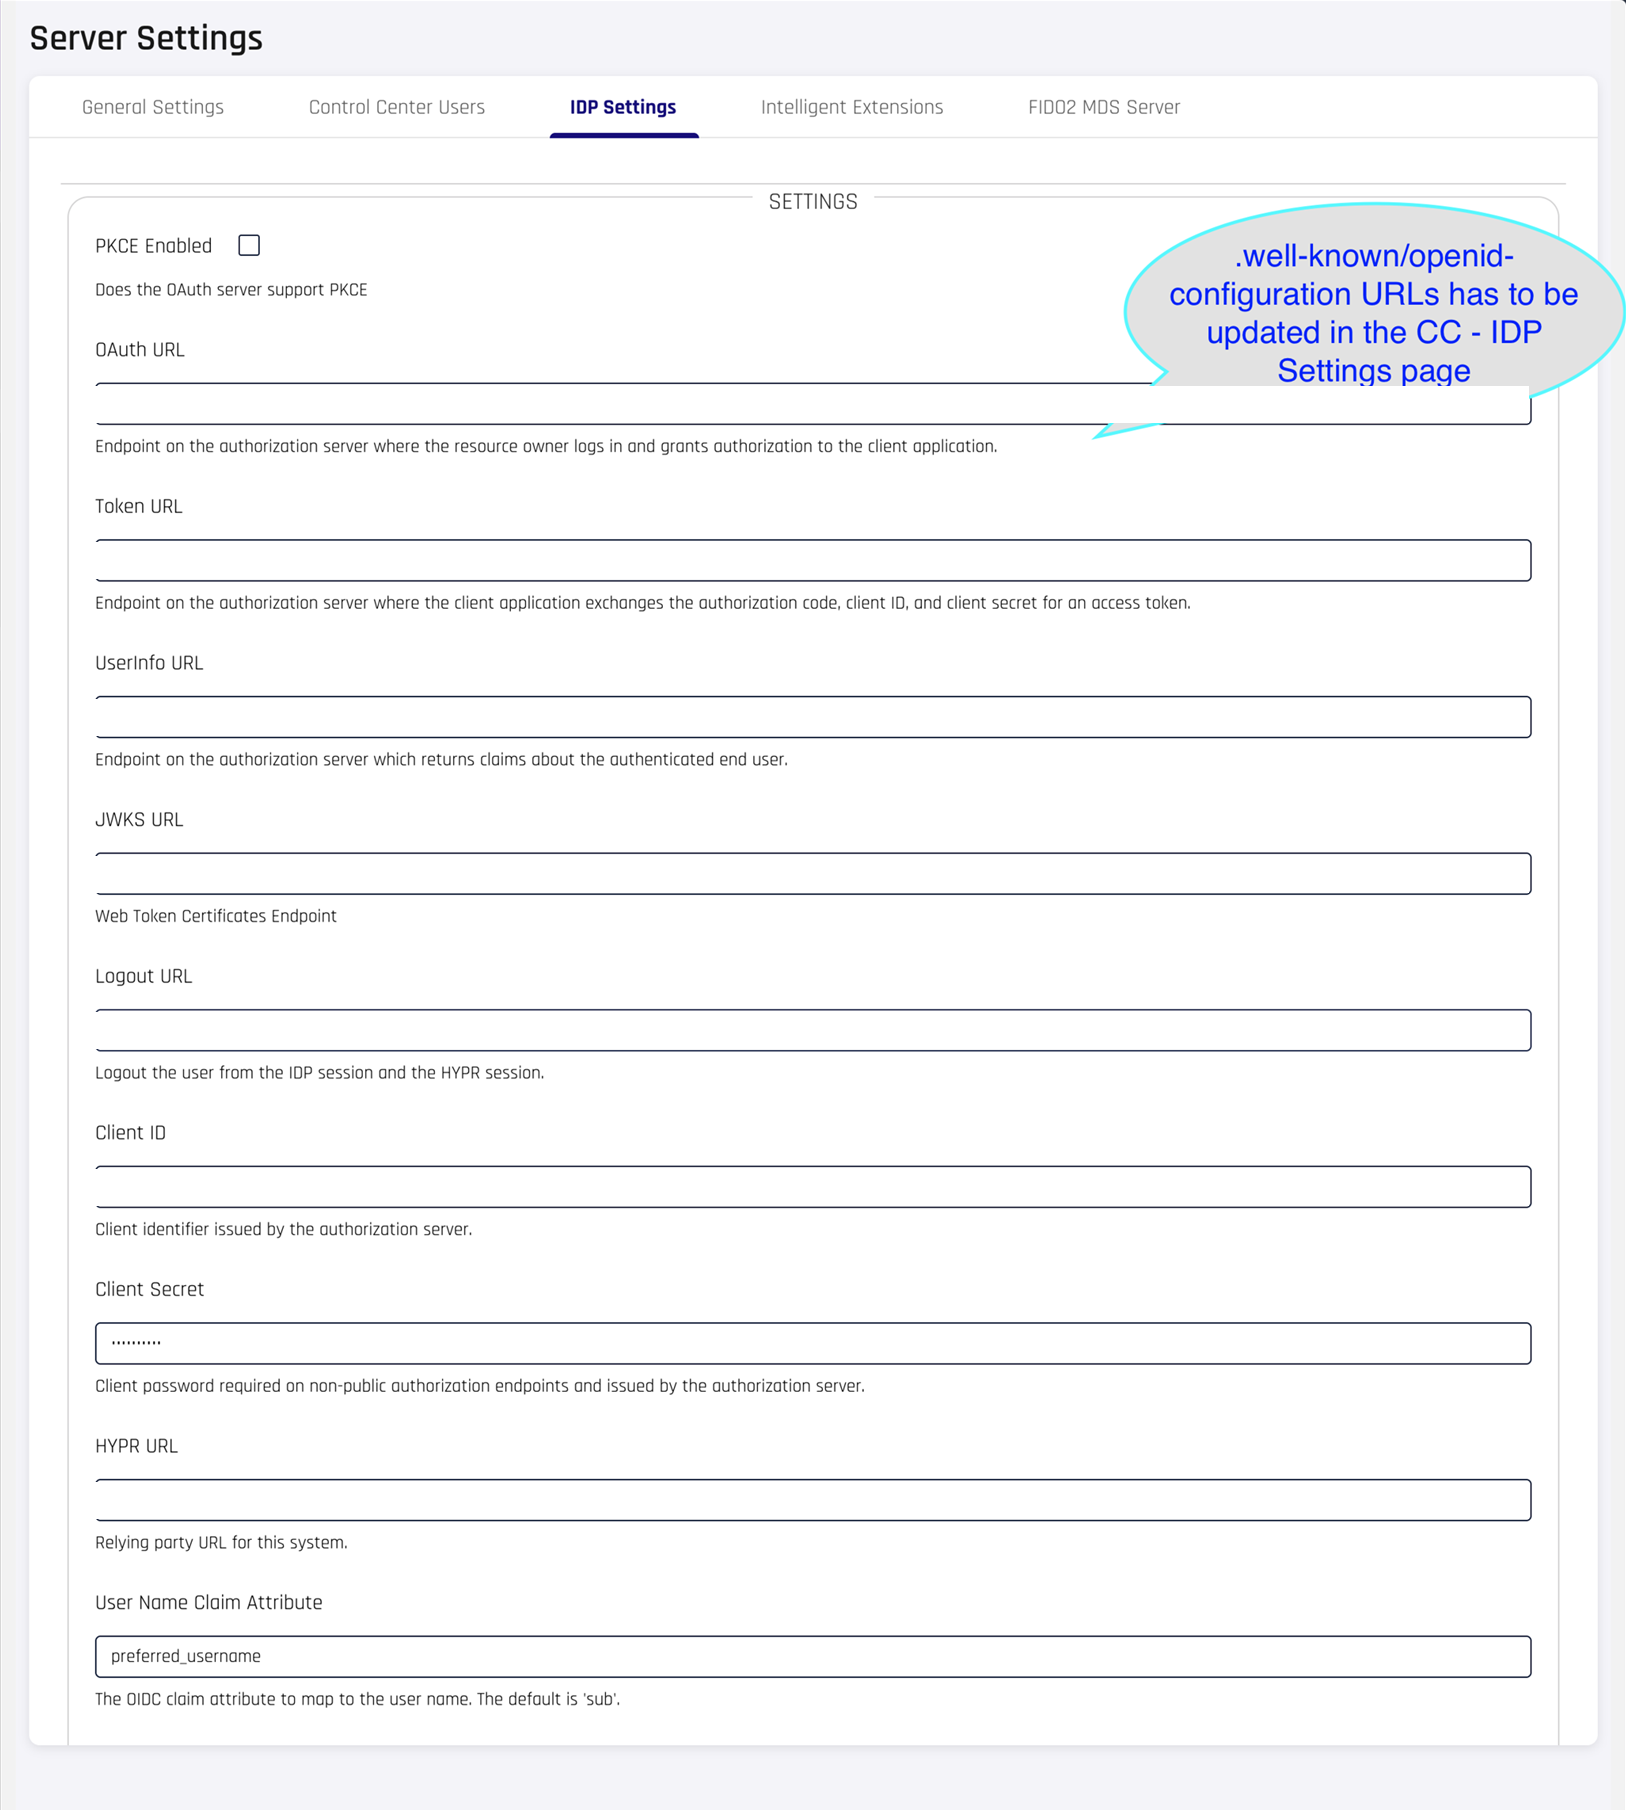

-
Update the Client ID and Client Secret fields. Copy these values from your Okta application's General → Client Credentials section.
-
Complete the remaining fields:
Field Value HYPR URL Your Control Center URL User Name Claim Attribute preferred_usernameResource Leave blank Generic parameters Leave blank 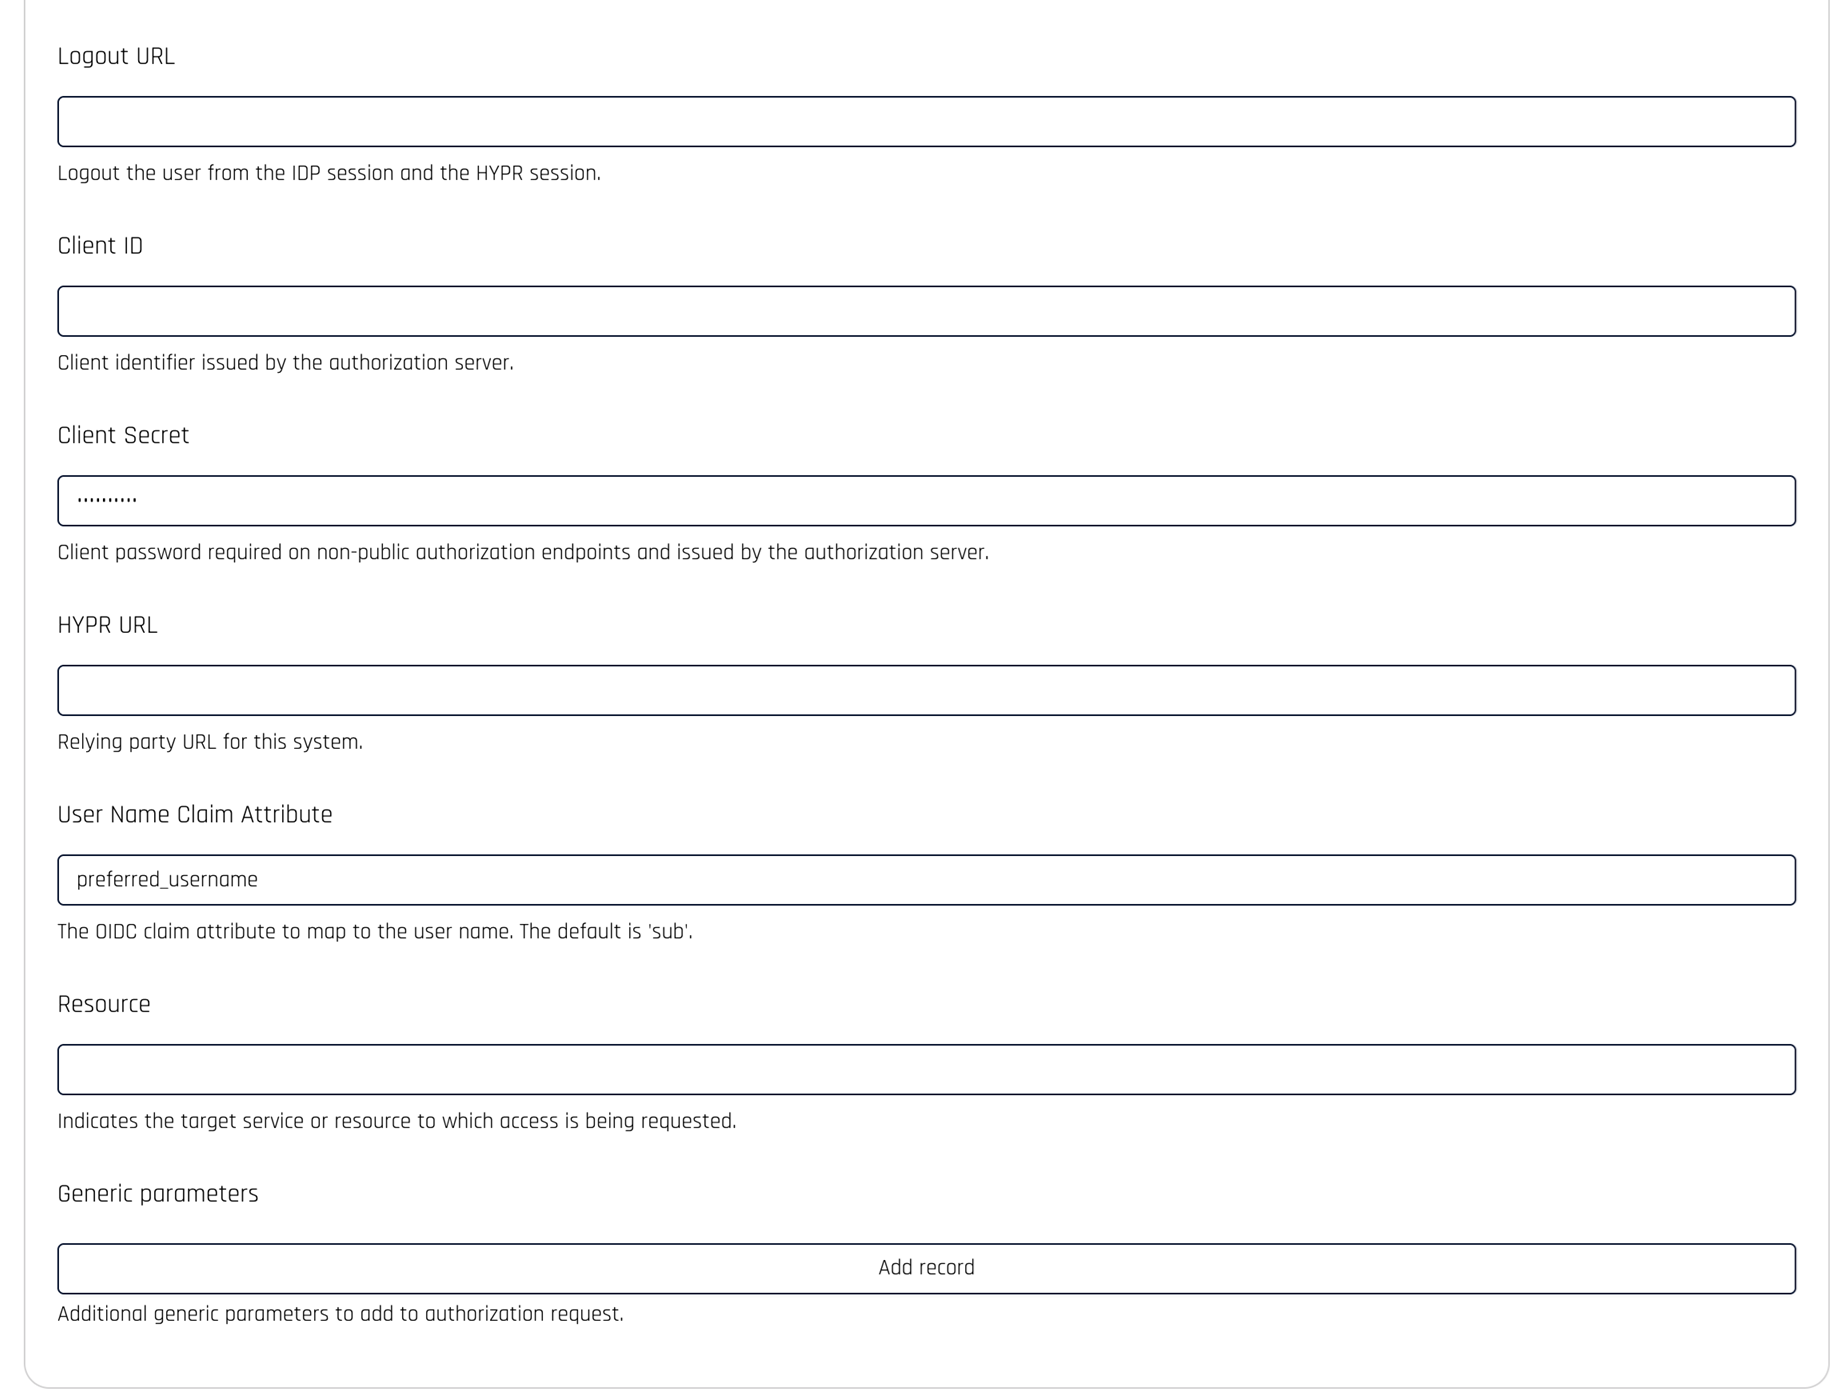
-
Click Save.
See IdP Management for full details on adding an IdP to Control Center.
Verify OIDC Flow
After saving the configuration, logout of the HYPR Control and enter the URL for your HYPR Control Center in the browser. You should be redirected to Okta to sign in.
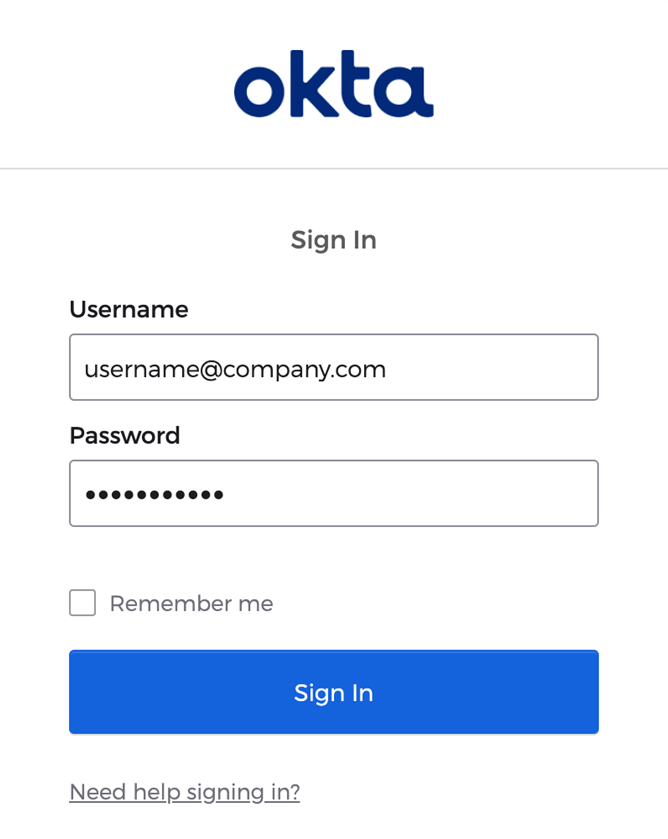
After clicking Sign In, you will be redirected back to HYPR and signed in as that user with the role matching that user's group membership in Okta.
Return to Global Settings > Control Center Users to inspect the user account.
You'll notice IdP Assigned next to the role, which indicates the role was assigned based on the hypr_role claim.
Configuring Logout
Configure the Okta logout endpoint so that signing out of Control Center also ends the active Okta session.
-
From your Okta OpenID Connect Well-Known URL endpoints (the same
https://<your-okta-domain>/.well-known/openid-configurationURL used when configuring the OIDC setting), copy theend_session_endpointvalue. It appears near the bottom of the JSON payload.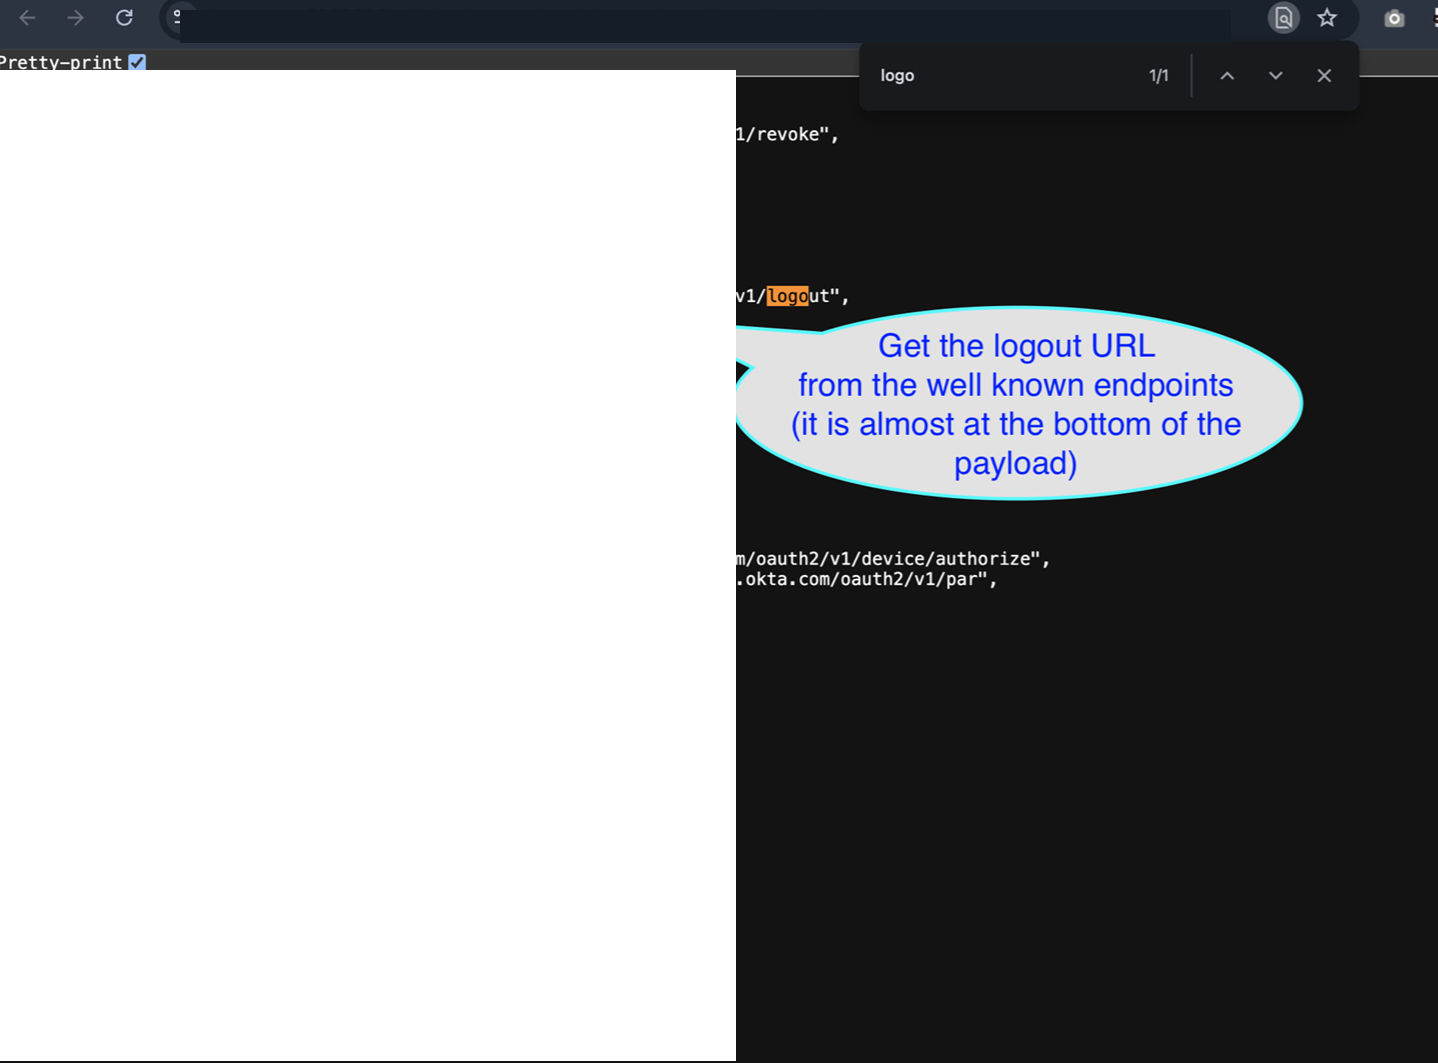
-
In Control Center, return to Advanced Mode → Global Settings → Server Settings → IDP Settings, then update the Logout URL field with the value you copied. Click Save.

-
In the Okta admin console, open your HYPR Control Center application and update the Sign-out redirect URIs field to your Control Center login URL.

When a user logs out of Control Center, the active Okta session is logged out as well. This is the expected behavior.