HYPR and CrowdStrike IdP Policy Configuration
Policy Management Overview
Learn how to create a standard policy for CrowdStrike, specifically for the Identity Protection Risk Score. Multiple policies can be defined for different use cases or scenarios.
Manage Adapt risk policies using standard administrative operations via the HYPR Control Center.
Overview
This guide covers integrating CrowdStrike Falcon's Identity Protection Risk Score into the HYPR Adapt access decision process. HYPR Adapt evaluates the score against your risk policy to determine whether a user is granted access, required to use phishing-resistant authentication, undergo identity verification, or denied access.
On this page
- Set up the CrowdStrike signal handler in Control Center
- Set up CrowdStrike
- Set up the risk policy in Control Center
- Assign the policy
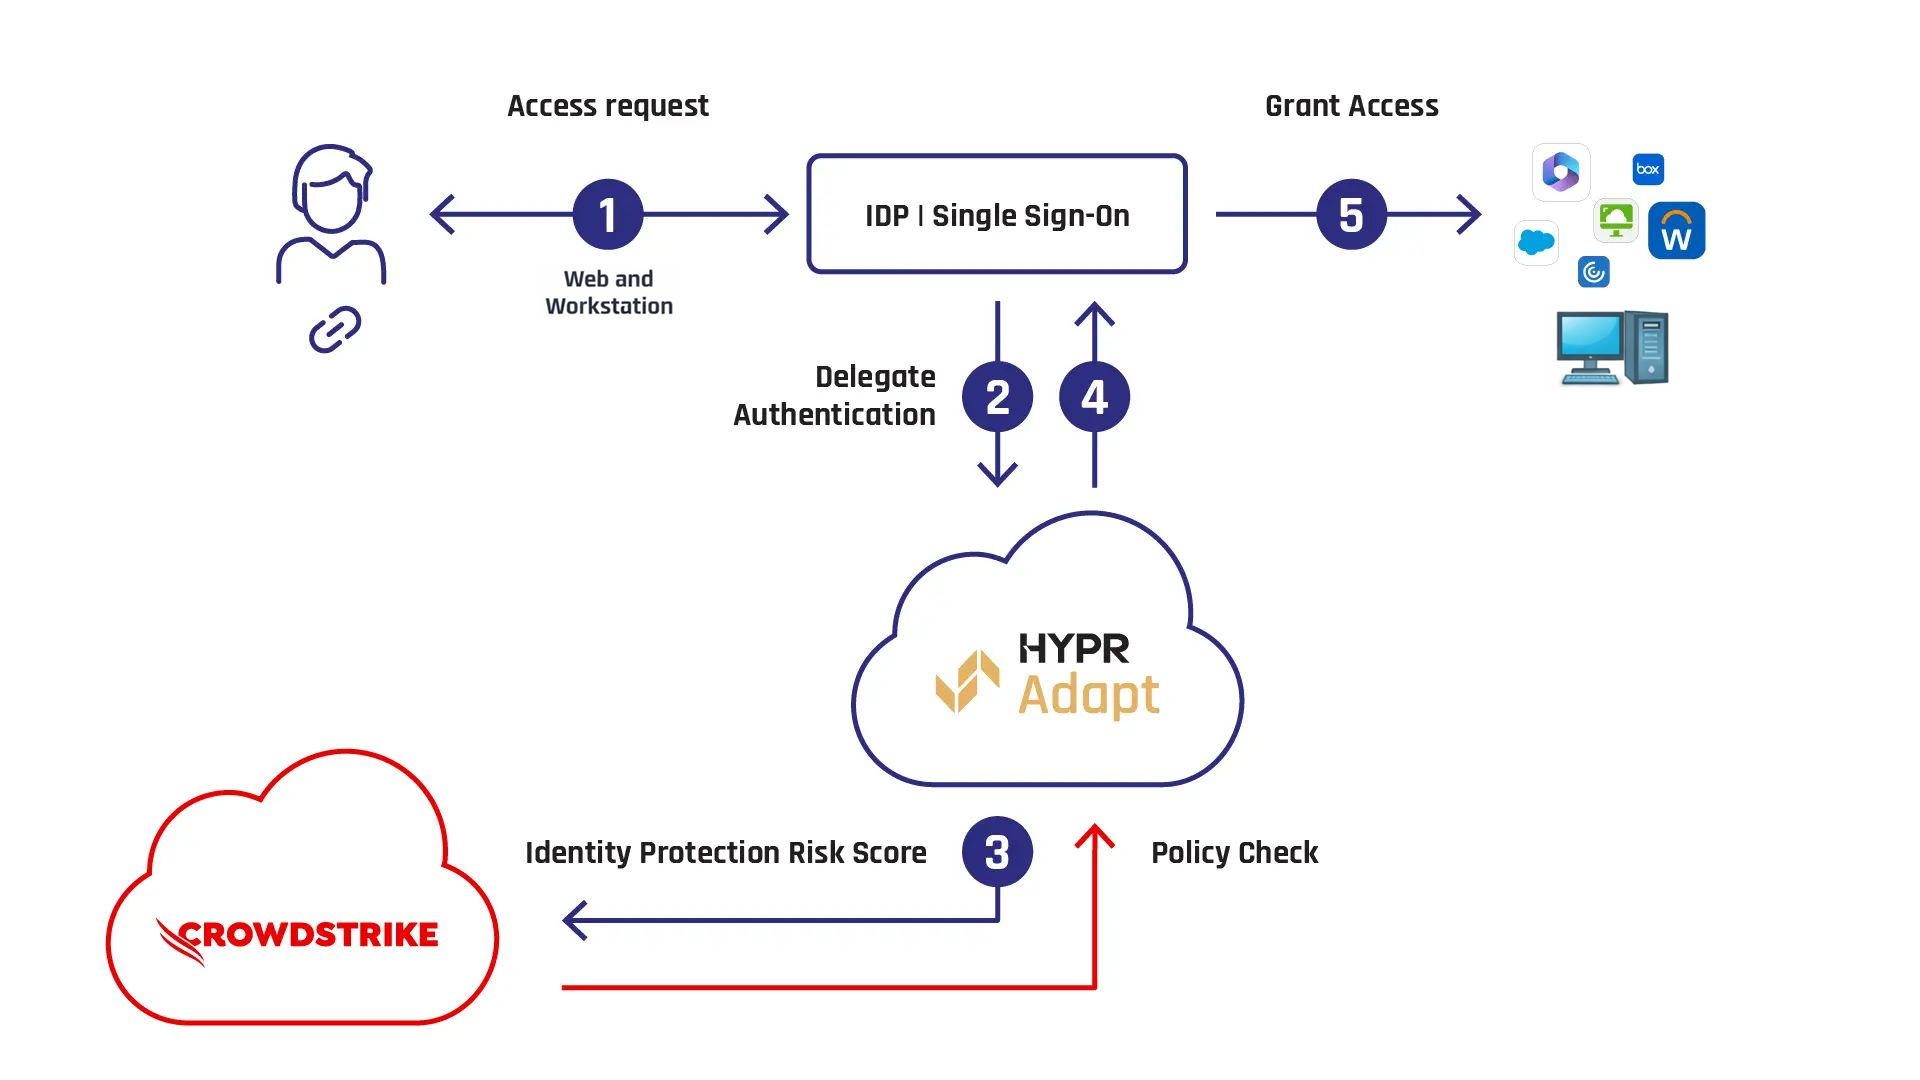
Integration workflow
- IdP authentication: The user initiates login with their Identity Provider (IdP).
- HYPR Adapt policy check: The IdP queries HYPR Adapt for authentication requirements.
- Risk score retrieval: HYPR Adapt retrieves the Identity Protection Risk Score from CrowdStrike Falcon.
- Policy enforcement: Based on the risk score, HYPR Adapt applies security measures such as:
- Seamless SSO
- MFA enforcement
- Identity re-verification
- Access denial
- Access decision: If policy conditions are met, the user gains access to enterprise applications.
This policy can be used for authentication flows that rely on your IdP integration, including workstation and web sign-ins. For web sign-in scenarios, HYPR uses the user's email-based username to look up CrowdStrike Identity Protection events and scores. Ensure that, in Active Directory, each Windows username has an associated email address that matches the username used for web login. In your HYPR tenant, assign this IdP policy to the rpApp that is linked to your IdP integration so HYPR Adapt can evaluate the policy during sign-in.
Complete the setup in this order:
- Set up the CrowdStrike signal handler in Control Center
- Configure CrowdStrike Falcon to send the required events
- Create and assign the CrowdStrike IdP risk policy in Control Center
Set up the CrowdStrike signal handler in Control Center
Create the signal handler first so that HYPR Adapt can receive CrowdStrike events before you build the policy. For general Signal Handler screen details, see Signal Handler Management.
-
In Control Center Standard Mode, go to HYPR Adapt > Signal Handlers and click + Signal Handler.
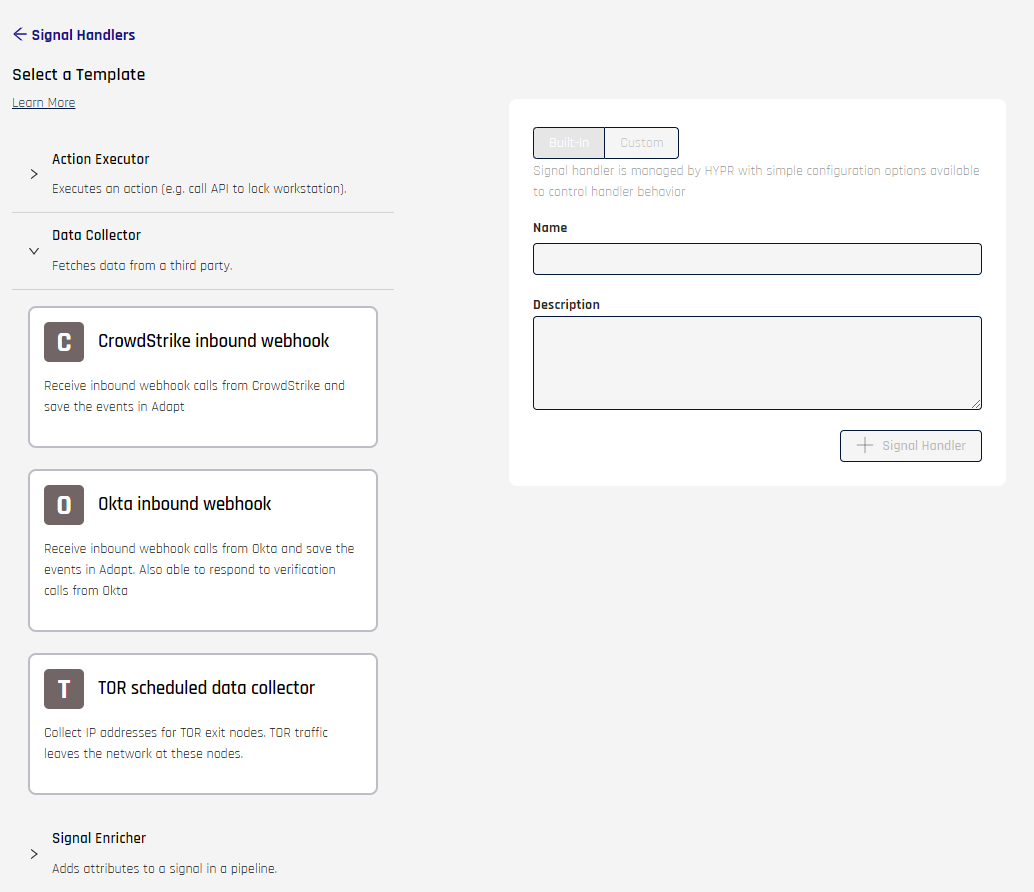
-
Expand Data Collector and select CrowdStrike Webhook Data Collector.
For CrowdStrike webhook handlers, HYPR recommends starting with the Built-In content type. Built-In handlers use a definition tested by HYPR and only expose configuration fields. Selecting Custom lets you edit the underlying code; do this only if you need to extend the behavior and make sure any changes are thoroughly tested before using the handler in production.
-
Set the Name and Description for the handler, then create it.
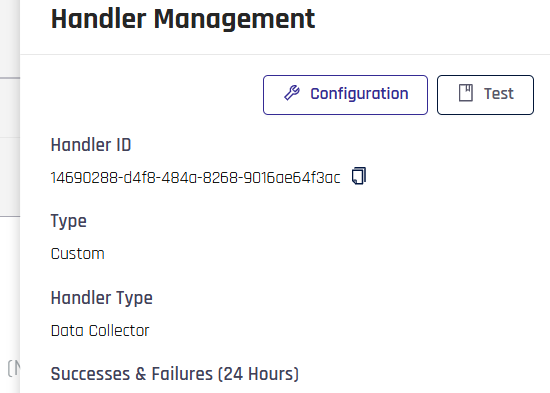
-
Once you have created the signal handler, click Configuration on the pane that appears on the right.
Make sure you specify the following credentials:
- Control Center API key
- Control Center base URL
- HMAC secret key
- HMAC test key

The HMAC secret key is a production value that is not defined by HYPR or CrowdStrike. Whatever value you choose, it must exactly match the Secret configured on the CrowdStrike webhook client so that HMAC signature validation succeeds.
To use the sample test event later in this guide, set HMACTestSecretKey to hmacsecretkeyhmacsecretkeyhmacsecretkey.
Click Update Configuration.
Set up CrowdStrike
After the signal handler is ready, configure CrowdStrike Falcon to send the Identity Protection events that HYPR Adapt will evaluate.
HYPR prerequisites
- Confirm with your HYPR representative that the feature flag SEND_WORKSTATION_SIGNALS is enabled for your tenant.
- Confirm with your HYPR representative that the feature flag ENABLE_ADAPT_POLICIES is enabled for your tenant.
- Confirm with your HYPR representative that the feature flag ENABLE_ADAPT_UNAUTHENTICATED_WEBHOOK is enabled for your tenant.
Create a CrowdStrike API client (for Identity Protection reads)
In CrowdStrike Falcon, create an OAuth2 API client and enable:
- Read scope for Identity Protection Assessment, Identity Protection Entities, and Zero Trust Assessment
- Write scope for Identity Protection GraphQL
You’ll use the client ID/secret and tenant information when configuring the HYPR Adapt policy.
Configure the CrowdStrike webhook client
In CrowdStrike Falcon, configure a webhook client that targets Control Center.
-
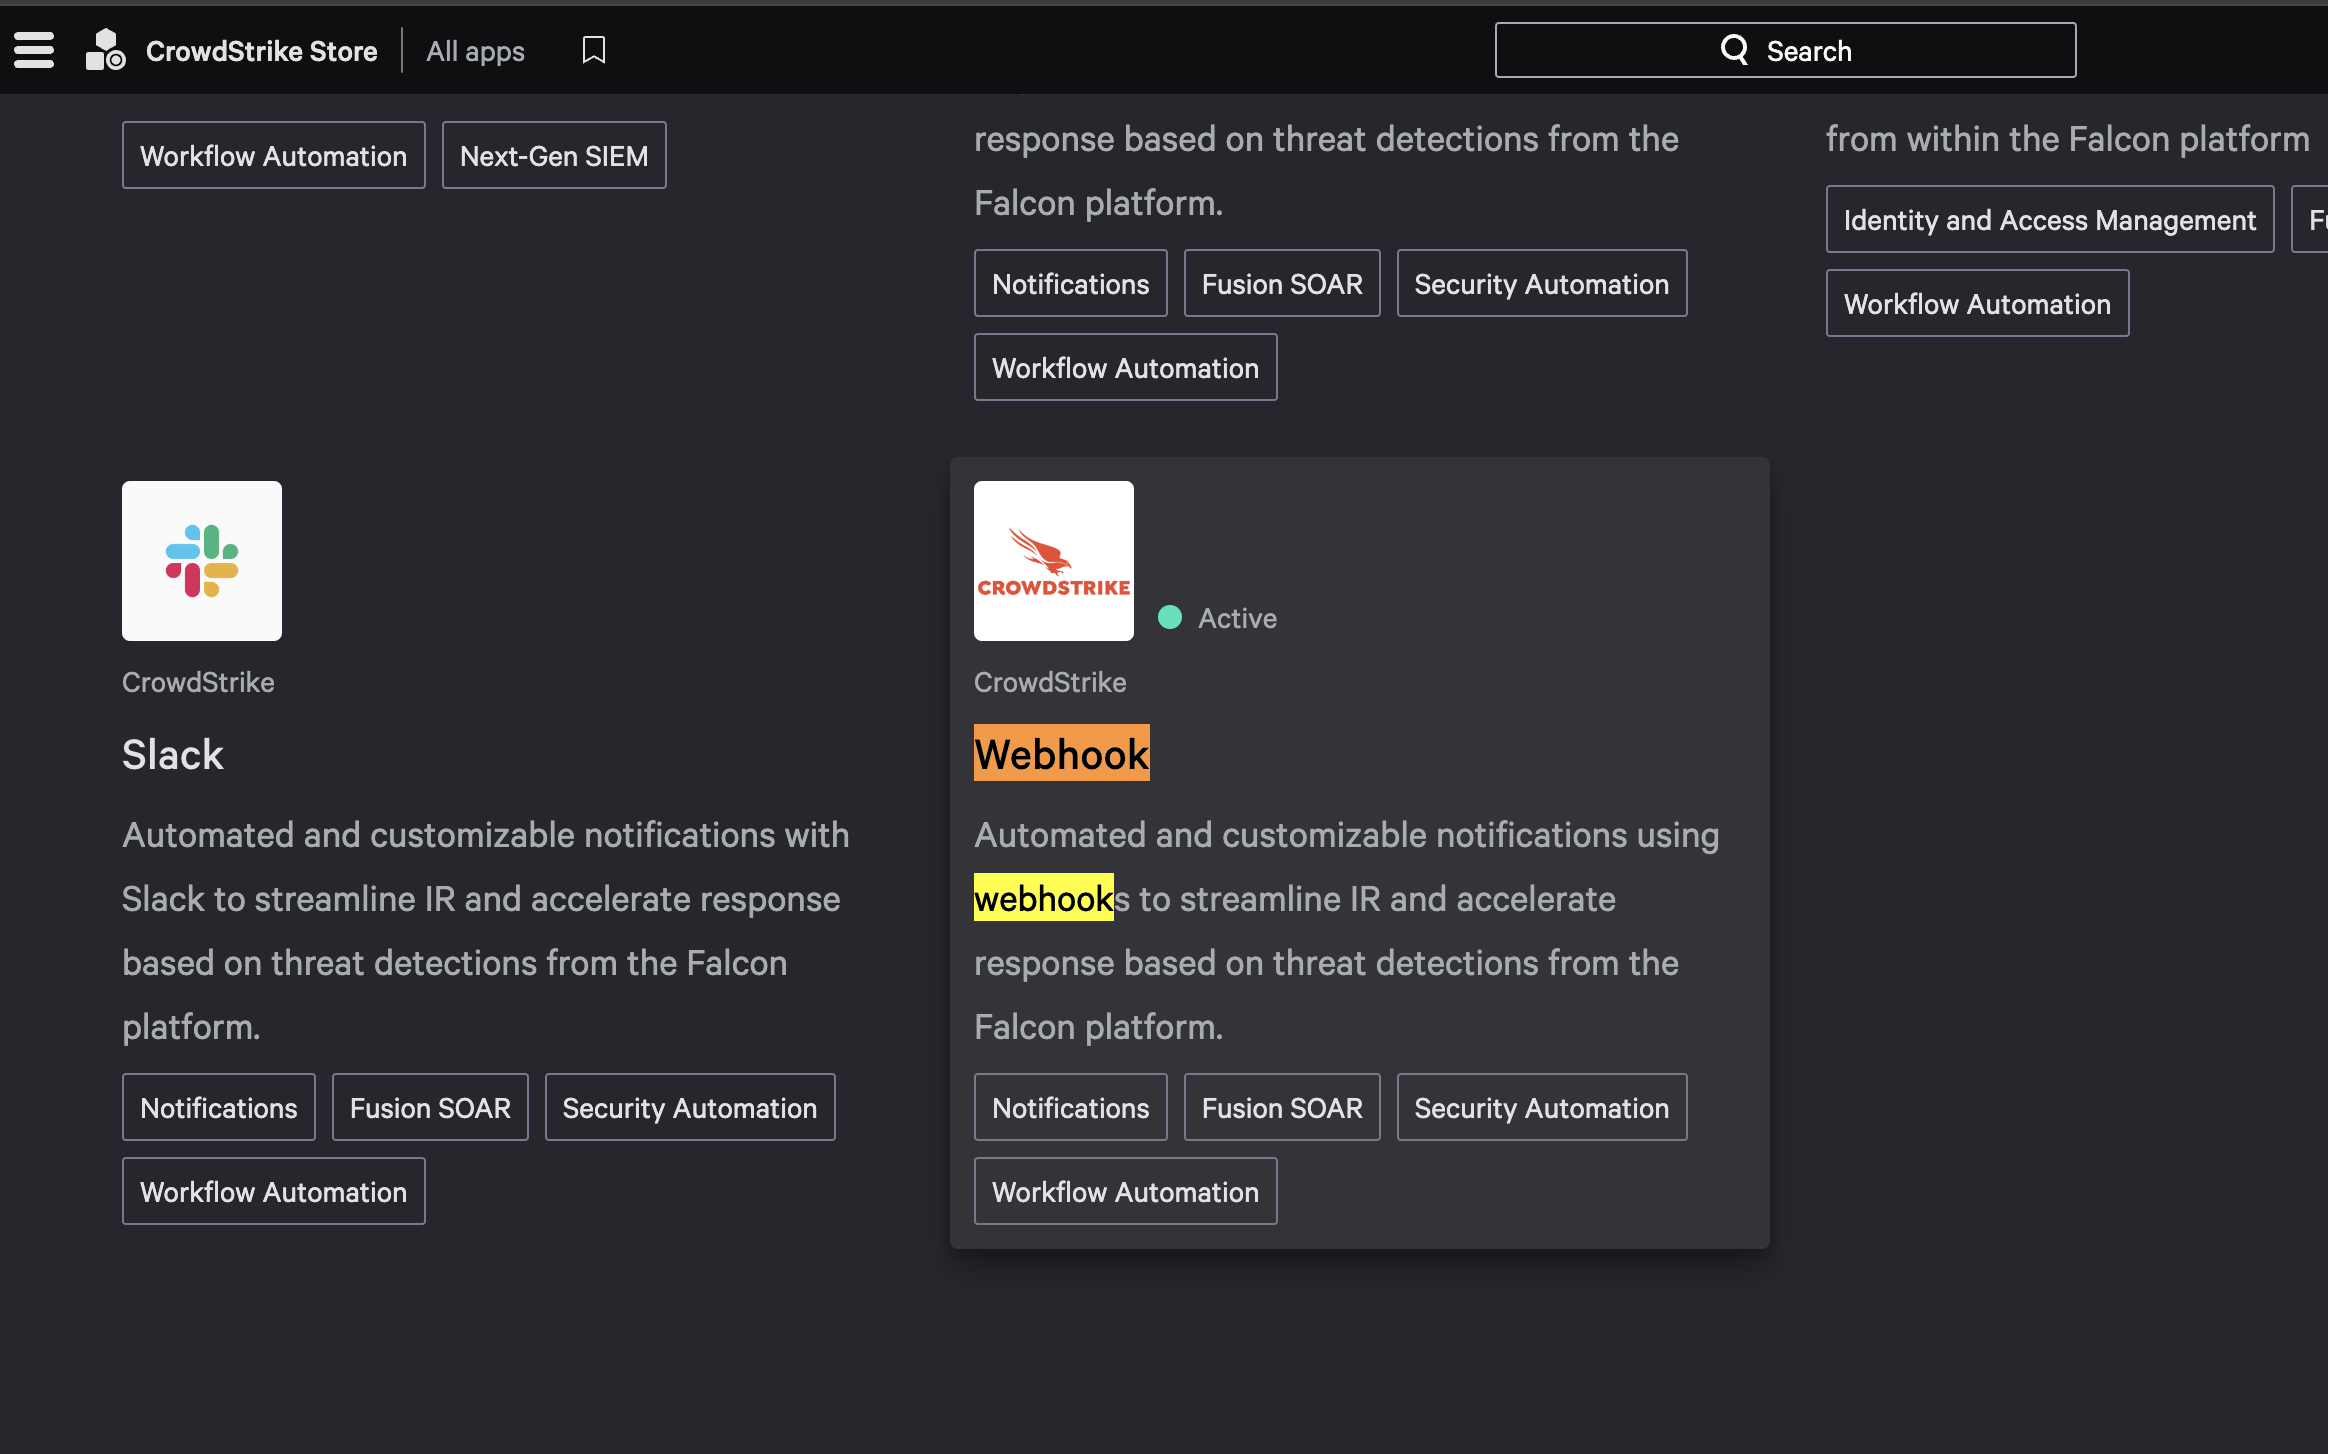
Go to CrowdStrike Store → All Apps.
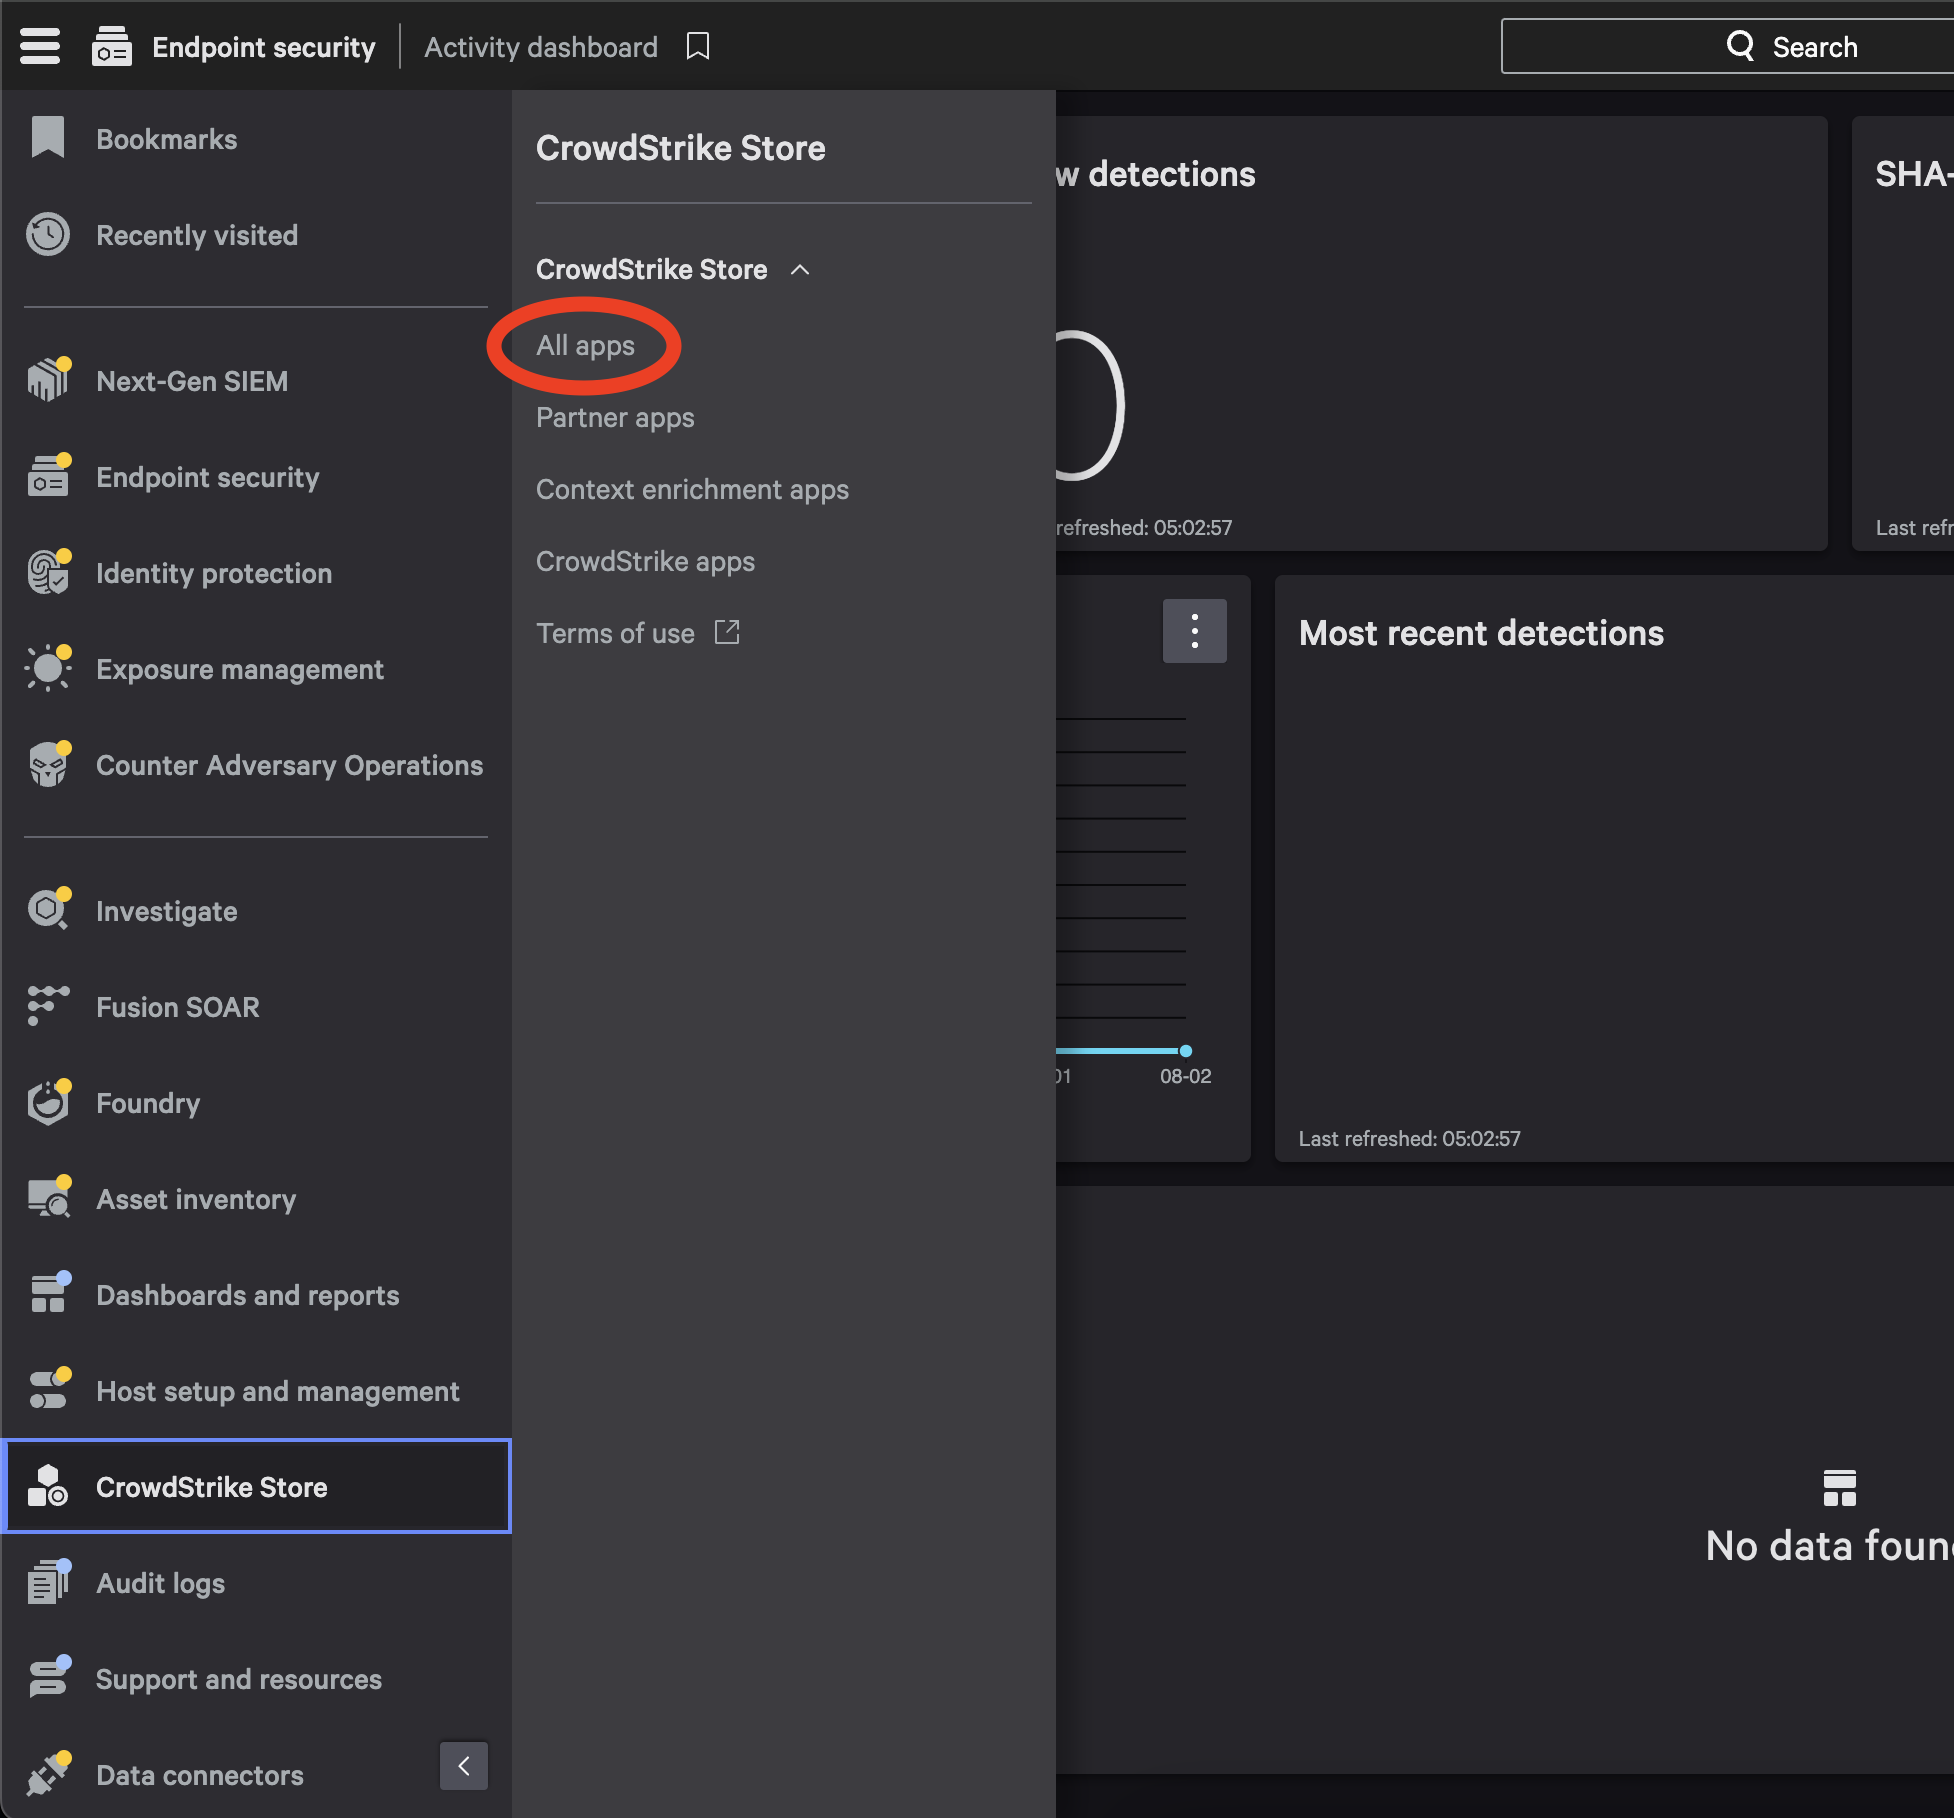
-
Open the Webhook application.
-
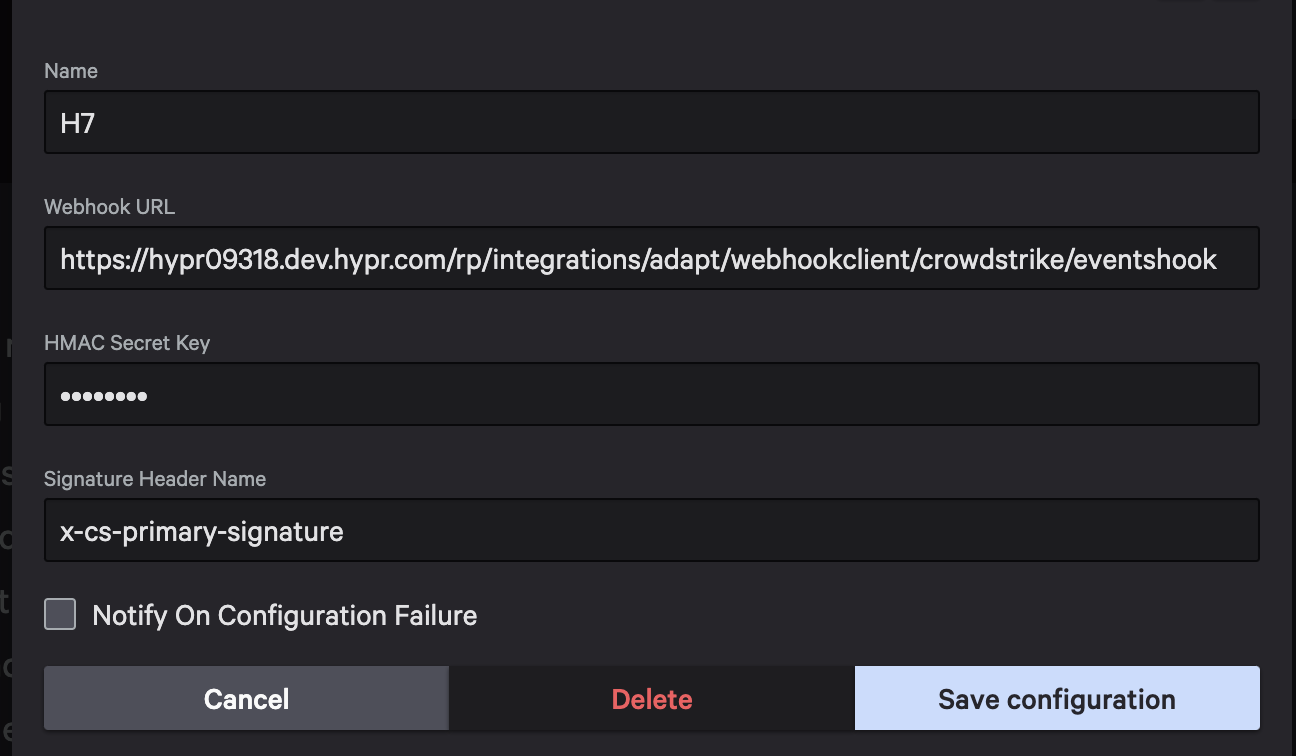
Select Configure → Add Configuration and set:
-
Webhook URL:
{baseURLForCC}/rp/integrations/adapt/webhookclient/crowdstrike/eventshook -
Signature header name:
x-cs-primary-signature
Note: CrowdStrike creates the Signature Header name in a mixed case format, i.e.,
X-Cs-Primary-Signature. You will need to manually update the Signature Header to be all-lowercase format.- Secret: set this to the same strong, random value you configured as the HMAC secret key in the HYPR signal handler.
-
-
Save the configuration. Keep the Webhook name handy—you’ll select it in the workflow step.
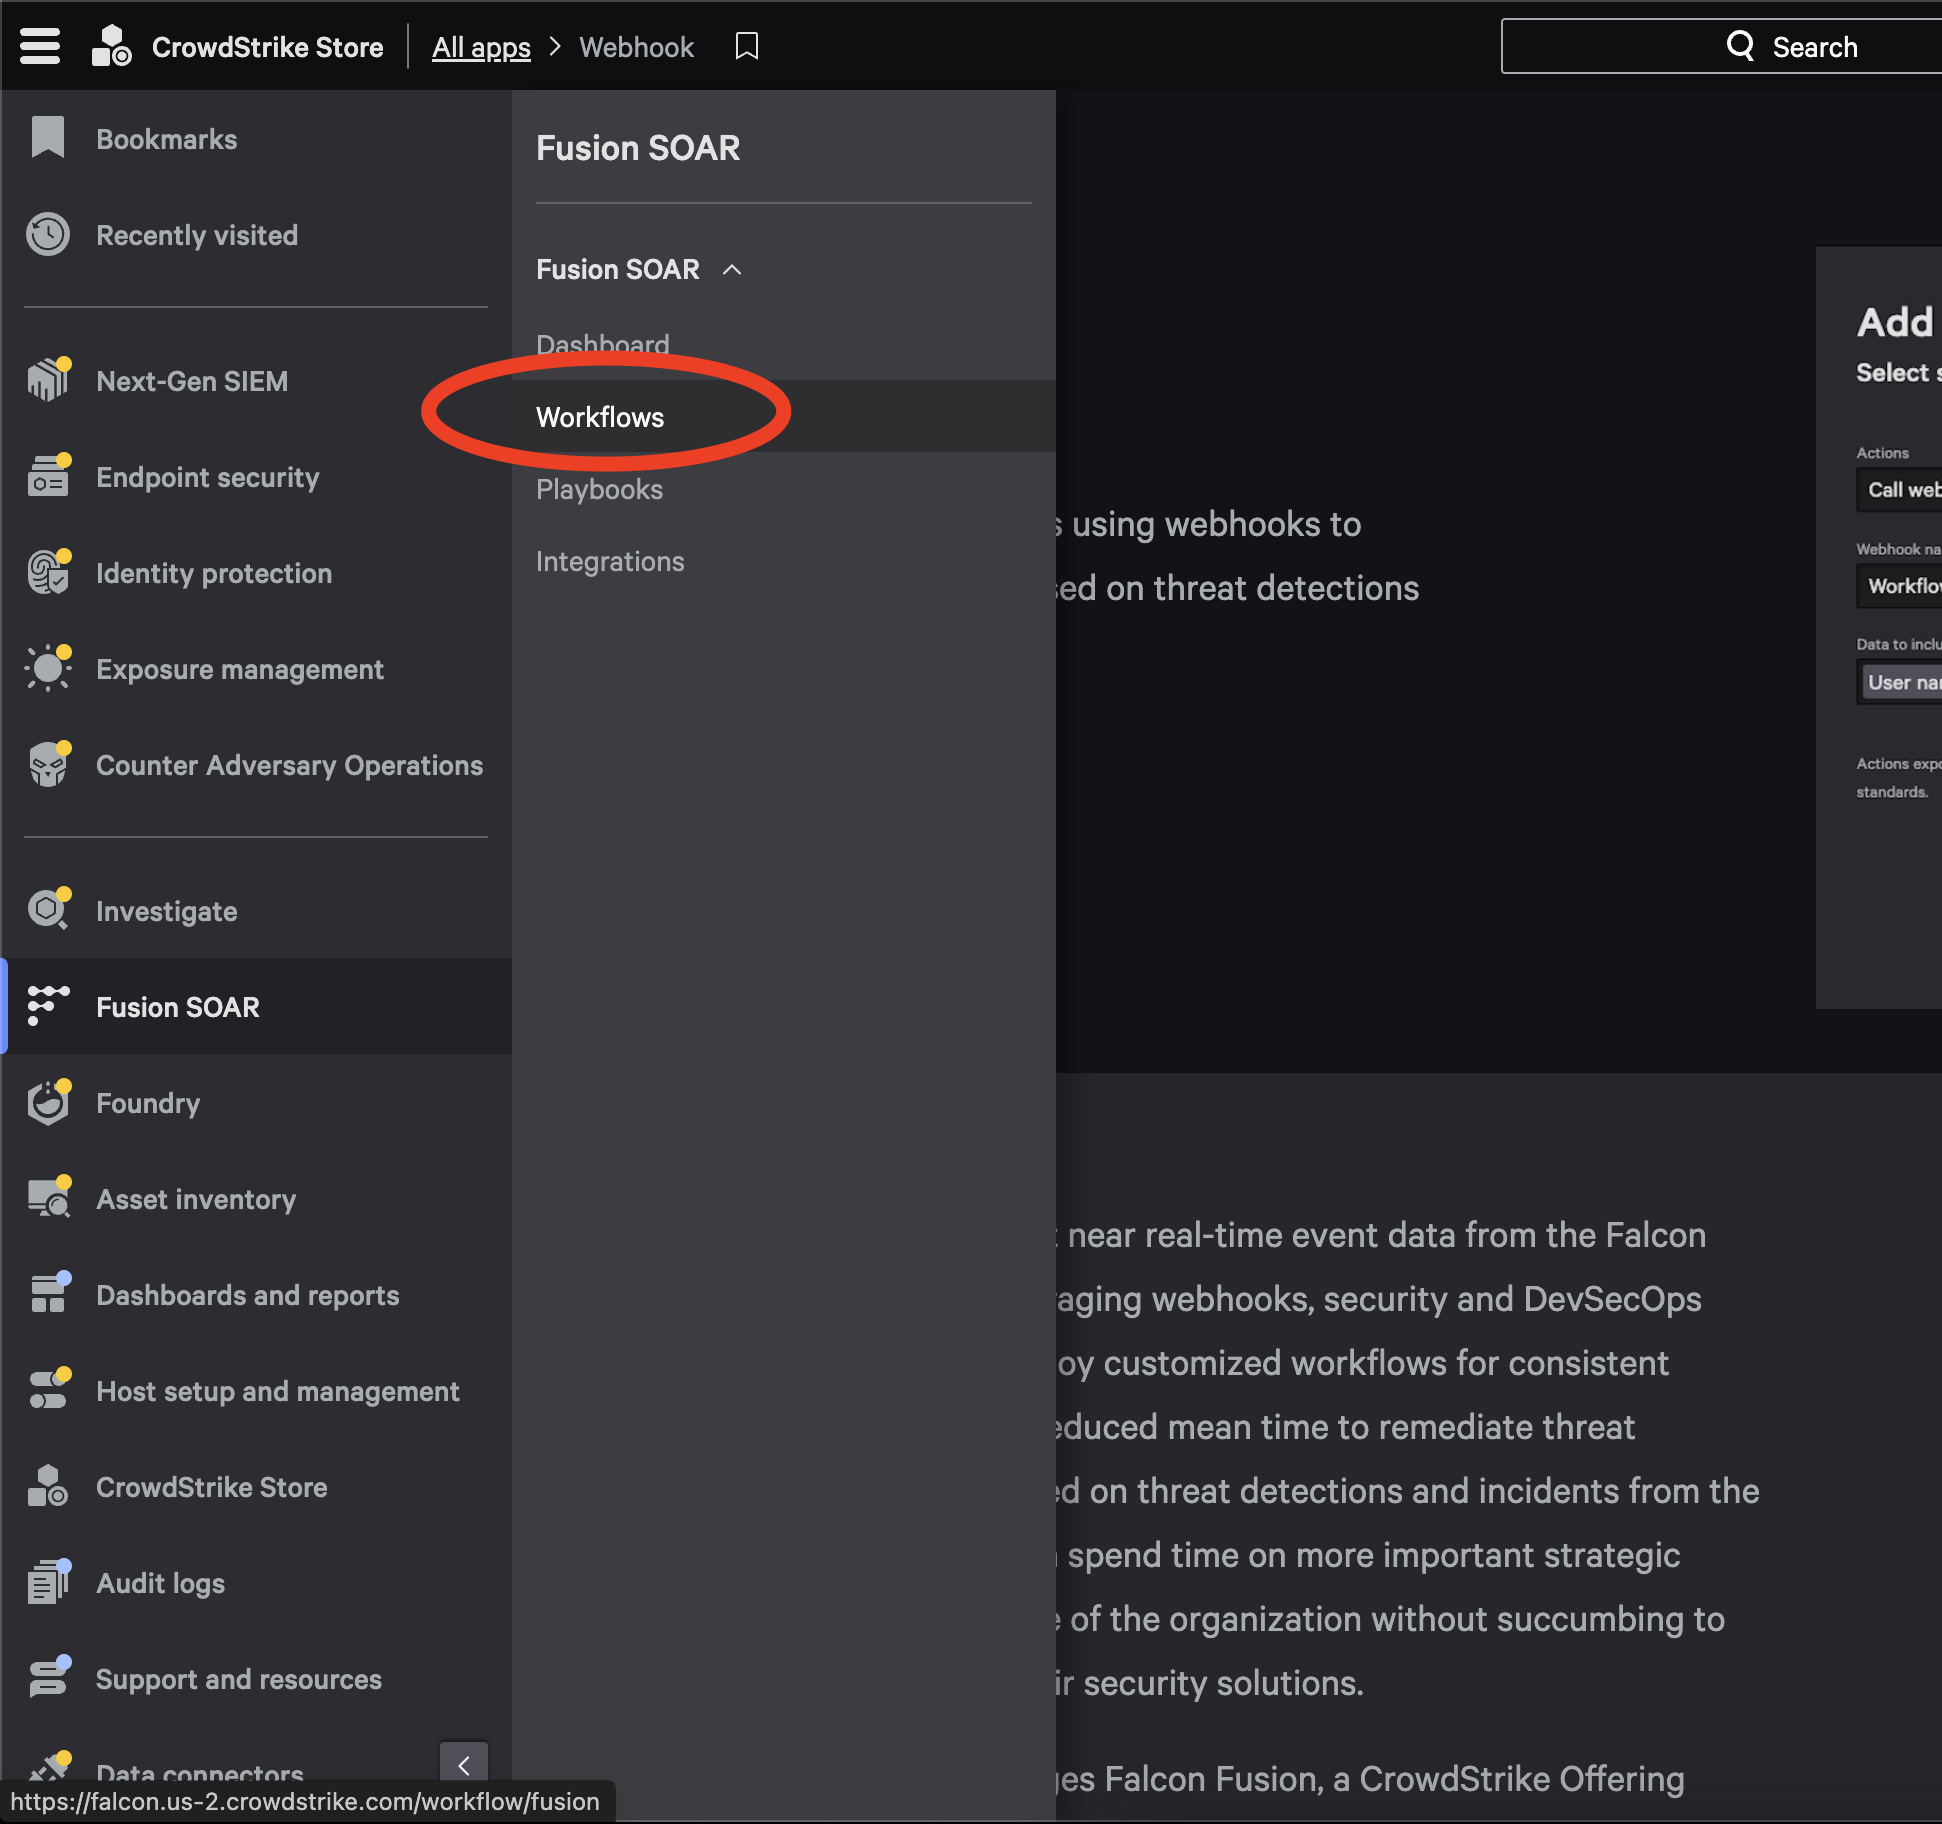
Create the Identity Protection workflow (Fusion SOAR)
-
Go to Fusion SOAR → Workflows.
-
Select Create Workflow (top right), then select
Create workflow from scratch. -
Select
Eventas the workflow trigger. -
Select Detection → Identity Detection, then select
Next.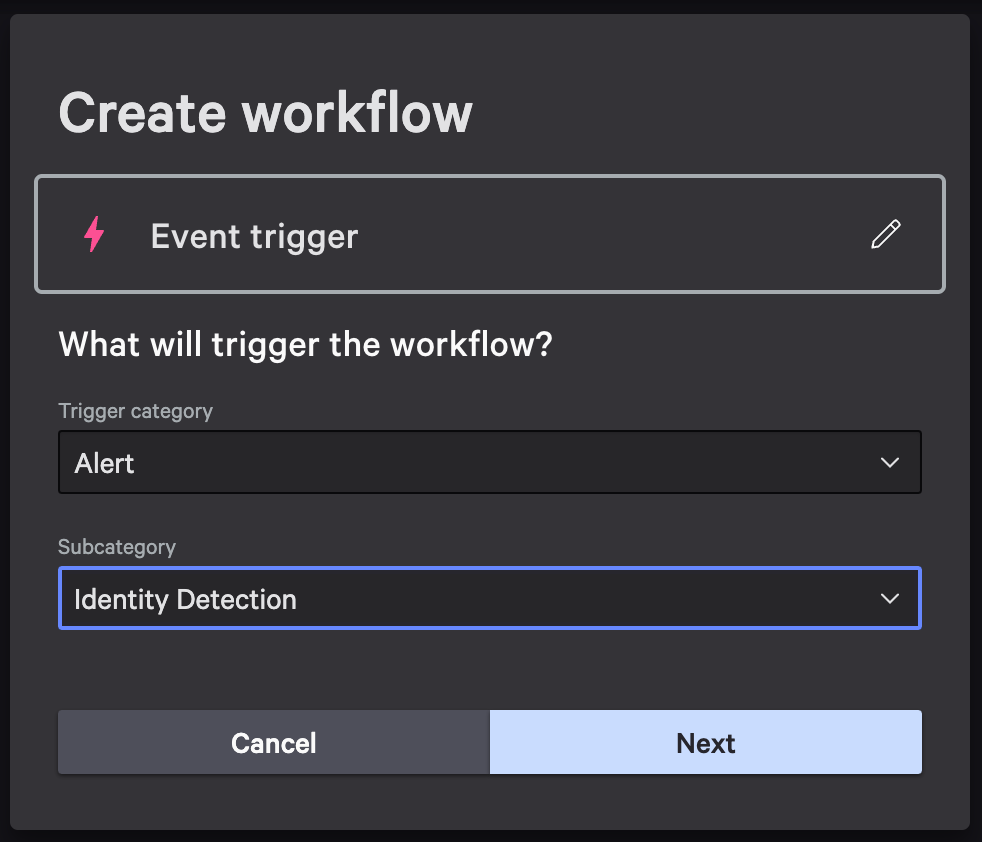
-
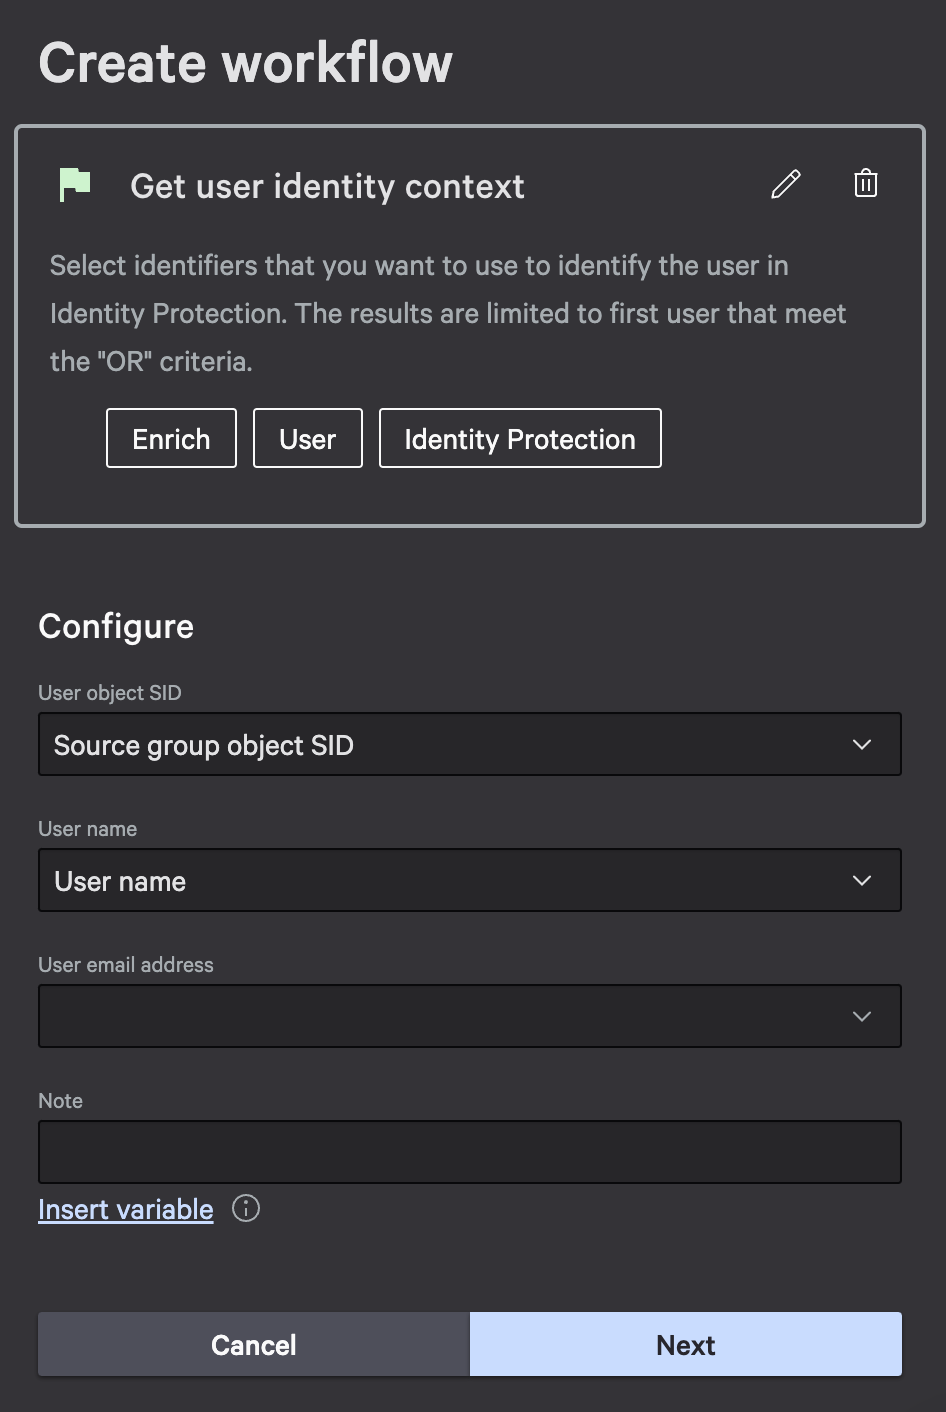
Add an Action step. Search for
context, then choose Get user identity context.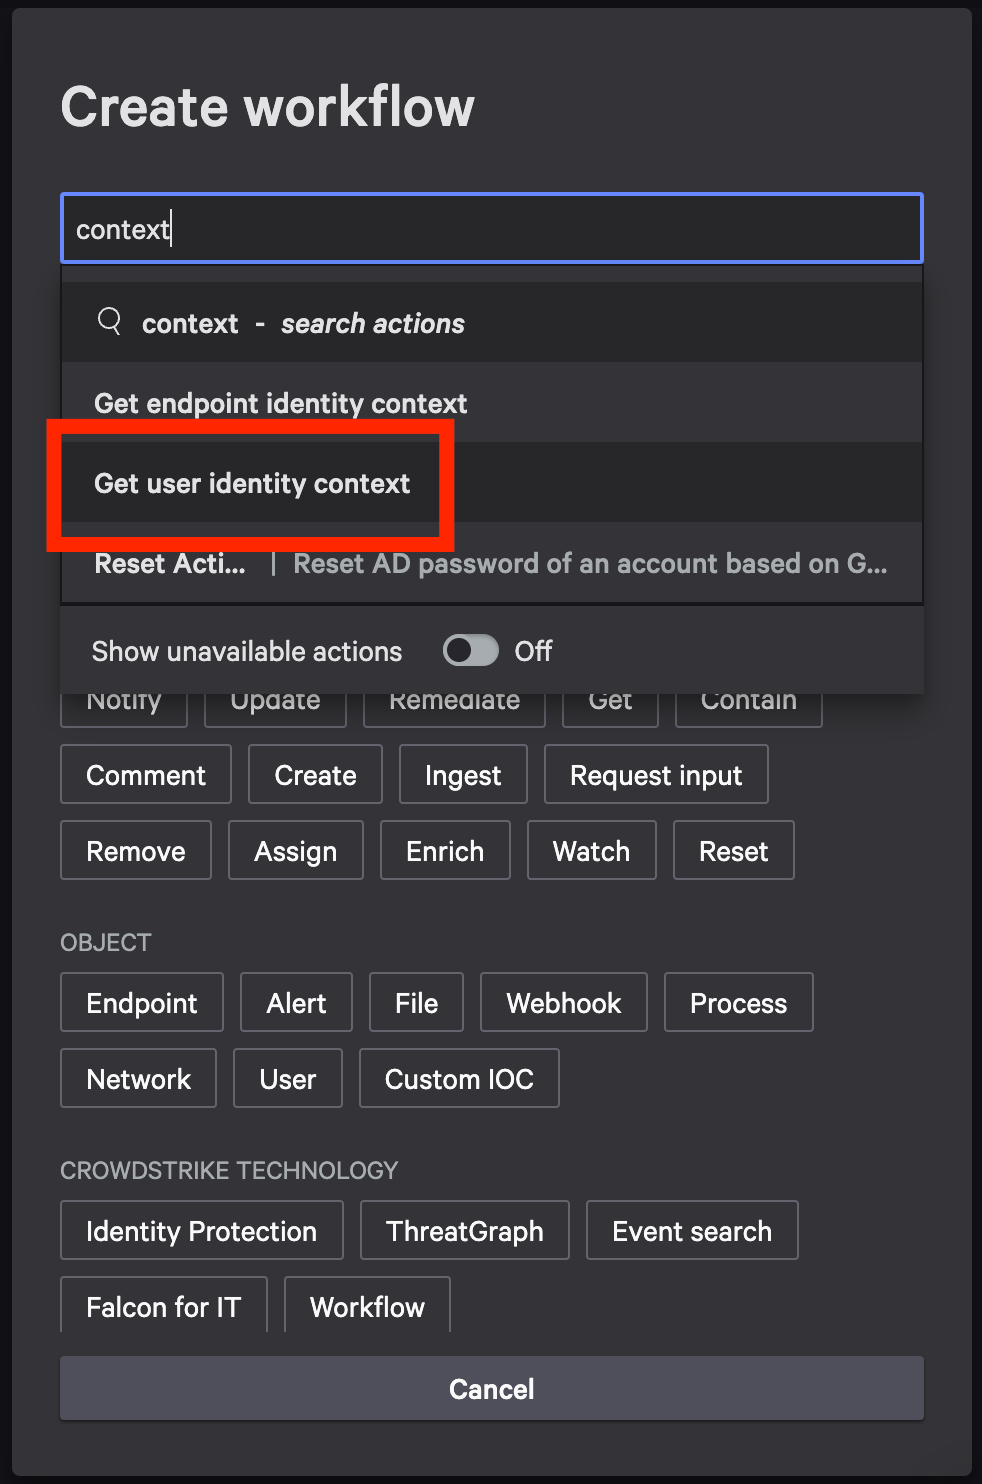
-
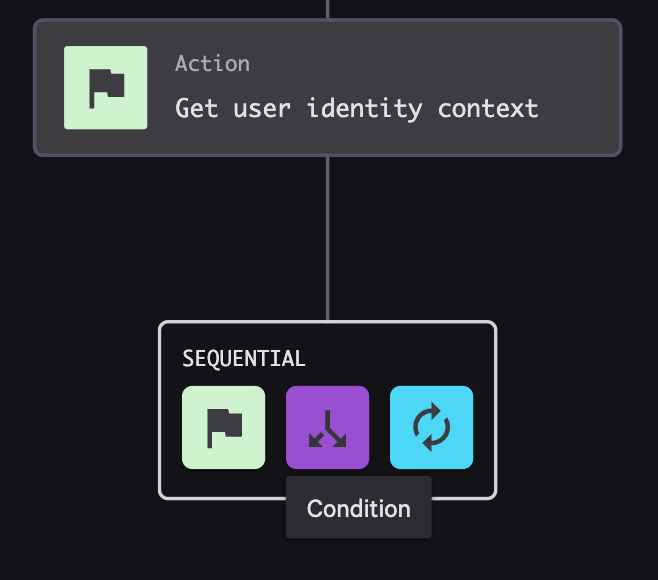
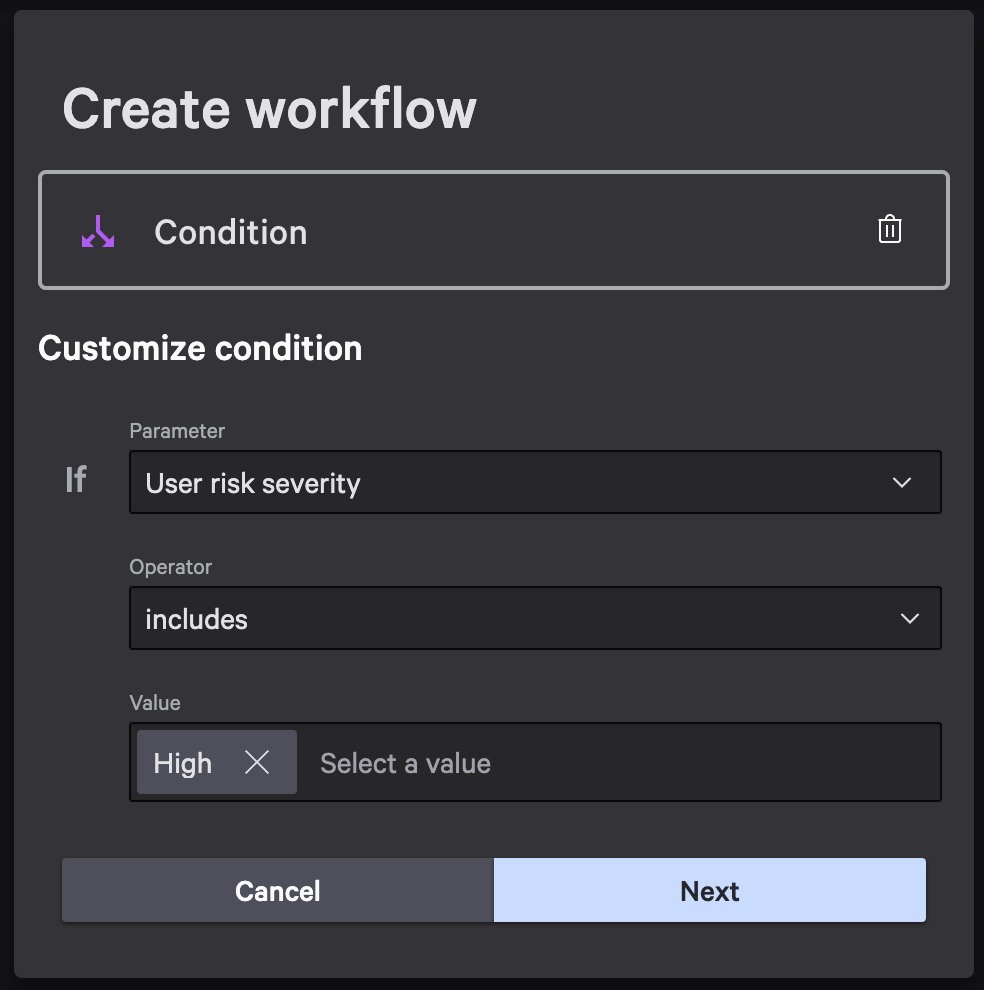
Add a Condition step and configure it so that the webhook is only called when the risk criteria you care about is met (for example, when the event indicates elevated risk).
-
On the TRUE branch, add an Action step and choose Call webhook.
-
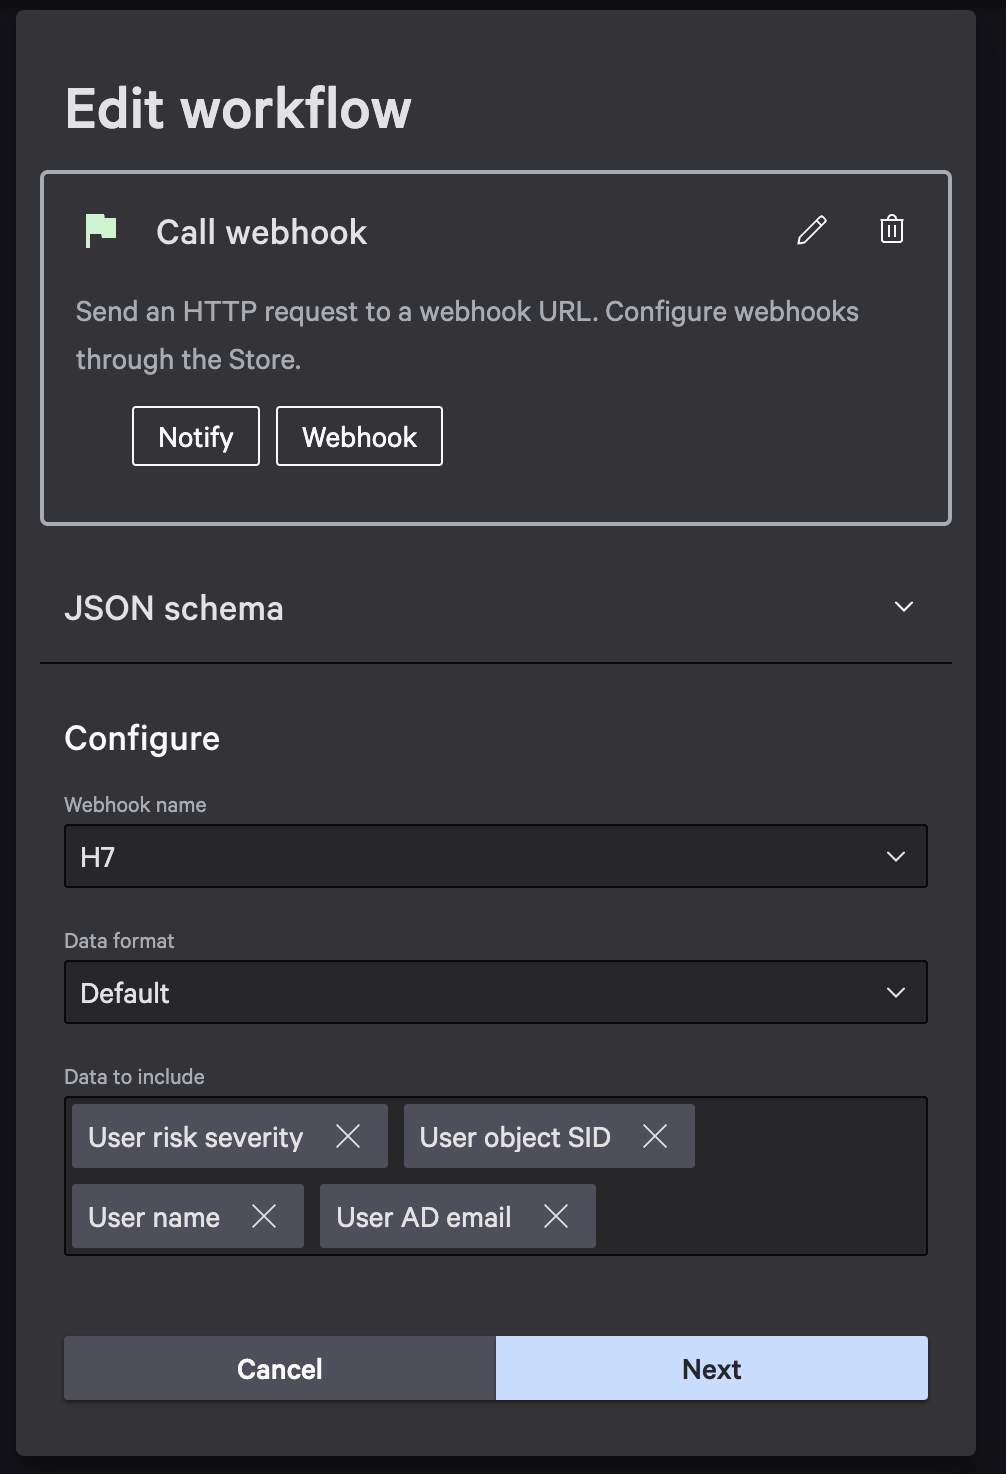
Configure the webhook call:
- Select the Webhook name you created earlier.
- Leave the default format as JSON.
- Include the Identity Protection attributes required for evaluation (risk score/severity plus the user/device identifiers needed to correlate the event).
-
Select
Next, then selectFinish. -
In the final confirmation window, use the Test the signal handler and workflow steps below to test with CrowdStrike-provided sample trigger data. After the sample trigger data test is successful and you can see the event in View Ingested Signals, return to this confirmation window and set
Workflow statustoONso events are sent immediately.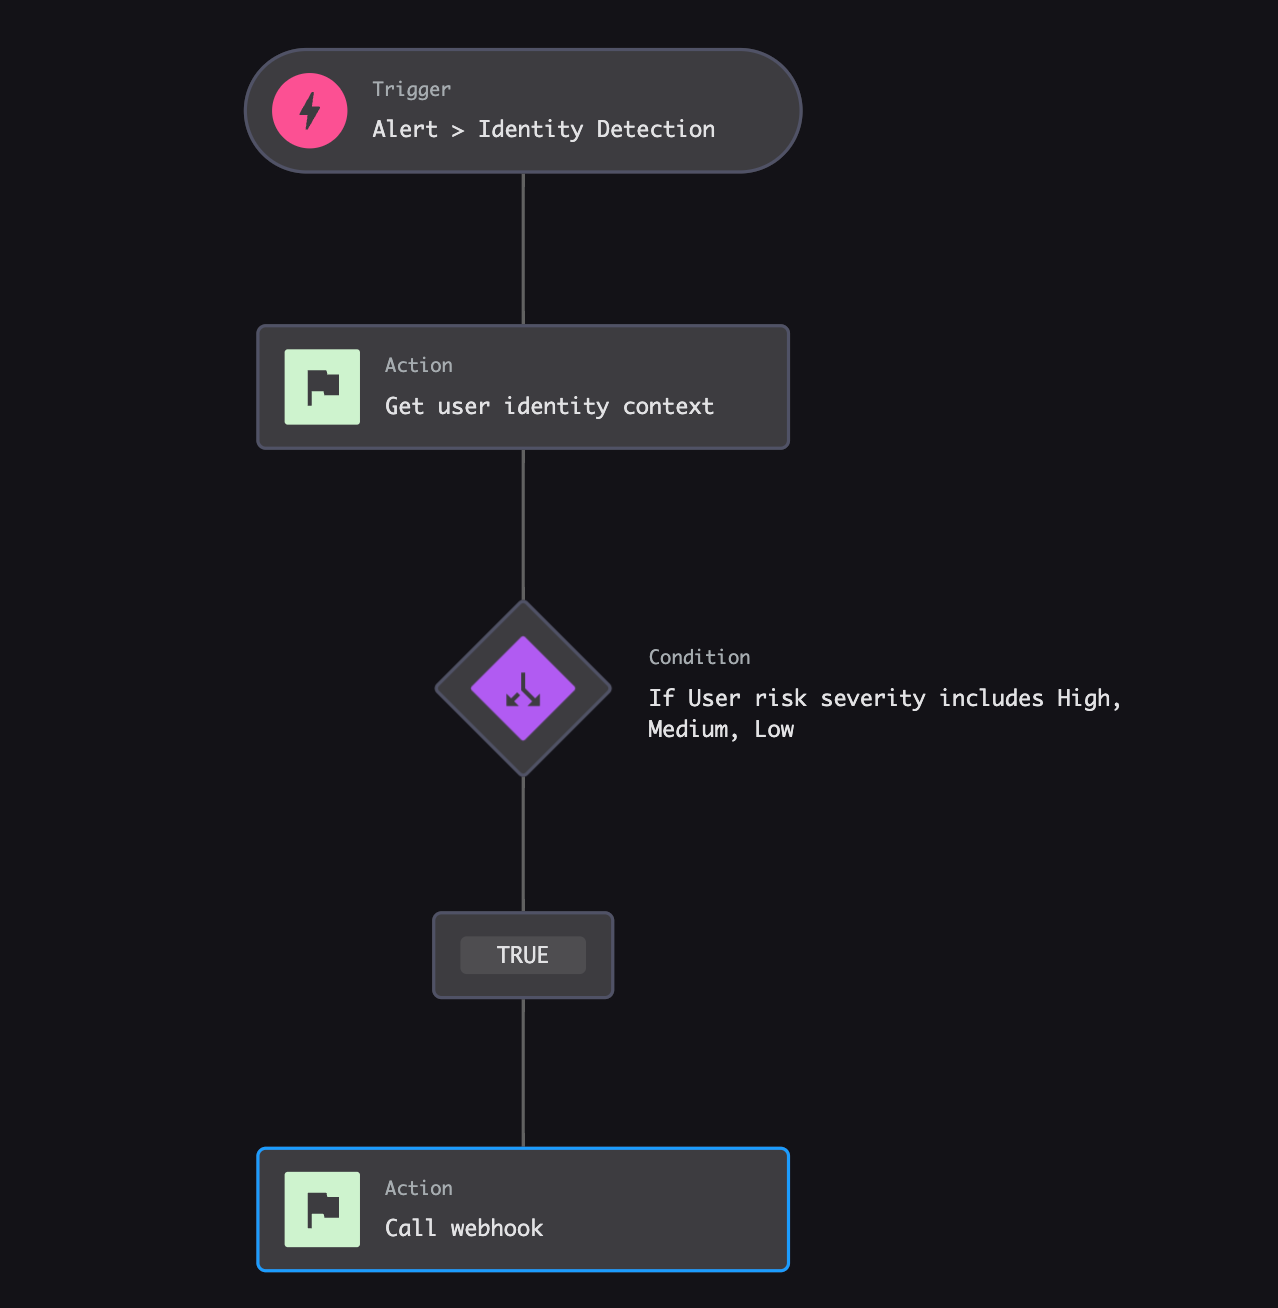
After the workflow is enabled, generate or wait for a qualifying Identity Protection event and confirm that it appears in the CrowdStrike Webhook Data Collector in Control Center. If the event does not appear there, the risk policy will not have any CrowdStrike data to evaluate.
Test the signal handler and workflow
After you configure CrowdStrike, validate the Identity Protection workflow end-to-end using CrowdStrike-provided mock trigger data. This confirms not just that Control Center can receive CrowdStrike events, but that the Fusion workflow and webhook are wired correctly.
To validate the Fusion workflow end-to-end, run the workflow with CrowdStrike-provided mock trigger data, using CrowdStrike's provided Custom JSON:
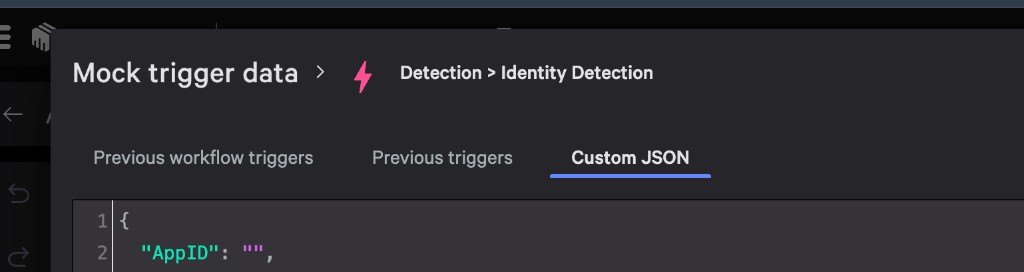
If your Fusion workflow uses different attribute names, update the Custom JSON input so it matches the fields you selected for the webhook call.
In Control Center, open the IdP Signal Handler, go to View Ingested Signals, and confirm the Custom JSON event appears. Once this test is successful, you have verified that the Identity Protection workflow works end-to-end and you can safely set the workflow's status to ON.
Set up the risk policy in Control Center
To get started, first you must create a policy.
-
At the top right of the Risk Policies list, select Add New Policy.

-
Complete the Add New Risk Policy dialog fields as follows:
Field Value Policy Type Custom Policy Policy Templates CrowdStrike IdP Integration Policy Name (Provide a name.) Policy Description (Provide a description.) 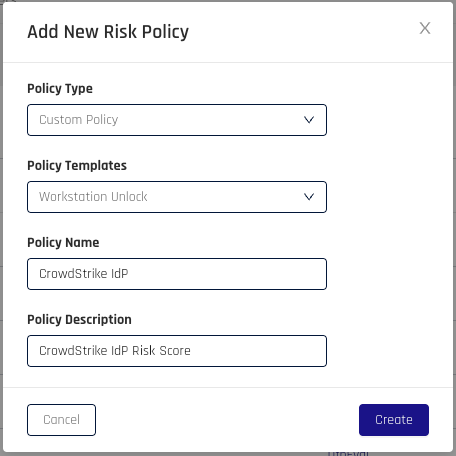
Your policy now appears in the Risk Policies list.
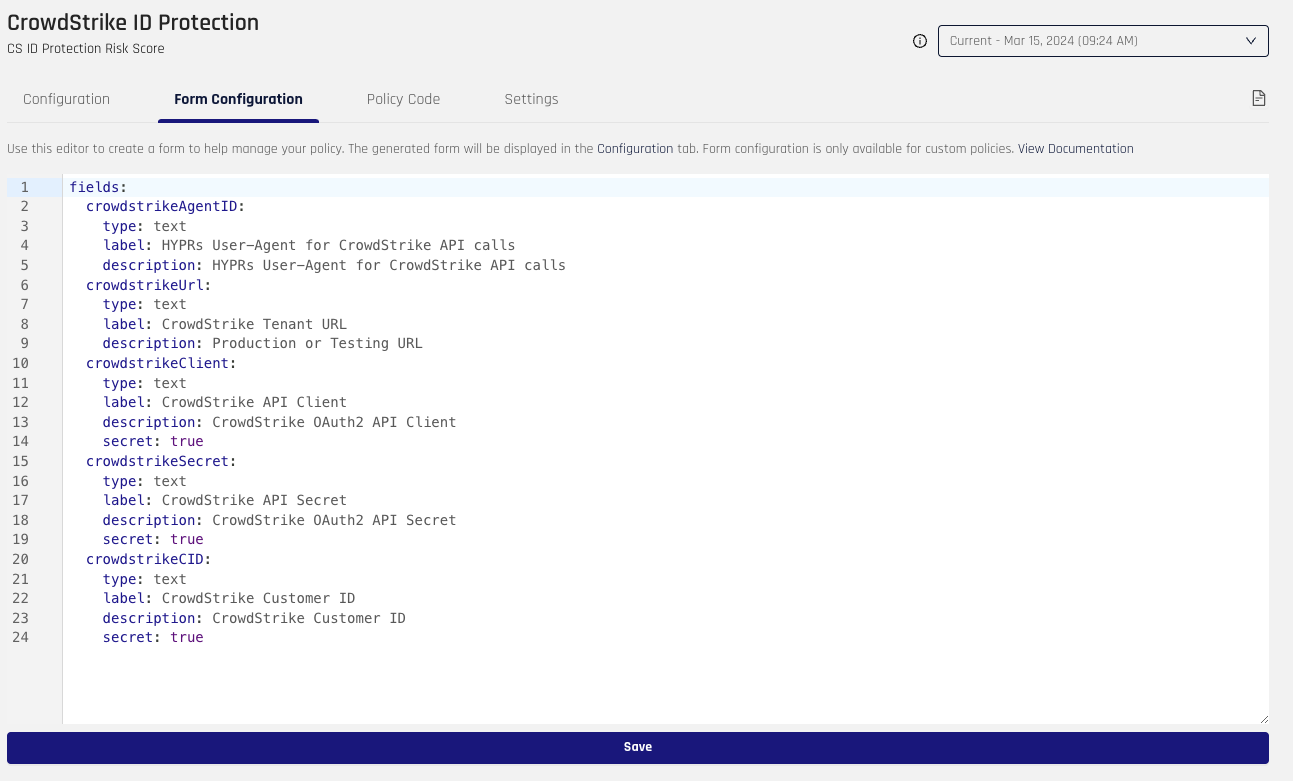
Form Configuration
As part of creating a policy, you must define the variables that will be used for the policy. For CrowdStrike, we must create an AgentID field, URL field, Client field, Secret field, and Customer ID field. Keep in mind, the form names, such as crowdstrikeURL, will be used as variables in the policy.
Once the form is populated, click Save.
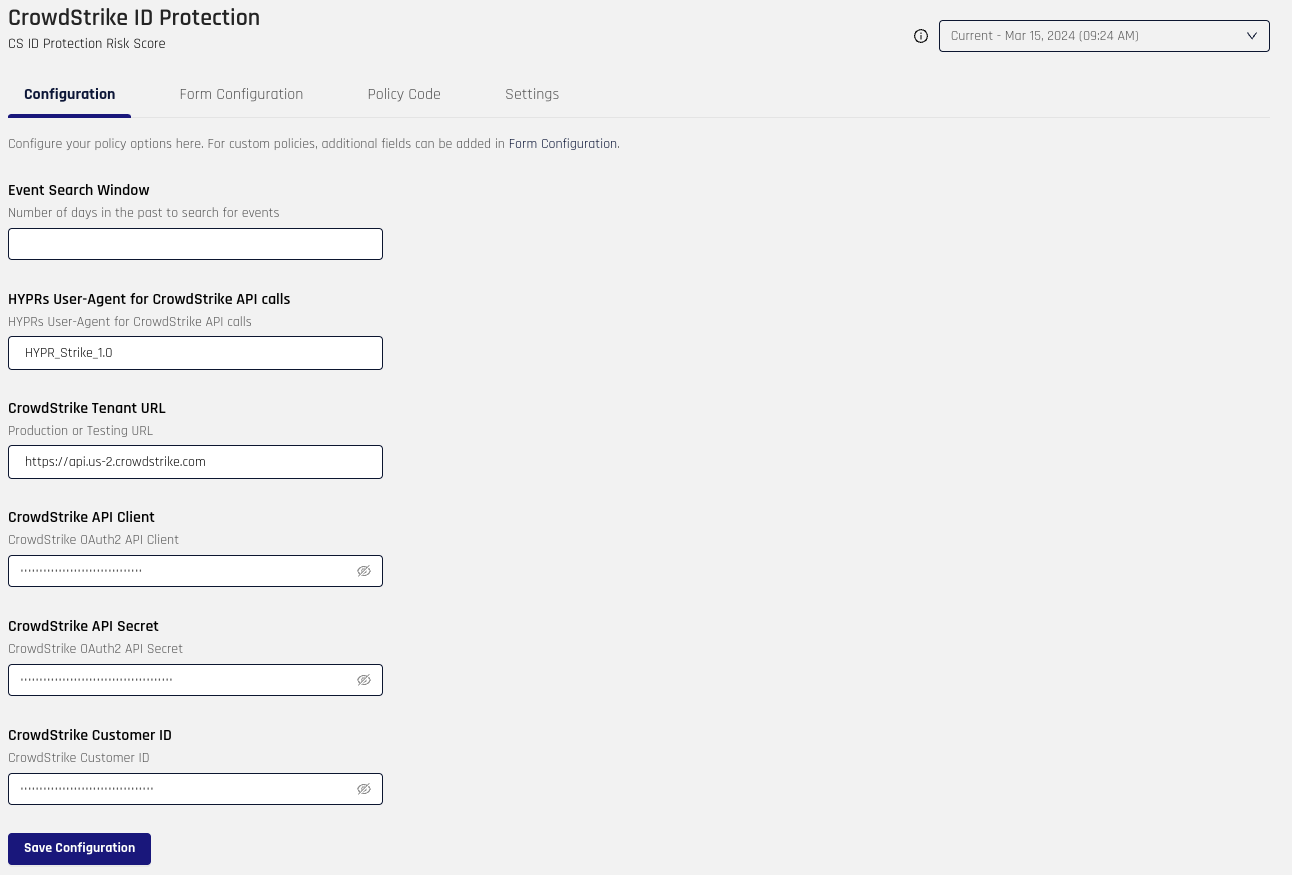
Configuration
With the form configured, you can now define the values that will be used as part of the policy.
-
Enter the CrowdStrike Tenant URL.
-
Provide your OAuth2 CrowdStrike API Client and CrowdStrike API Secret.
-
Add your CrowdStrike Customer ID.
-
When you are satisfied with the values in these fields, click Save Configuration.
-
Ensure your CrowdStrike API client has the required Identity Protection read/write permissions. For the CrowdStrike-side setup steps, see Stage 2: Set up CrowdStrike.
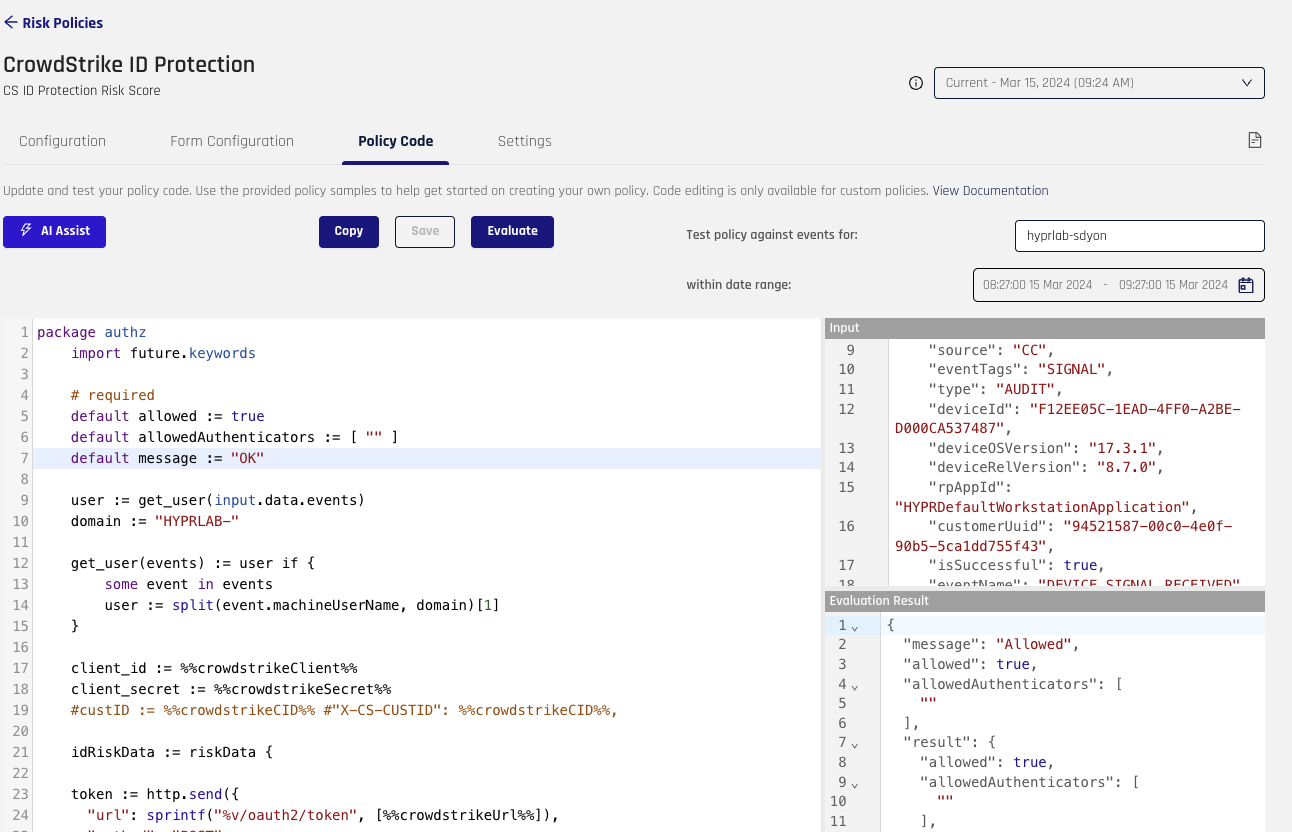
Policy Code
Within the Policy Code tab, you will be able to modify and test the policy to your desired outcome.
To test a policy:
-
Request the policy from HYPR to get started.
-
Provide a user at the top right.
-
Add a date range to receive data for the user to test. You will see the data populate the area labeled Input.
-
Click Evaluate. The results will be displayed at the bottom right, labeled Evaluation Result.
-
Once the policy meets your requirements, click Save.
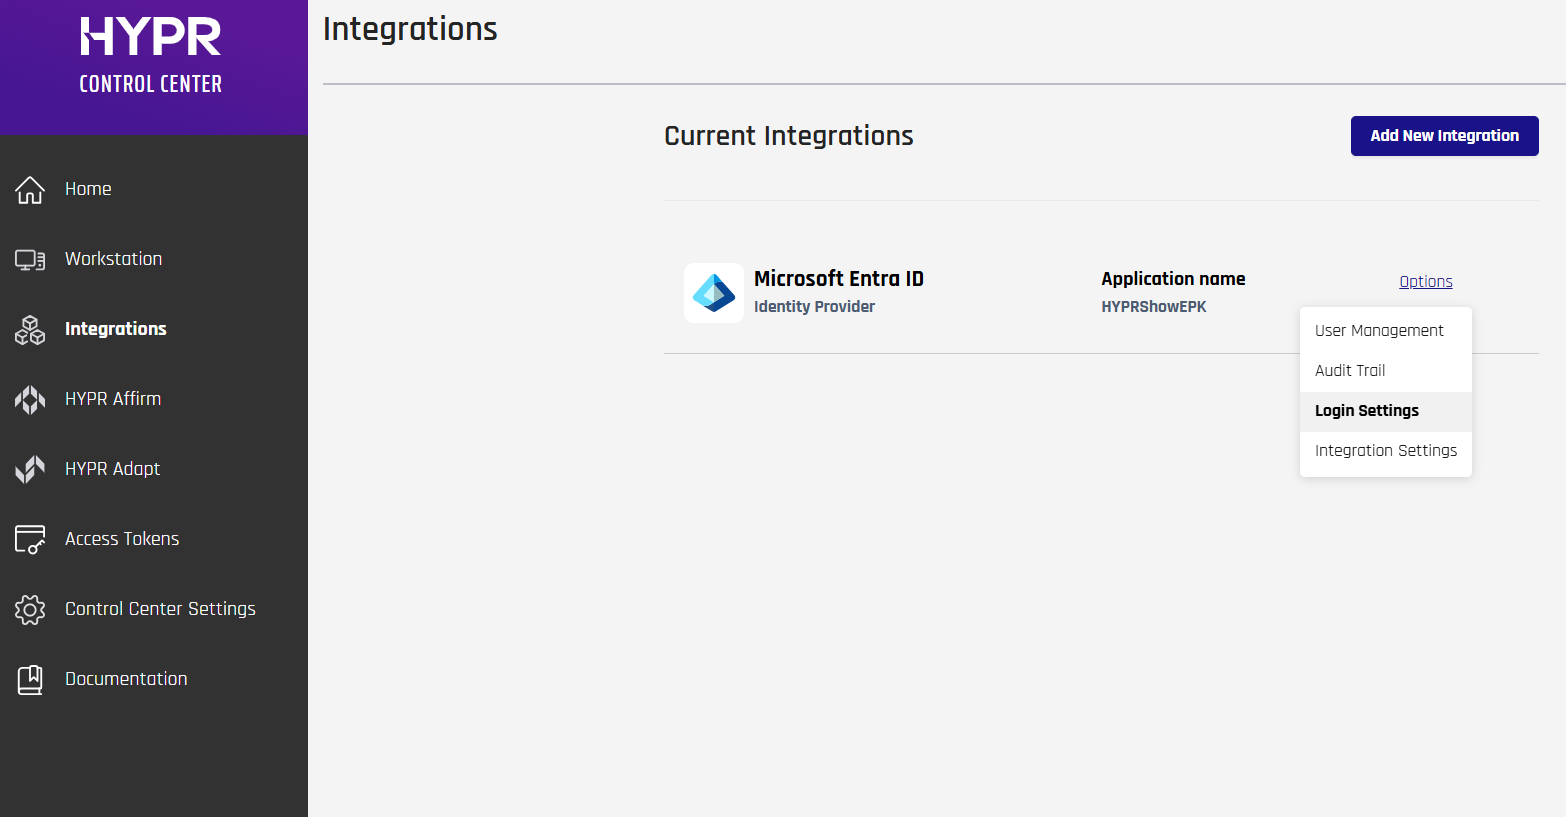
Assign the policy
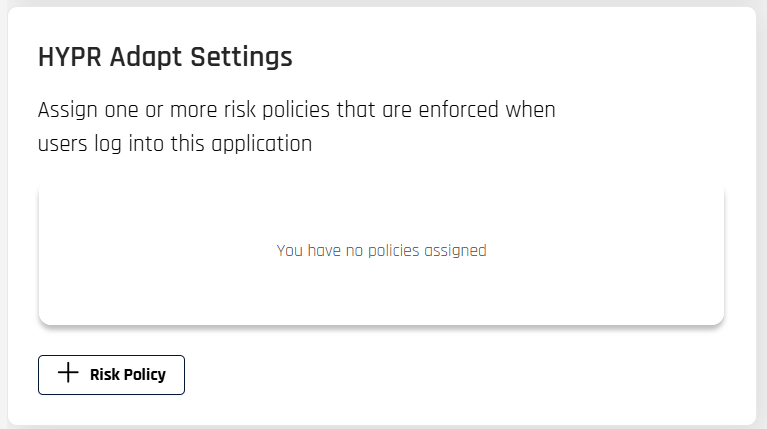
After you save the policy, assign it to the rpApp that is associated with your IdP integration so HYPR Adapt can evaluate CrowdStrike data during sign-in.
-
In Control Center Standard Mode, go to Integrations > Configured Integration Name > Login Settings for the application that should use this policy.
-
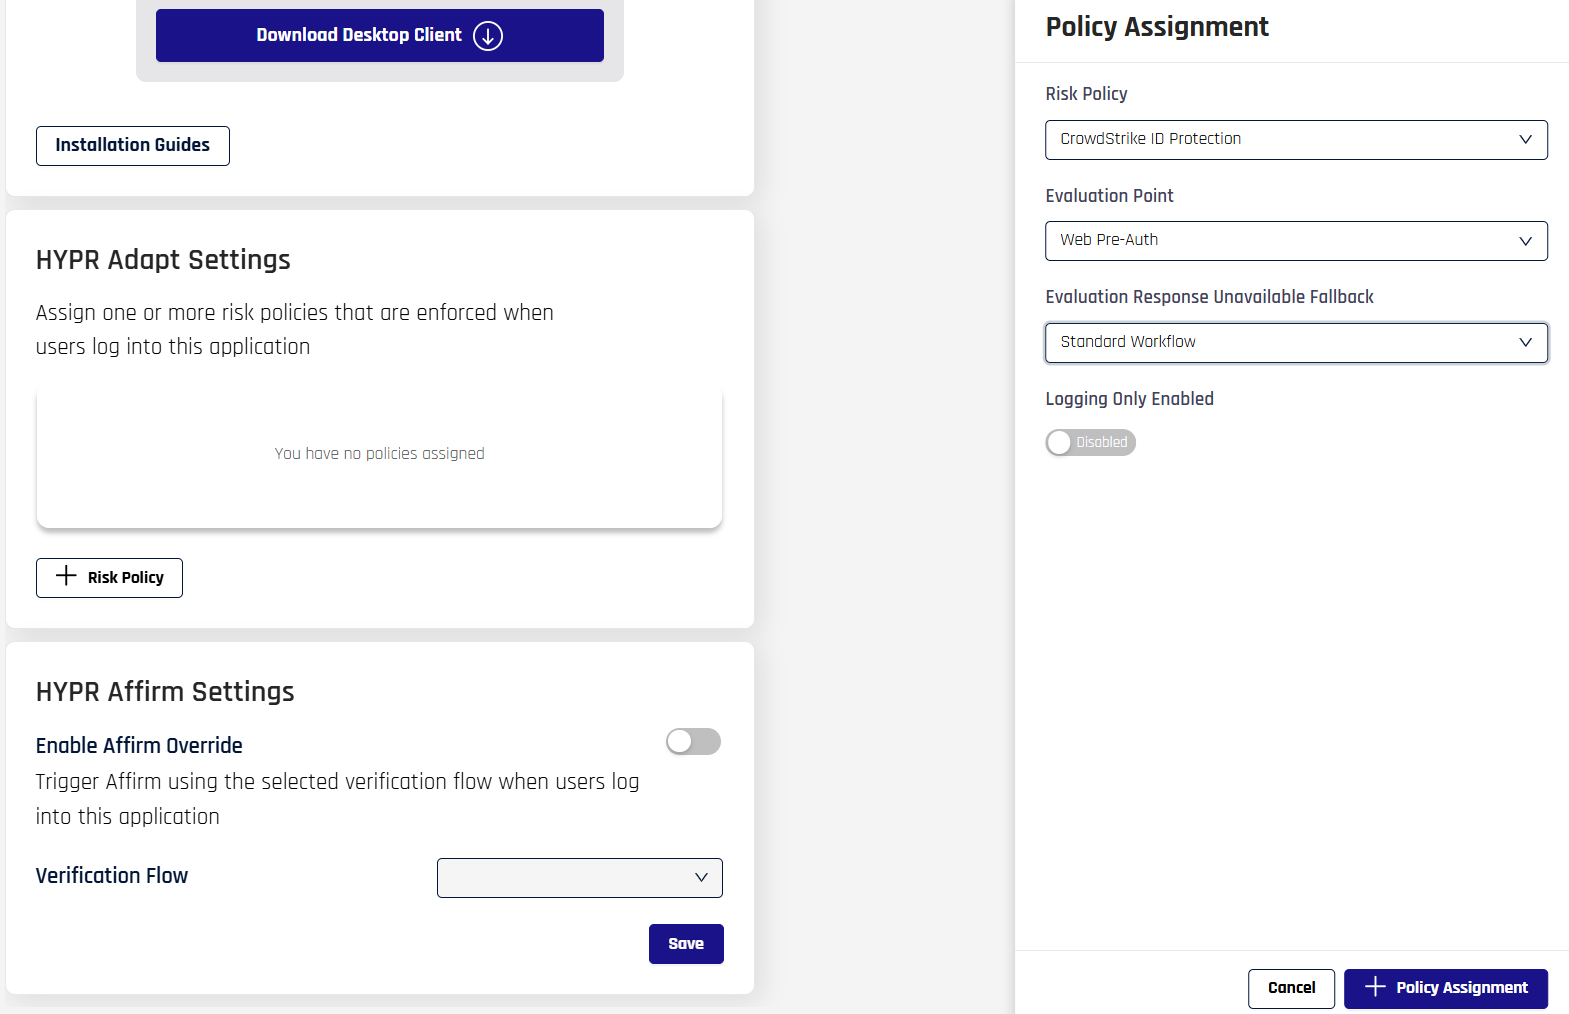
In the HYPR Adapt Settings section, click Assign Risk Policy to open the assignment dialog.
-
In the dialog, select this CrowdStrike IdP policy in Risk Policy, select the correct Application, and choose the appropriate Evaluation Point (see the Evaluation Points diagrams in Risk Policy Management).
- If you assign the policy to Workstation Pre-Unlock or Workstation Post-Unlock evaluation points, HYPR intercepts workstation authentication and evaluates the policy during workstation sign-in or unlock (see Risk Policy Management for details)
- If you assign the policy to Web Pre-Auth or Web Post-Auth evaluation points, HYPR evaluates the policy during web sign-in flows that use the linked IdP
rpApp(see Risk Policy Management for details)
-
Set the Evaluation Response Unavailable Fallback and Logging Only Enabled options as needed for your environment, then click +Policy Assignment so the assignment appears under HYPR Adapt Settings.
-
For IdP login scenarios such as Okta, make sure the assigned application and chosen evaluation point match your production sign-in flow.