AD CS setup for Single Registration
To enroll certificates in behalf of another user, an Enrollment Agent certificate must be present on the Windows server where the HYPR Enrollment Service is running. In addition, a User template must be defined to allow user certificates can be issued.
Configure Active Directory Certificate Services (AD CS)
Screenshots below were taken using Active Directory 2008. Your AD may have a different user interface if you're on a newer version.
To enroll certificates on behalf of another user, an Enrollment Agent certificate must be present on the Windows server where the HYPR Certificate Enrollment Service is running. In addition, a user template must be defined to allow user certificates to be issued.
The following instructions occur in the Microsoft Management Console Certificate Templates snap-in.
DA privileges are required to create, configure, and deploy certificate templates.
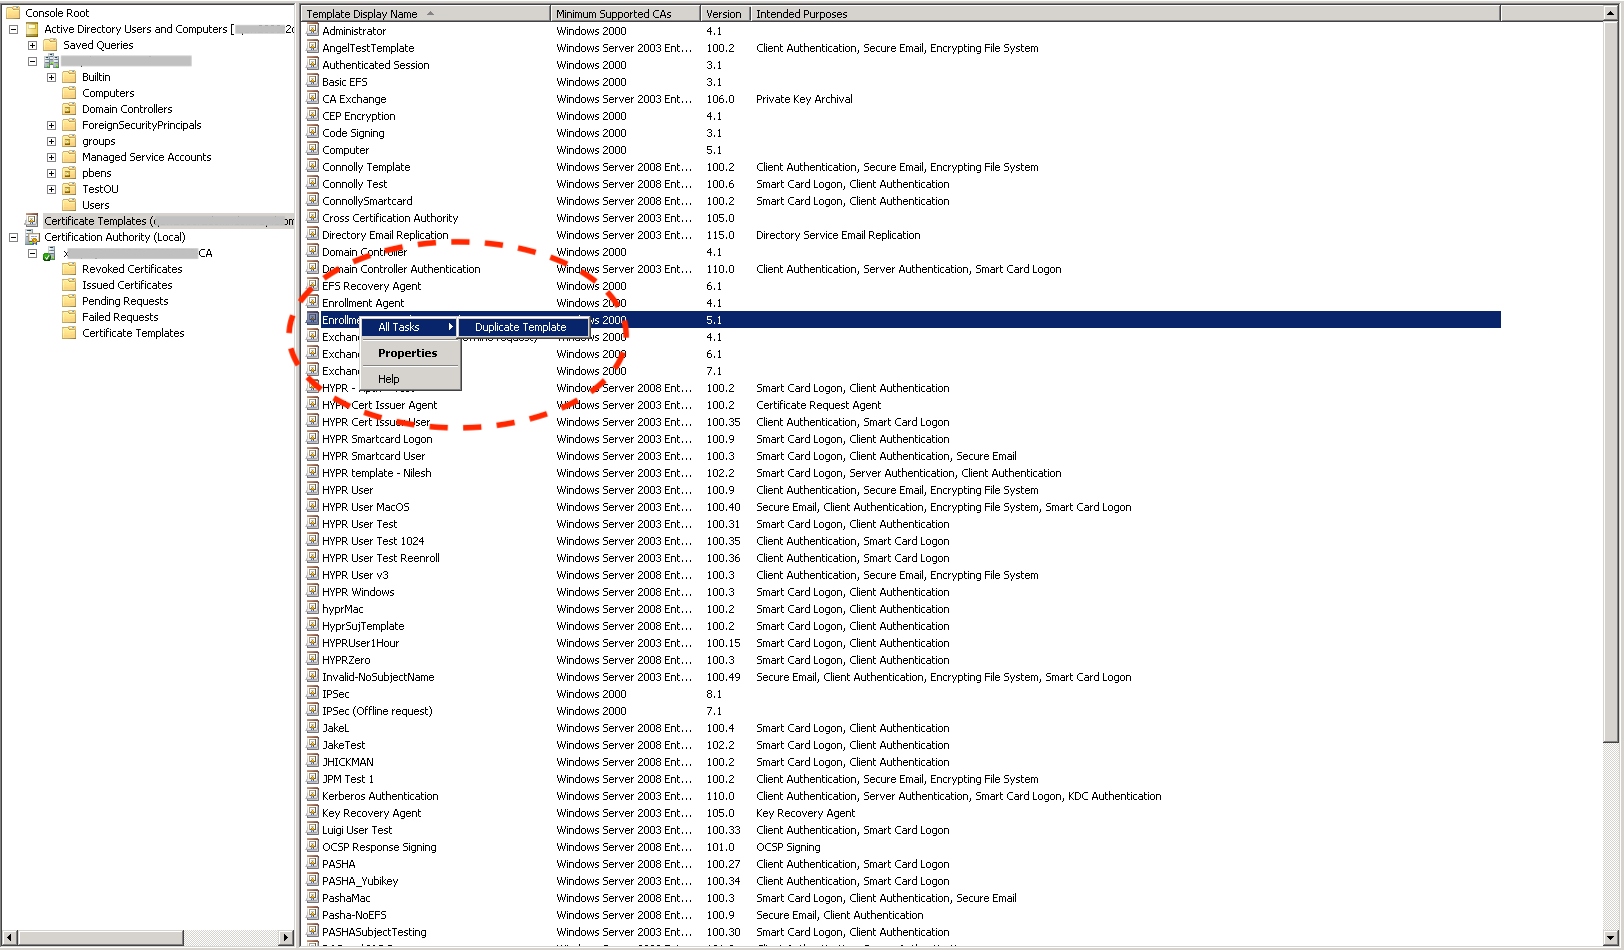
Create the HYPR Enrollment Agent Template
-
Right-click the Enrollment Agent (Computer) template and choose the** All Tasks → Duplicate Template** menu option.
-
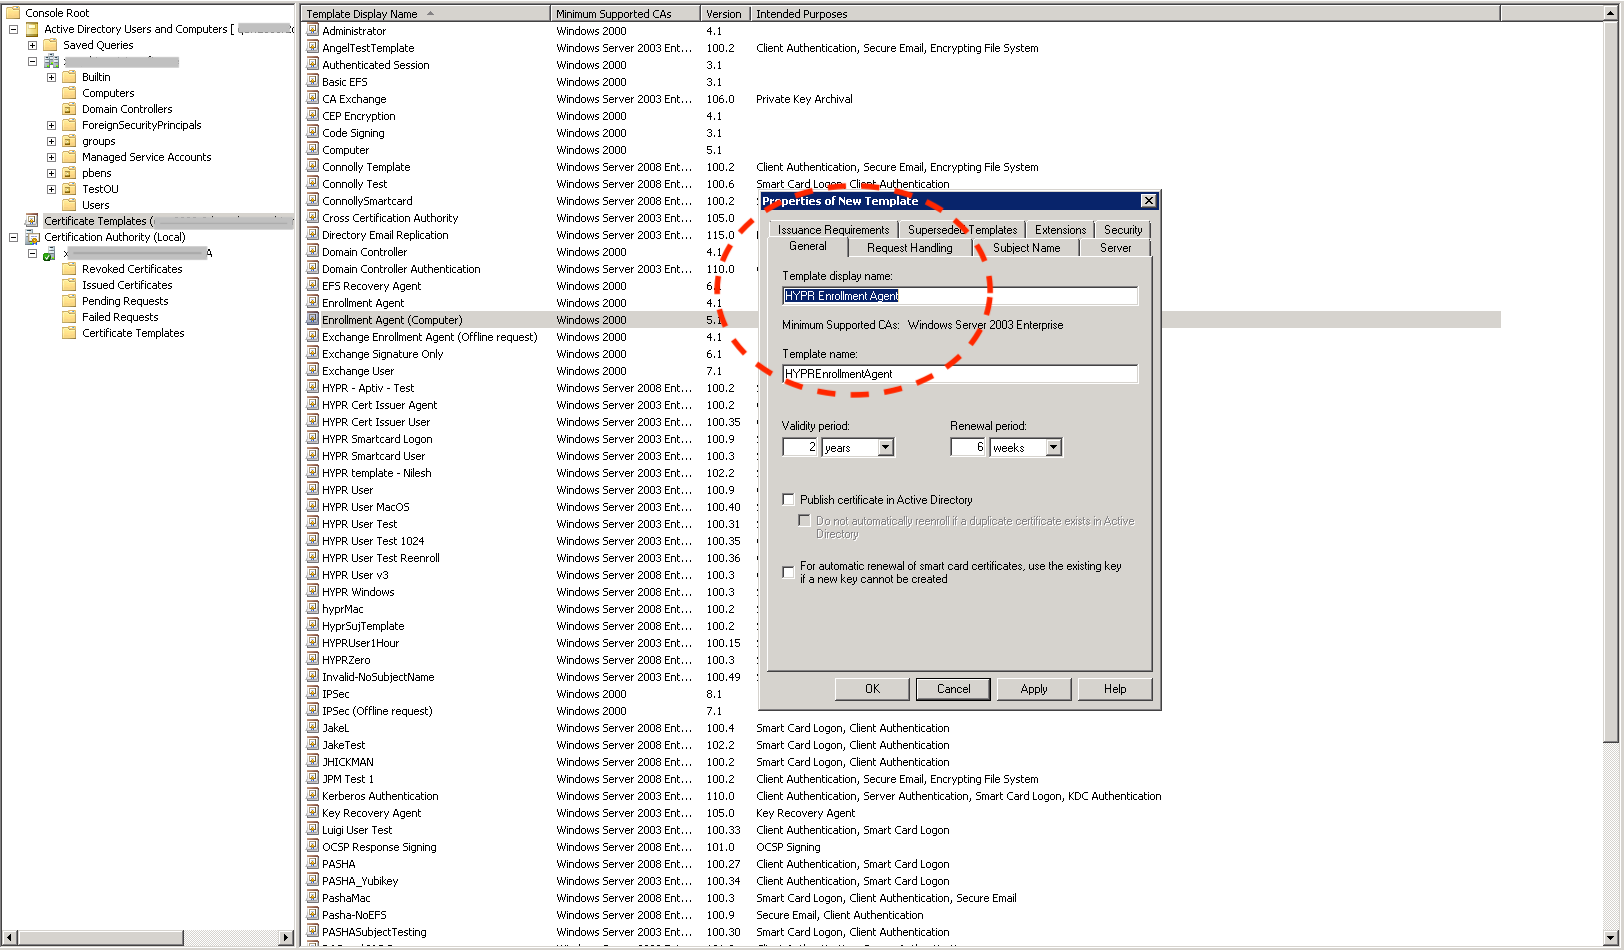
Name the new template HYPR Enrollment Agent.
-
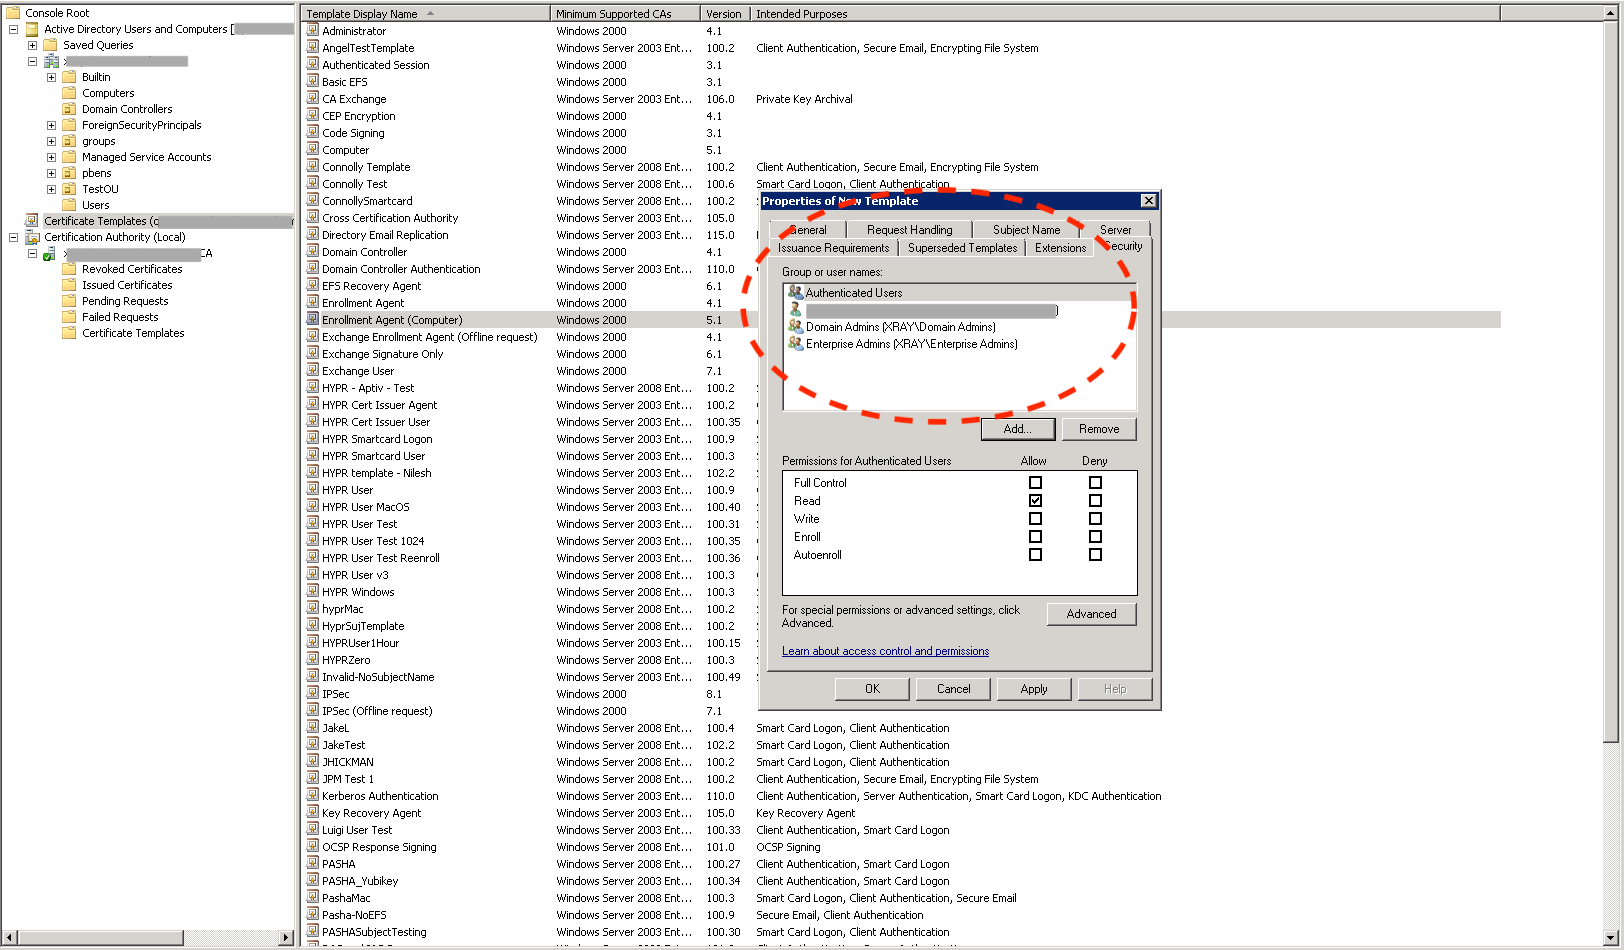
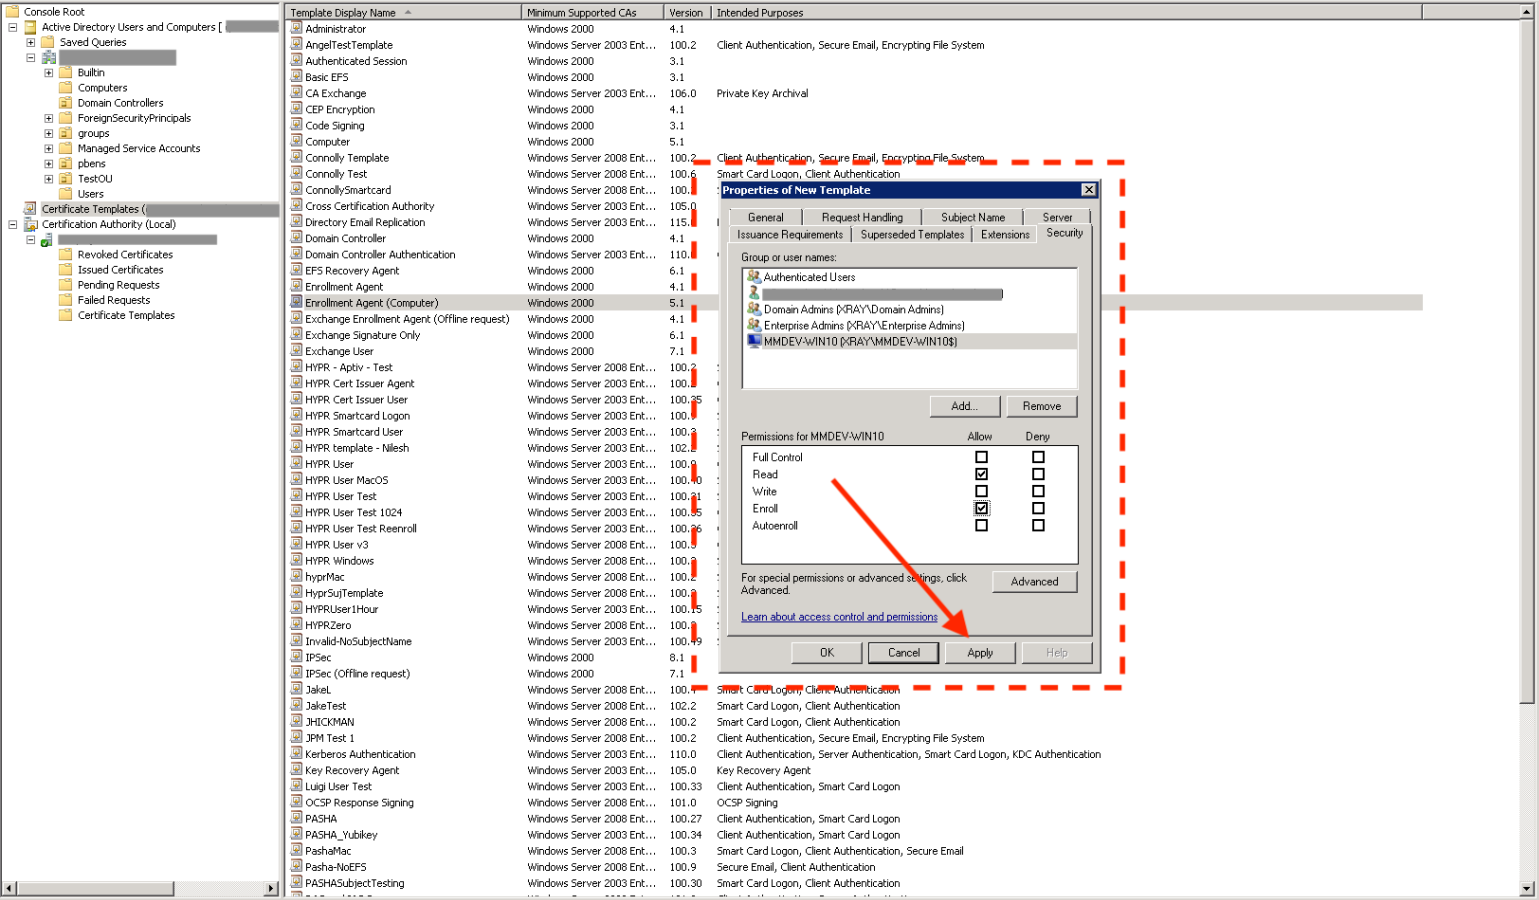
Select the Security tab to display the current access control list for the template.
-
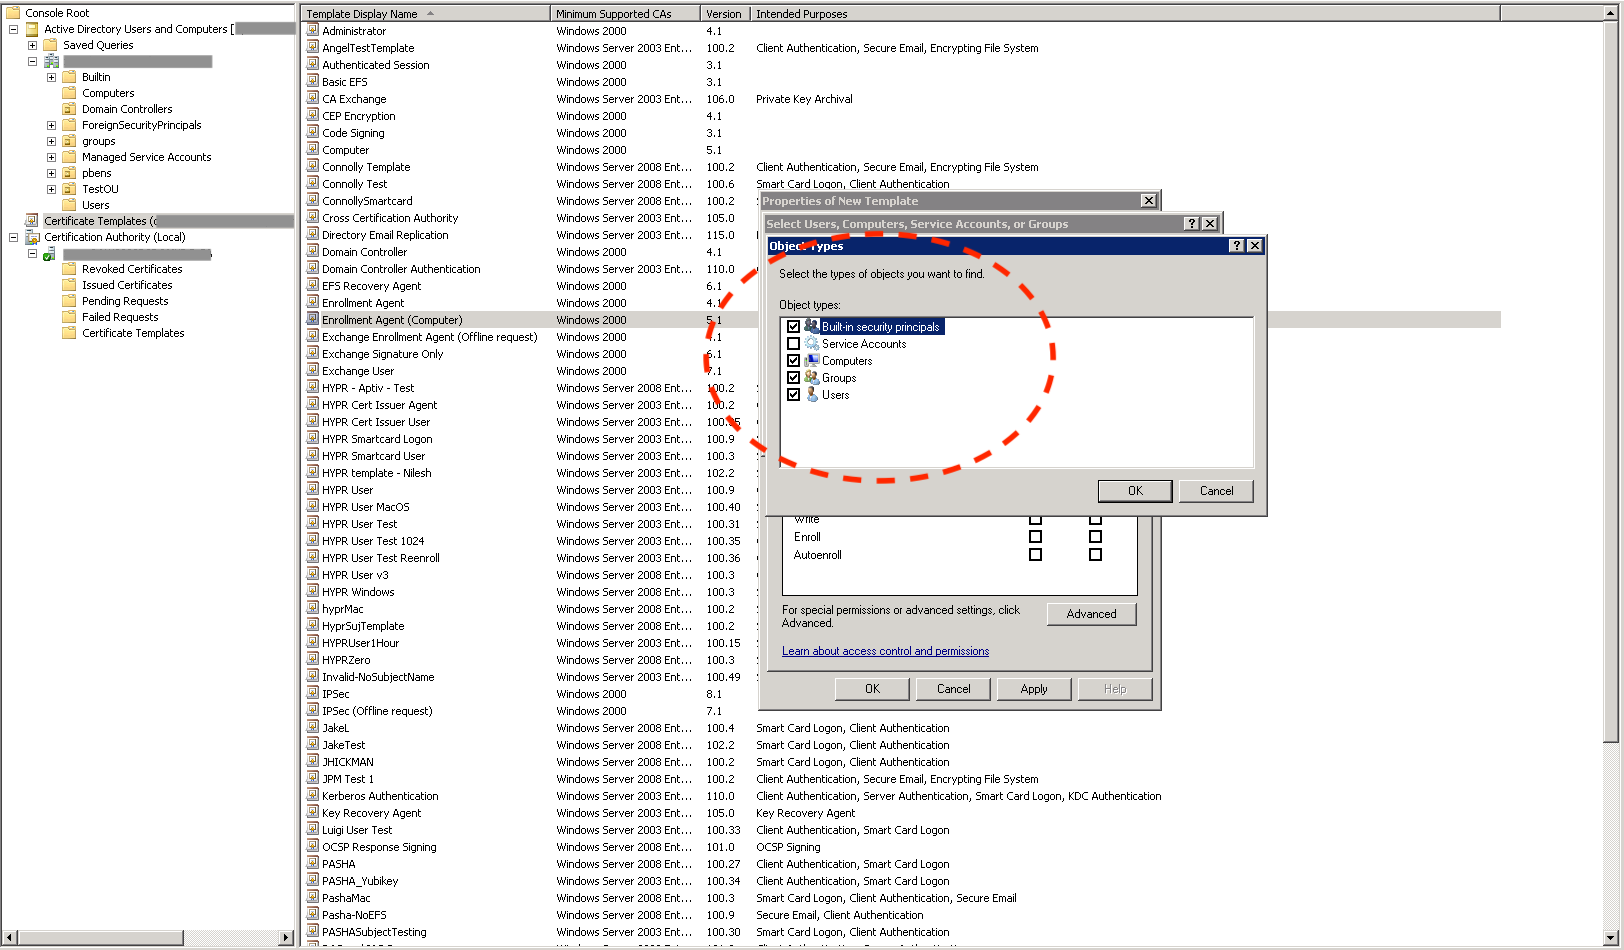
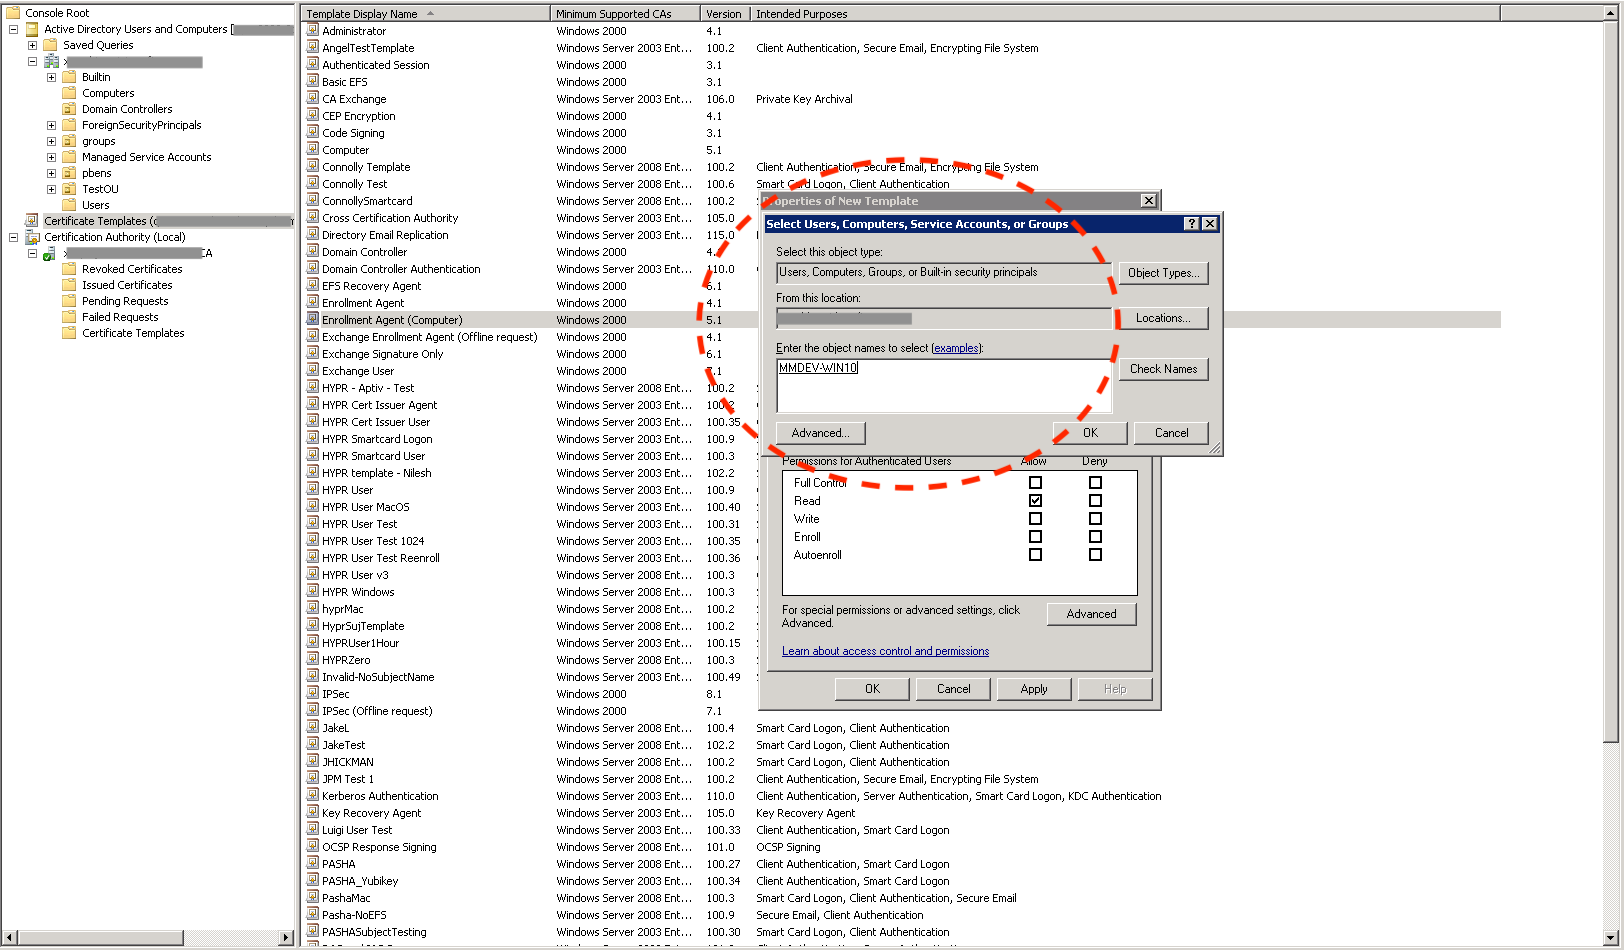
To tighten the access controls on the template, click Add… and add an entry for the computer where the HYPR Enrollment Service will be running.
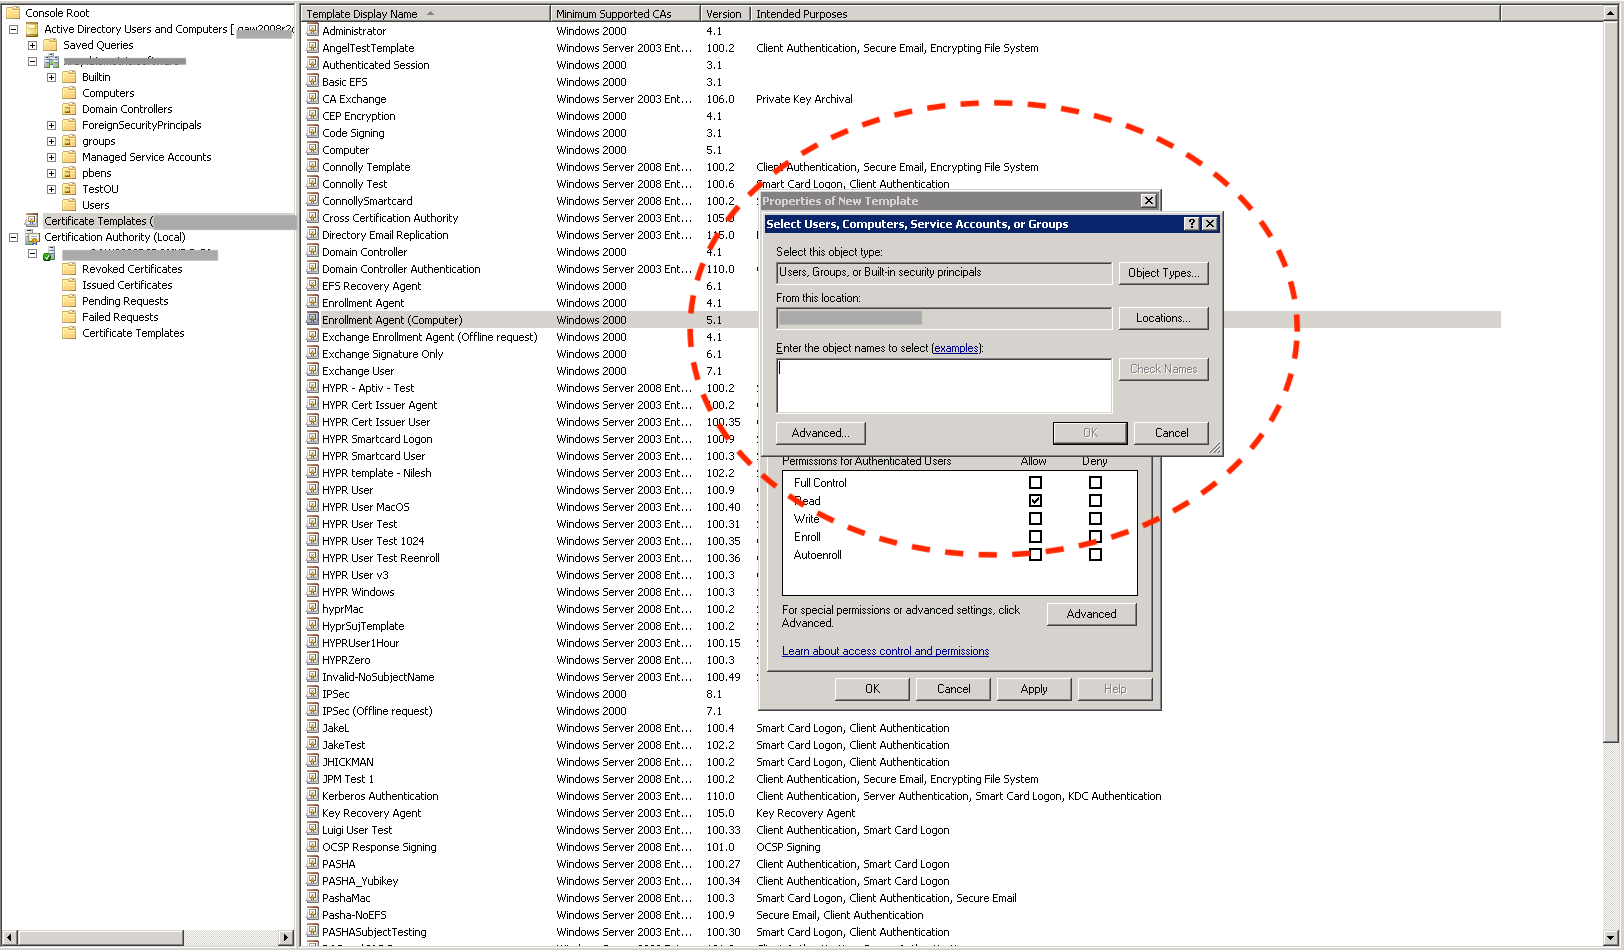
-
Check the Allow column's box next to Enroll, then click Apply to save the template.
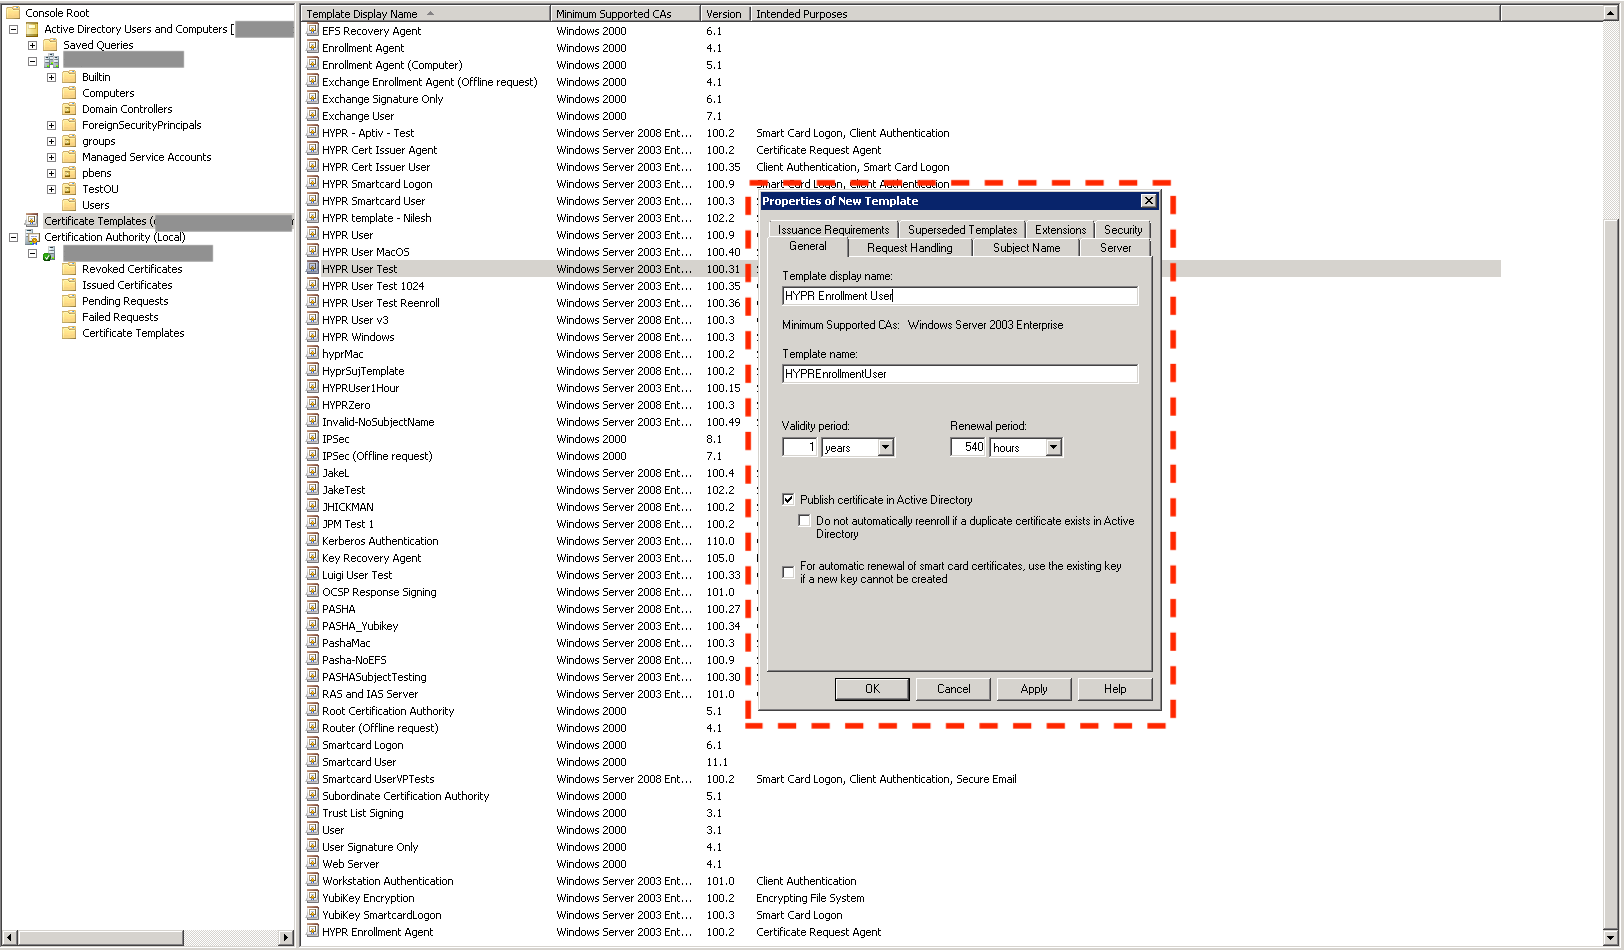
Create the HYPR Enrollment User Template
-
Duplicate an existing template (see Creating a Custom Certificate Template) and name it HYPR Enrollment User. This is the template that will be used to issue user certificates.
-
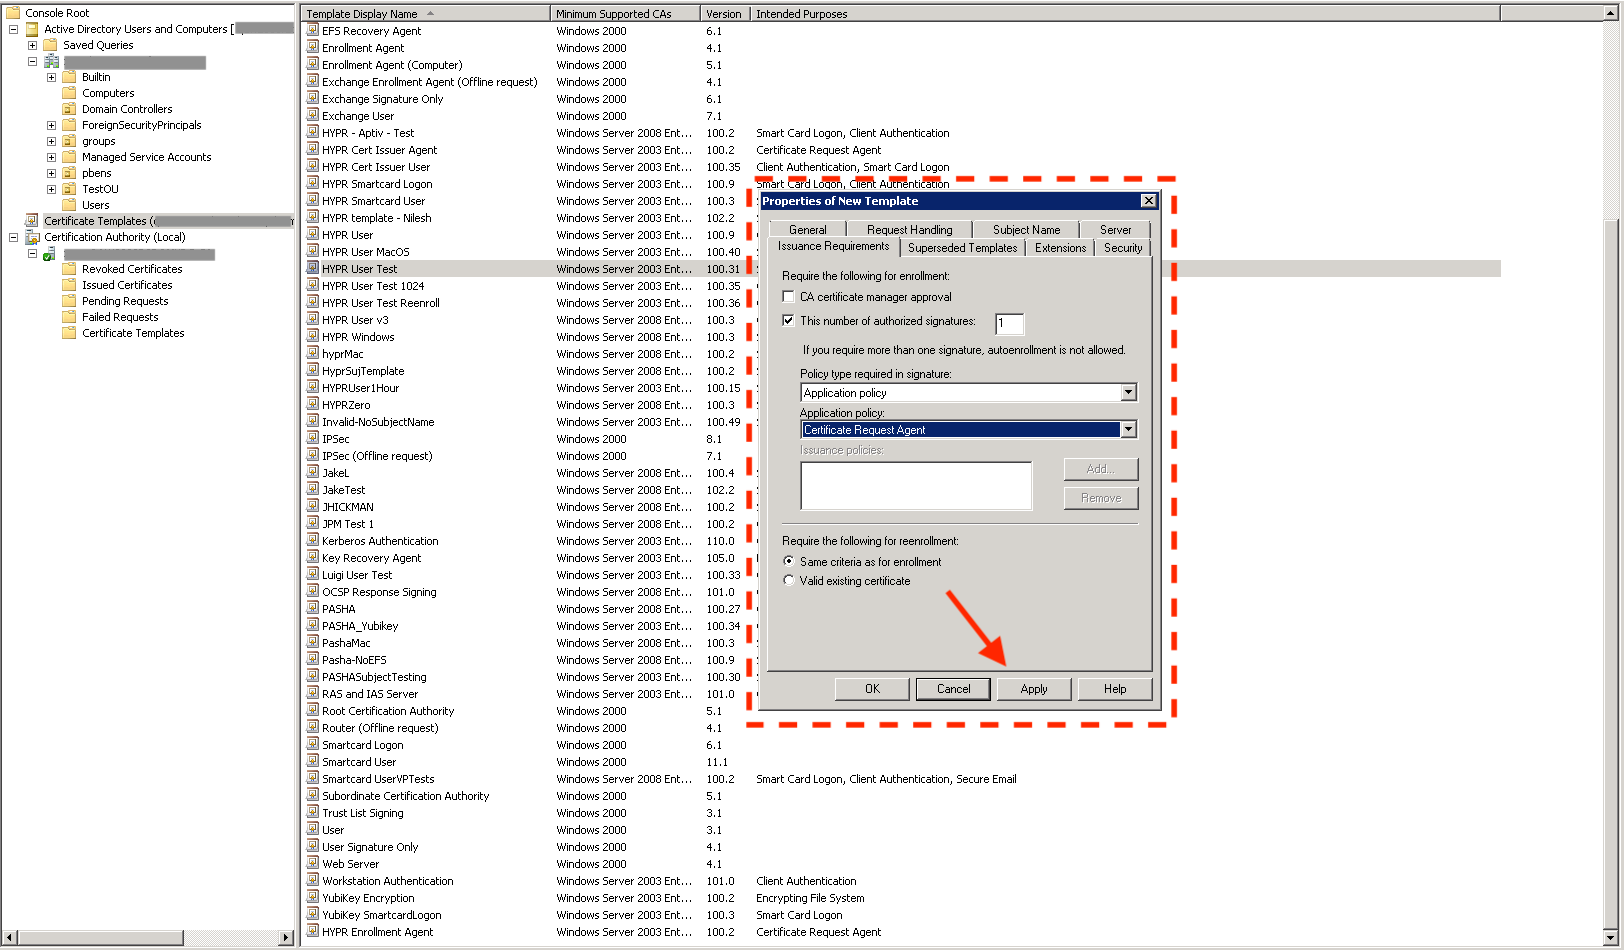
Select the Issuance Requirements tab.
-
Check This number of authorized signatures and give it a value of 1.
-
Set the Application Policy to Certificate Request Agent.
-
Click Apply to save the template.
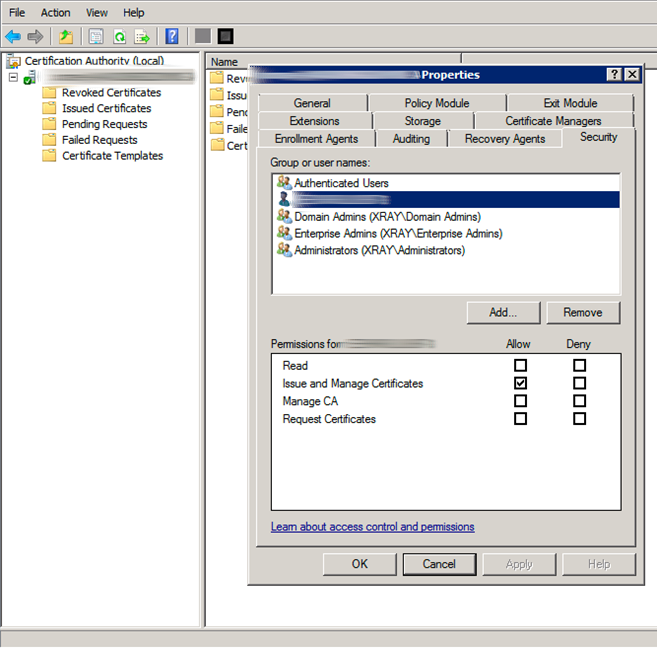
Grant System Account Permissions
-
Right-click the server name and choose Properties.
-
On the Server Properties dialog, select the Security tab.
-
Select the server's computer account. Under the Allow column, check the box for Issue and Manage Certificates, then click OK.
-
On the Server Properties dialog, select the Certificate Managers tab. In the Certificate Managers pane, select the computer account you added in the previous step.
-
In the Certificate Templates pane, click Add... and choose the HYPR Enrollment User template. Click OK.

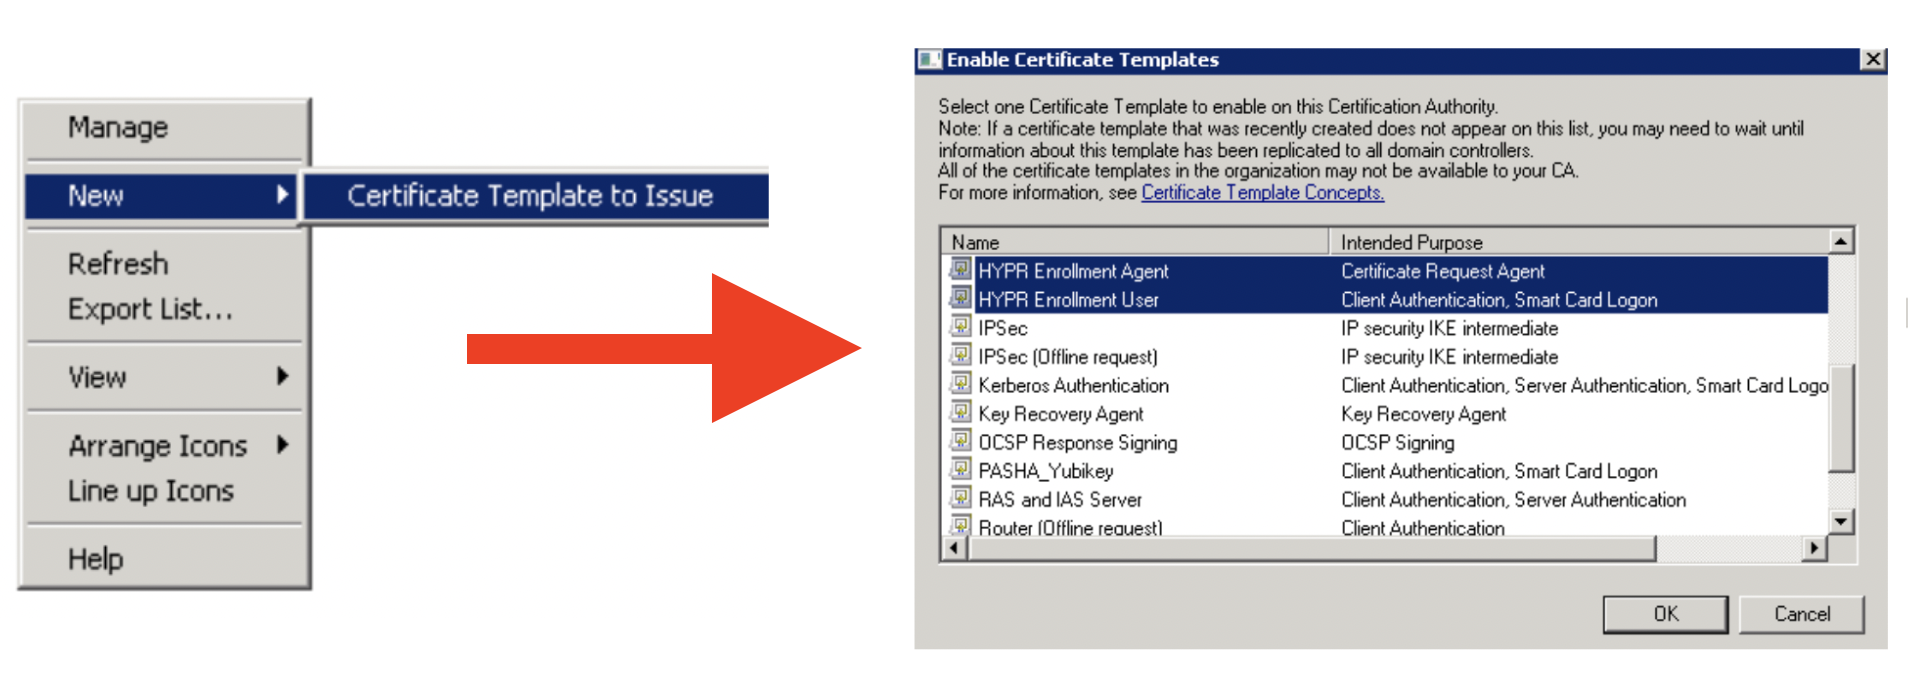
Enable the Templates
-
Right-click and select the New → Certificate Template to Issue menu option.
-
Select the HYPR Enrollment Agent and HYPR Enrollment User templates from the list.
-
Click OK to publish the certificate templates for use.
Deploy the HYPR Enrollment Agent Template
-
On the Windows server where the HYPR Enrollment Service is running, log in as a Domain user. Deploy the Enrollment Agent certificate to the Local Machine certificate store. Run
certlm.msc. -
Right-click Personal and choose Certificates.
-
Right-click Certificates and choose All Tasks → Request New Certificate.

-
Continue to click Next until the following dialog is displayed.
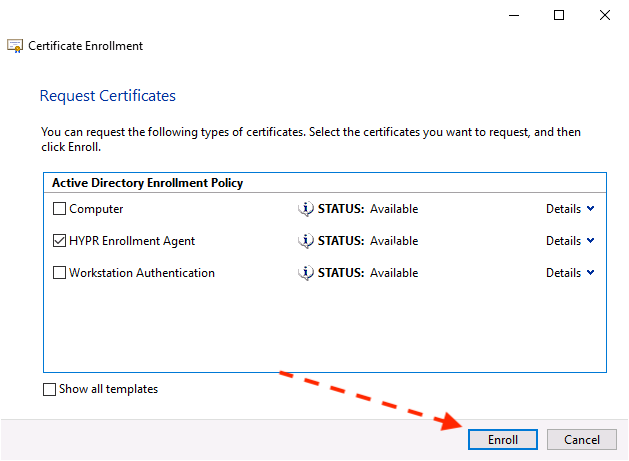
-
Choose the HYPR Enrollment Template and click Enroll to deploy the Enrollment Agent certificate to the Windows server.
Configuring Active Directory (AD) Users
Before a user can start the web registration flow, their AD user account must be configured as follows:

-
In the management console, click Start.
-
Navigate to Active Directory Users and Computers.
-
In the top menu, click View -> Advanced Features.
-
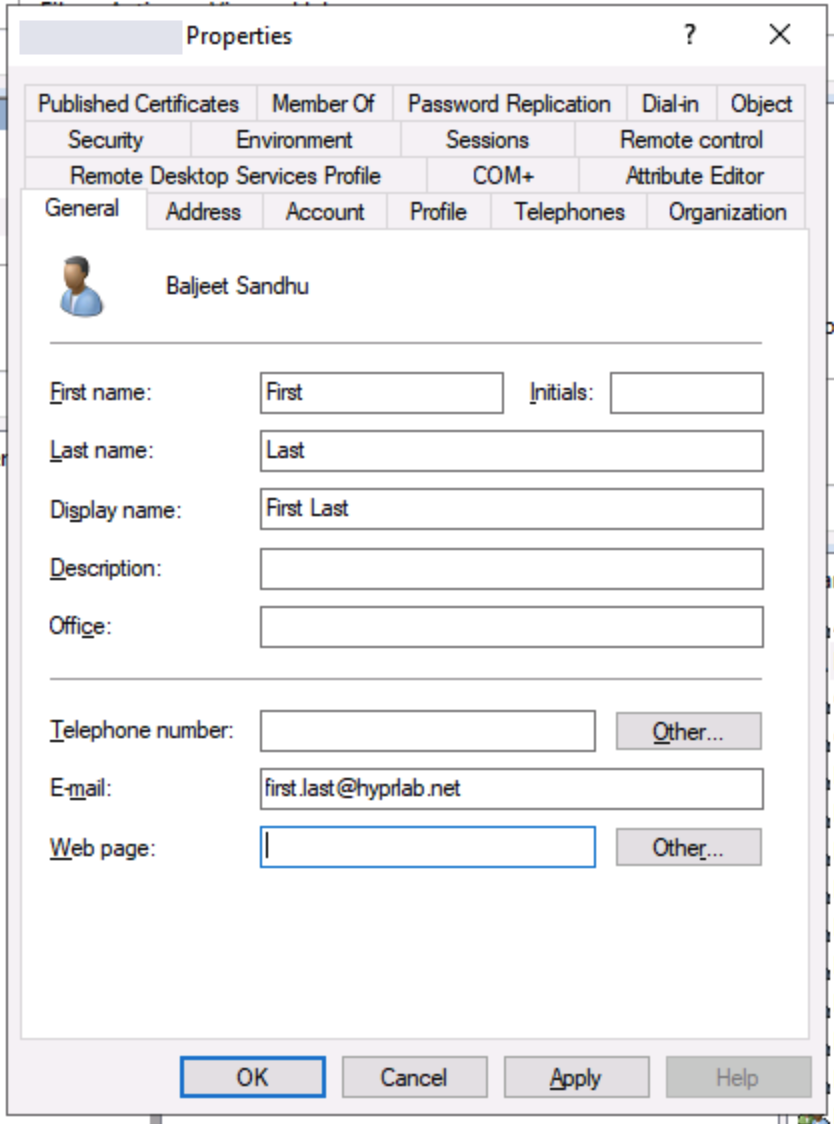
Select the user that you will invite to register.
-
Under the General tab, enter the user's email address into the E-mail field.
-
Click the Attribute Editor.
-
Scroll down, click the mail attribute, and enter the user's email address.
Conditional Enrollment for Single Registration
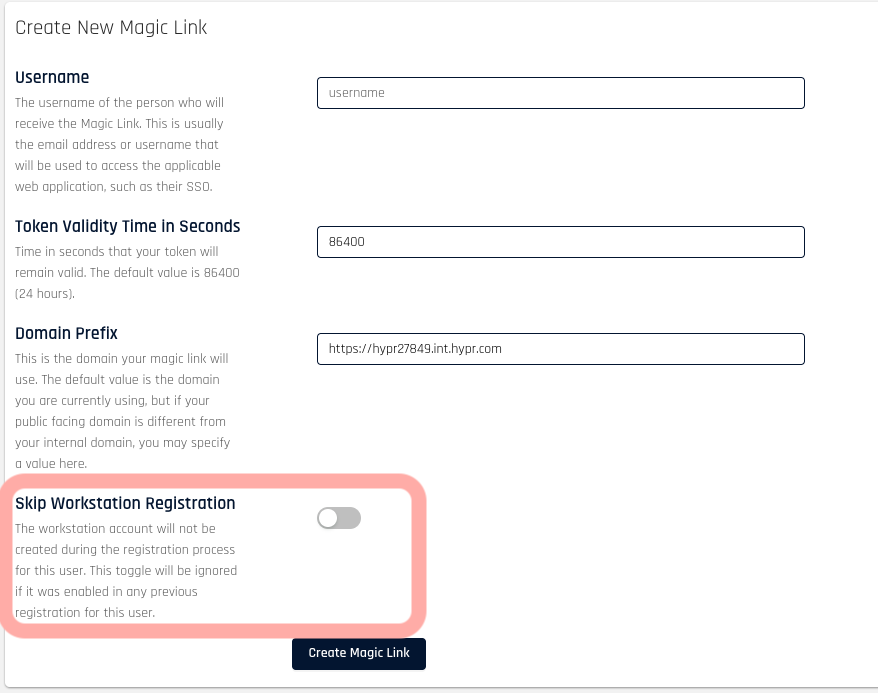
Organizations typically have different user groups that might require access to various resources. The registration requirements may then be tied to the resources those users want to access. When HYPR is configured for a Single Registration experience, administrators can decide whether a given user is expected to have a computer account created during enrollment. This provides the flexibility to have web-only registrations without requiring complex setups.
In order to choose the type of accounts a user should get during registration, follow the next steps:
-
Acces the Magic Links page to onboard new users (see Registering Users with a Magic Link).
-
If you want to skip the creation of a Computer account during the user's registration, toggle the Skip workstation registration option.