Email Notification Customization
Overview
In HYPR 11.1 and later, Control Center administrators can manage the look and feel of email notifications sent from HYPR.
Each notification type starts with a default HYPR template. You can create a custom template for that notification type, create multiple versions of that template, and then choose which version is active. The active version is the one used when an email for that notification type is sent.
You can also revert a notification type back to the default template when needed.
Access Notification Settings
Open Control Center Settings and select the Notification Settings tab to view the email notification types available in your tenant.
If you do not see the expected notification types, confirm with HYPR Support or your HYPR representative that the relevant product capabilities are enabled for your environment.
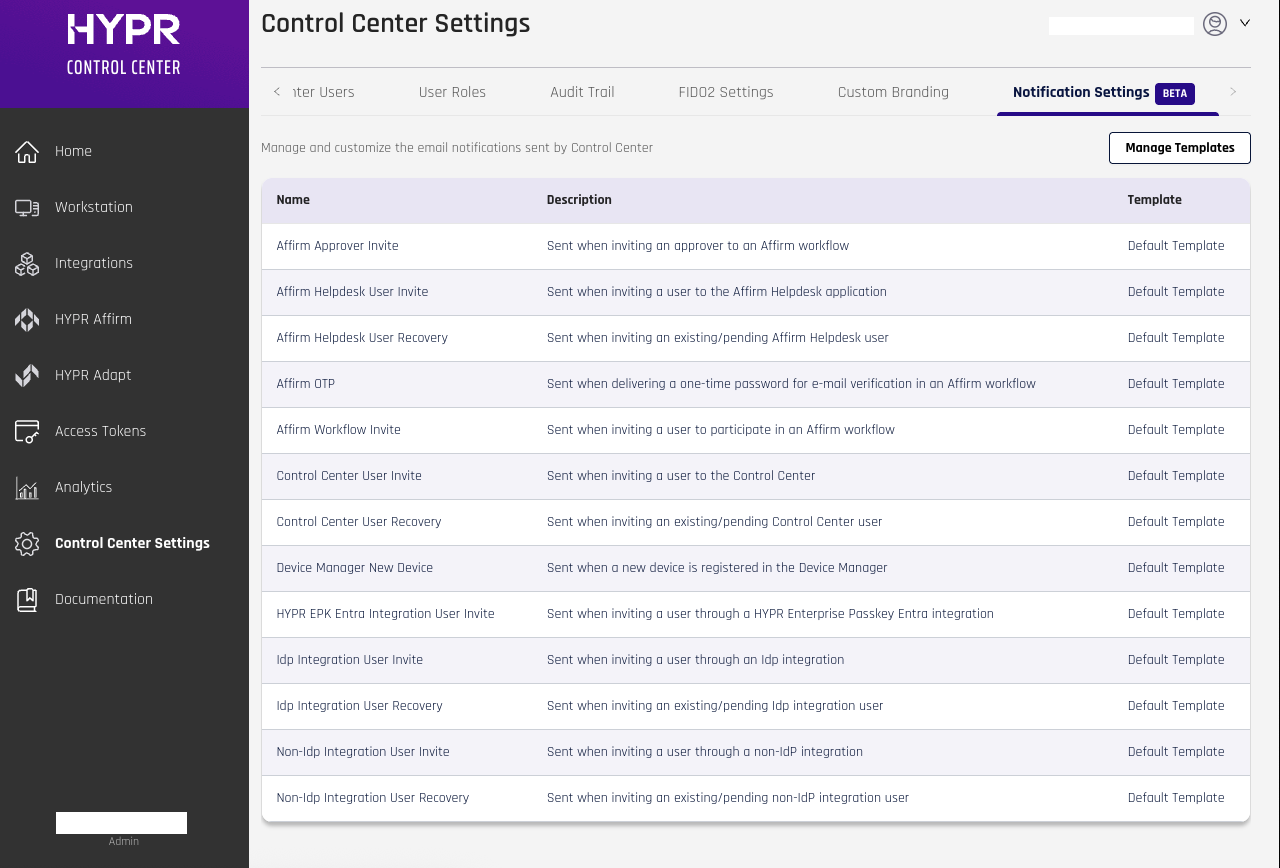
If Default Template is shown in the Template column, no custom template is currently active for that notification type.
Template Management
Click Manage Templates to open the template management workspace.
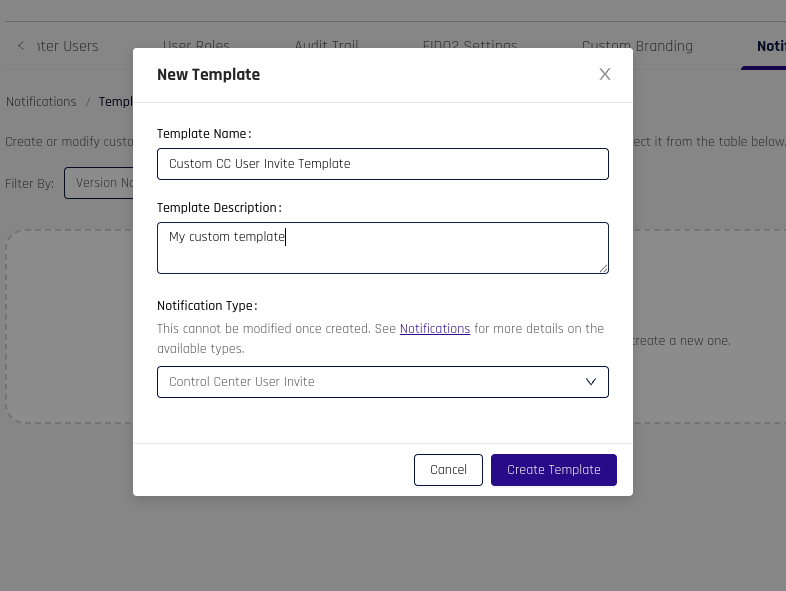
Click + Template to create a new template and set its name, description, and notification type.
Only one custom template can be created for a single notification type.
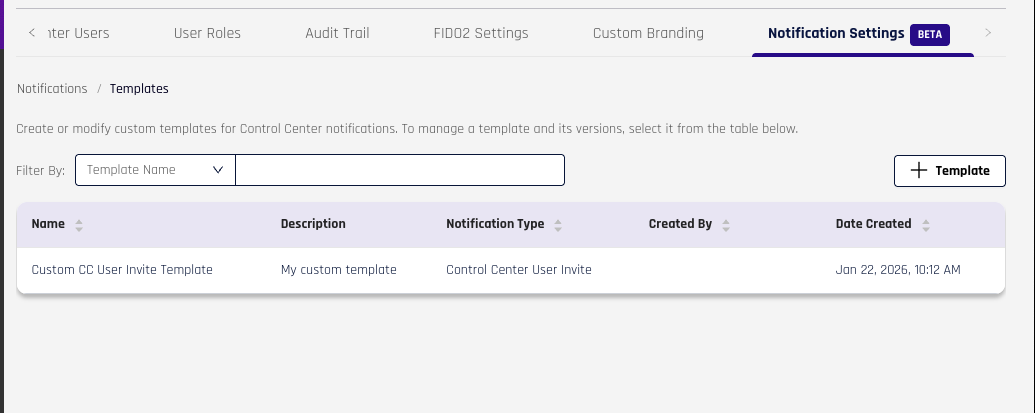
Once created, the template will appear in a table where you can click it to manage its versions.
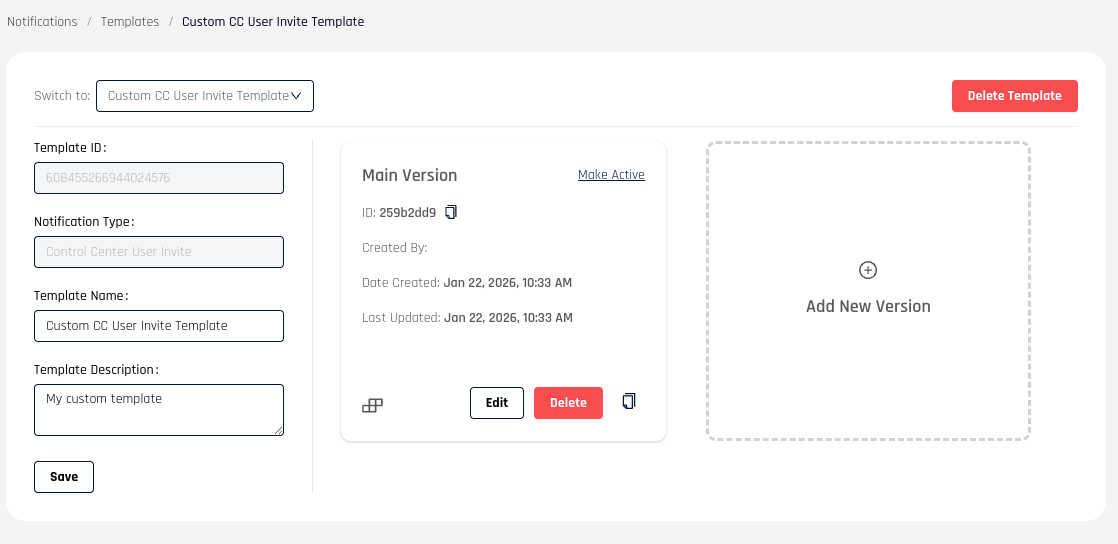
Template Versions
Select a template to open its version management page. This is where you create and manage the versions that define the look and feel of that template. You can also update the template name and description or delete the template from this page.
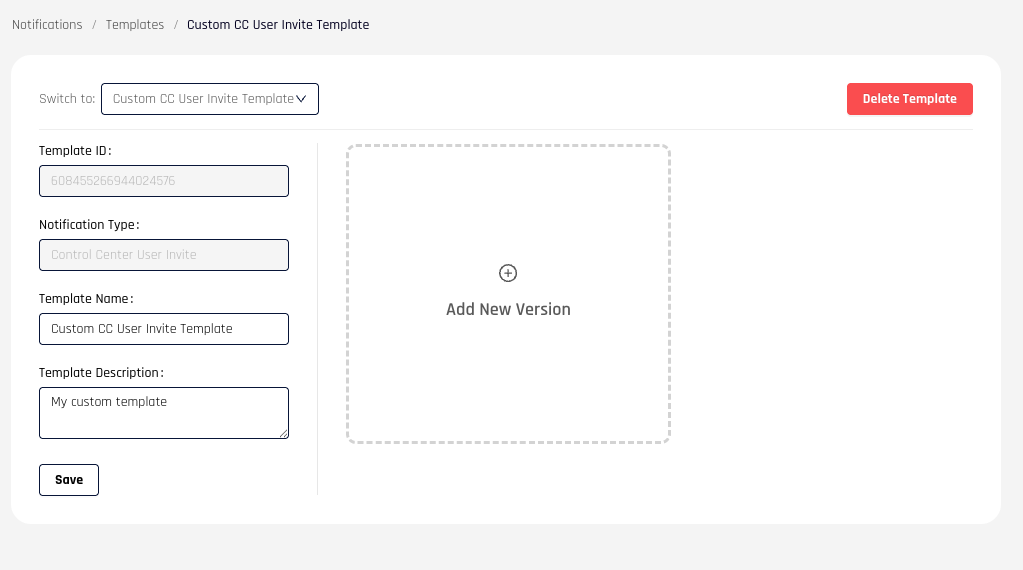
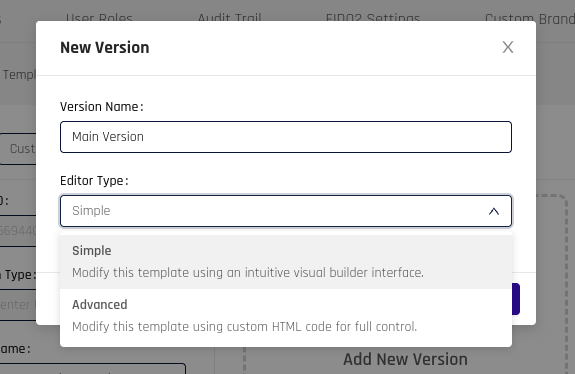
Click Add New Version to create a version and choose the editor type.
Two editor types are available:
- Simple: A drag-and-drop editor for working with modules and global styling settings. The overall layout remains structured.
- Advanced: A full HTML editor for complete control over the template markup and styling.
Each version appears as a card on the management page. The icon at the bottom left shows whether the version uses the Simple or Advanced editor. From the card, you can edit, delete, clone, or activate a version.
Template Version Editor
Simple Editor
The Simple editor provides an editable preview of the email template. When you create a version, it starts from the default template for that notification type.
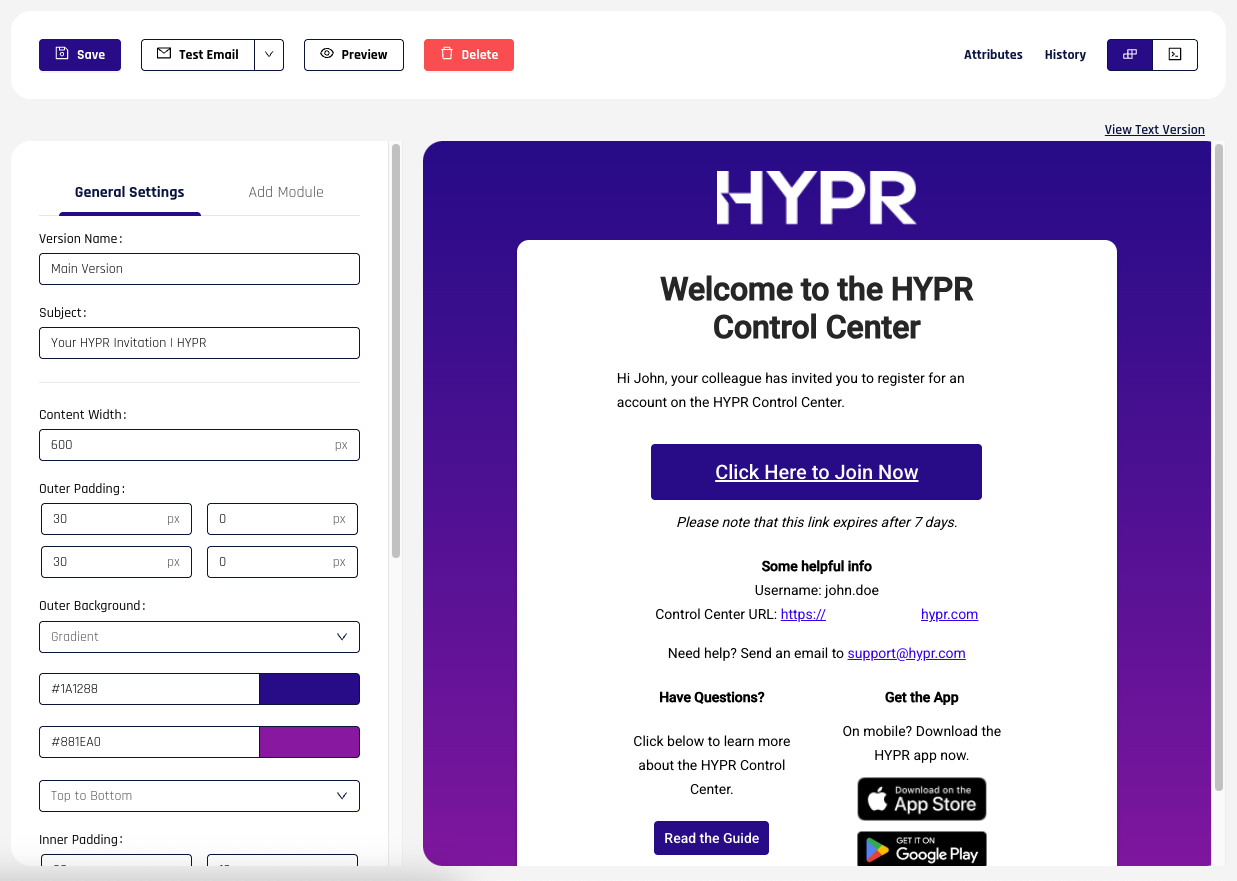
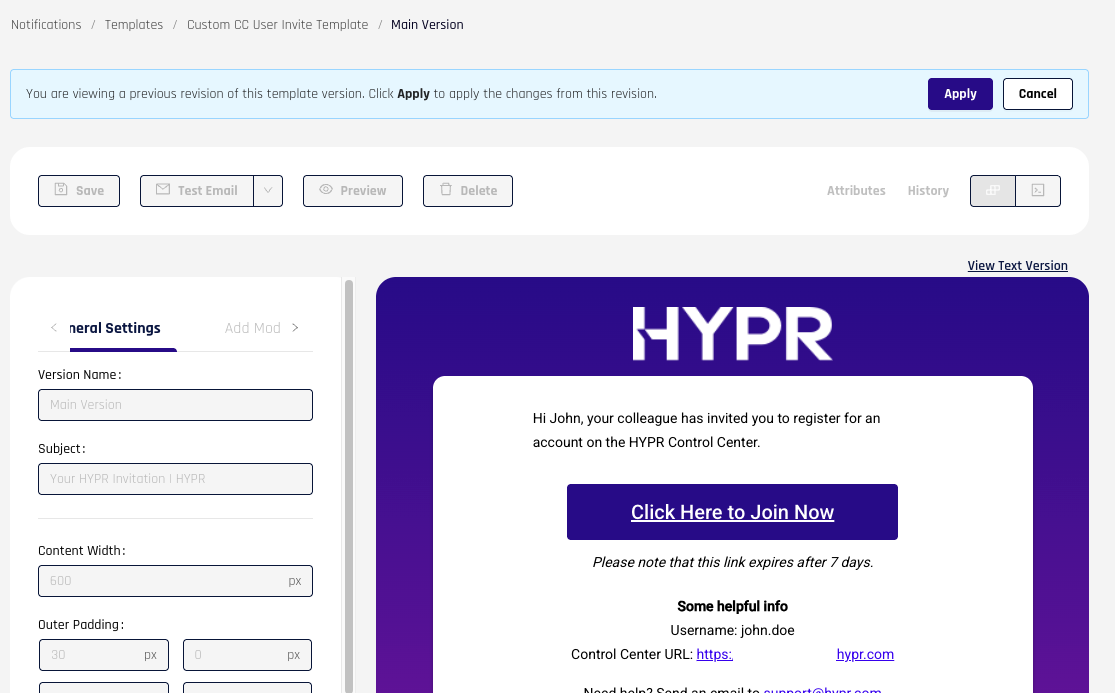
General Settings
Use General Settings to configure the global content and styling of the template. Anything not controlled at the module level is managed here.
The following configurations are available under General Settings:
- Version Name: The name of the version
- Subject: The email subject title used for messages generated from this template
- Content Width: Sets the width of the content area of the template (the white area in the example screenshot)
- Outer Padding: Sets the padding of the main container of the template (gradient area)
- Outer Background: Sets the color of the outer background (single color or a two-color gradient)
- Inner Padding: Sets the padding of the content container of the template (white area)
- Inner Background: Sets the color of the content container background (single color or a two-color gradient)
- Inner Border Radius: Sets the border radius of the content container
- Text Color: Sets the global color of text in the template (this can be overridden in a text module)
- Link Color: Sets the global color of links in the template
- Auto generate plain text: Email templates include a plain-text version for clients that do not support HTML email. If enabled, the text version is generated automatically. If disabled, you can set it separately from the HTML content.
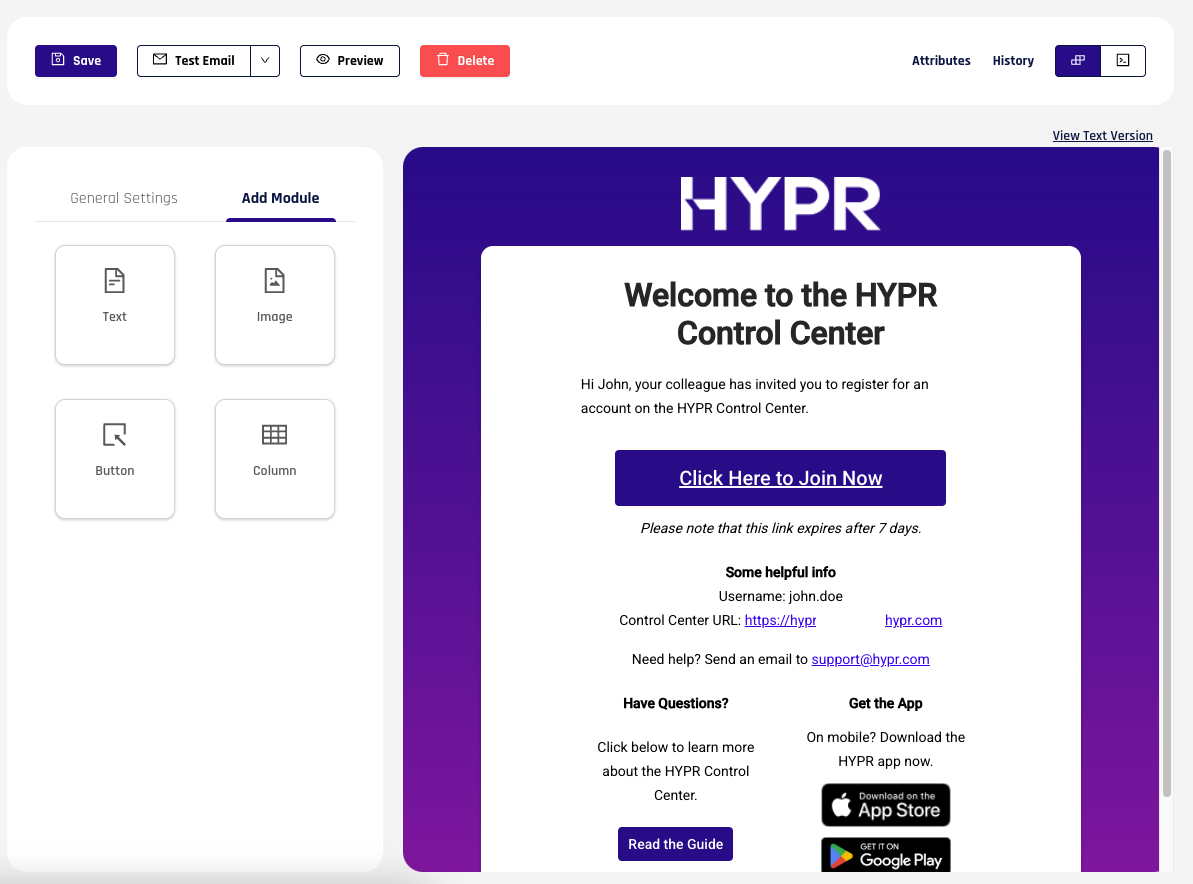
Modules
In the Simple editor, template content is assembled from modules:
- Text: Add text content with rich-text formatting
- Image: Add an image to the template
- Button: Add a button-styled link
- Column: Place multiple modules on the same row
Working With Modules
The preview editor enables an admin to set the structure of their template. You can use the UI to perform the following actions:
- Adding a module
- Moving a module
- Cloning a module
- Deleting a module
Column modules cannot be placed within other column modules.
Module Settings
Below are the module-specific settings and options available for each module.
Text
- Content: The actual text, editable through a rich text editor (supports text styling and links)
- Color: Text color for this module (overrides global text color set in General Settings)
- Alignment: The text alignment
Image
-
Image: The image source. Clicking Select Image opens a file manager where you can select or upload an image.
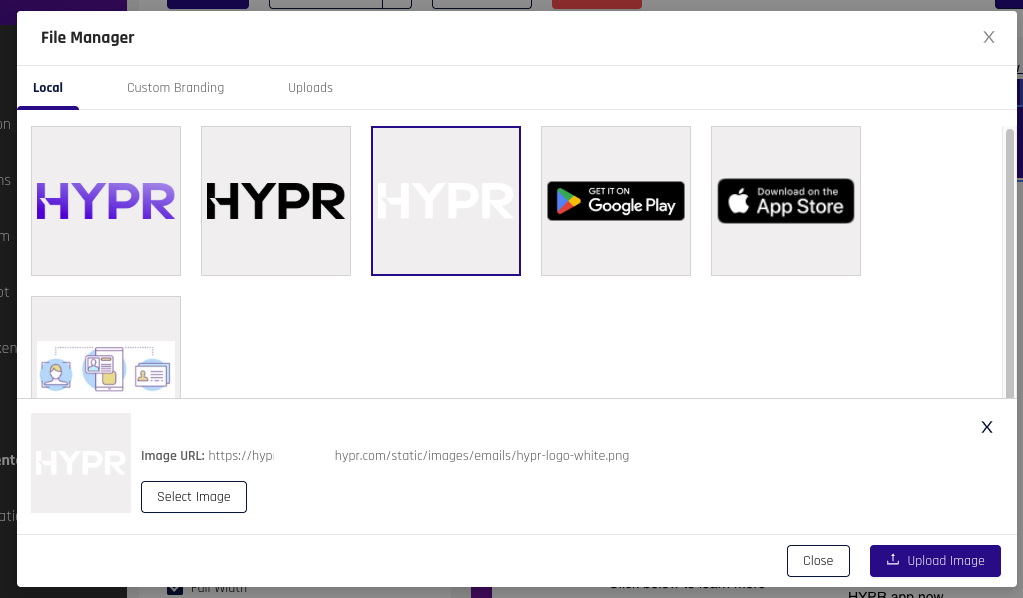
-
Link: Optional URL to attach to the image
-
Image Width: The width of the image
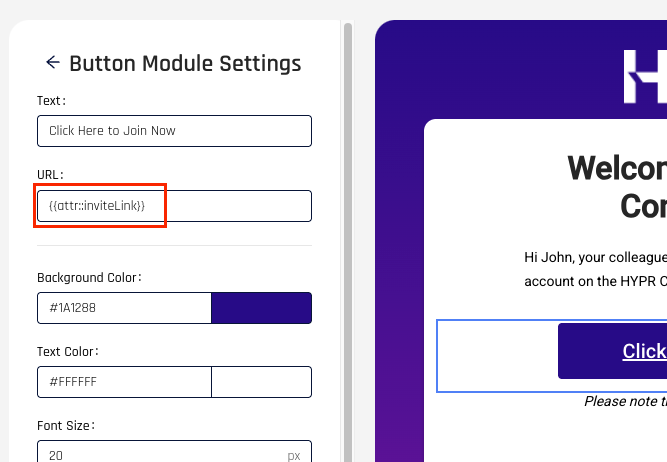
Button
- Text: Button label text
- URL: URL a user is navigated to when the button is clicked
- Background Color: Button background color
- Text Color: Button text color
- Font Size: Button text size
- Font Weight: Boldness of the button text
- Button Padding: Inner spacing of the button
- Text Decoration: Controls whether the button text is underlined
- Border Radius: Roundness of the button corners
Column
- Layout: Sets the number and span size of columns
- Column Padding: Spacing between columns
Each module also has the following settings:
- Width: Module container width (can be set to Full Width)
- Padding: Outer spacing of the module container
Advanced Editor
The Advanced editor provides an HTML editor and a non-editable preview.
When you create a version, it starts from the default template for that notification type.
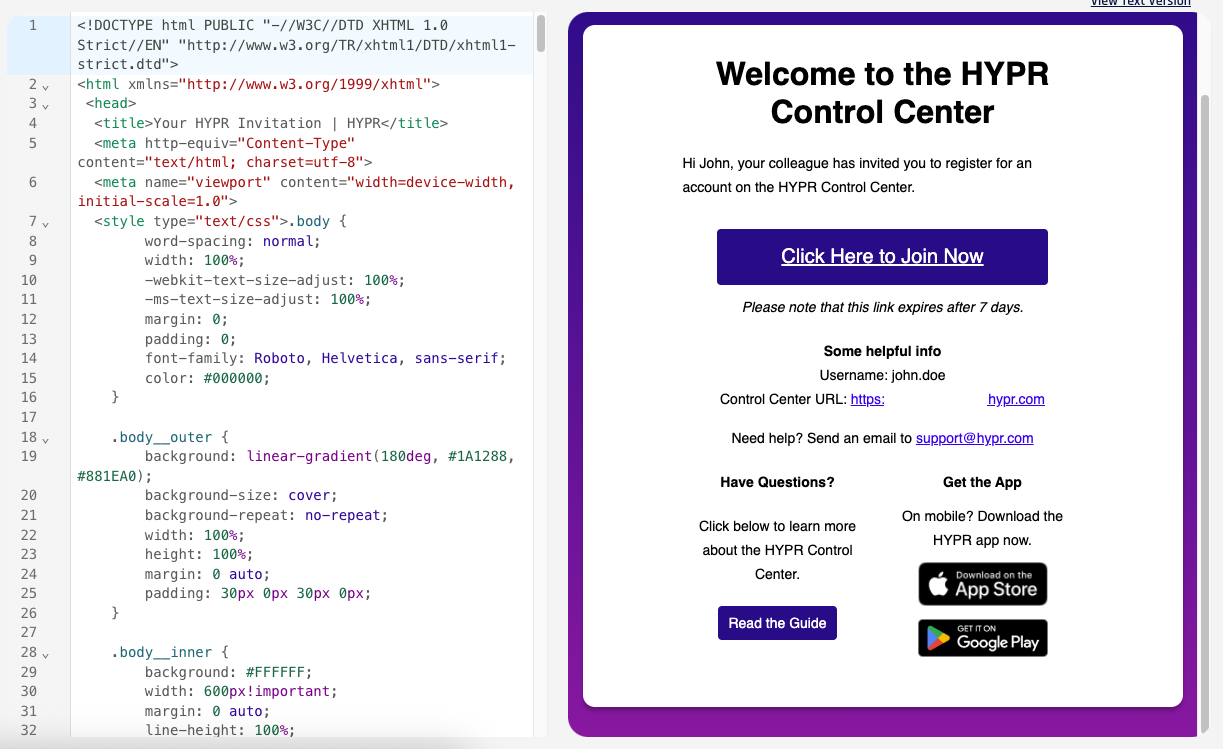
The preview updates in real time as the HTML changes.
The subject of an email can be set by including a <title> tag in the HTML <head> element.
Text Version
Click View Text Version to review or edit the plain-text version of the template.
If Auto generate plain text is enabled, the text editor is disabled and shows the generated text output instead.
For Advanced editor versions, the plain-text editor is always enabled and does not sync with the HTML content.

Toolbar
The top toolbar provides the main actions used while editing a version.

Simple Editor Toolbar
Advanced Editor Toolbar
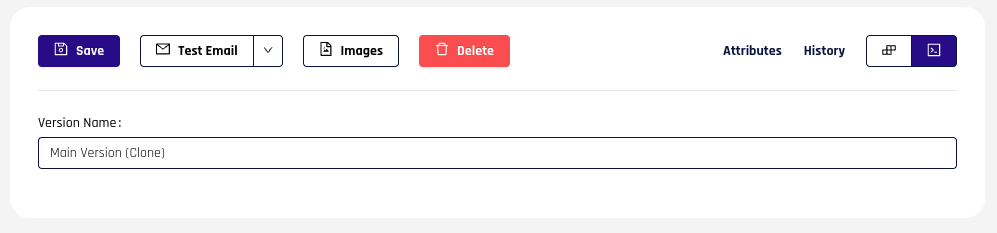
The following tools are available from the toolbar:
- Save: Save changes to the current version
- Test Email: Send a test email generated from the current version
- Preview: Open a rendered preview of the template
- Images: Open the image file manager for the template
- Delete: Delete the template or current version, depending on context
- Attributes: View and set test values for supported attributes
- History: Review earlier revisions
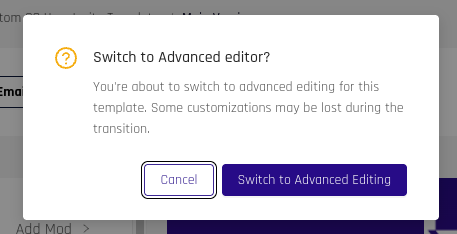
- Editor Type Toggle: Switch between the Simple and Advanced editors
- Version Name: Update the version name
Testing Emails
You can generate a test email for a version before making it active. The Test Email button includes a dropdown where you specify the recipient address.
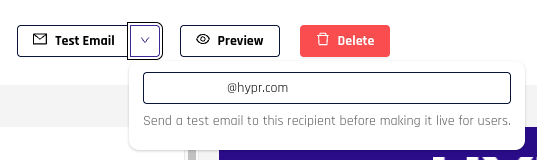
The version does not need to be saved before testing. The generated email uses the current editor state.
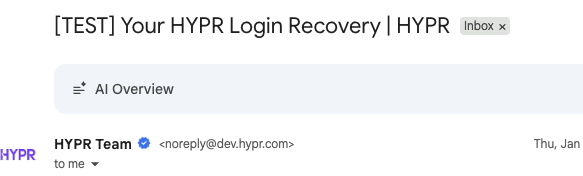
The received message includes a [TEST] prefix in the subject.
Email Preview
You can also preview the rendered email without sending a test message. Click Preview to open a modal that renders the current HTML output.
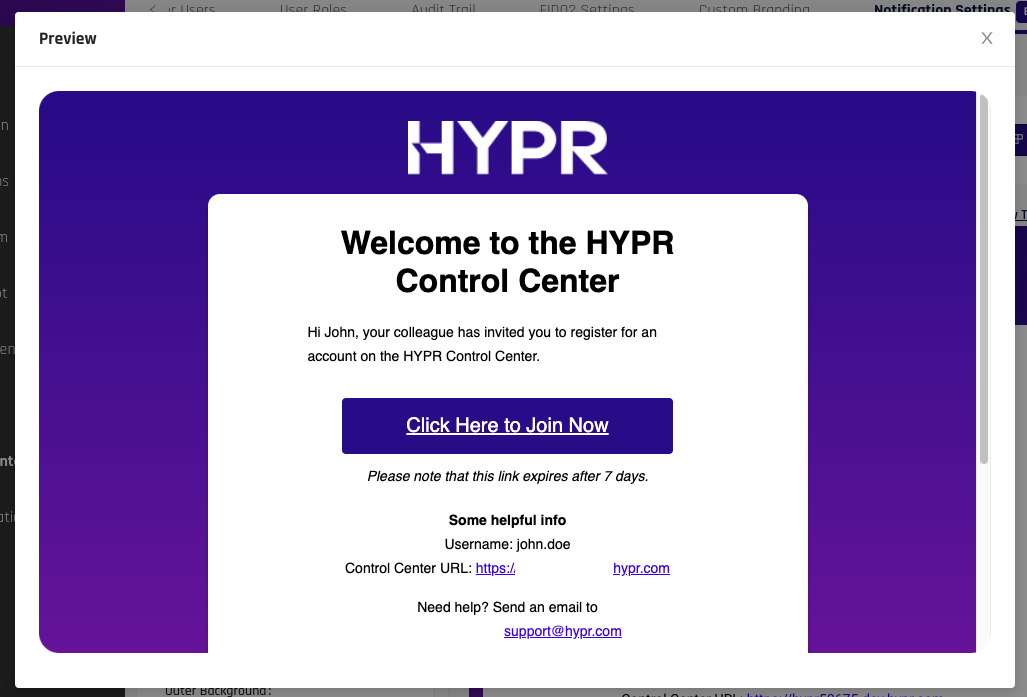
This preview is rendered in a modern browser engine, so the final result can still vary slightly across email clients. Test emails provide the most accurate validation.
Attributes
Email messages include recipient-specific values such as usernames, invitation links, or tenant details. These values are inserted through placeholder attributes when the message is generated.
The list of available attributes and their usage can be accessed by clicking the "Attributes" button.
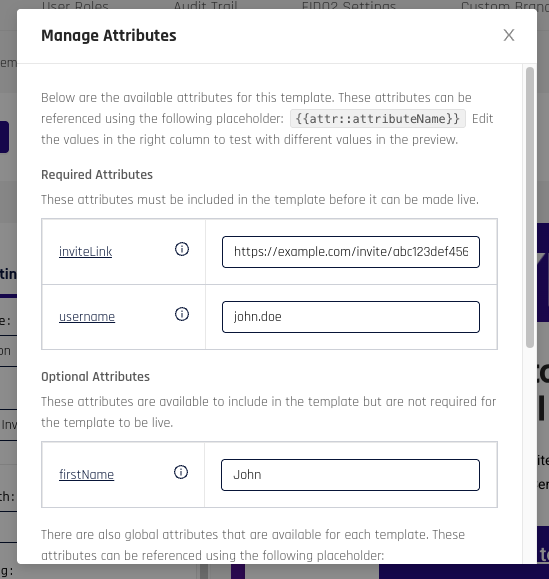
The modal explains the attribute naming format and lets you set test values for preview and testing.
Attributes can be included in the template as shown below:
There are two attribute types:
- Template-specific attributes: prefixed with
attrand configurable with test values in the editor - Global attributes: prefixed with
globaland resolved from tenant-level configuration
History
Each saved revision records who made the change and when. Open History to review earlier revisions and restore prior content if needed.
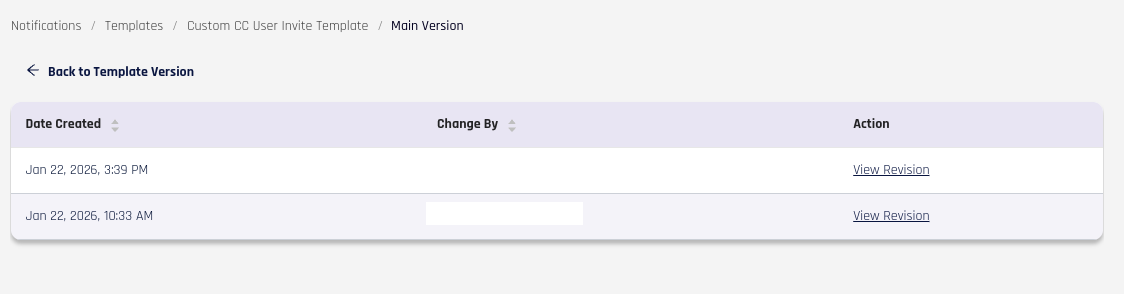
Click View Revision to open a read-only view of that revision. From there, you can apply the revision content or return to the current version.
Editor Type Toggle
You can switch editor types after a version has been created by using the editor toggle on the right side of the toolbar.

When switching from Simple to Advanced, the HTML content is generated from the most recently saved state of the version.
When switching from Advanced to Simple, the version resets to the default template for that notification type.

Assigning Templates
To make a version live for a notification type, click Make Active on the version you want to use. That version becomes the active source for that notification type.
Back on the main Notification Settings page, the active template is shown with quick-access links to the assigned version.

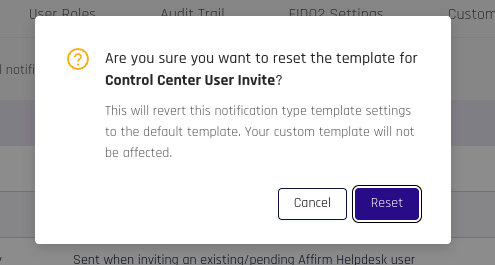
To return to the default HYPR template, click the reset control next to the template and version name and confirm the action.
API Management
Email notification templates can also be managed through API for automation and lifecycle management use cases. If you need to automate template or version administration, use the HYPR API resources available for your deployment.