HTTP Proxy Support
Passwordless for Windows
Admins can configure proxy settings so that the HYPR Passwordless client can communicate to the HYPR Control Center. Proxies are honored in the following order if set:
-
Configured proxy in the HYPR Passwordless client.
-
Configured system-wide WinHttp proxy.
-
Support for a Proxy Auto Config (PAC) URL.
Configured Proxy in the HYPR Passwordless for Windows Client
The HTTP proxy can be configured solely for HYPR Passwordless via the following registry settings:
| Registry Value Name | Description |
|---|---|
| Proxy Bypass | Specifies the proxy bypass list (i.e., a comma-delimited list of host names to be excluded from consideration). If the URL matches any of the hosts in the proxy bypass list, the proxy will be bypassed and a direct connection will be made. Host names can include wildcards (e.g., .hypr.com or 10.20.). |
| Proxy Server | Specifies the proxy server (i.e., "proxy[:port]) to be used (e.g., "proxy.nyoffice.hypr.com:808"). If the port is not specified, it defaults to 8080. |
Configuring a System-wide WinHttp Proxy
A proxy can also be specified system-wide using the netsh winhttp set proxy command. Here's an example:
netsh winhttp set proxy proxy.hypr.com:808 "*.hypr.com,10.20.*"
You can restore the proxy settings back to direct access with netsh winhttp reset proxy.
netsh winhttp reset proxy
Support for a Proxy Auto Config (PAC) URL
A proxy can also be configured to reference a PAC URL, a JavaScript file controlling proxy settings. It can look like this:
function FindProxyForURL(url, host) {
    return "PROXY proxy.nyoffice.hypr.com:808";
}
The PAC URL can be picked up from DNS or DHCP, or manually configured for the HYPR Passwordless client with this registry setting:
| Registry Value Name | Description |
|---|---|
| Proxy Auto Config Url | Specifies the URL of the proxy auto config file (e.g., http://nyoffice.hypr.com/proxy.pac). |
Use the HTTP Proxy to Install HYPR Passwordless Client for Windows
Once you've configured the HTTP Proxy, include it when installing the HYPR Passwordless Client on the workstation. Installation can happen either by using the wizard or by the command line.
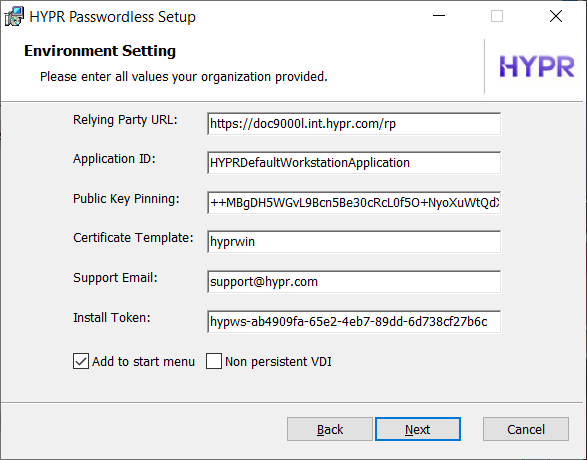
Using the Wizard
If you're using the Installing with the UI, set the HTTP Proxy value on the Environment Setting screen to the proxy you configured above.
Using msiexec with Command Line Parameters.
If you're setting the parameters directly on the command line, pass in the proxy via the HYPRPROXY parameter. See Command Line Installation for Windows.
msiexec.exe /qn /i .\WorkforceAccess.msi HYPRRP="https://highlandsbank.com/rp"
HYPRSUPPORT="support@hb.com" HYPRHASH="LeM8XnCIy8+Cxm+HKTEOBZr1g3D8odQNHTH+vdu7RWc="
HYPRTEMPLATE="HYPRUser" HYPRPROXY="http://proxy.example.com:8080"
Using msiexec with the hypr.json File
If you're setting the parameters using the hypr.json configuration file, pass in the proxy via the proxy parameter.
{
 "version":"1.0",
 "rpUrl":"https://highlandsbank.com/rp",
 "appId":"WorkstationAccess",
 "pinningHash":"LeM8XnCIy8+Cxm+HKTEOBZr1g3D8odQNHTH+vdu7RWc=",
 "supportEmail":"support@hb.com",
 "proxy":"http://proxy.example.com:8080",
 "fullUI":"1"
}
For security reasons, the proxy parameter won't be displayed in the Registry Editor alongside the other HYPR keys.
Upgrading Earlier Versions
The installation commands are the same as for a fresh install (see above). However, you only need to provide the new proxy value. The installer will reuse the existing values for the rest of the parameters.
For example, to upgrade using msiexec with command line parameters, just specify the HYPRPROXY value:
msiexec.exe /q /i WorkforceAccess_x64.msi HYPRPROXY="http://proxy.example.com:8080"
Passwordless for macOS
You can configure the HYPR Passwordless client for macOS to communicate with the HYPR Control Center server via a proxy. You may:
-
Configure the proxy directly in the HYPR Application
-
Set a system-wide proxy in macOS
Configuring a Proxy for the HYPR Passwordless for Mac Client
Configure a proxy directly in the HYPR Passwordless client by modifying ProxyServer and ProxyBypass parameters in the Application's HyprOneService.plist file:
| Parameter | Description |
|---|---|
| ProxyServer | The proxy server to be used (proxy[:port]). The port is default to 8080 if not specified. |
| ProxyBypass | A comma-separated list of host names to be excluded. Matches bypass the proxy for direct connections. Host names can include wildcards (e.g., .mycompany.com or 10.20.). |
For more information on changing the HyprOneService.plist configuration settings, see Installing Manually. Remember to save the file and restart the computer for your changes to be applied.
Configuring a System-wide Proxy in the macOS Settings
Alternatively, use the following steps to configure a system-wide HTTP/HTTPS proxy in macOS.
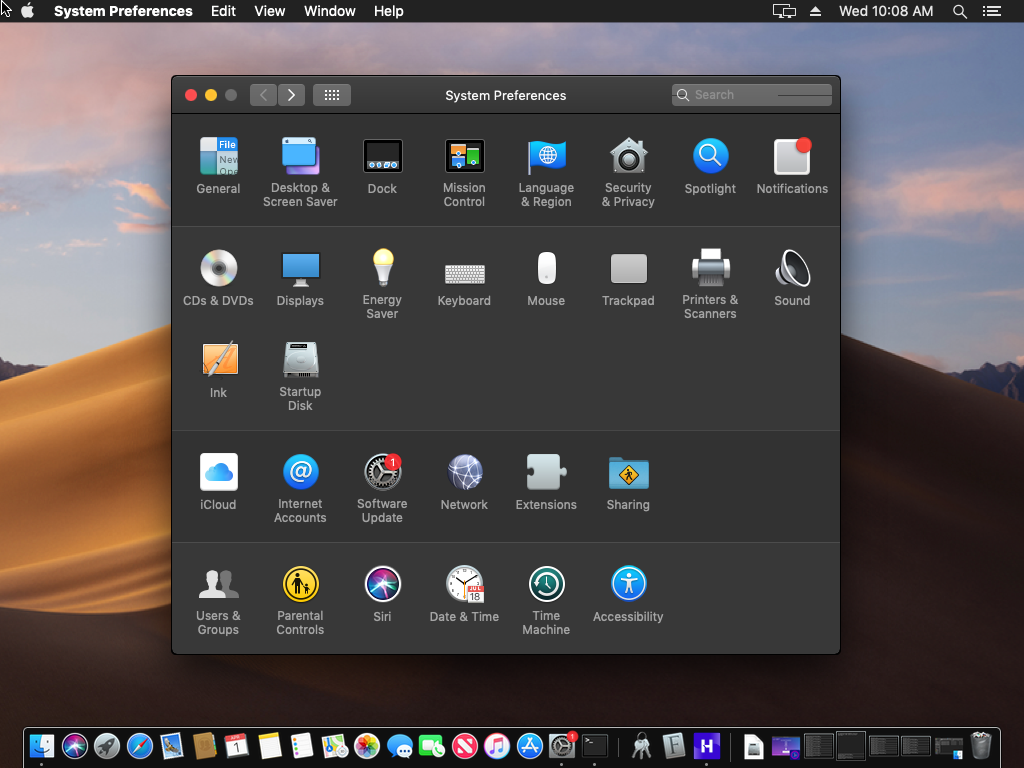
-
Open System Preferences > Network.
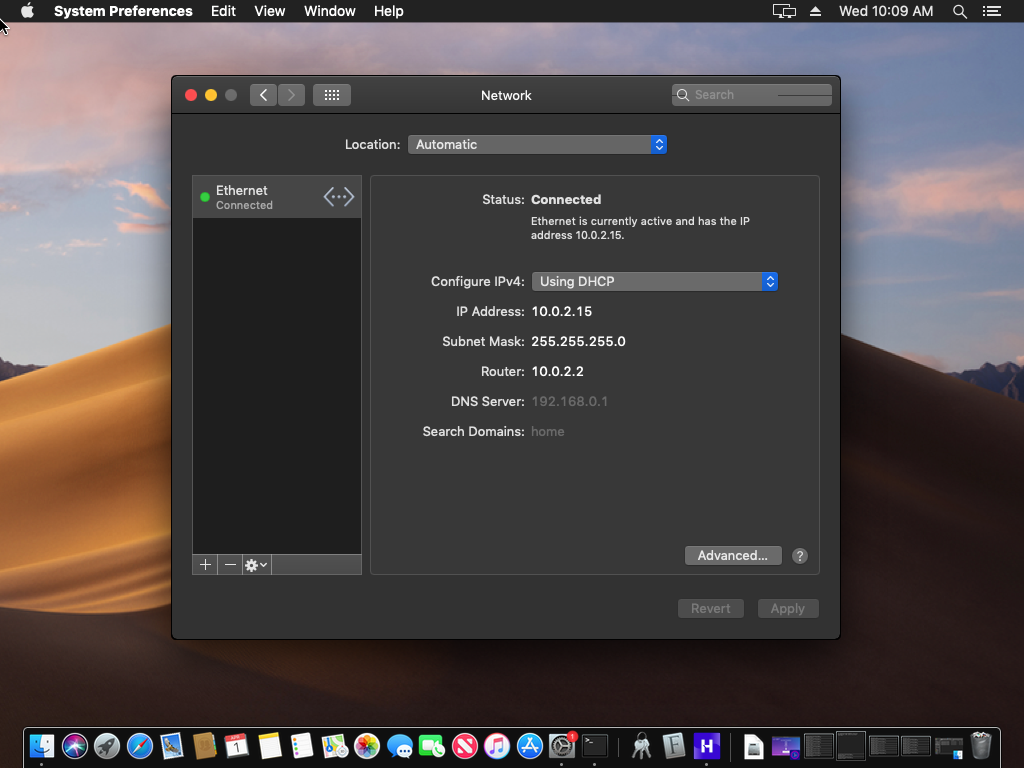
-
Depending on which network adapters are available (e.g., Ethernet or Wi-Fi), select the appropriate network adapter and then click Advanced….
-
Choose the Proxies tab at the top of the page. There are three ways to configure a proxy:
-
Manually configuring the proxy
-
Specifying a URL for a proxy auto config (PAC) file
-
The system discovers the proxy automatically via DNS
-
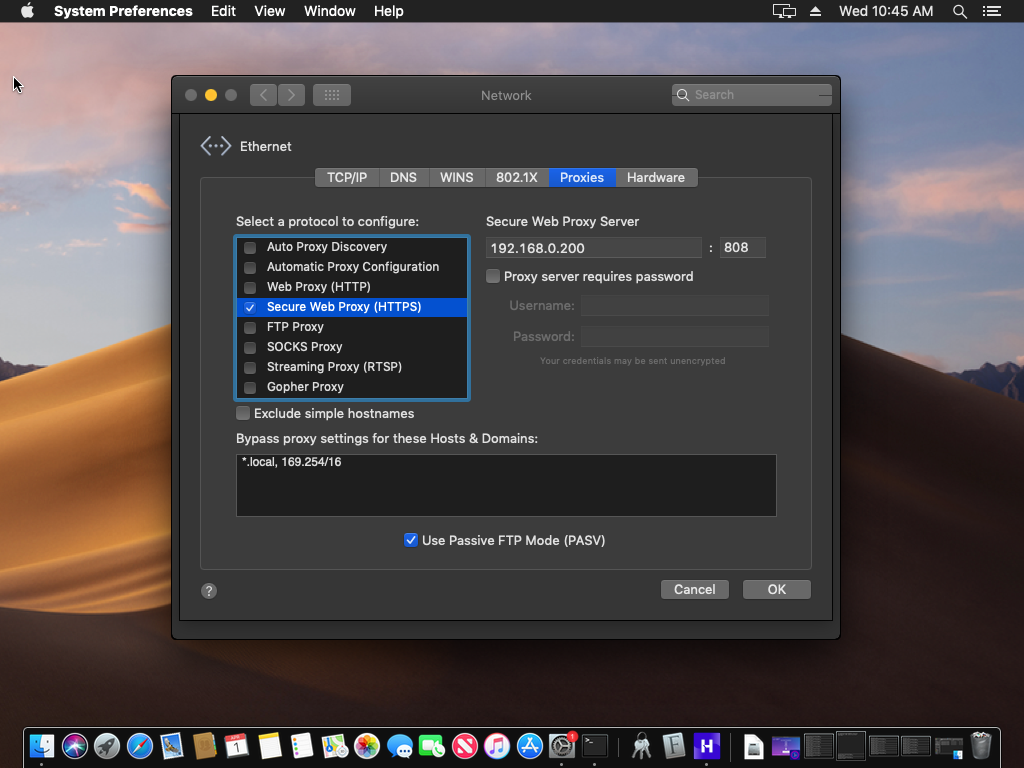
Manually Configuring the Proxy
-
Select "Secure Web Proxy (HTTPS)".
-
Enter the host name or IP address of the proxy server along with the TCP port on which the proxy server is listening. For example, the following screenshot shows a proxy at 192.168.0.200 listening on port 808.
-
Click OK when finished.
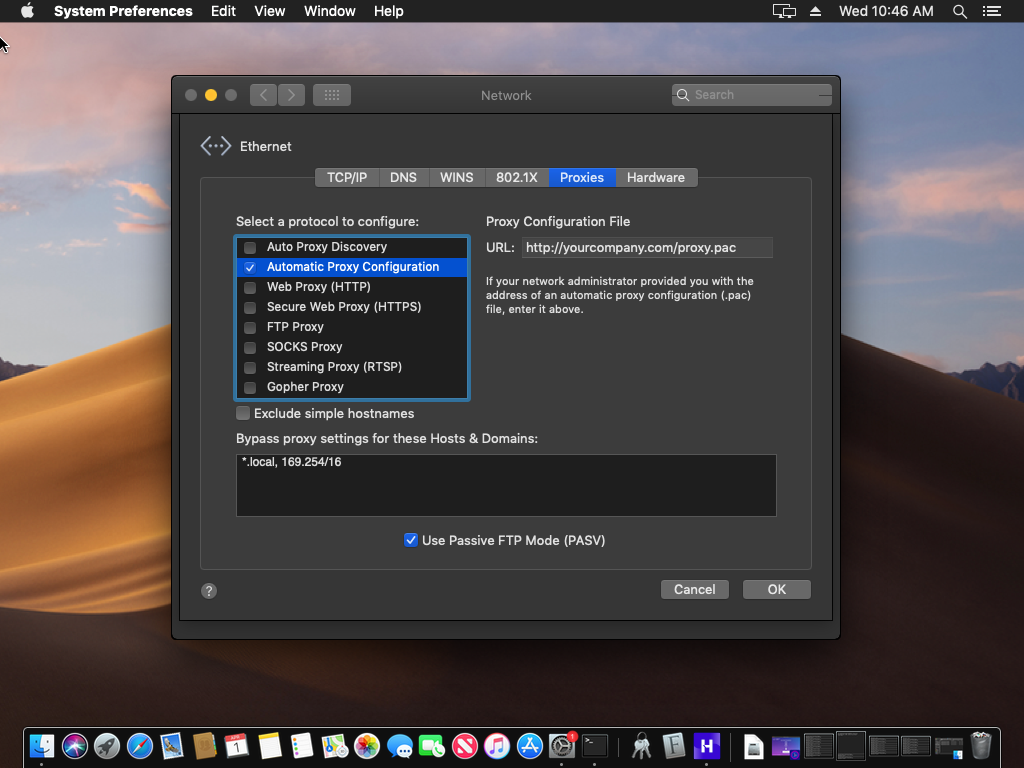
Specifying the URL of the Proxy Auto Config (PAC) File
-
Select Automatic Proxy Configuration.
-
Enter the URL for the Proxy Auto Config (PAC) file.
-
Click OK when finished.
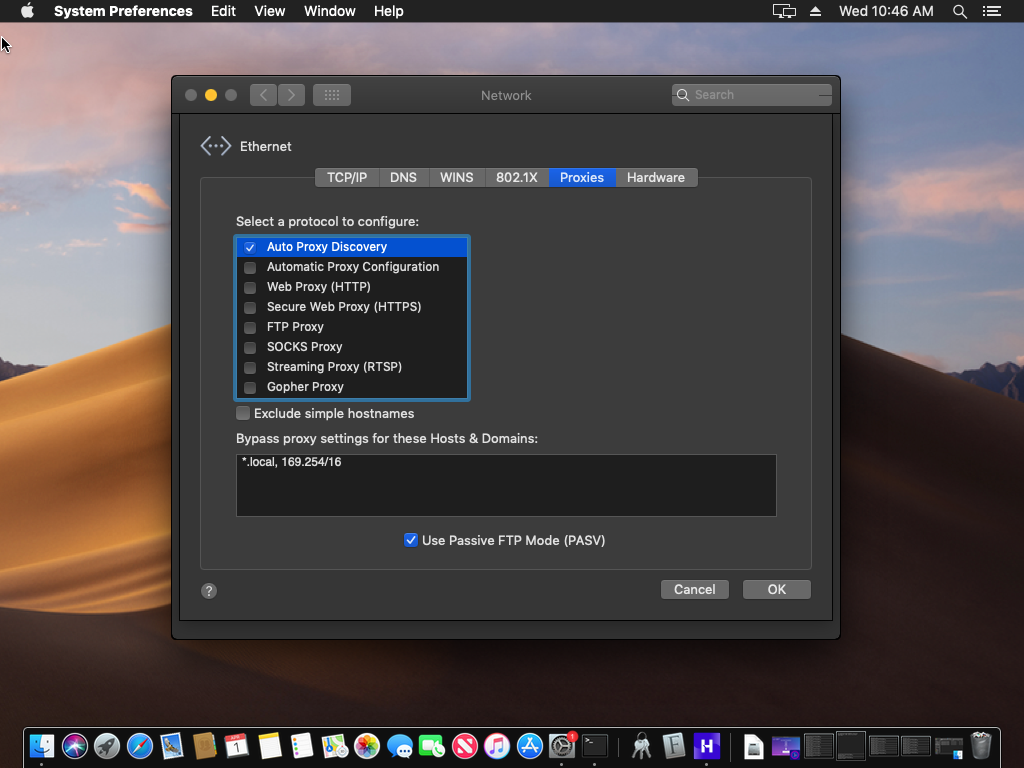
Discovering the Proxy Automatically via DNS
Select Auto Proxy Discover to have macOS discover the proxy automatically via DNS.
Use the HTTP Proxy to Install HYPR Passwordless Client for Mac
Once you've configured the HTTP Proxy, include it when installing the HYPR Passwordless client on the workstation. See Installing with the UI: Installing on macOS.
Upgrading Earlier Versions
If your installer came without a hypr.json configuration file, you'll need to manually create one with the proxy field added. For example:
{
 "version":"4",
 "rpUrl":"https://highlandsbank.com/rp",
 "appId":"WorkstationAccess",
 "pinningHash":"LeM8XnCIy8+Cxm+HKTEOBZr1g3D8odQNHTH+vdu7RWc=",
 "supportEmail":"support@hb.com",
 "proxy":"http://proxy.example.com:8080",
}
See the Installing Manually page for more information about the hypr.json configuration file.
To upgrade, place the hypr.json file and the HYPR installer package in the same folder and execute:
installer -pkg WorkforceAccess-X.X.X-Installer.pkg