RADIUS: Cisco Meraki VPN Authentication with HYPR
This process assumes HYPR RADIUS is installed and configured to be operational.
Dashboard Configuration
Once a RADIUS server has been configured appropriately, the following steps outline how to configure Client VPN to use RADIUS:
-
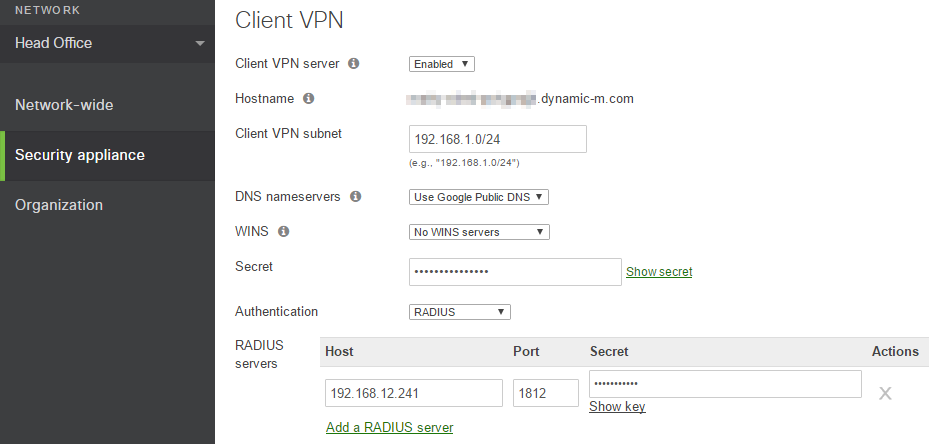
Log onto the Cisco Meraki Dashboard and navigate to Configure > Client VPN.
-
Select the option to enable the Client VPN Server.
-
Set the Client VPN Subnet. This will be a unique IP subnet offered to clients connecting to the MX Security Appliance via a Client VPN connection.
-
Specify the DNS servers.
-
Enter a shared secret that will be used by the client devices to establish the VPN connection.
The Other SecretThis is a different value from the RADIUS shared secret.
-
Select RADIUS as the Authentication method.
-
Click the Add a RADIUS Server link.
-
Enter your RADIUS Host IP Address
-
Enter the RADIUS Port that the MX Security Appliance will use to communicate to the NPS server. The default port is 1812
-
Enter the RADIUS Shared Secret (established when the MX was added as an authenticator)
-
-
Click Save changes.
While any RADIUS server can be used, the following configuration requirements are necessary for Client VPN integration:
-
RADIUS must be configured to allow PAP (unencrypted authentication)
IPsec EncapsulationCommunication between the client and the MX will be encapsulated within IPsec, so this does not mean that client communication is unencrypted.
-
The MX/Z1's IP address must be configured on the server as a RADIUS client/authenticator, with a shared secret
Cisco Meraki VPN can now use HYPR RADIUS for passwordless authentication.