OpenID Connect Integration in CC
HYPR exposes an OpenID Connect (OIDC) provider that any standards-compliant OIDC relying party (RP) can delegate authentication to. When HYPR Affirm is configured as the authenticator on the OIDC integration, every sign-in attempt from the RP is routed into the configured HYPR Affirm verification flow. After the requester completes verification, HYPR returns an id_token to the RP, which then enforces its own access policies against the verified identity.
This article walks through the end-to-end setup using Cloudflare Zero Trust as the worked example. The same pattern applies to other OIDC relying parties; consult your RP's vendor documentation for the equivalent fields described in the Configure the Relying Party section.
Authentication Flow
- A user attempts to access an application protected by the OIDC relying party (for example, Cloudflare Access).
- The RP redirects the user to HYPR for authentication via OIDC.
- HYPR routes the user into the configured HYPR Affirm verification flow.
- The user completes the configured verification steps (for example, government-issued ID and biometric verification).
- HYPR checks a connected directory to confirm the verified identity matches an existing account.
- HYPR completes the OIDC flow, issuing an
id_tokenand redirecting the user back to the RP. - The RP enforces its access policies and grants or denies application access based on the verified identity.
Architecture Overview
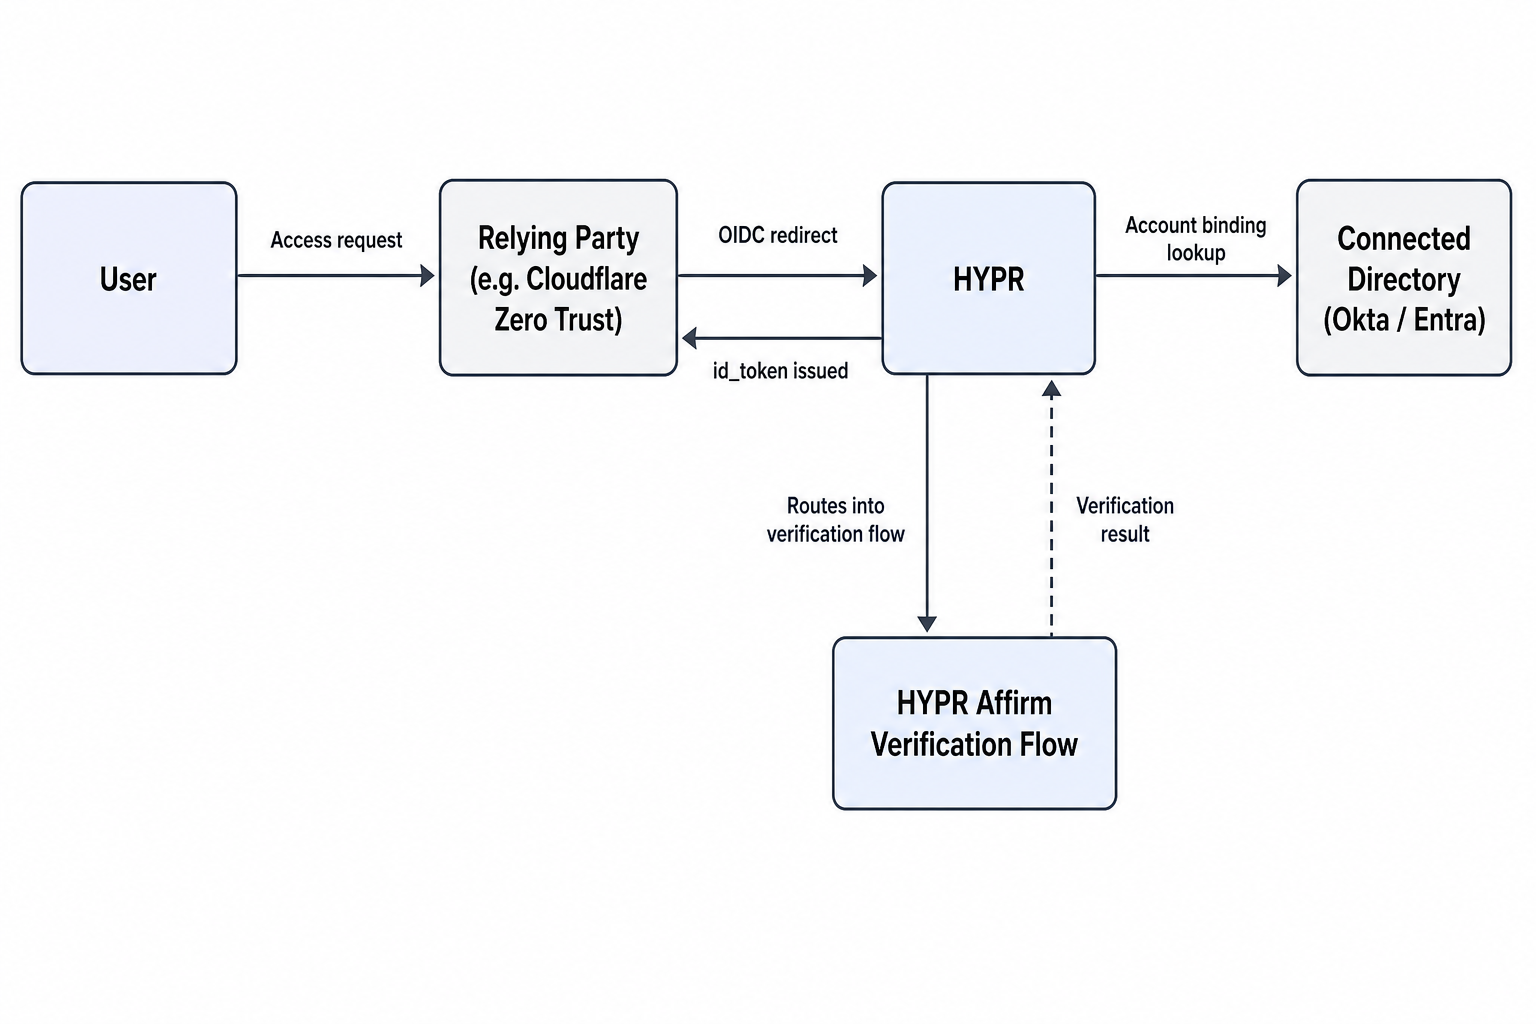
HYPR performs the identity verification, the relying party enforces access policy, and the protected application receives a verified identity context.
Prerequisites
- A HYPR tenant with administrator access
- A connected directory in HYPR Control Center (Okta, Microsoft Entra ID, or another supported directory)
- HYPR Affirm enabled on the tenant, with at least one verification flow already authored
- An account with the OIDC relying party (Cloudflare Zero Trust in this example) and administrator access to its identity-provider configuration
- A protected application configured behind the relying party (for example, an application protected by Cloudflare Access)
- A test user that exists in the connected directory
Collect Your Relying Party Callback URL
The relying party's callback URL is required when configuring the HYPR OIDC integration. Locate it before starting in HYPR.
For Cloudflare Zero Trust:
-
Sign in to the Cloudflare One dashboard.
-
Open Settings > Team name and domain (some UI versions label this General).
-
Copy the team domain. The callback URL takes the following form:
https://{ZERO_TRUST_TEAM_NAME}.cloudflareaccess.com/cdn-cgi/access/callbackReplace
{ZERO_TRUST_TEAM_NAME}with your team name. Save the resulting URL for the next section.
For other relying parties, locate the callback URL the RP exposes for an external OIDC provider. Vendor documentation typically lists this under "identity provider", "OAuth callback", or "redirect URI".
Create the OIDC Integration in HYPR Control Center
In HYPR Control Center, register the relying party as an OIDC integration.
-
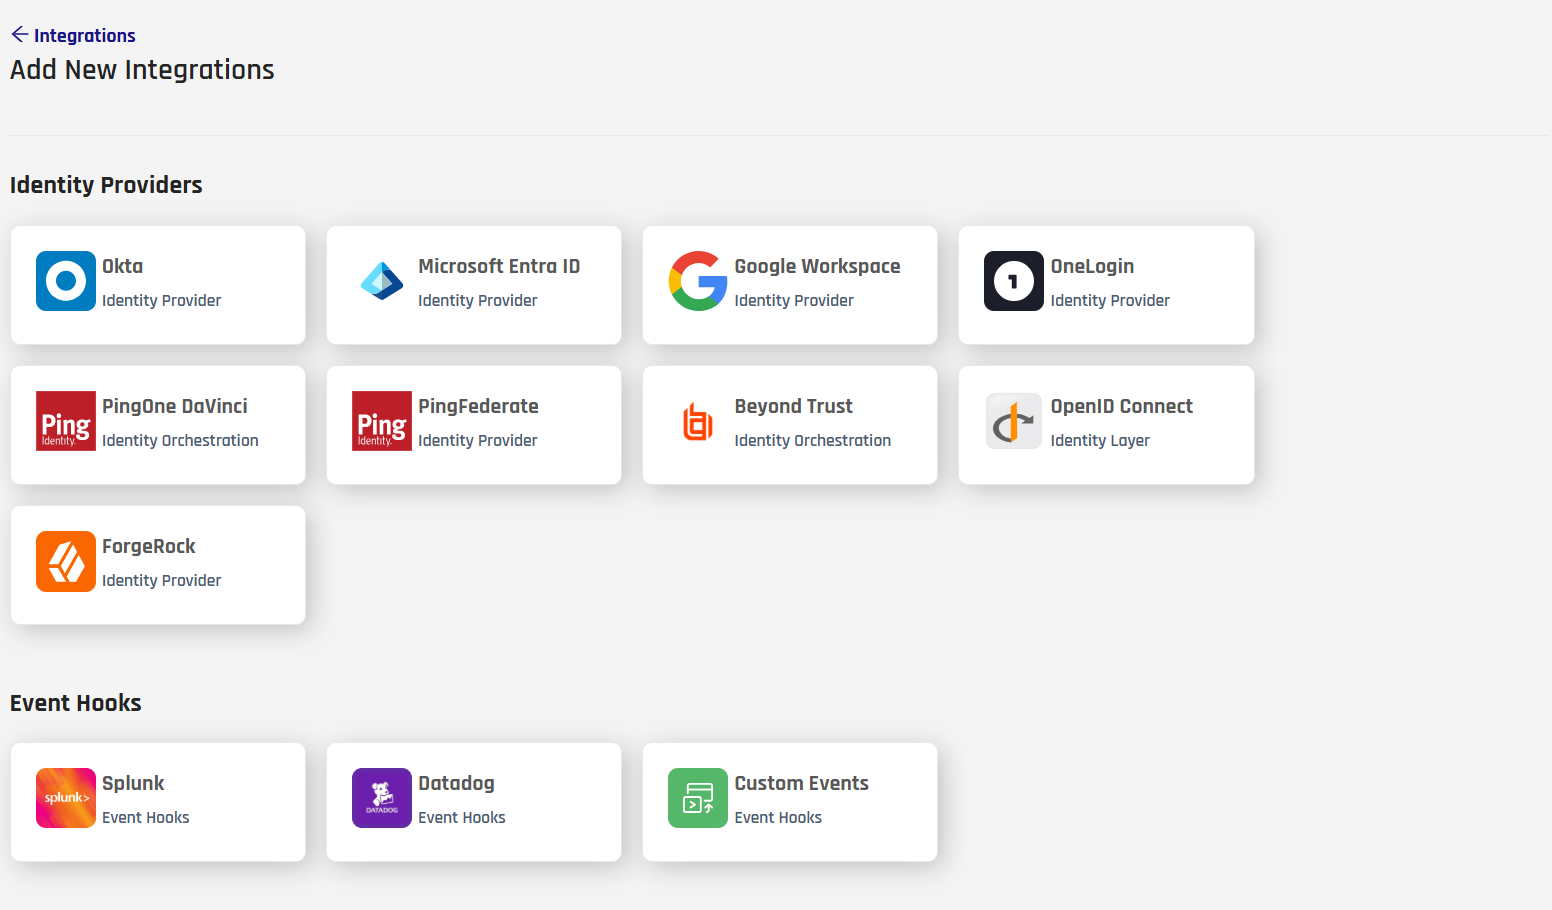
Go to the Integrations screen and click Add New Integration.

-
Select OpenID Connect.
-
Complete the integration form:
Field Value OpenID Connect Application Name A descriptive name, for example HYPRAffirmCloudflareOIDC. Spaces and special characters are removed automatically; the name is limited to 23 characters.OIDC Redirect URL List The relying party callback URL collected in the previous section. Enter multiple values as a comma-separated list if more than one RP shares this integration. 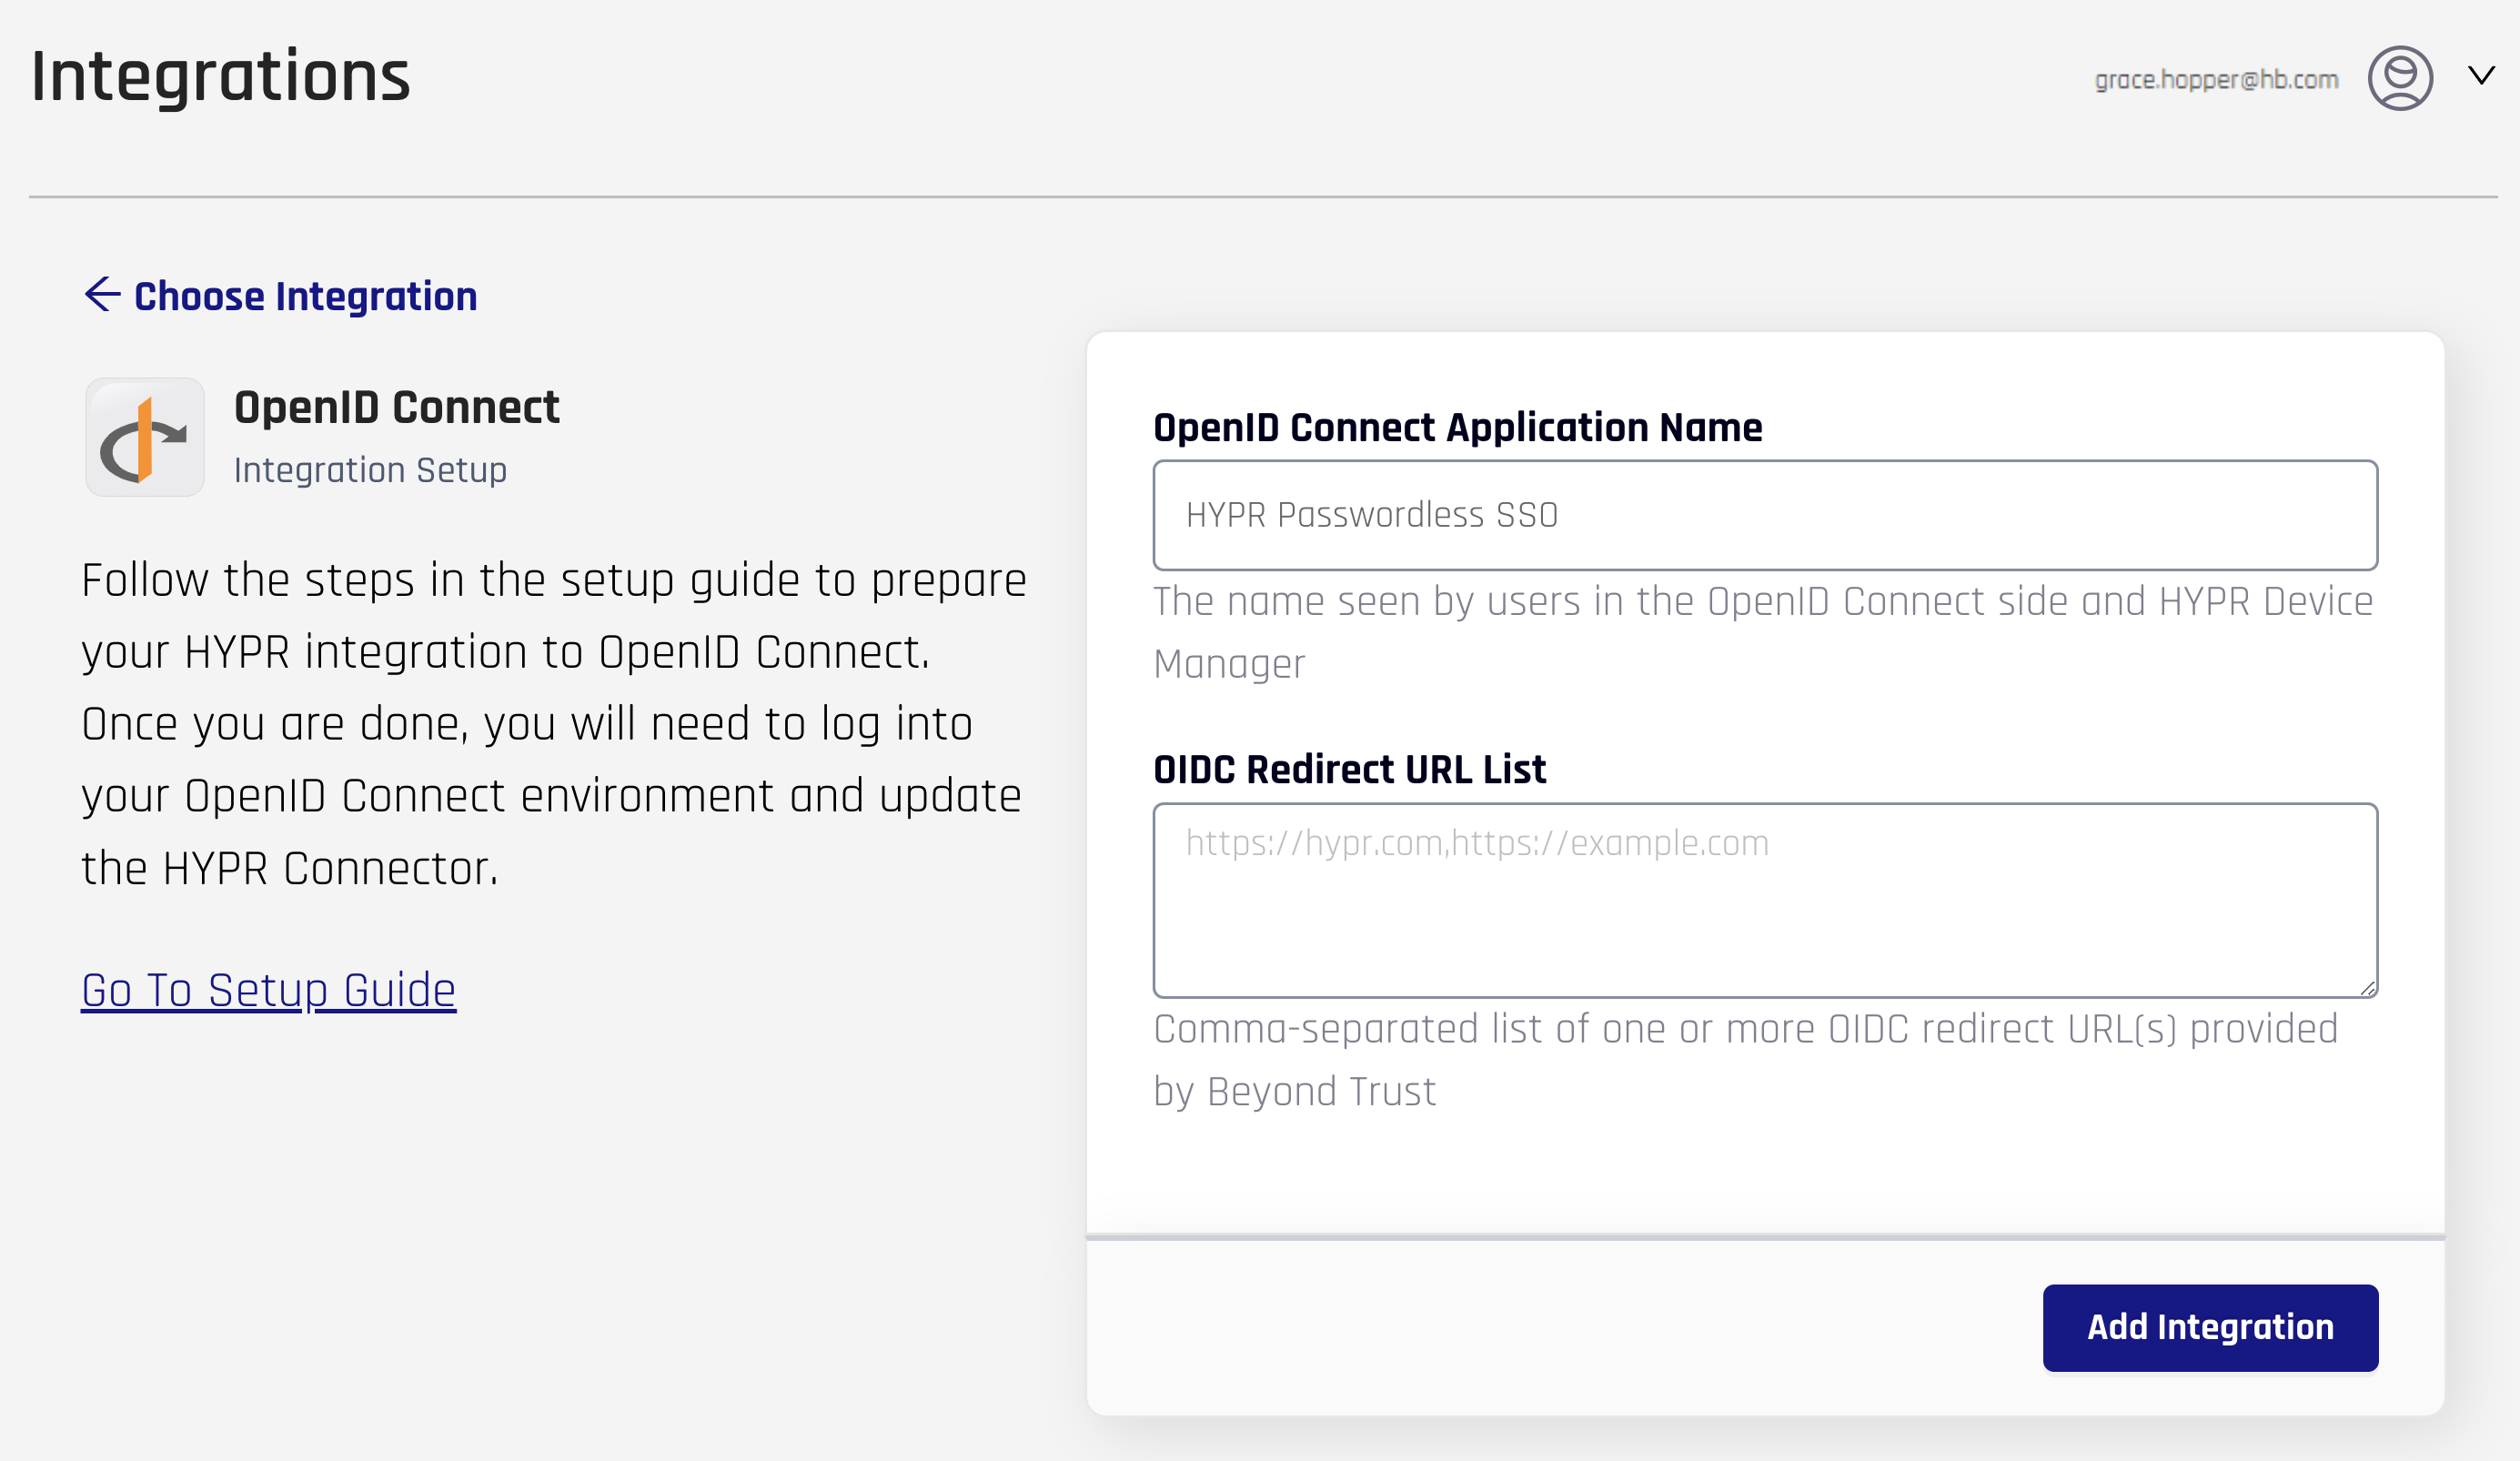
-
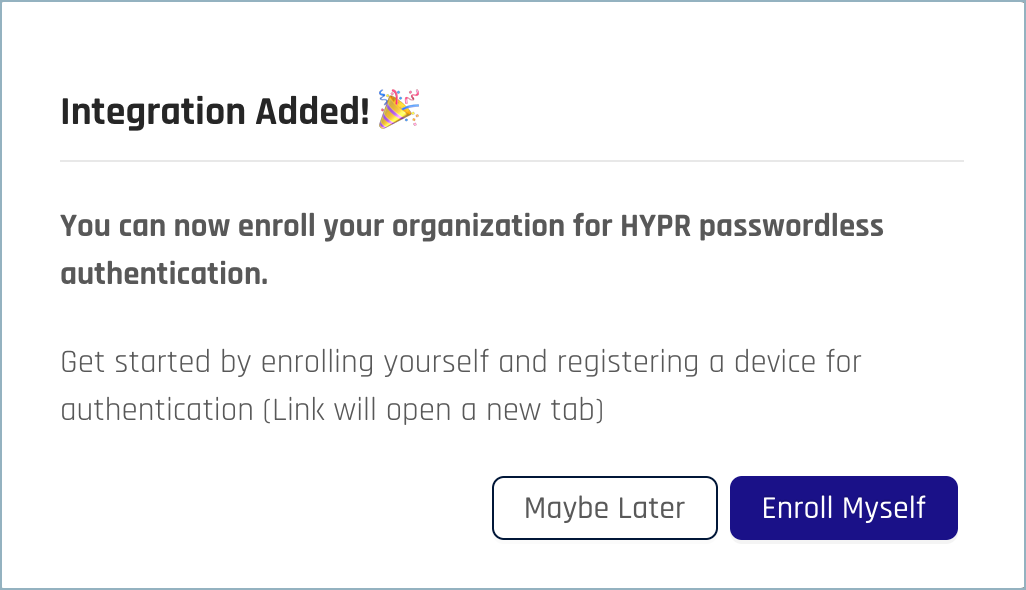
Click Add Integration. On success, the Integration Added confirmation appears.
-
Click Maybe Later to return to the integration's main page.
-
HYPR displays the generated client credentials and discovery endpoint on the same form. Keep this tab open or copy the values now — these are needed when configuring the relying party.
Field Description Where it goes in the RP OIDC Client ID Client ID generated by HYPR RP Client ID OIDC Client Secret Client secret generated by HYPR RP Client Secret Well-Known Endpoint URL OpenID Connect discovery document URL RP Certificate URL or discovery endpoint field 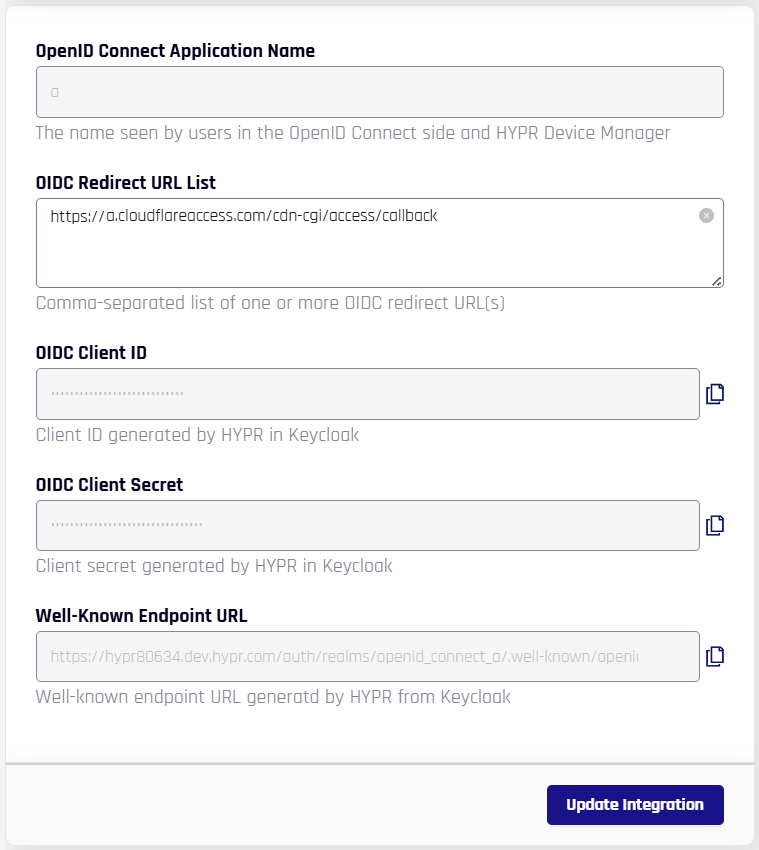
-
Click Update Integration to save.
Configure HYPR Affirm as the Authenticator
By default, an OIDC integration uses the standard HYPR passwordless sign-in. To route every sign-in through a HYPR Affirm verification flow, enable Affirm as the authenticator on the integration's Login Settings tab.
Author the verification flow before enabling the override. The drop-down only lists flows that already exist in HYPR Affirm. For verification-flow setup, see Verification Flows in the HYPR Affirm configuration guide.
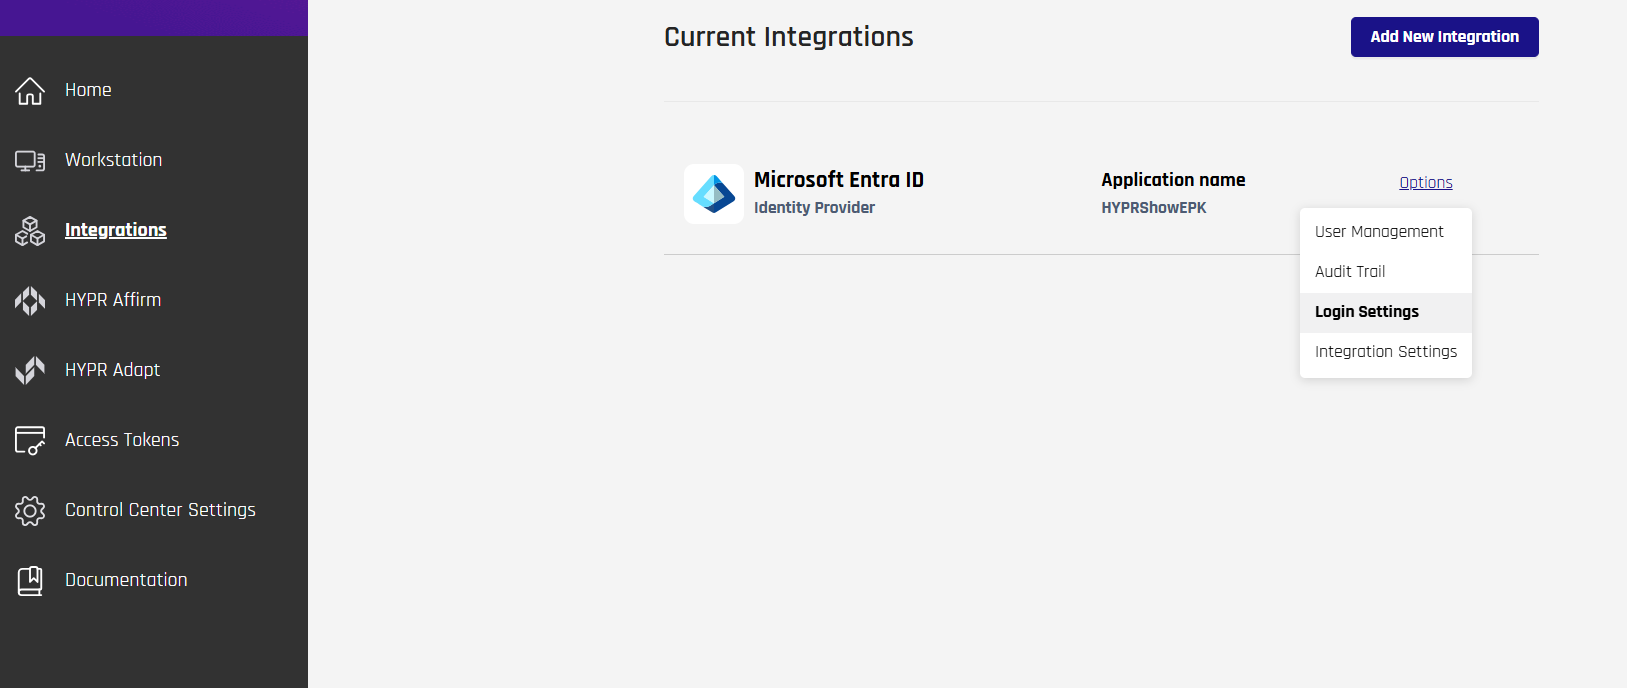
-
From the OIDC integration page, open the Login Settings tab.
-
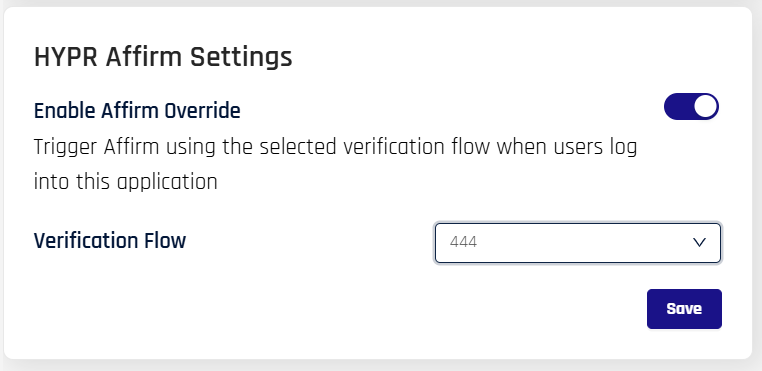
Locate the [Affirm] Authenticator section. Under HYPR Affirm Settings:
- Toggle Enable Affirm Override to On.
- In Verification Flow, select the HYPR Affirm verification flow that should run when users sign in through this integration.
-
Click Save.

-
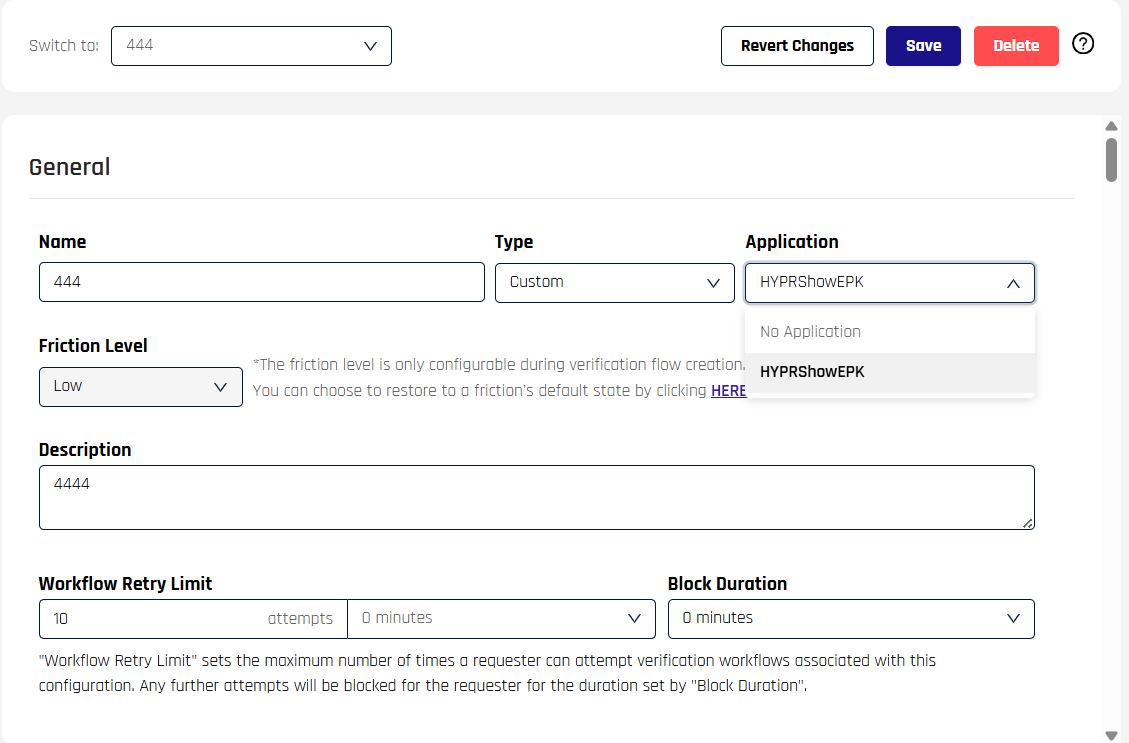
Attach the verification flow to the OIDC integration's relying party application (RpApp). This step is required for the integration to route into the intended Affirm flow.
Enable the Integration
After saving Login Settings, enable the integration so HYPR begins servicing sign-in requests from the relying party.
- Open the Integration Settings tab.
- Scroll to Integration Status and click Enable.
- HYPR confirms the activation; the integration is now ready to receive OIDC traffic.
Continue with the HYPR Integrations common UI experience in the Integrations main page to complete enabling your integration, enrolling users, and monitoring activity with the integration's Audit Trail.
Configure the Relying Party
Copy the following values from HYPR's integration form and paste them into your relying party's OIDC provider configuration:
| Value | HYPR field |
|---|---|
| OAuth client identifier | OIDC Client ID |
| OAuth client secret | OIDC Client Secret |
| OIDC endpoints | Derived from the Well-Known Endpoint URL — open that URL in a browser to retrieve the JSON discovery document, which lists authorization_endpoint, token_endpoint, and jwks_uri |
The sections below show where to enter these values for each supported relying party. If your RP is not listed, consult its documentation for the equivalent OIDC identity-provider configuration fields.
Cloudflare Zero Trust
-
In Cloudflare One, go to Settings > Authentication and click Add new under Login methods.
-
Select OpenID Connect.
-
Provide the following values:
Cloudflare field Value Name A descriptive label, for example HYPR AffirmApp ID / Client ID The OIDC Client ID from HYPR Client Secret The OIDC Client Secret from HYPR Auth URL The authorization_endpointvalue from the discovery documentToken URL The token_endpointvalue from the discovery documentCertificate URL The jwks_urivalue from the discovery documentEmail Claim emailOIDC Scopes openid,email,profileProof Key for Code Exchange (PKCE) Off Enable SCIM Off -
Click Save.
Test the Integration
Validate the end-to-end flow before exposing the protected application to users.
- From the relying party admin UI, open the OIDC provider entry created above.
- Trigger the connection test (for Cloudflare, this is the Test button on the provider entry; for other RPs, consult the vendor docs).
- When prompted, supply the test user's email address.
- Complete the HYPR Affirm verification flow.
- Confirm the relying party reports a successful connection result.
Validation Checklist
- The user is redirected from the relying party to HYPR and back to the RP callback successfully.
- HYPR routes the user into the expected HYPR Affirm verification flow.
- Token exchange succeeds with no endpoint or certificate errors.
- The relying party's access policy returns the expected allow or deny outcome for the test user.
- The protected application receives an authenticated identity context after a successful policy evaluation.
What This Enables
- Centralized policy enforcement at the relying party (for example, Zero Trust policies in Cloudflare).
- High-assurance identity verification through HYPR Affirm verification flows for every sign-in.
- Consistent access decisions across any application protected by the relying party, all routed through the same HYPR Affirm flow.
Related Documentation
- Administering HYPR Affirm — author and configure verification flows
- Adapt + Affirm Integration — route Adapt risk policies into Affirm verification flows
- Integrations — enable, enroll users, and audit activity