Policy Management
Policy Management appears only in Advanced Mode: App Properties for the Application selected under Choose an App.
The calls to control RP Application policies, including enabling/disabling specific authenticators, can be found under RP Applications > Application Properties > Policy Management in the HYPR Passwordless API collection.
Enabling and disabling individual AAGUIDs can be administered via the RP Applications > Advanced Configuration > FIDO2 Settings APIs.
FIDO (not FIDO2) registration, authentication, and deregistration calls can be found in the HYPR Passwordless FIDO API.
HYPR Control Center views an authenticator as a sensor that can be used to verify your identity - including fingerprint, camera, audio recorders, or a decentralized PIN, among others. Alone or in combination, these rules around required authentication methods create the policies that govern access to a given Application.
This article discusses the default authenticators and policies provided so you can quickly get started. It then covers the creation, modification, and removal of authenticators and the policies they combine to form.
A JSON data structure that allows a relying party to communicate to a FIDO Client the capabilities or specific authenticators that are allowed or disallowed for use in a given operation.
Installed Authenticators and Policies
HYPR Control Center comes with two default, pre-installed authenticators:
-
Native (TouchID or FaceID on iOS; Biometric prompt on Android)
-
Personal Identification Number (PIN)
Similarly, each application uses a default set of policies built by combining these authenticators: registration, authentication, and for Web Applications, also an authentication step-up policy.
If you’re using the HYPR Mobile App, then no modification is required, the Control Center will use these authenticators and policies by default.
Registration Policy
defaultRegAction is the registration policy. The user is presented with authenticator options during device registration. This typically includes all authenticators that will be used in the policies. The default registration policy comprises Native, followed by PIN. This means that during registration, the users will be asked to enroll with their Native ID. The secondary registration option is the PIN authenticator, acting as an alternative authenticator when a Native ID is unavailable.
Authentication Policy
defaultAuthAction is the default authentication policy. The user is presented with authenticator options (generally a subset of the authenticators that were registered with the Registration Policy) during authentication; it is defaulted to only PIN.
Authentication Step-up Policy (Web Applications Only)
completeMediumTransaction is the default authentication step-up policy. This policy is used during step-up authentications (or transactions), typically a subset of the authenticators that were registered with the Registration Policy; it defaults to only Native.
Authenticator Management
While in production, disabling and enabling an authenticator will impact all users enrolled with that authenticator.
To manage authenticators:
-
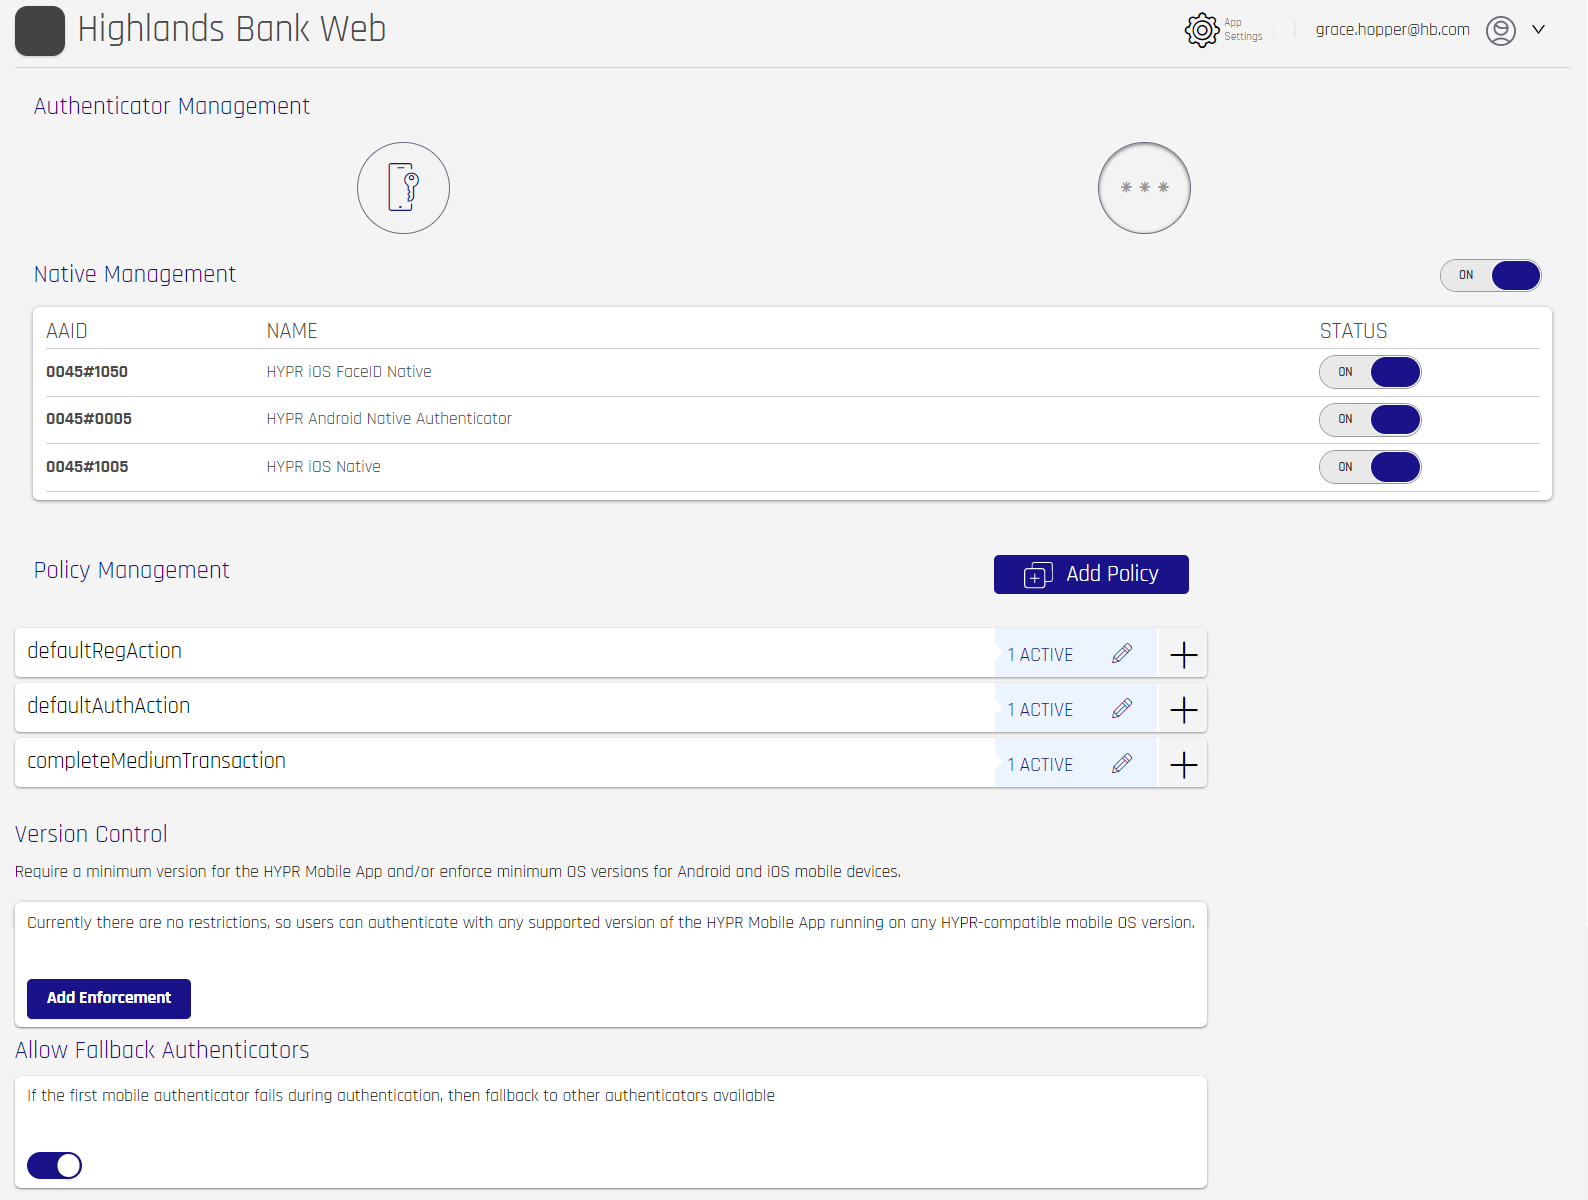
From the Control Center, choose the Application in the navigation panel for which the policy is intended; in the App Properties menu, select Policy Management. Available Authenticators will be shown under Authenticator Management. Click an icon to display information about that authenticator in the sections below. In this example, Native is chosen; if PIN had been chosen, the title of the next section would have been PIN Management.
-
Use ON/OFF toggle switches to manage enabled authenticators. Toggling the top-level switch will disable or enable the entire group of switches below to match; or you can use the individual toggles to choose specific AAIDs.

Once you are okay with how the authenticators behave, you can start adding them to policies. For stronger authentication, combine more than one authenticator as requirements for access.
Policy Management
The Policy Management section enables you to add authenticators to a policy or manage existing authenticators within a policy. Each selected authenticator in a policy set is required to satisfactorily complete the authentication flow.
To view details about a policy, expand its entry by clicking the + on the right of the policy. It will change into an x. Each Authenticator set will be shown in numeric order. Click the x or expand a different entry to conceal the details.

Add a Policy
Ensure the policies you create in the Control Center match the configuration in the HYPR SDKs.
To create a new policy, click Add Policy at the top right of the section.
Perform the following steps:
-
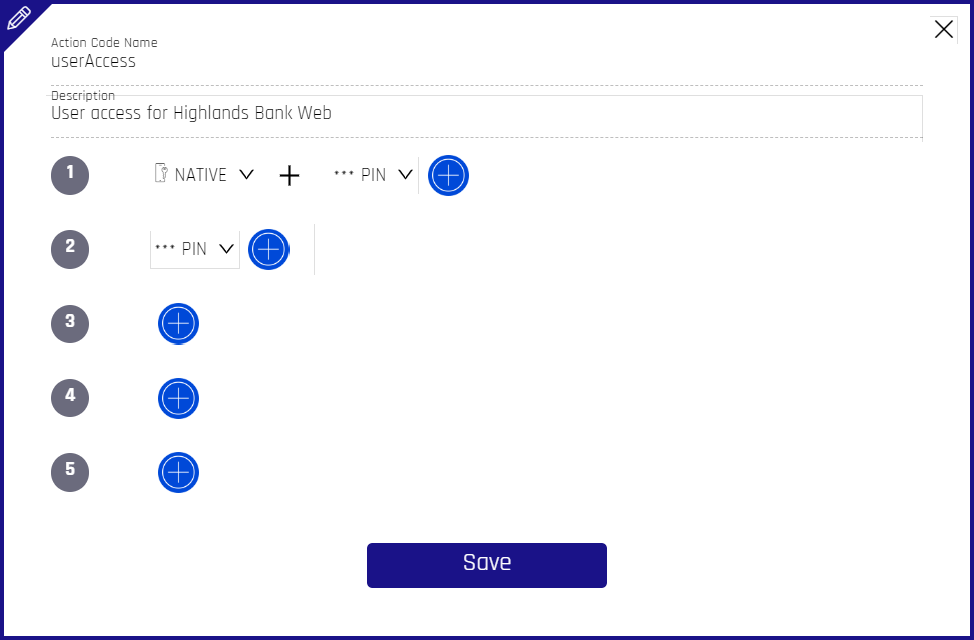
Fill the Action Code Name and Description fields, and build a new policy. The below example shows a Native + PIN requirement by the policy, and then just PIN if the first fails. Click the '+' icon next to a set number to add a new entry; if one is present, clicking the + adds an "AND" condition that requires the HYPR Mobile App user to use a Step-up authentication that includes both authentication methods.
-
Adding more authenticator rows enhances the policy to enable a different set of requirements if the first cannot be fulfilled by the device.
-
Click Save to finalize, and the HYPR Control Center will automatically return to the Policy Management primary page.
If the first set of authenticators are unavailable to the HYPR Mobile App, it will try the second set in the policy, and so on, up to a maximum of five sets.
Edit or Delete a Policy
-
With the intended Application chosen, open Policy Management in the left navigation pane.
-
On the Policy Management page, in the Policy Management section, locate the policy to be deleted. Click the pencil icon to the right of the entry.

-
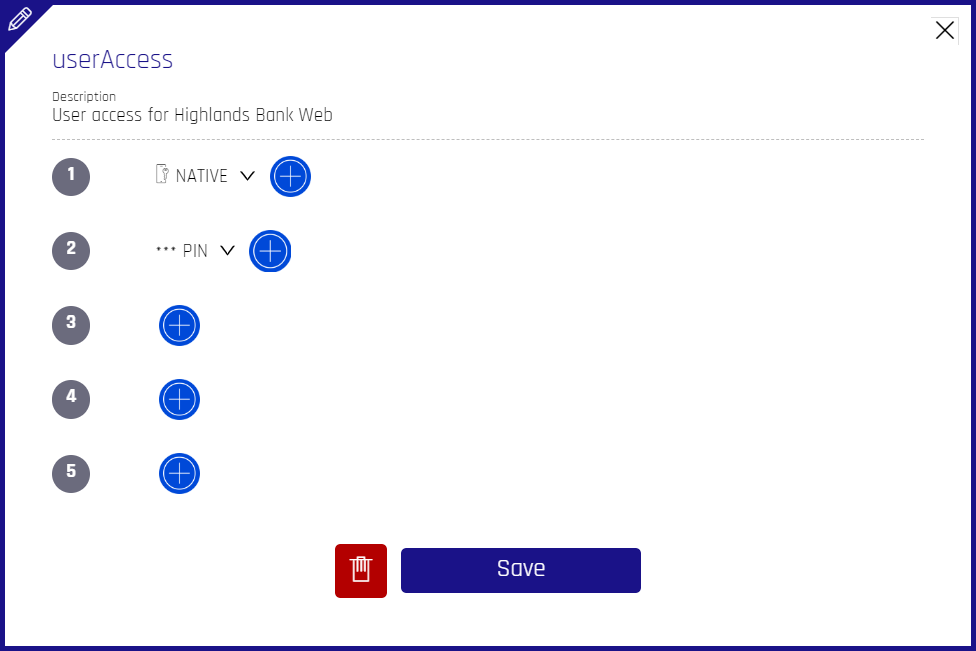
The Edit Policy dialog opens; now there is a trash can icon that was not present in the the creation dialog.
-
To edit, make the necessary amendments and click Save
-
To delete, click the trash can icon, then click Yes, I’m Sure! Your policy is now deleted

-
Version Control
You can determine a minimum version of the HYPR Mobile App, Android OS, or macOS for HYPR Mobile App users. Users will be notified if they need to upgrade and will not be able to login after the cutoff date until the required minimum version is reached.
When enabled, this feature will require the user's application to update the client-side configuration file by fetching it from the server. This means that in order to implement this feature successfully, the Block Authentication On date should be set in such a way so as to allow all users sufficient time to log in and have their applications fetch the configuration file beforehand. Not doing so may lead to the feature not working as intended for users on older application versions.

-
Click Add Enforcement to enforce version control on your HYPR users.
-
Choose the Type, complete the Version, and select the Block Authentication On date, then click Save when done.
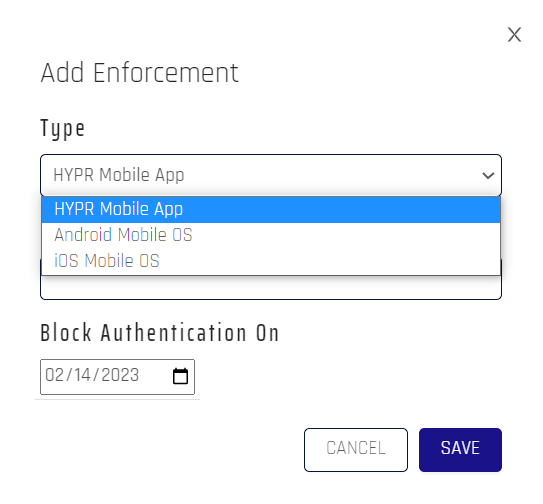
The entry is displayed in the main Policy Management page.

Use the pencil icon to edit the entry, and the trash can icon to remove it.
What Users Experience
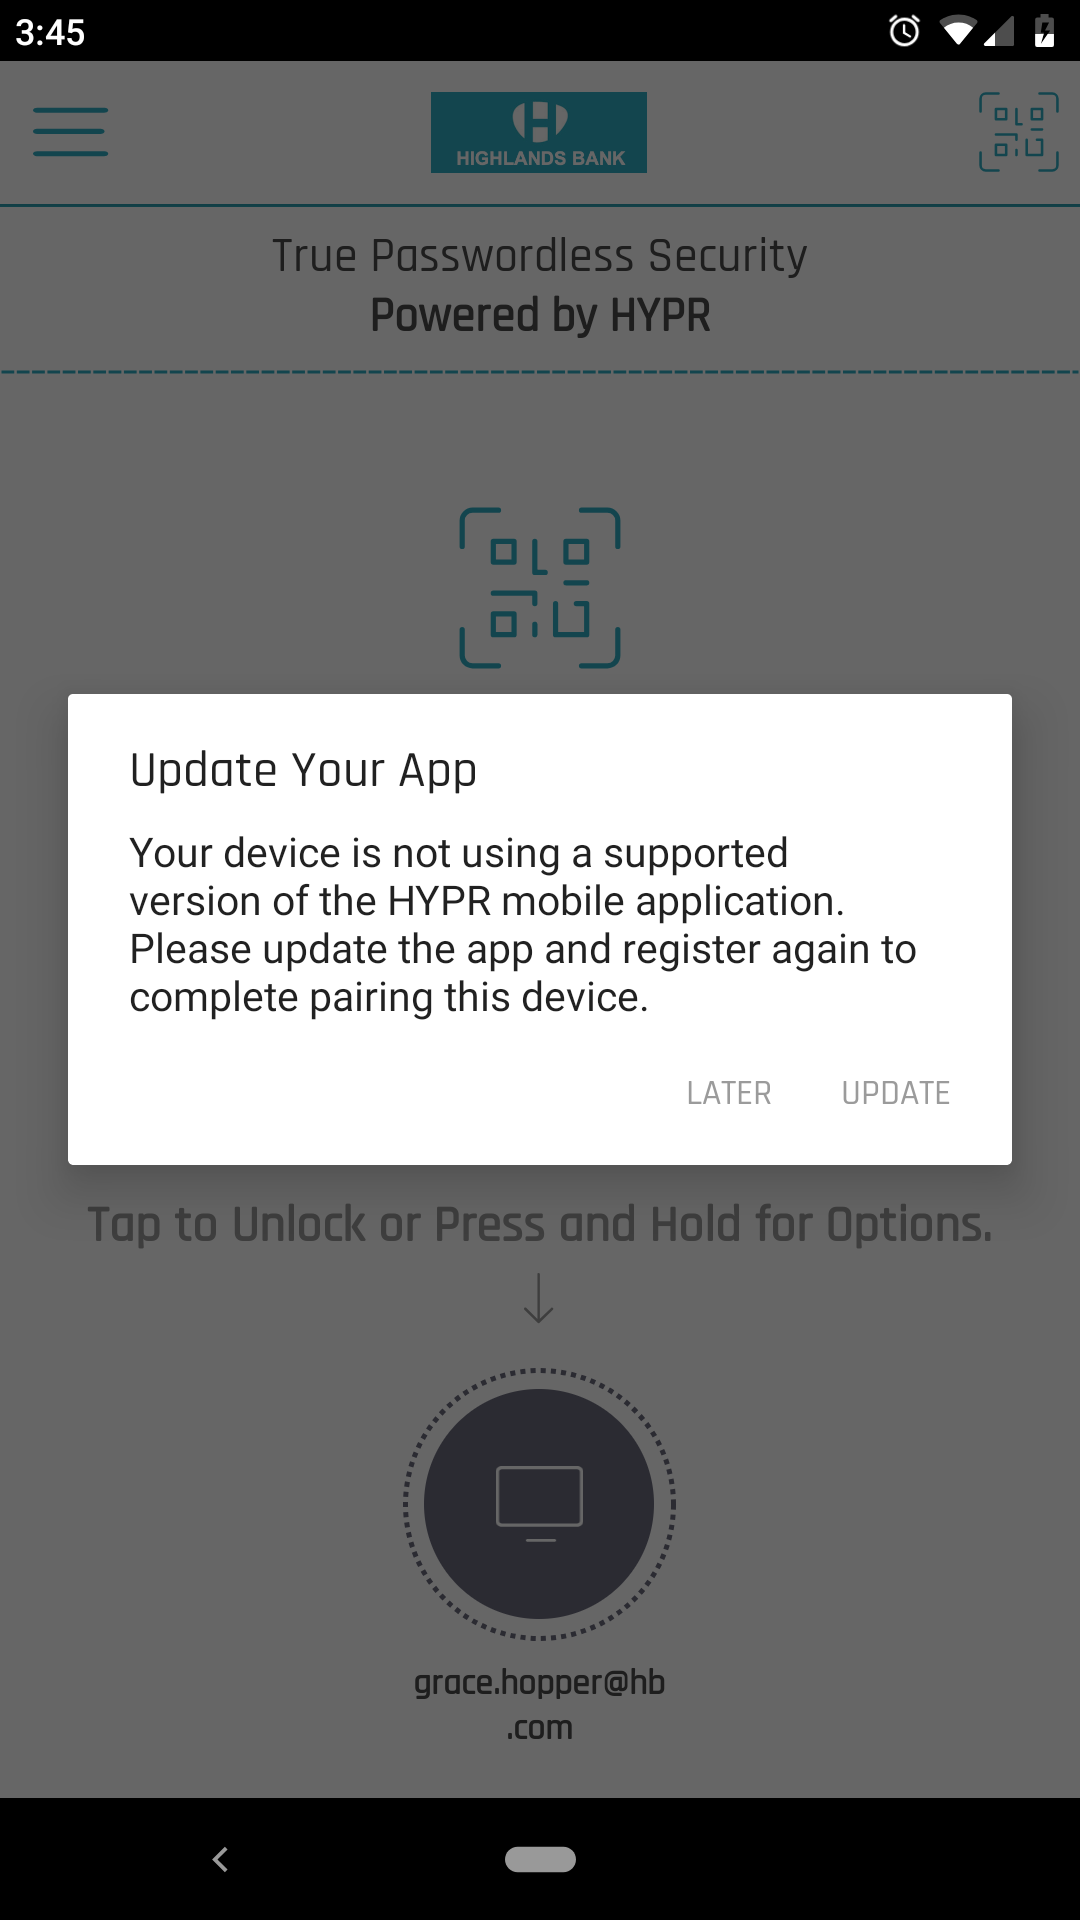
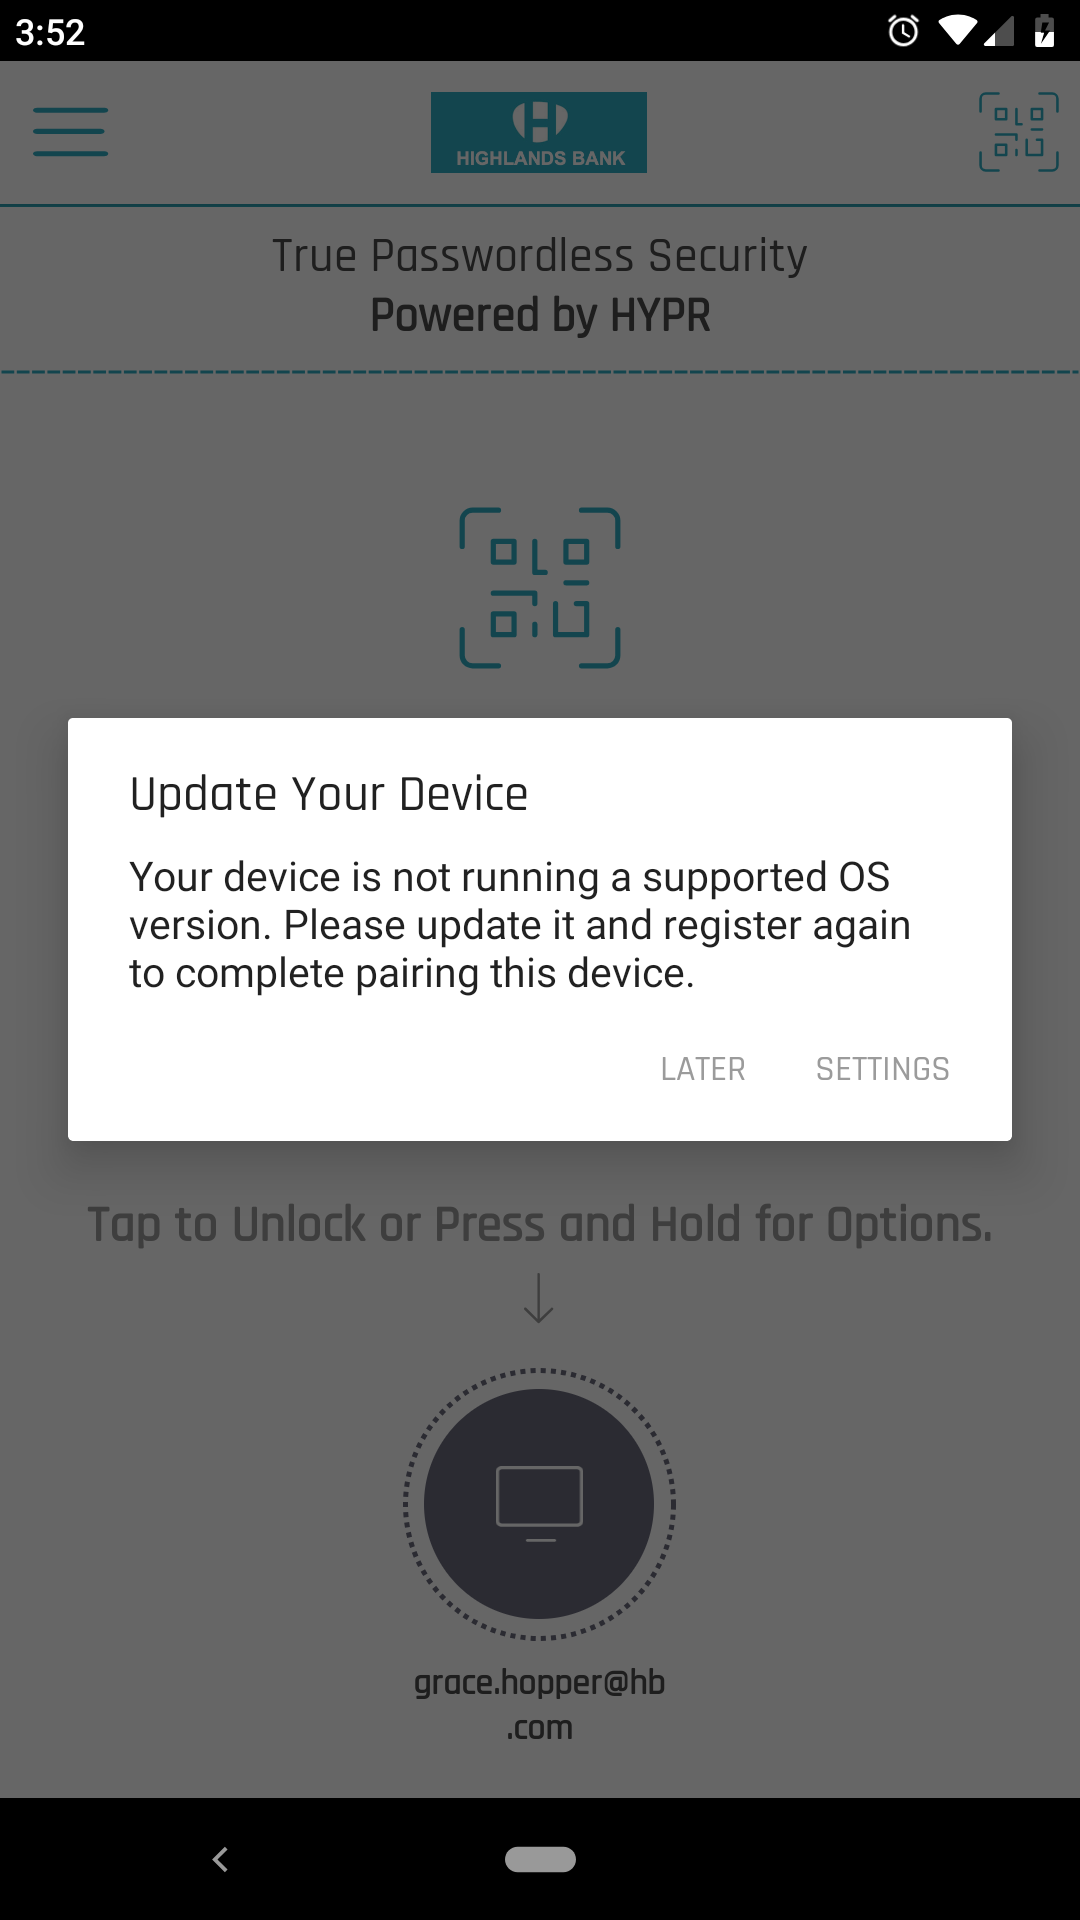
If the version of the HYPR Mobile App or an OS version is lower than the Minimum Version stated in Version Control, a message will be shown explaining they need a higher version:
-
The HYPR Mobile App message provides a Later option and an Update option that opens the PlayStore/App Store page with the latest HYPR Mobile App version for your device.
-
The message for the operating systems provides a Later option and a Settings option that opens the device system settings to look for updates.
Allow Fallback Authenticators
Toggle this feature to allow users with more than one authenticator the chance to use a different authenticator if the first one fails.

The following is required for this functionality:
- The policy definition must include two or more authenticators
- The user must have these two (or more) authenticators paired with HYPR
Once enabled, if an authentication attempt fails, the next method defined in the policy will initiate, following the order defined in Policy Management until all available methods are exhausted.
Users with two accepted methods paired already will not need to refresh their pairs. In contrast, users with only one method paired when Fallback Authenticators are enabled will need to unpair their existing account and pair all methods once again. It is recommended to motivate users to complete two pairings before toggling the Allow Fallback Authenticators switch.