Access Tokens
Access Tokens appear in more than one place in Control Center:
- In Standard Mode: Access Tokens in the main left navigation
- In Advanced Mode: Advanced Config Menu for the Application selected under Choose an App
Create and manage API tokens and Workstation Installation tokens.
The HYPR Control Center exposes an extensive set of APIs which use access tokens as an authentication and authorization mechanism. API access tokens can be created and revoked by Control Center admin users as described below. Tokens have an expiration period (TTL) of 30 days. The expiration date is reset to the current date+TTL each time you use the token, so if you don't use the token for more than 30 days it will expire and you'll need to generate a new one.
Workstation Installation tokens are used during the installation process for the HYPR Passwordless client.
Every token is bound to a specific RP Application. Any operation within the RP Application and the scope of the token (API or Workstation Installation) is allowed in the presence of a valid token.

API Tokens
The Control Center exposes a set of APIs you can use to perform user management tasks programmatically rather than through the UI. For example, you could create a script that deletes workstation users through an API request rather than through the Control Center. Please see the API documentation for more information.
The APIs use access tokens as an authorization mechanism for your API requests. As an administrator, you’ll need to create an access token through the Control Center then include the token in every API request you submit.
API access tokens can be used in the following cases:
-
API requests for the Workstation user APIs, which require a token of type
access-tokenDefaultApp. To create this type of access token, select HYPR Default Workstation Application (HYPRDefaultWorkstationApplication) as the Application during token creation. -
API requests for the Control Center Admin APIs , which require a token of type
CCAdminAccessToken. To create this type of access token, select Control Center Admin (controlCenterAdmin) as the Application during token creation. -
API requests for Integrations you’ve created through the Integrations section in the Control Center, for example an Okta integration. For this type of access token, the Application you select during token creation is the name you gave the integration when you created it.
Workstation Installation Tokens
Whenever you install the HYPR Passwordless client, either for yourself or for other users, you must provide a Workstation Installation token (also called an endpoint security token). See the HYPR Passwordless client Installation instructions for more information. However, this token is given to you by HYPR after you sign up for the service and should not be changed. You use the same token for all installs. Typically you don’t need to create a token manually for this purpose. However, HYPR Support may occasionally ask you to create one.
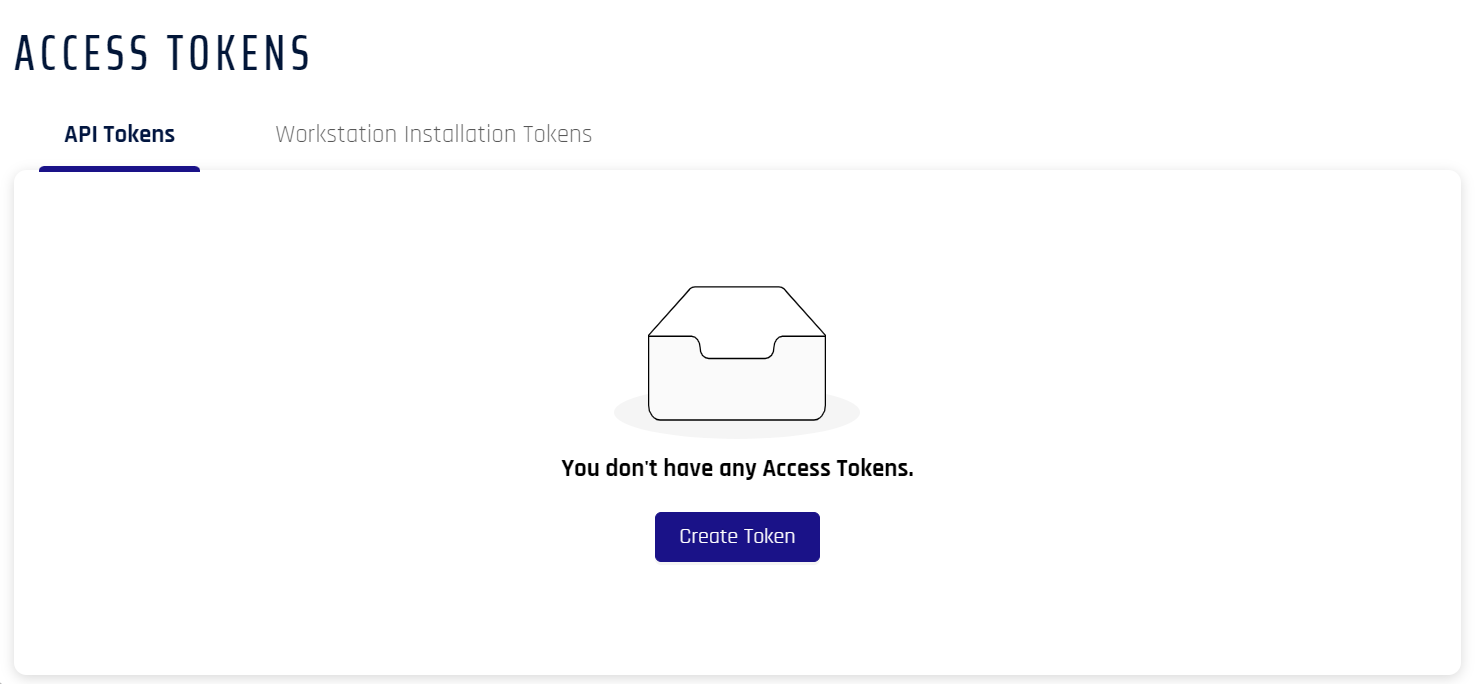
Create an Access Token
You can create both types of token in the Access Tokens section in the Control Center.
Standard Mode
-
Click Access Tokens in the Control Center left navigation pane.
-
Click Create Token. If no tokens are listed, this button will be in the center of the pane. If tokens are already present in the list, it will appear in the upper right, above the list.
-
Type a display name for the new token in the Name your Token field. Choose a name that will help you identify the token's purpose. It can be any combination of characters and can include spaces.
-
Select an Application for which you need the token.
-
Select a token type. Click Next when finished.
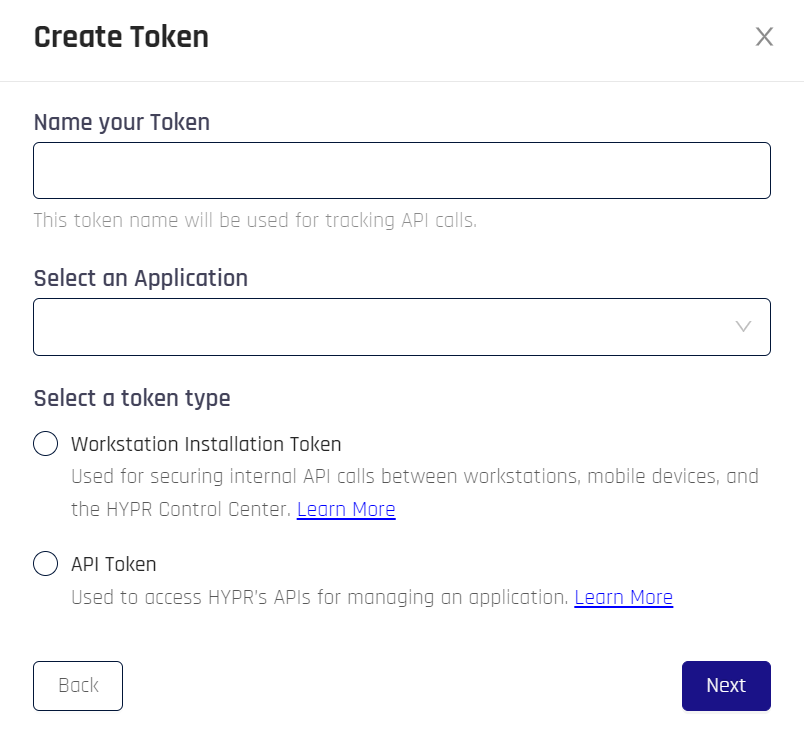
API Tokens OnlyHYPR Default Web Application (
HYPRDefaultApplication) may appear in the list of choices. This Application is created by HYPR to support your instance of HYPR. You typically would not need to create an access token for the HYPR Default Web Application. If you decide to, HYPR Default Web Application only accepts API tokens, not Workstation Installation tokens. -
-
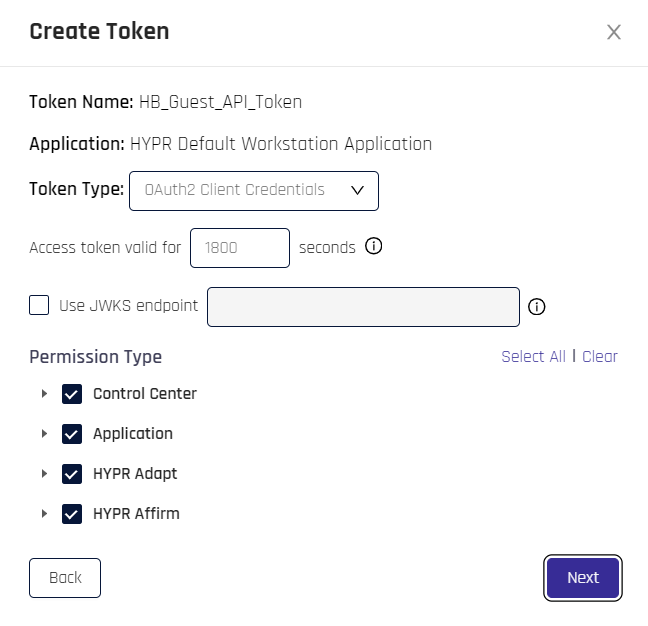
If you made a Workstation Token, skip this step. Assign properties to the token.
-
Token Name: The name assigned to the token in the previous step.
-
Application: The RP Application assigned to the token in the previous step.
-
Token Type: Choose a value from the drop-down to continue.
-
Bearer Token: A token used to access API collections, as with the HYPR Passwordless API. If this type of token is selected, continue to the next step to assign permissions.
-
OAuth2 Client Credentials: Using this option requires a few extra choices:
-
Set the time in seconds that the Access Token will be valid
-
If you are using JSON Web Key Sets (JWKSs), check the box next to Use JWKS endpoint and add a valid URL to connect HYPR to the endpoint
JWKS Endpoint BehaviorIf the JWKS Endpoint is used:
-
The API client creates the key pair and keeps the private key (HYPR never sees it)
-
It shares its public key via the JWKS endpoint
-
HYPR calls the JWKS endpoint via HTTP GET
-
In the JWKS response, HYPR matches the
kidattribute with thekeyIdin the JWT header to locate the public key -
It then uses the public key to verify the JSON Web Token (JWT) signature
-
-
-
-
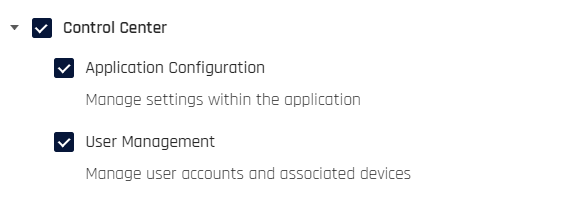
Permission Type: Permissions are grouped into categories; choose the permissions you wish the token to allow. Click Select all for full permissions; click Clear to start over. For what each permission grants, see Token Permissions.
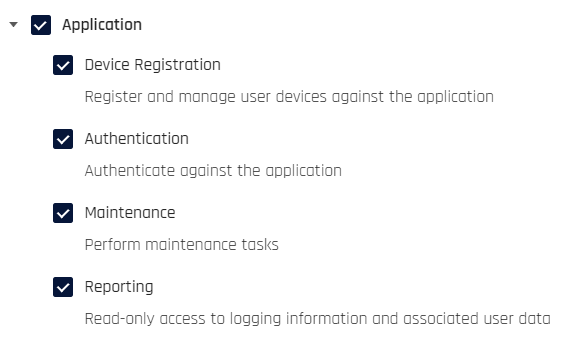
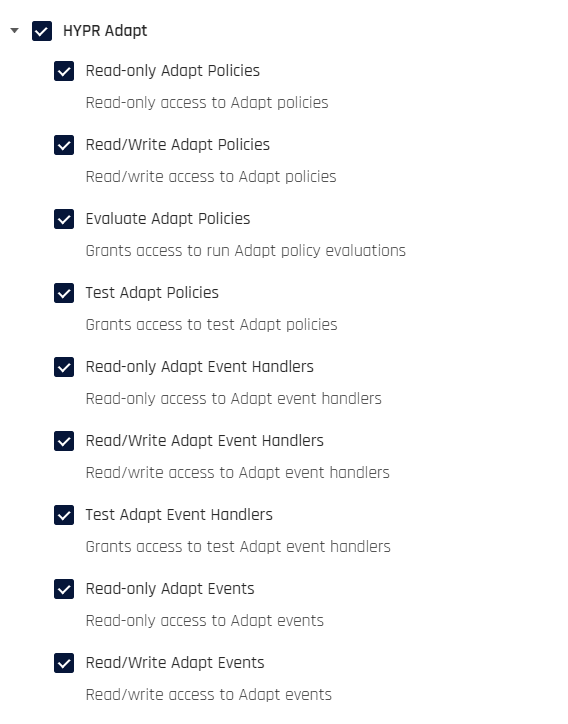
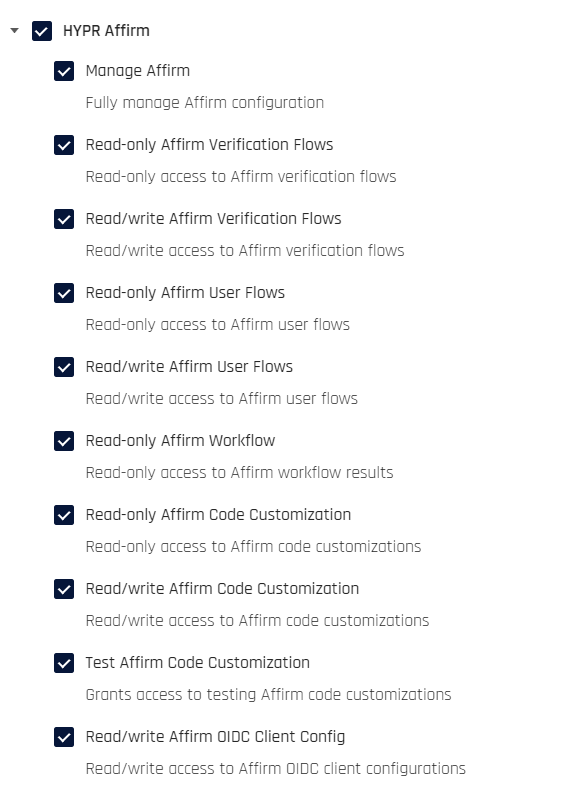
-
Token Expiration Date: Select a date on which your token will expire; the token will no longer be valid after that date.
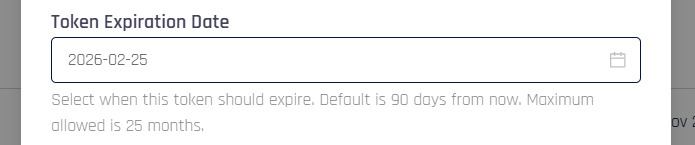
Once you have filled in everything, click Next.
-
-
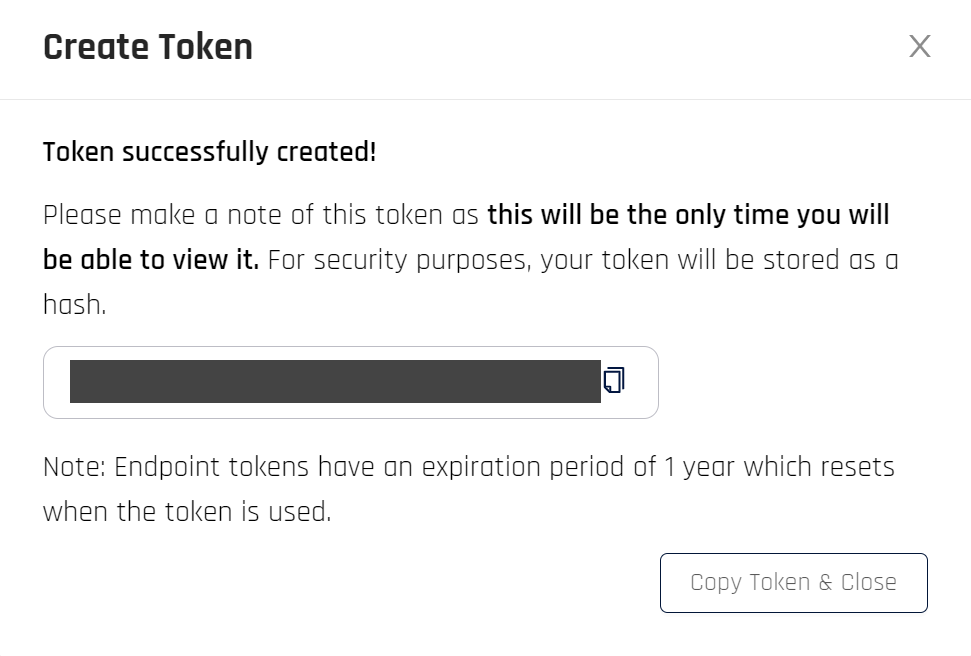
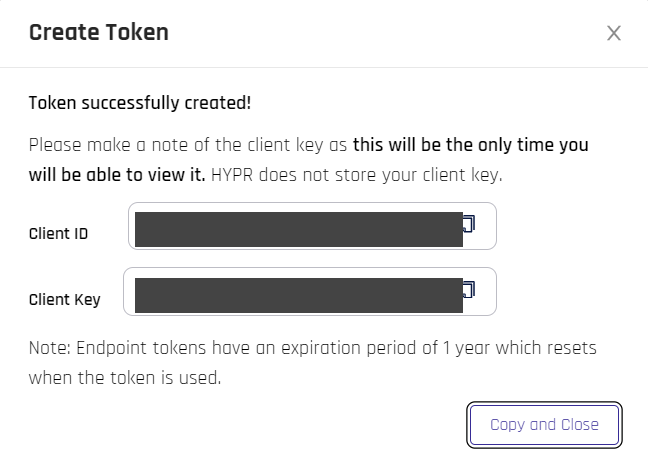
This step provides the option to capture the Bearer Token or gather the Client ID and Secret from an OAuth token. copy the information presented to a safe location. This is a one-time action; the results are never displayed again beyond this dialog.
-
Bearer token: You have the option to copy the token; clicking Copy Token & Close will transfer the token to the clipboard and close the dialog
-
Oauth token: Copy the Client ID and Client Key values and store them somewhere safe. clicking Copy and Close will transfer both values, labeled, to the clipboard, then close the dialog
-
-
The following table displays. It shows the same information for both types of token.
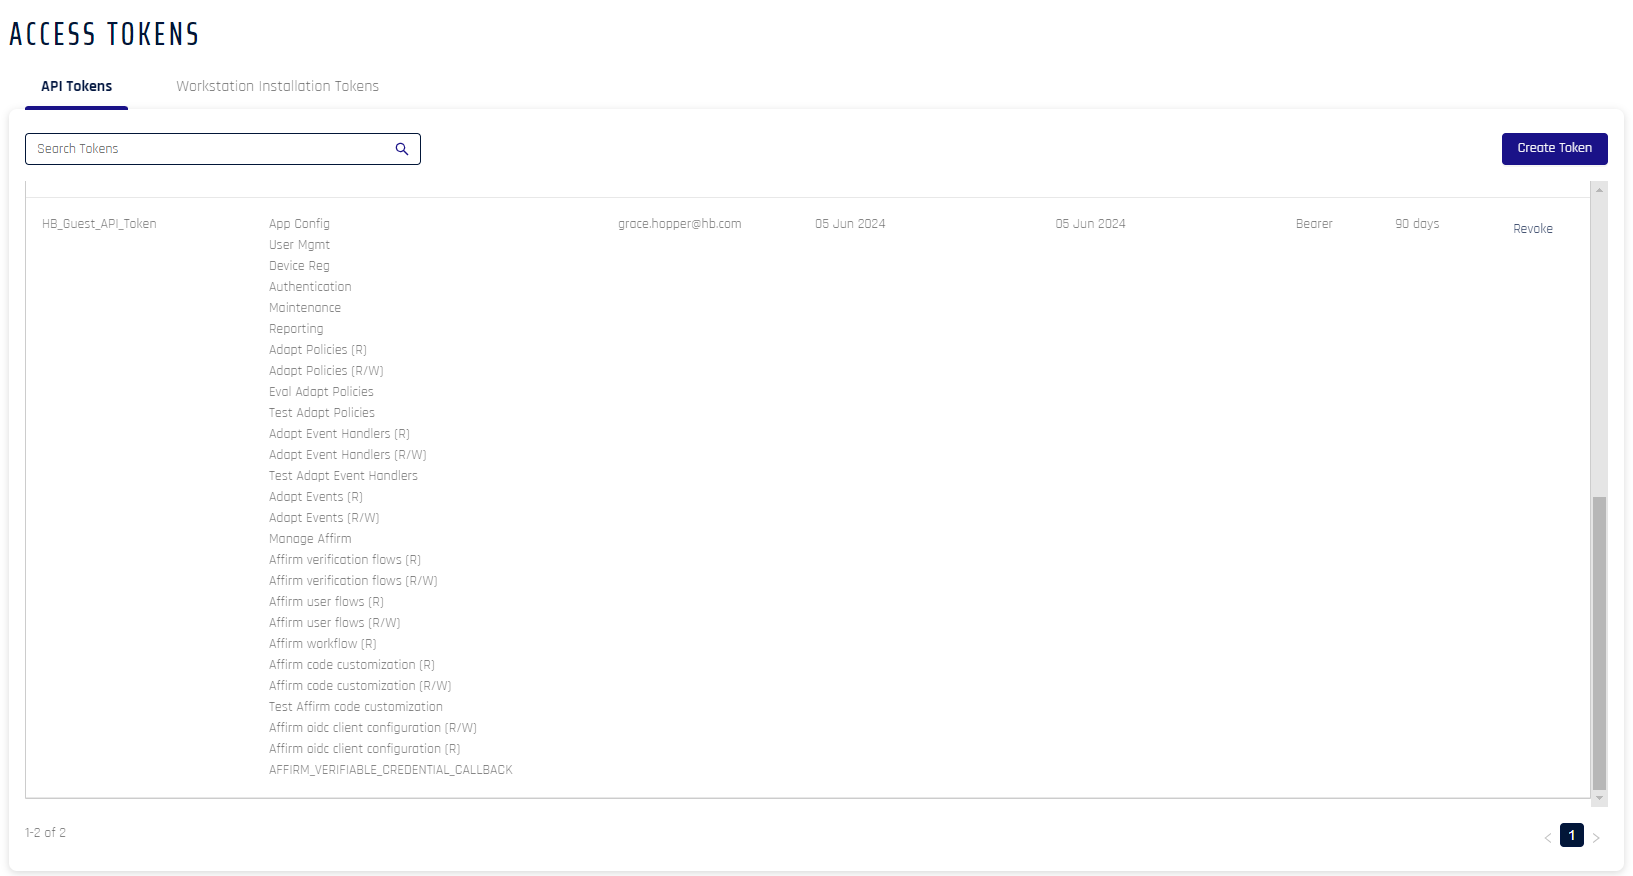
Field Name Description Token Name of the token Permissions The permissions assigned to the token, in the shortened form described under Token Permissions Created By Creator of the token Created On Date of creation Last Used Last used by the clients for registration/authentication and de-registration Type The type of token
Possible Values: API | Workstation InstallationExpires Time left before the token expires (hover for the time). The expiration period is configured when the token is created (for example, 90 days for a new access token). If the token is not used before it expires, a new token must be issued and any integrations using the old token must be updated. Actions The only available action as of this version is to Revoke the token
If you have chosen to create OAuth token credentials, continue to Exchanging OAuth Credentials to Obtain a Token.
Advanced Mode
-
In the selected RP Application left menu, open Access Tokens.
-
Click Create Token.
-
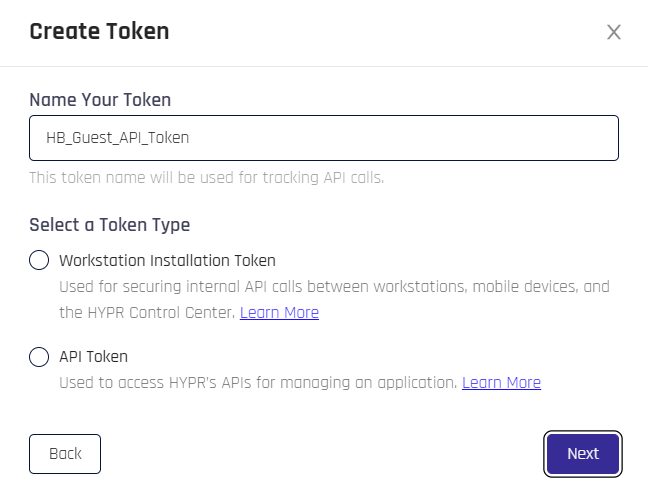
The Create Token dialog opens. Name the token, then Select a Token Type:
-
Workstation Installation Token
-
API Token
When finished, click Next.
-
-
If you made a Workstation Token, skip this step. Assign properties to the token.
-
Token Name: The name assigned to the token in the previous step.
-
Application: The currently selected RP Application.
-
Token Type: Choose a value from the drop-down to continue.
-
Bearer Token: A token used to access API collections, as with the HYPR Passwordless API. If this type of token is selected, continue to the next step to assign permissions.
-
OAuth2 Client Credentials: Using this option requires a few extra choices:
-
Set the time in seconds that the Access Token will be valid
-
If you are using JSON Web Key Sets (JWKSs), check the box next to Use JWKS endpoint and add a valid URL to connect HYPR to a server which provides a set of cryptographic keys in JSON format for verifying JSON Web Tokens (JWTs).
JWKS Endpoint BehaviorIf the JWKS Endpoint is used:
-
The API client creates the key pair and keeps the private key (HYPR never sees it)
-
It shares its public key via the JWKS endpoint
-
HYPR calls the JWKS endpoint via HTTP GET
-
In the JWKS response, HYPR matches the
kidattribute with thekeyIdin the JWT header to locate the public key -
It then uses the public key to verify the JSON Web Token (JWT) signature
-
-
-
-
Permission Type: Permissions are grouped into categories; choose the permissions you wish the token to allow. Click Select all for full permissions; click Clear to start over. The categories are the same ones shown under Standard Mode above. For what each permission grants, see Token Permissions.
Once you have assigned Permission Types, click Next.
-
-
This step provides the option to capture the Bearer Token or gather the Client ID and Secret from an OAuth token. copy the information presented to a safe location. This is a one-time action; the results are never displayed again beyond this dialog.
-
Bearer token: You have the option to copy the token; clicking Copy Token & Close will transfer the token to the clipboard and close the dialog
-
Oauth token: Copy the Client ID and Client Key values and store them somewhere safe. clicking Copy and Close will transfer both values, labeled, to the clipboard, then close the dialog
-
-
The following table displays. Click the appropriate tab to see information for each type of token.
Field Name Description Token Name of the token Permissions The permissions assigned to the token, in the shortened form described under Token Permissions Created By Creator of the token Created On Date of creation Last Used Last used by the clients for registration/authentication and de-registration Type The type of token
Possible Values: Bearer | OAuthExpires Time left before the token expires. This value resets to 30 days after each use; if not used within 30 days of the last use, it will expire and a new token will need to be issued Actions The only available action as of this version is to Revoke the token
Double VisionThese tokens can also be managed from the Control Center Standard Mode Access Tokens list.
If you have chosen to create OAuth token credentials, continue to Exchanging OAuth Credentials to Obtain a Token.
Token Permissions
This section explains the entries in the Permission Type list you tick when creating a token. The headings below match the groups shown there: Control Center, Application, HYPR Adapt, and HYPR Affirm. Which groups appear depends on what the tenant has enabled, so a group you do not see is one the tenant does not have. The list is the same in Standard and Advanced mode.
The permissions you assign decide which API operations the token can call. Assign only the ones the integration needs; a token presenting a permission it was not granted receives 403 Forbidden.
The Permission column below is the label shown in Control Center. The OAuth scope column matters only when you request an OAuth access token, where the scope string is what you send in the request; a Bearer token carries its permissions internally and needs no scope parameter.
Select All ticks every permission in the list, not just the group you are looking at. On a tenant with HYPR Adapt or HYPR Affirm enabled, that includes their permissions too, so a token meant to read login events also gains the ability to rewrite verification flows. Tick the specific permissions the integration needs instead.
Names in the Token List
The Access Tokens list shortens these names and marks the level of access with a letter, where (R) is read-only and (R/W) is read/write. Read/Write Adapt Policies appears there as Adapt Policies (R/W).
Control Center Permissions
These govern tenant-wide configuration and user records, and are not limited to a single Application.
| Permission | OAuth scope | What a token with this permission can do |
|---|---|---|
| Application Configuration | hypr:cc:applications | Read and change tenant and Application configuration: email notification settings and templates, certificate authority settings (issuing and trusted CAs, CSRs), FIDO2 settings and authenticator metadata, throttle status and rescans, report definitions, and integration configuration. This is the broadest of the Control Center and Application permissions. In the API collection, see Control Center > Certificates and RP Applications > Advanced Configuration > FIDO2 Settings. |
| User Management | hypr:cc:users | Read and change user records and the aliases and email addresses attached to them, retrieve a user's recovery PIN, and manage scheduled jobs. Covers the /rp/api/username and /rp/api/alias operations. In the API collection, see RP Applications > Application Properties > User Management and User Management > Alias. |
Application Permissions
These act against the Application the token was created for.
| Permission | OAuth scope | What a token with this permission can do |
|---|---|---|
| Device Registration | hypr:rp:reg | Start, amend, and cancel device registration sessions for users of the Application, and read the QR metadata a client needs to pair. Covers the /rp/api/client/reg and /rp/api/versioned/client/registrations operations. It does not permit authentication. In the API collection, see RP Applications > Workstation > Registration. |
| Authentication | hypr:rp:auth | Raise and complete authentication requests: out-of-band authentication requests and transactions, FIDO2 assertion options and results, Desktop SSO challenges and their status, and a user's FIDO2 status. It does not permit registering a new device. In the API collection, see RP Applications > Application Properties > Device > OOB, RP Applications > Workstation > HYPRspeed, and the FIDO2 RP API assertion calls. |
| Maintenance | hypr:rp:maint | Run and track a fixed set of named maintenance activities against the Application, and nothing else. The five operations it permits
The activities are a fixed set, not arbitrary administrative actions: converting an Okta integration from the version 1 to the version 2 form, Okta alias maintenance, and adjusting the log level for an Application. Each runs in two stages, where validation reports whether the activity can proceed and changes nothing, and execution performs it. These operations are present on HYPR Cloud deployments. On a self-hosted deployment the permission can be assigned but has no endpoints to act on. |
| Reporting | hypr:rp:report | Read-only access to reporting and audit data: execute report definitions, read report metadata, and use the bulk introspect and fetch operations to export entities such as users, devices, and login events. It grants no write access. In the API collection, see the Bulk Export API and Analytics, and on this site Bulk Export API. |
HYPR Adapt Permissions
On a tenant with HYPR Adapt enabled, the list also shows a HYPR Adapt group, covering risk policies, signal handlers, and risk events. For what each of those grants, see Access Token Permissions in the HYPR Adapt documentation.
HYPR Affirm Permissions
On a tenant with HYPR Affirm enabled, the list also shows a HYPR Affirm group, covering verification flows, workflows, customization, and location configuration. For what each of those grants, see Access Token Permissions in the HYPR Affirm documentation.
Obtain an OAuth Access Token
An OAuth token is not used directly. Creating one gives you a client ID and secret, which your integration exchanges for a short-lived access token before calling the API. HYPR implements the OAuth 2.0 client credentials flow with a signed JWT client assertion, so the exchange is server to server and needs no user present. The token that comes back carries the permissions you assigned when you created the credentials.
Choose a Bearer token instead if the caller cannot perform that exchange; a Bearer token is presented as-is.
For the full process, including generating the JWT assertion, exchanging it for a token, and the errors to expect, see Obtaining an OAuth Access Token.
Use the Access Token
An access token is provided on every request to the HYPR API HTTP endpoint. The request will fail if the token is missing or does not have permissions for the requested operation. The request will also fail if the token has expired, been revoked, or is invalid.
The access token must be sent in the Authorization header using the Bearer schema.
Here is an example of how to pass an access token using the cURL command:
curl \
--location 'https://highlandsbank.hypr.com/rp/api/protected-resource' \
--header 'Authorization: Bearer eyJ0eXAiOiJKV1QiLCJhbRciOiJSUzI1NiI'
Revoke an Access Token
When you revoke an API access token, you’ll no longer be able to submit API calls for the entity to which the token applies (for example, an integration). In most cases, you won’t need to revoke access tokens. In some cases, HYPR Support may ask you to perform this task.
Avoid revoking a Workstation Installation token unless HYPR Support recommends it. This token is used during the installation process for the HYPR Passwordless client. Although installations you’ve performed already won’t be affected if you revoke the token (the HYPR Passwordless client will run as usual for everybody), you won’t be able to install the HYPR Passwordless client for any new users. See the HYPR Passwordless Installation instructions for details.
To revoke an access token, complete these steps:
Standard Mode
-
Open Access Tokens in the Control Center left navigation pane.
-
Locate the access token you want to revoke.
-
Click Revoke in the Actions column of that token.
-
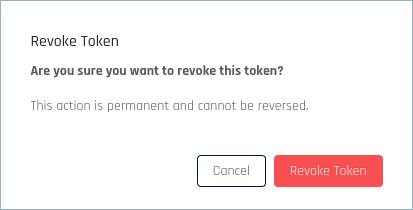
In the confirmation dialog, click Revoke Token.
Advanced Mode
-
Click Access Tokens in the Control Center left navigation pane.
-
Locate the access token you want to revoke.
-
Click Revoke in the Actions column of that token.
-
In the confirmation dialog, click Revoke Access Token.