HYPR Integrations
Integrations appear only in Standard Mode.
HYPR RP applications are automatically created when a new Integration is made, and will be available in the Advanced Mode applications list in the navigation menu.
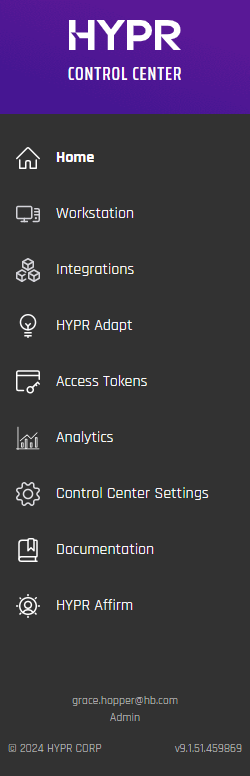
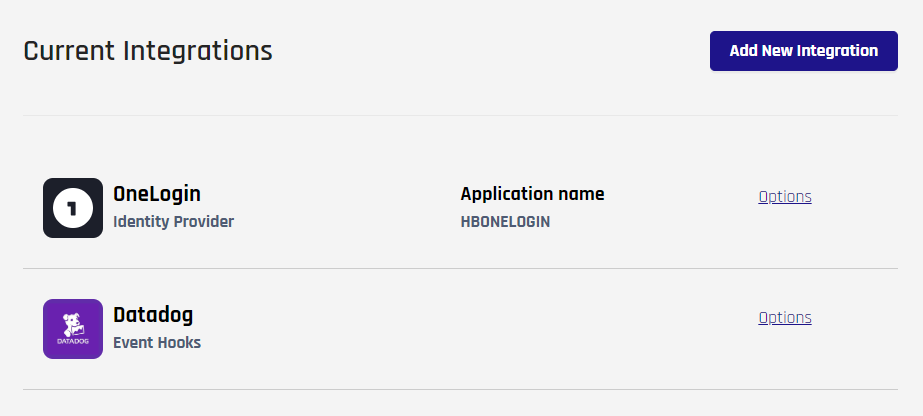
Select Integrations in the Control Center left navigation pane to set up and manage other types of web authentication. Here existing Integrations are listed, each with an _Application name _(a.k.a. rpAppId) and an Options link. Hovering over Options presents links to the common tabs that govern each Integration: User Management, Audit Trail, Login Settings, and Integration Settings. Each of these is described below.
Add an Integration
Click Add New Integration to configure a new authentication experience. A bank of tiles grouped by integration type appears. Choose the one you wish to configure, and it will begin the configuration process.
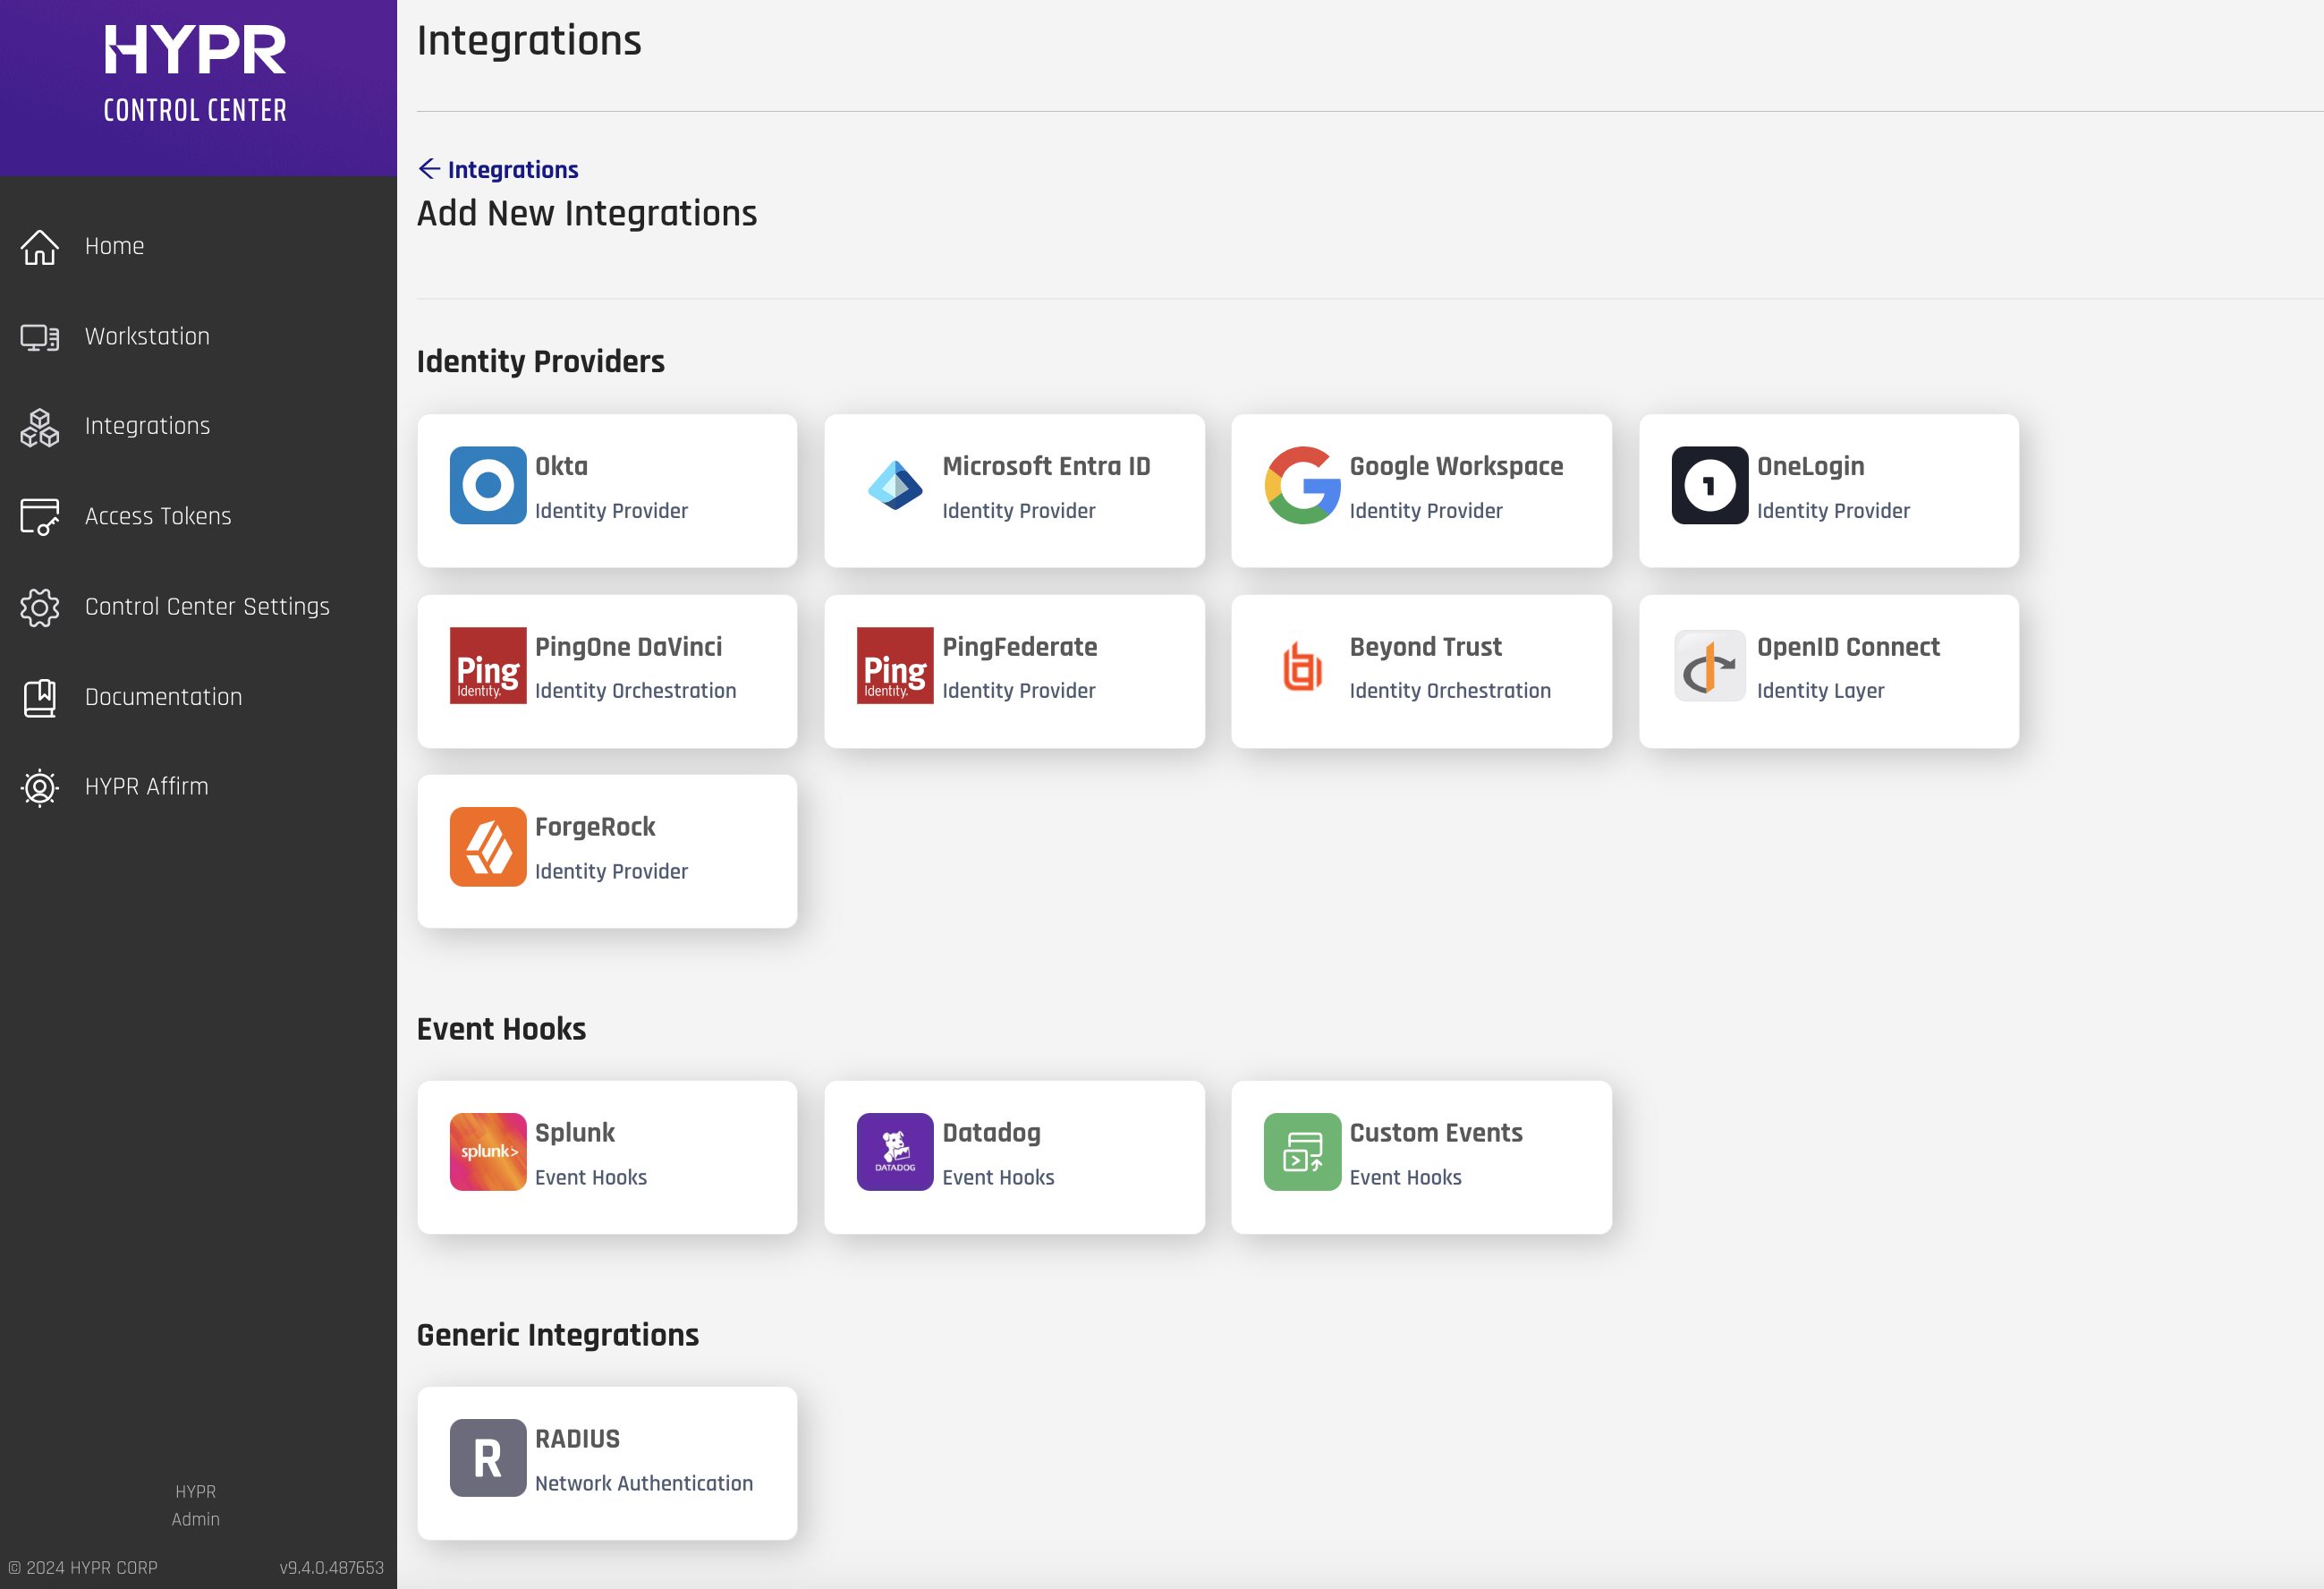
Tiles that indicate Coming Soon when you hover your cursor over them are under development. Click the links below for instructions on how to configure the IdP with HYPR.
HYPR allows multiple deployments of an integration for different use cases - where you have more than one Okta server, for instance.
- Each deployment creates a new Application, which can be viewed under Advanced Mode
- The same individual email addresses in Okta can be enrolled separately into each HYPR Okta integration deployment
Entra Options
HYPR now offers different options when it comes to integrating HYPR with Entra. This section briefly describes the available choices. Each is mutually exclusive; you must select one or the other, but you may add as many of each as are needed.
Each of these options requires both Entra ID Admin Access and HYPR Control Center Admin access.
Entra ID integrations can be used to enable HYPR Affirm and the generic HYPR Enterprise Passkey. If you have any questions please reach out to HYPR for more guidance.
HYPR External Authentication Method (EAM)
With the HYPR EAM integration, organizations can seamlessly use HYPR as an Entra ID authentication method to meet multifactor authentication requirements without the need for federation. Unlike federation configurations, the user identity is established and managed in Microsoft Entra ID. Essentially, HYPR’s leading phishing-resistant MFA becomes a like-native authentication option in the Entra ID ecosystem, and can be invoked to satisfy MFA requirements for Conditional Access policies, Privileged Identity Management (PIM) and Identity Protection sign-in risk policies.
HYPR Login Experience
The IdP Integrates with HYPR via federation (SAML). After the user provides their UserID into the third-party IdP, the browser will redirect to HYPR to perform the web authentication. HYPR owns the login UX and functionality. This is the existing HYPR integration pattern with most third-party IdPs. This integration should only be considered if the workstations are joined to Active Directory and your organization has no intentions to migrate them to Entra cloud (either Hybrid Entra Joined or Entra Joined). If this is an option in the future or you already have workstations that fit this pattern, you must use HYPR Enterprise Passkey.
HYPR Enterprise Passkey
The HYPR Mobile App will act as an Enterprise Passkey and will integrate directly with Entra, just like a physical security key. After the user performs an initial pairing with HYPR, they are able to navigate to Microsoft’s self service portal My Sign-Ins, and register the HYPR Mobile App as a security key. Depending on your Entra tenant’s configuration, users will be able to authenticate to their Entra Joined workstations or Entra protected web applications. There is no redirection to HYPR, and the user’s login experience will be managed by Microsoft. This is the required option if any of your organization’s workstations are currently joined to or planning to be joined to your Entra cloud infrastructure.
Okta Options
These options require both Okta Admin Console Access and HYPR Control Center Admin access.
Okta OIDC via CC
Use Control Center to configure HYPR to authenticate users into the Okta application console. Okta OIDC integration can be used to enable HYPR Affirm and the generic HYPR Enterprise Passkey.
Okta Identity Engine (OIE) via CC
A Control Center integration using a static API token method to connect HYPR to OIE, allowing customization of authentication methods for each user.
Okta SAML Manual Installation
This is a manual integration using SAML settings and requiring direct assistance from HYPR Support (hosted) and Admin access to your KeyCloak server (on-premises).
Ping Options
These options require HYPR Control Center Admin access.
PingOne DaVinci
Control Center UI-enabled integration where HYPR authenticates users via an application in the PingOne DaVinci Admin Console.
PingFederate
Manually configure the HYPR Integration Kit to use PingFederate as an Identity Provider (IdP). HYPR provides an IdP Adapter which enables users to authenticate using OOB Authentication to the HYPR Mobile App via FIDO UAF or via direct FIDO2 Authentication and Password Credential Validator (PCV).
SIEM Options
Datadog Event Hooks
Splunk Event Hooks
Custom Event Hooks
Other Integration Options
Each one of these integrations creates artifacts on the IdP during the initial Add Integration process. HYPR leverages these artifacts to onboard users, and as part of the authentication process. Changing or removing any settings is a violation of HYPR's Support contract.
Integration Settings
Enabling the Integration
RADIUS integrations do not require this step.
Make sure the Domain Name Administrator role is added to the HYPR Service Account in Entra, or you will receive an error stating, "Insufficient privileges to complete the operation," when attempting to enable or disable the Integration.
This example uses Entra as the example integration. To enable the integration:
-
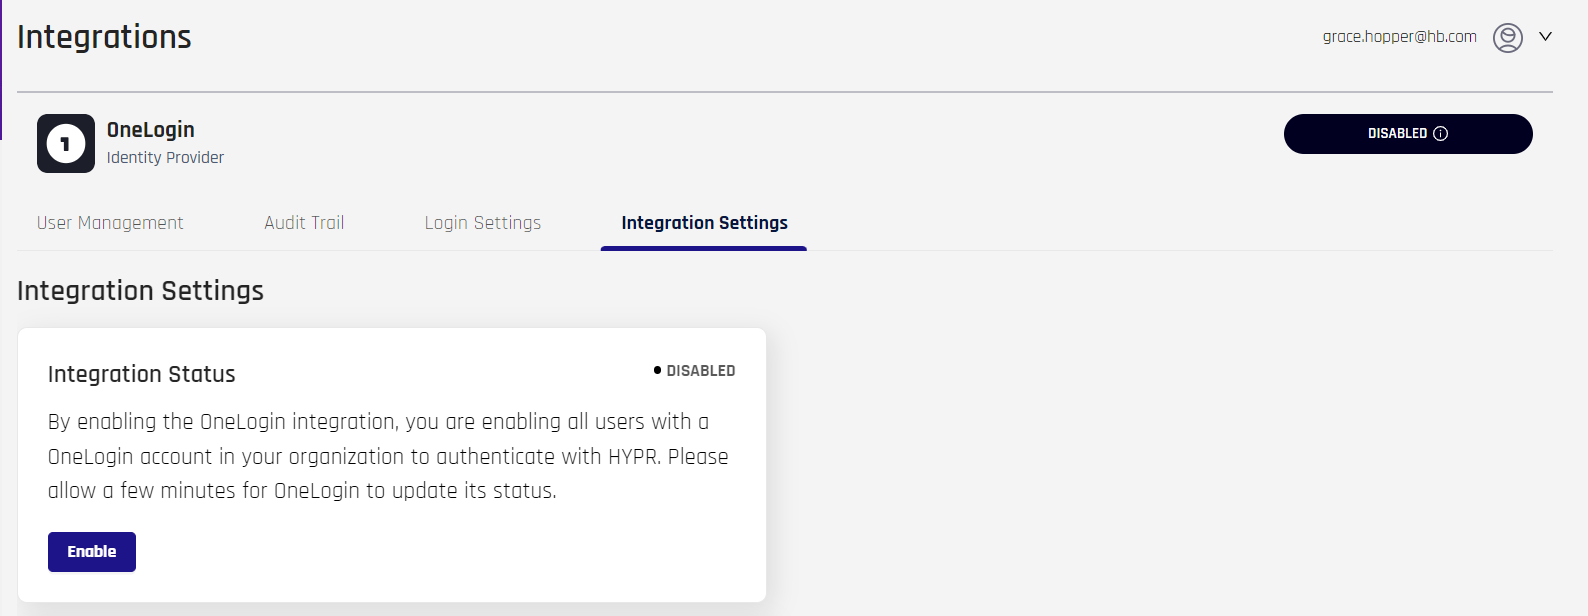
Go to the Current Integrations screen in the HYPR Control Center and click on the integration.
-
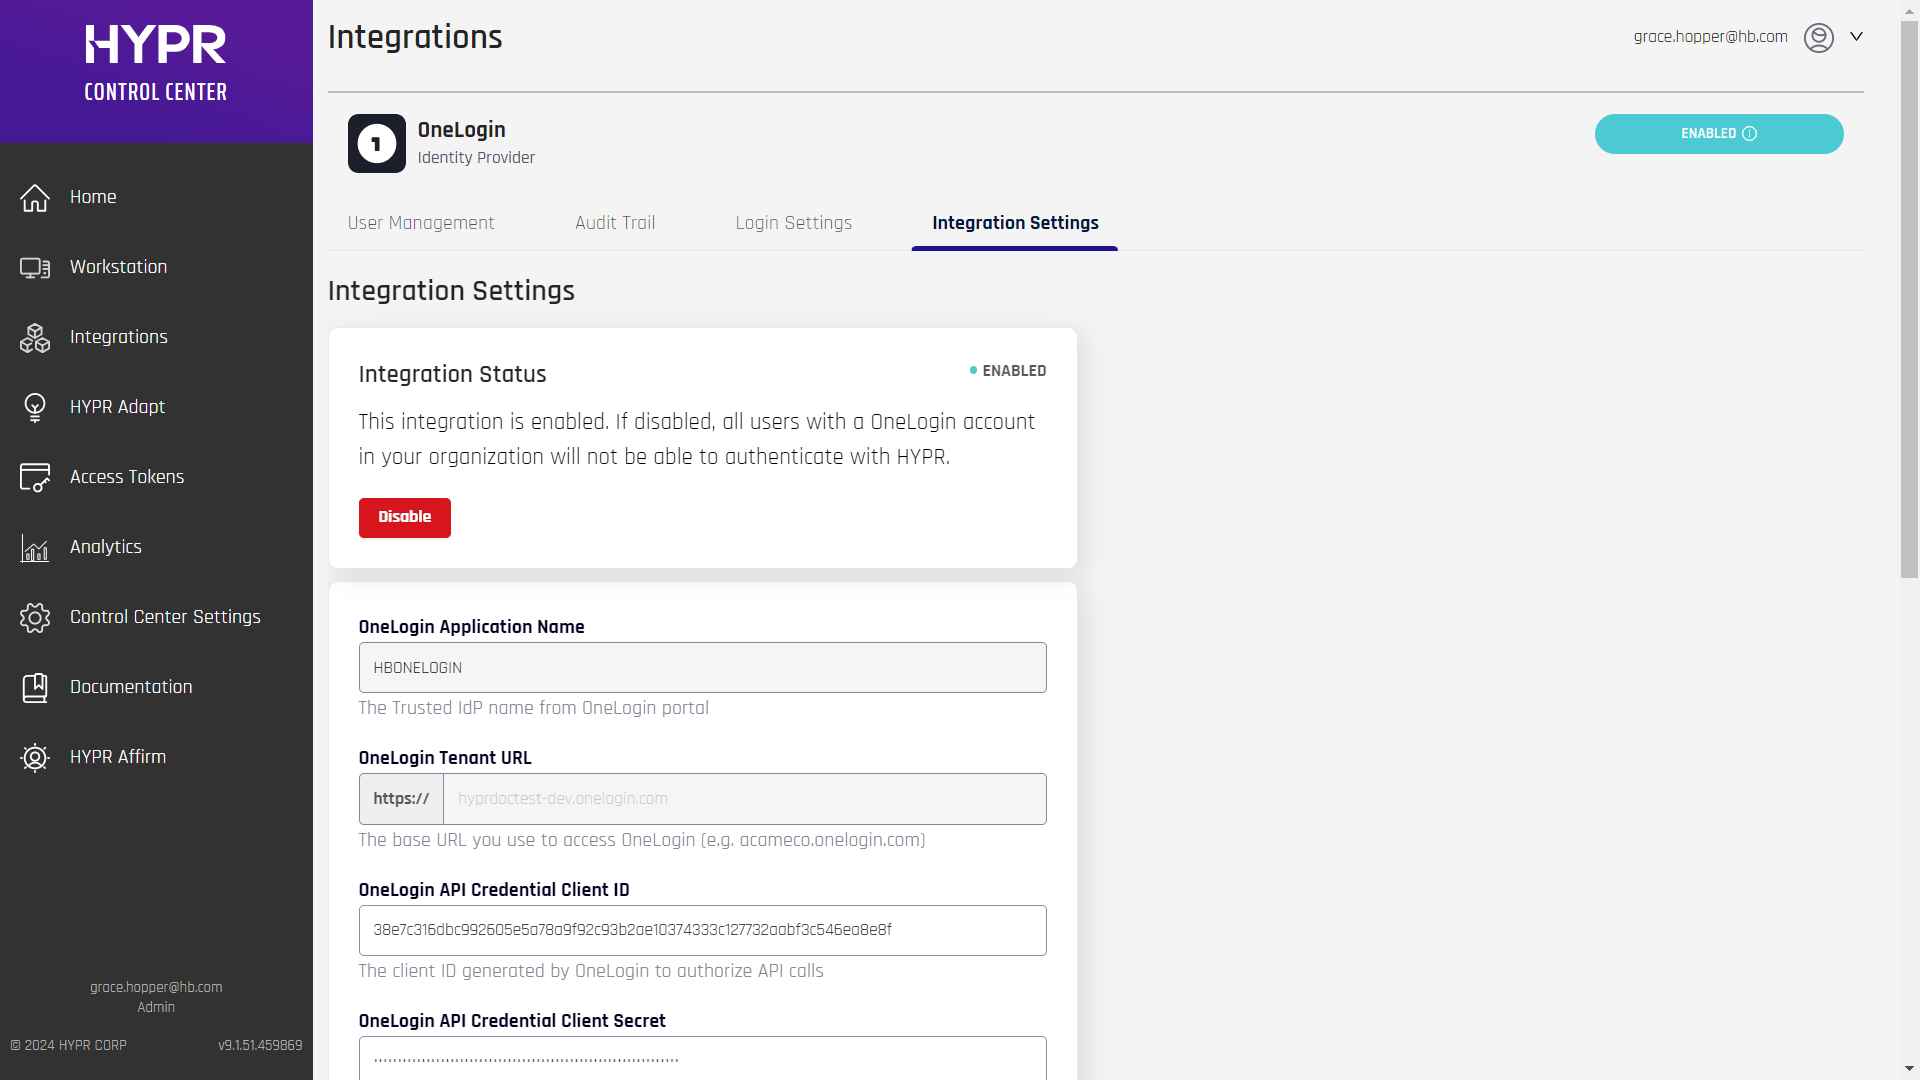
Go to the Integration Settings tab and click Enable in the Integration Status section.
-
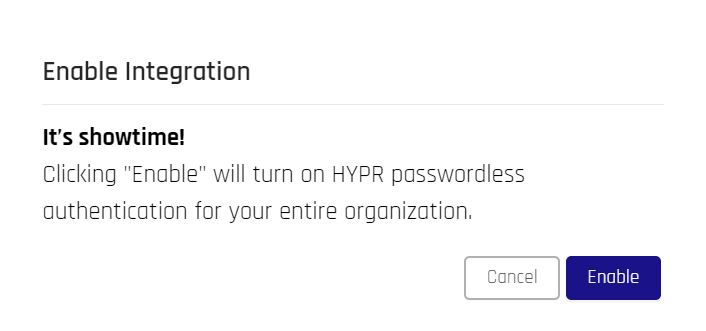
The Enable Integration dialog appears. Click Enable to continue or Cancel to go back.
-
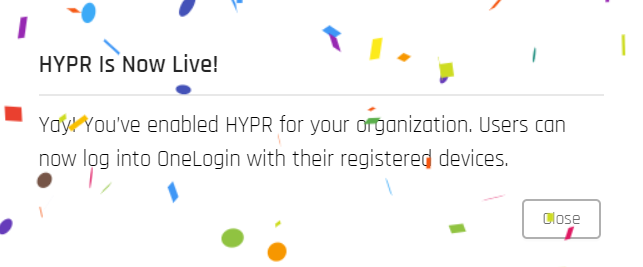
A success dialog displays. Click Close to return to Control Center Integrations.
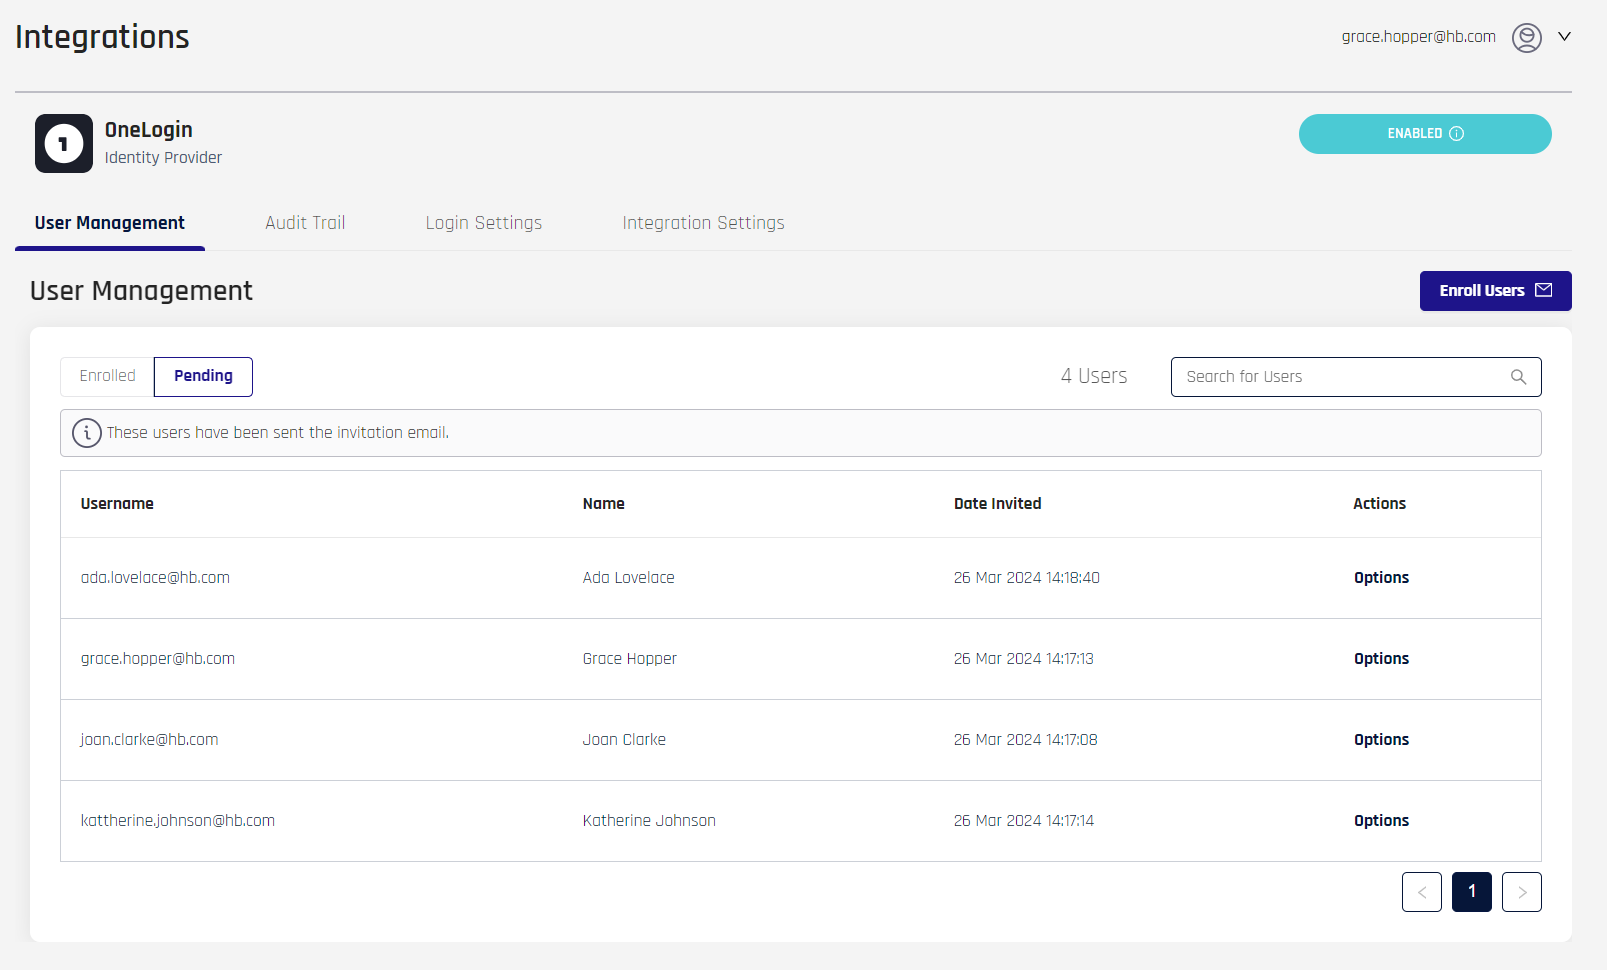
While the integration is enabled, the status indicator will change to say "Enabled" in the upper right the Identity Provider main page and under Integration Status.
To update the Integration Settings, make your changes, then click Update Integration to save the new configuration. You may be required to re-enter fields containing secret/sensitive information.
It is safe to update HYPR integrations in both Enabled/Live and Disabled modes.
Once you enable the integration, the IdP login flow will change for all enrolled users. Please review the What Will Happen in [Your IdP] section of the IdP-specific integration articles and make sure you’re ready to communicate the changes to your organization.
Disabling the Integration
If deploying the HYPR Native Experience, make sure the Domain Name Administrator role is added to the HYPR Service Account in Entra, or you will receive an error stating, "Insufficient privileges to complete the operation," when attempting to Enable or Disable the Integration.
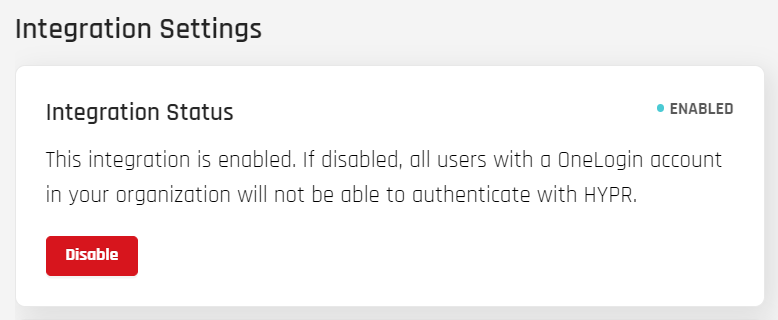
To temporarily deactivate an integration, open the Integration Settings page and click the Disable button under the Integration Status section.
Disabling the integration has the following effect:
-
The login flow for integration-based applications reverts to username + password
-
The Device Manager application is hidden on each user’s IdP home page where applicable
-
The Device Manager application no longer appears in the IdP Admin Console
The HYPR Control Center will remember which users were enrolled so you can reactivate the integration later if desired.
Before disabling the integration, please make sure the enrolled users are aware that they’ll no longer be able to use their mobile devices to login, and must know their password to access their IdP-based apps.
Deleting the Integration
If you want to permanently remove the integration, go to the Integration Settings page and click the Delete Integration button under the Delete [IdP] Integration section.

To confirm, you’ll need to type the integration name in all capital letters on the Verify Integration Deletion dialog, then click Delete Integration. _
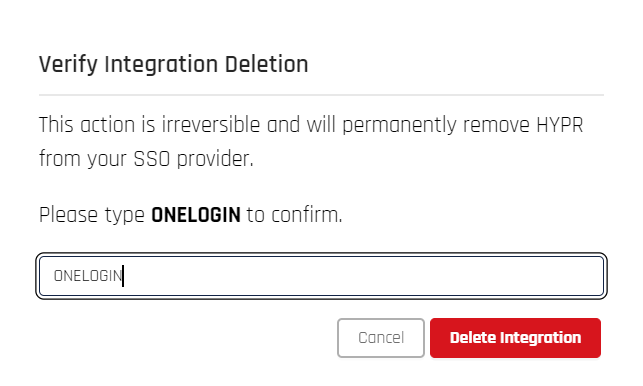
The effects of deleting the integration are the same as disabling it (see Disabling the Integration). However, deleting the integration will also clear the list of enrolled users in the HYPR Control Center. If you decide to add the integration again later, you’ll need to re-enroll your users from scratch.
User Management
The user interface for HYPR Enterprise Passkey User Management is significantly different than for other HYPR integrations. See Entra: HYPR Enterprise Passkey: User Management for HYPR Enterprise Passkey.
Enrolling Users
When new hires join your company, you’ll need to invite them to enroll so they can use passwordless logins with IdP-integrated applications. For each user you want to enroll, you’ll need a valid email address. The enrollment invitation will be sent to this address, so it needs to be one they can access. It can be a corporate or personal email address.
If you are enrolling users with HYPR Enterprise Passkeys, the process is slightly different than described here. See Entra: HYPR Enterprise Passkeys for specific enrollment instructions.
Even though the invitation email may be sent to the user’s personal email address, they’ll be enrolled using their corporate email account.
-
Go to the Integrations screen in the HYPR Control Center and click the integration.
-
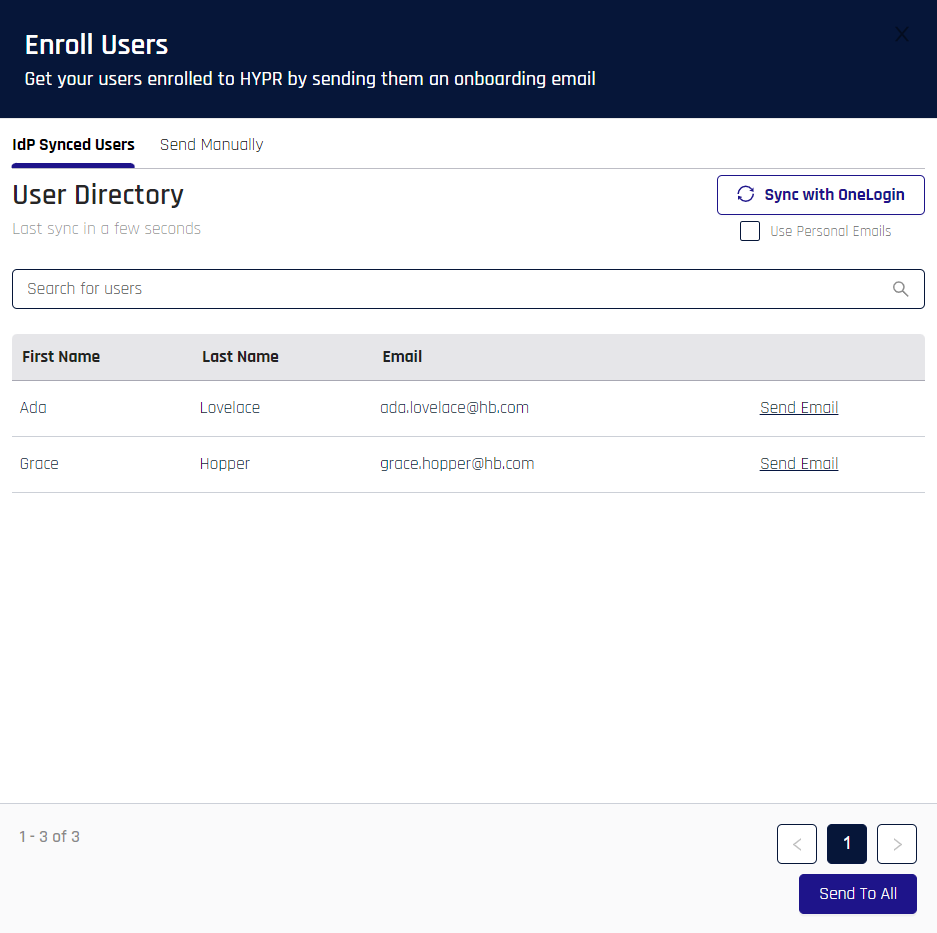
Go to the User Management tab and click Enroll Users. The Enroll Users drawer opens from the right, defaulting to the IdP Synced Users tab, which shows a list of IdP-based users and their email addresses.
No SyncThe Enroll Users drawer for the PingOne DaVinci and **RADIUS ** integrations does not use IdP Synced Users, nor does it include the option to Sync Users; instead it will only display the Send Manually tab and the option to Upload a CSV.
-
If you do not see all the users you expect to see, click Sync with [IdP] to refresh the list. If they still do not appear, verify their app assignments and permissions in the IdP, then sync again.
-
You have a few options for sending Magic Link emails:
-
On the IdP Synced Users tab:
-
Send To All: Located at the bottom of the Enroll Users drawer; when clicked, it opens a confirmation dialog. Click Send Enrollment Emails and every user on the list will receive a Magic Link in their inbox.
-
Send Email: Sends a Magic Link email to the address shown in the list. Once clicked, this link will change to a green Sent! indicator.
-
Use Personal Emails: If checked, the Send Email links turn into Enter Email links and Send To All greys out. When clicked, Enter Email opens a dialog to enter the personal email of the user. When you have entered it, click Send Enrollment Email to send a Magic Link to the user's personal email address.
-
-
- On the Send Manually tab:
-
Send To An Individual: For singular email delivery, complete the fields and click Send at the bottom right.
-
If Use the email address as the users's username is not checked, you must provide the Username separately; if it is checked, the Username field will not be displayed
-
Clicking Enable Audit Trail Access will grant the user the ability to see the Audit Trail; the Admin role will automatically have Audit Trail access
-
-
Upload CSV: Clicking this link opens the Send in Bulk dialog. Click Download Template to obtain the preformatted
.csvfile and add user data; each user must have information in the following fields: email, username, firstName, lastName. Make sure there are no extraneous extra lines at the end. When you have finished adding user data, save the file and drag it into the Upload CSV drop zone. If it has been formatted properly, a list of users will populate the Enrollment Drawer. Click Send to deliver Magic Links to all the email addresses in the file.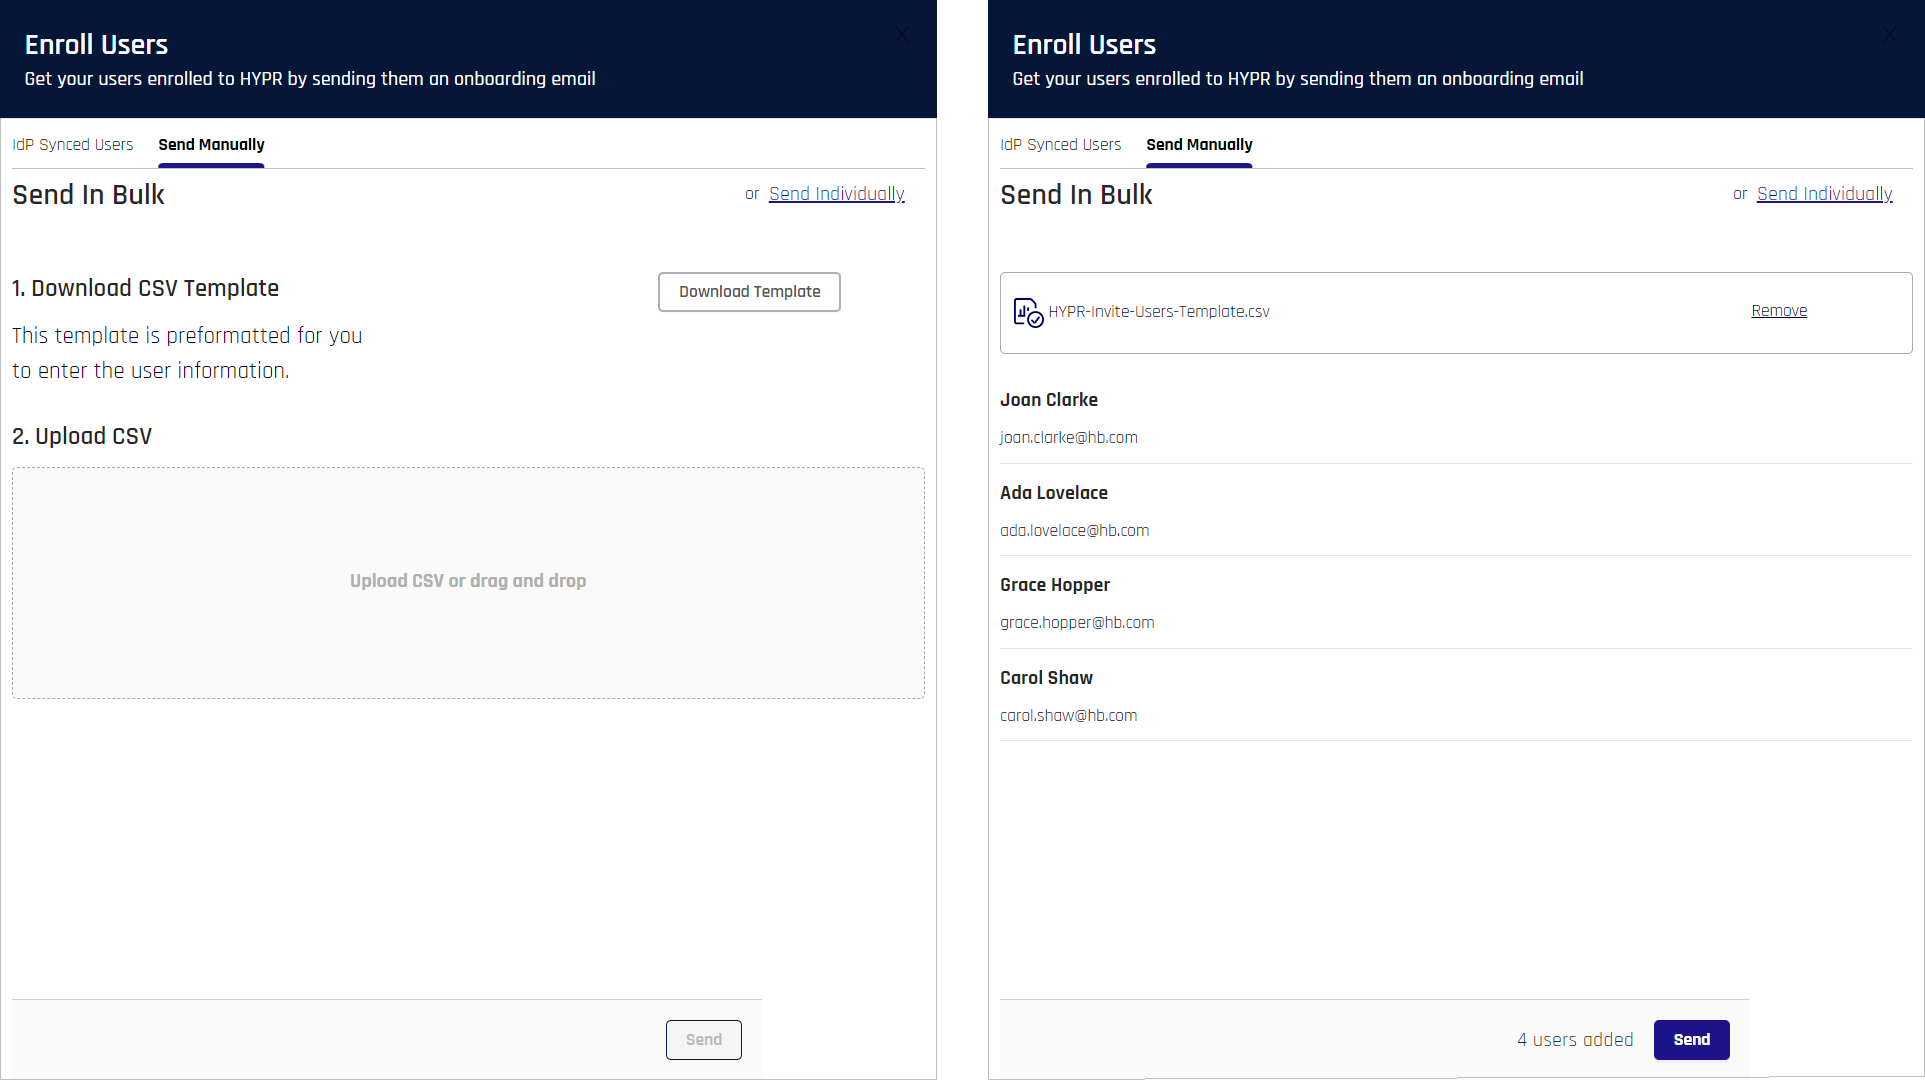
-
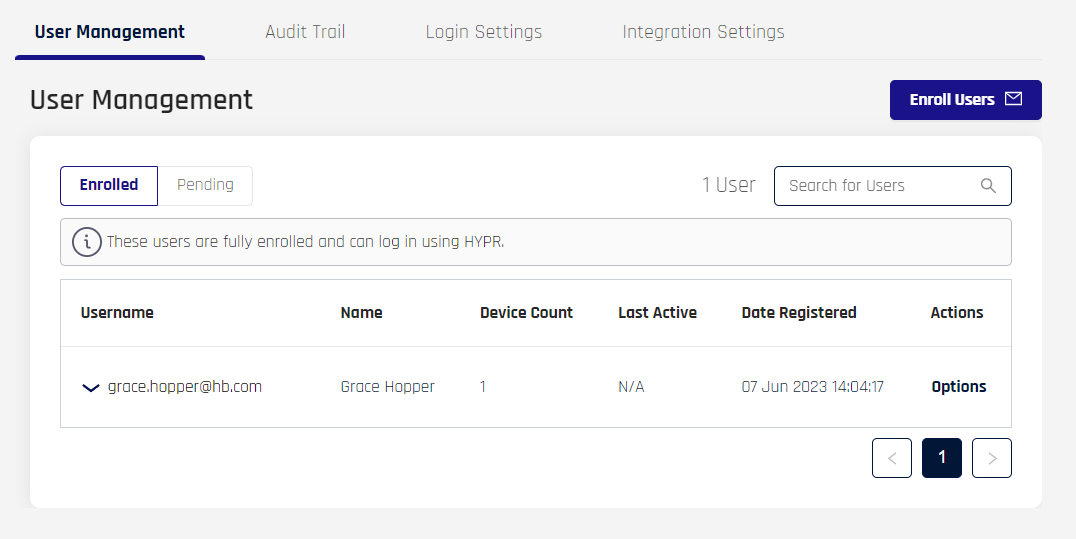
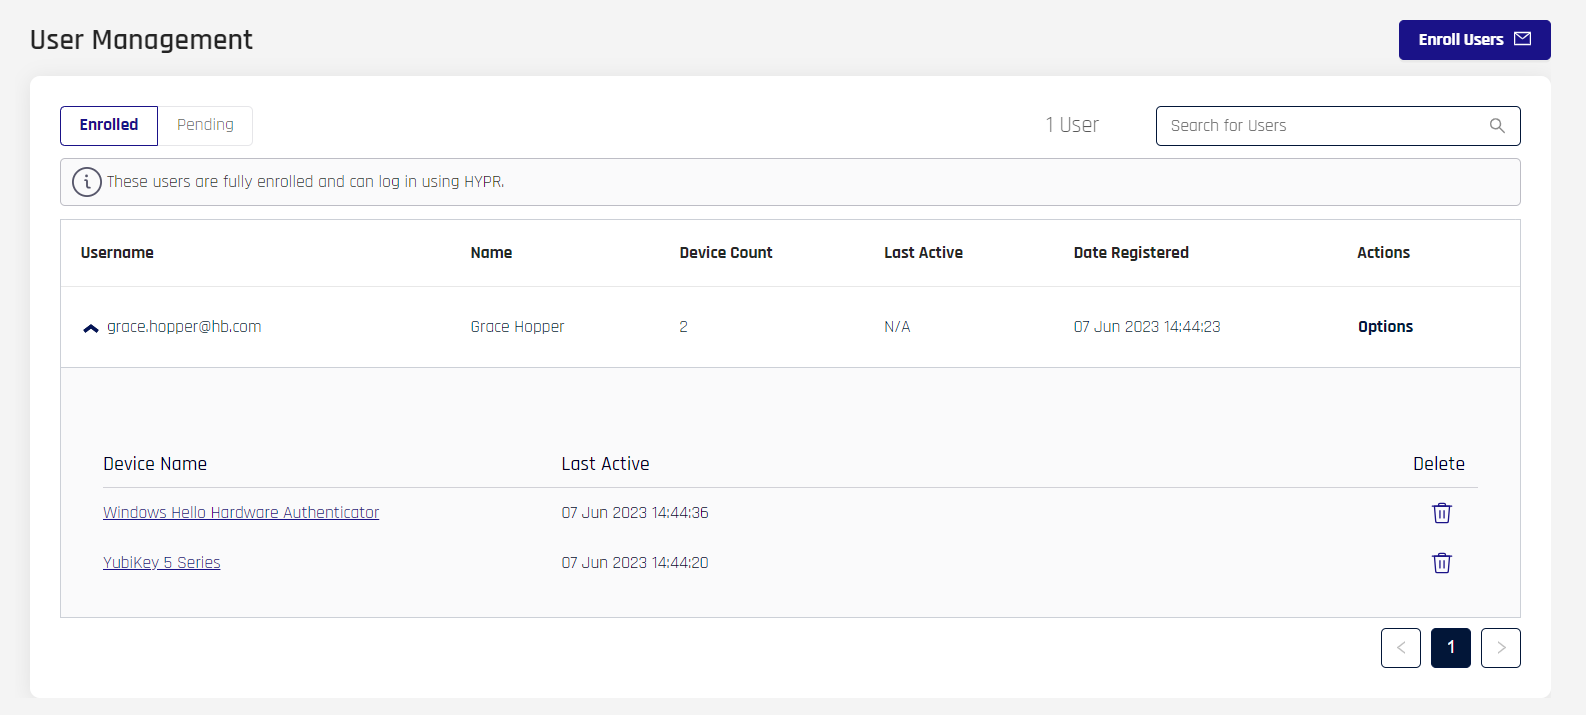
The User Management pane displays a list of Enrolled user or Pending users. Select the list you wish to view by clicking the appropriate tab just under the title. The information displayed beneath each is the same, though the Options menus differ. Pending users have been invited, but have not yet paired any devices, while Enrolled users have paired at least one device with the Integration.
| Column | Description |
|---|---|
| Username | The username provided for the user; typically an email address. |
| Name | The full name of the user. |
| Device Count | The number of devices the user has registered with this Application. |
| Last Active | The last successful login. |
| Date Registered | The date of initial enrollment. |
| Actions | The following options appear on hovering over Actions. Click the link to jump to the action's description below. Send Invite via Personal Email Pending will show Resend Invite Enrolled will show Send Login Recovery Generate Magic Link Delete User |
In the Enrolled tab, each Username entry also has a drop-down chevron to the left of the entry. Clicking anywhere in the row will expand the user entry to display a table of devices attached to the user. Here you have the option to drill into the Device Name, or to delete the device using the trash can icon.
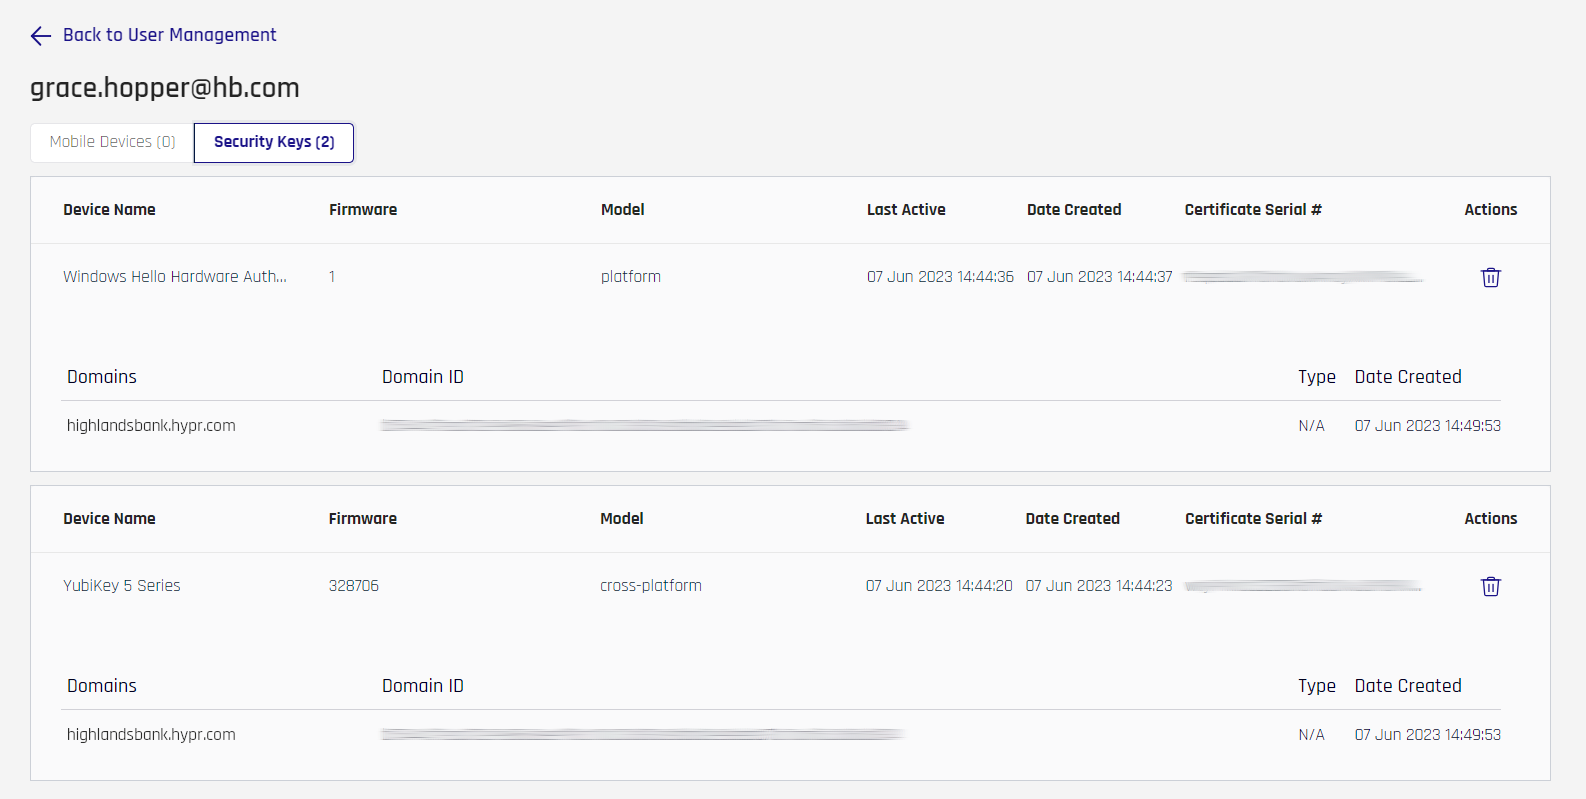
User Device Details
Clicking the device name opens the device details for the user, sorted at the top in tabs for Mobile Devices and Security Keys.
| Column | Description |
|---|---|
| Device Name | The self-identified name of the security key. |
| Firmware | The firmware version of the security key. |
| Model | cross-platform: A key not bound to a device; typically a security key platform: A key bound to a device; typically a device biometric |
| Last Active | The last time this method was used to login. |
| Date Created | When the pairing was created. |
| Certificate Serial # | A unique number to help identify the certificate. |
| Actions | Delete the device by clicking the trash can icon. |
User Actions
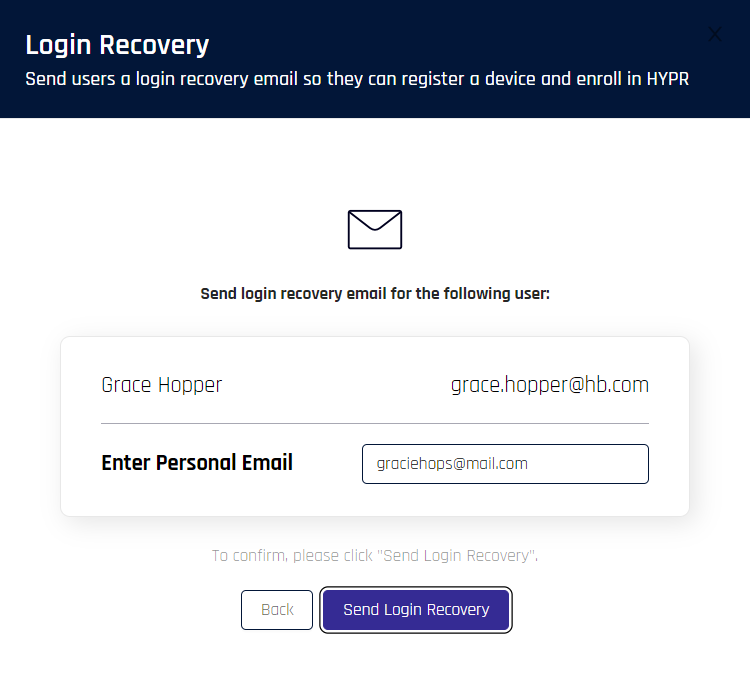
Send Invite via Personal Email
Choosing this option from the user Actions column will open the Login Recovery dialog. To use a personal email address to invite this user:
-
Enter Personal Email, and then click Send Login Recovery.
-
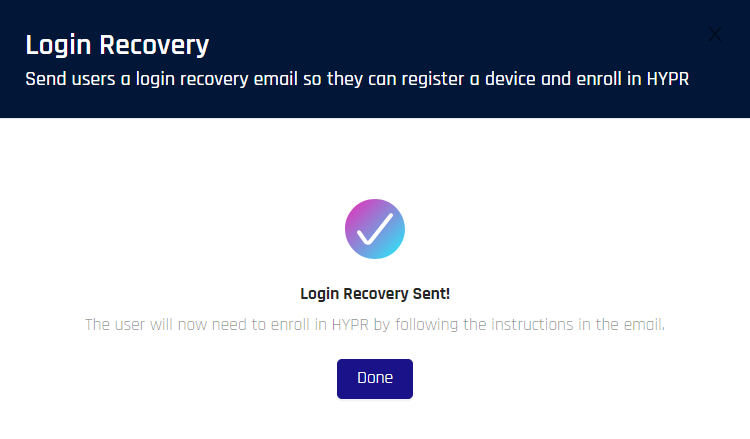
A confirmation displays. Click Done to return to the User Management pane.
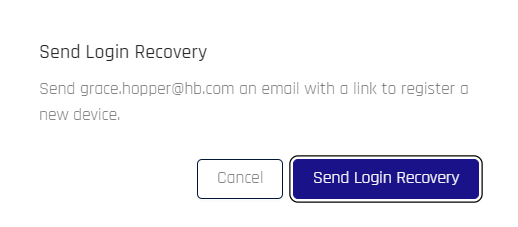
Resend Invite/Send Login Recovery
When either of these option is selected, a confirmation appears. Click Send Login Recovery, then clear the confirmation that appears in the lower right corner of CC. An email is automatically send to the address shown in the dialog text, and you are returned to the User Management pane.
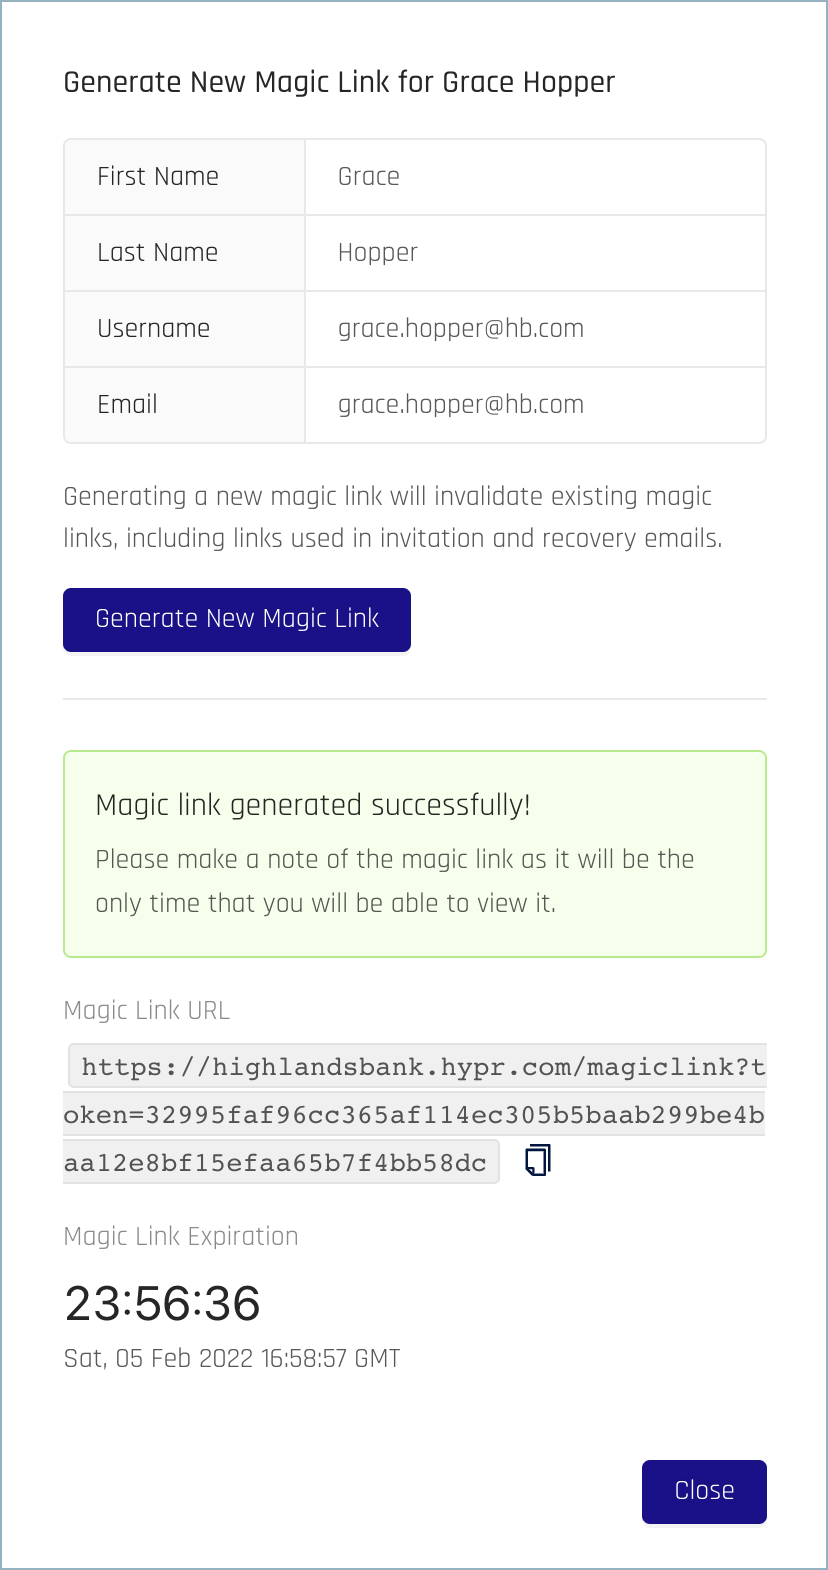
Generating a Magic Link
Magic Links work the same way as the links included in the auto-created email invitations. To generate a Magic Link for a specific user, complete these steps:
-
Go to the Pending list.
-
Locate the user you want to invite again. Click Options in the Action column.
-
Click Generate Magic Link. You’ll see a warning message telling you other Magic Links will be invalidated. Generally this behavior doesn’t cause a problem. Magic Links are unique to each user, so only links that were created previously for this user will be affected.
-
Click Generate New Magic Link.
-
Copy the link and send it to the user, for example through a separate email or other communication channel. They use it the same way they would use the link sent through the original enrollment process. Note, however, that Magic Links can only be used one time and also expire in 24 hours.
-
Click Close.
Delete User
Users can be deleted from either the Enrolled or the Pending list in the same fashion. If deleted from the _Pending _ list, their invitation will be invalidated.
To delete a user:
-
Locate the user you want to remove.
-
Click Options in the Action column.
-
Click Delete User.
-
In the confirmation screen, click Delete User.
In neither case are you removing the user from your IdP domain; you’re removing only their ability to complete the IdP login with HYPR passwordless authentication. If they could login before with a password, they’ll still be able to do so now.
Unpaired Users
Users who are Enrolled who unpair their devices will be moved to the Pending tab of User Management; a warning icon appears next to the Email field. Hovering over the icon, the text appears, "This user unpaired from HYPR."
What Users Do to Enroll
The user enrollment experience with HYPR Enterprise Passkey is explained under Entra: HYPR Enterprise Passkey.
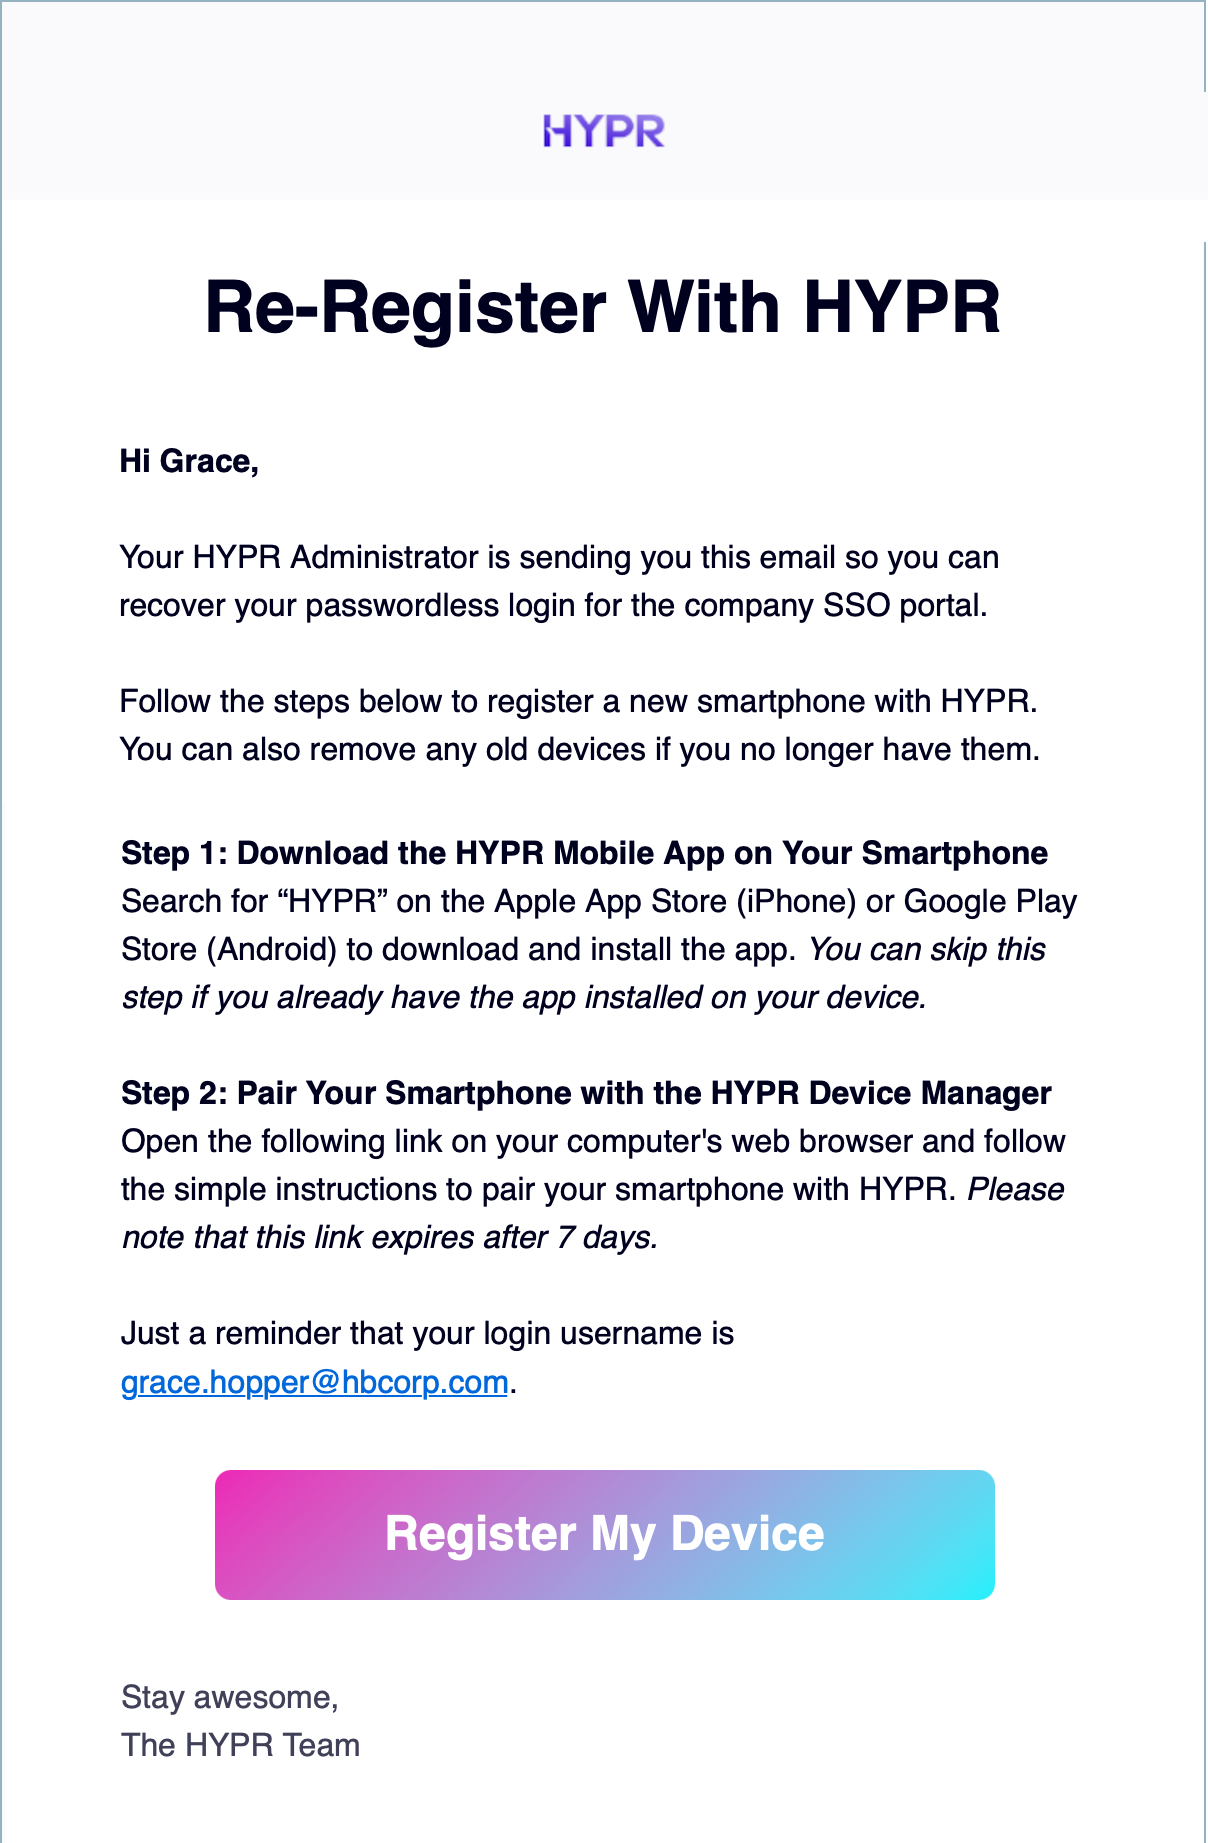
Users will receive an enrollment invitation via an email similar to the one below.
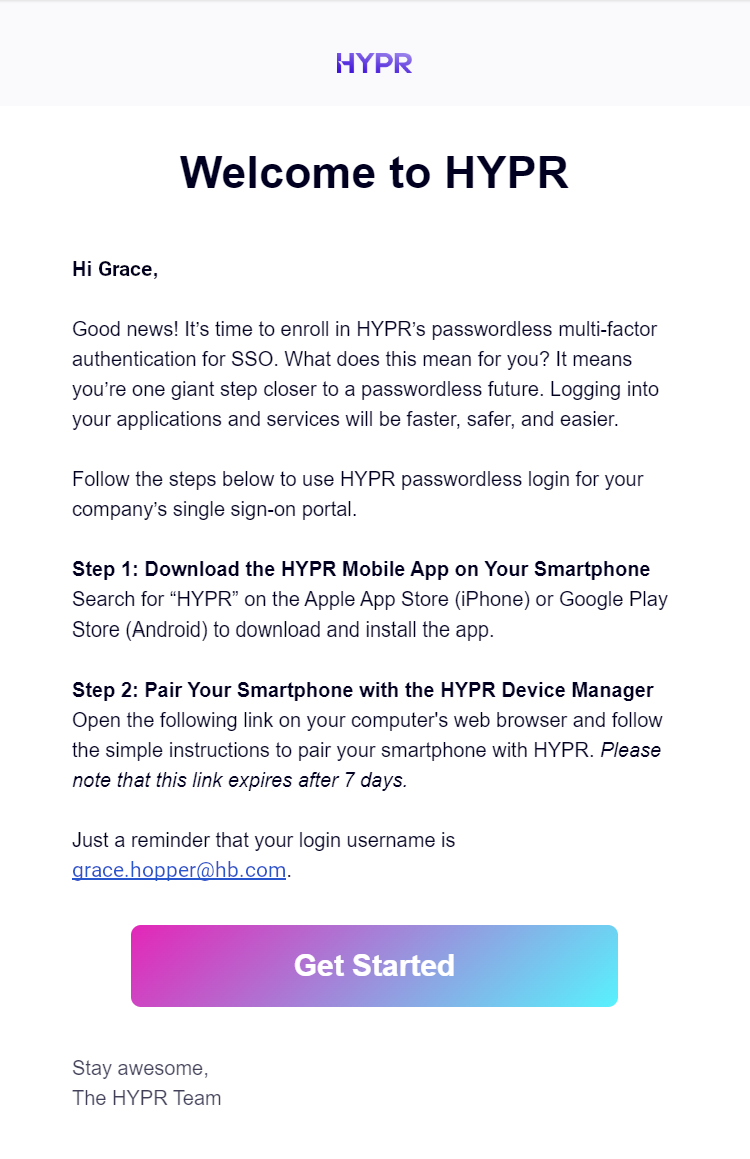
Users click the Get Started link to finish enrollment. The link takes them to the HYPR Device Manager where they choose the device they want to use to perform passwordless login for their IdP applications.
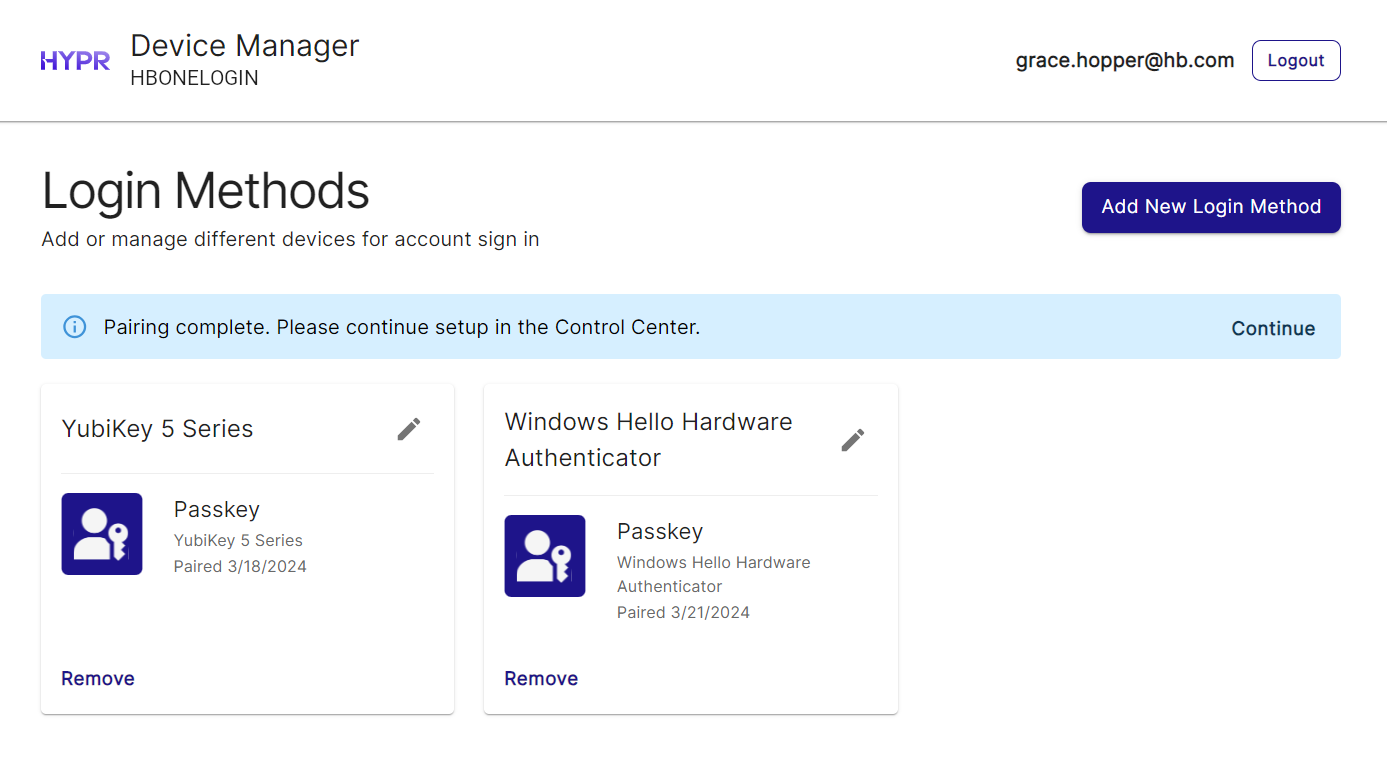
If Smartphone or HYPR Mobile App is the only option that appears and you want to allow security keys, you must configure the FIDO2 settings for the integration so this extra option appears. See Allowing the Use of FIDO2 Authenticators.
Users select the type of device they want, then pair the device following the on-screen instructions. (The process is similar to pairing a device with the Passwordless client for a workstation login; see Device Manager for steps on adding and removing devices.)
After you activate the integration, the next time your users login, they’ll see the new passwordless login option.
Changing the Device Used for IdP Logins
Currently, users of the HYPR Integrations don’t have self-service access to the HYPR Device Manager after their initial device registration. Users who want to add another device for logging in, or who need to unpair an existing device, will need to ask a Control Center admin to send them a new enrollment invite granting them one-time access to the Device Manager.
Audit Trail
You can view user and system activity--both related to the integration and general activity--through the Audit Trail feature. For example, you can see whether specific users have successfully enrolled or check the date and time an integration went live. HYPR Support may also ask you to verify activities or events by looking at the Audit Trail.
-
Go to the Integrations screen in the HYPR Control Center and click the integration.
-
Go to the Audit Trail tab.
-
Use the calendar field to specify the time period you want to view.
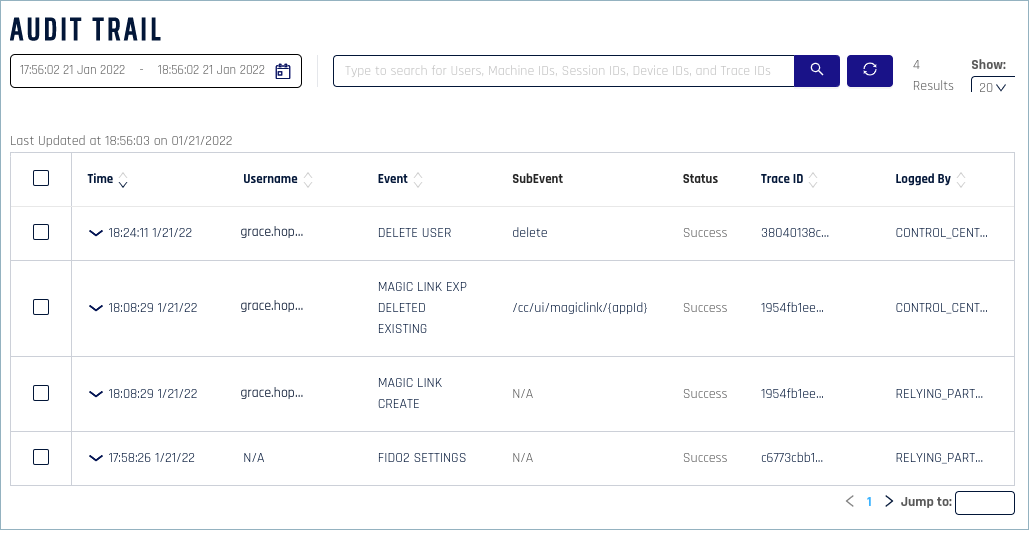
A single activity can sometimes generate several Audit Trail Events. In this case, the value in the Trace ID column will be the same, letting you see which Events come from the same activity. In the image above, for example, the two Events related to Magic Link creation have the same trace ID.
To see detailed information on a specific Event, click the down arrow next to the timestamp.
To export detailed information on all or selected Events, check one or more boxes in the left column, then click Export Selected. The content is downloaded to your local machine as a
.csvfile.
Login Settings
Allowing the Use of FIDO2 Authenticators
FIDO2 is a set of standards defining the use of mechanisms such as security keys and biometric recognition in multifactor authentication. By default, the only mechanism your users can choose for logging into the integration is a mobile device. If you would like them to be able to login with a security key, or through biometric recognition on their computer (Touch ID for Mac or Windows Hello, for example), you must enable FIDO2 settings for the integration.
RADIUS does not support FIDO2 authentication. If you are using FIDO2 with a Shared RADIUS integration, FIDO2 settings will apply for non-RADIUS users only.
To enable the use of security keys for integration logins:
-
Open Integrations in the HYPR Control Center and click the desired integration.
-
Select the Login Settings tab.
-
Configure the FIDO2 Settings as described in Control Center Settings: FIDO2 Settings.
-
Click Save.
The FIDO2 Settings Client Origin URL value must be all lowercase. If users are unable to pair FIDO2-based devices successfully, check that this URL does not contain any uppercase characters.
Frequently Asked Questions
Q: Should I enroll users before or after I make the integration live?
A: Users can be enrolled at any time, individually or in bulk, sending to either corporate or personal email addresses.
Q: What happens if users lose their mobile devices?
A: Users who no longer have access to a registered device will be unable to login until they register a new device. You’ll need to either send a login recovery email to their personal email address or generate a Magic Link that they can use to register a device. Both these options are available via the Enrolled list on the User Management pane.
Q: Why do users see an invalid link message when trying to register a device using a Magic Link?
A: For security purposes, you can ask HYPR Support to configure your Magic Links to only work once. However, if single use is turned on and you send the Magic Link to the user via a messaging app or other channel that attempts to preview the URL, the Control Center interprets the HTTP request as a registration event and will expire the link before the user has a chance to register. If this is the case, either send the Magic Link using a different method or format it in such a way that the app doesn’t attempt to generate a preview.