Entra-only Administrator Setup
Use this guide if your environment is cloud-first with Entra-joined Windows devices and does not require on-premises PKI.
Overview
An Entra-only setup means your Windows devices are joined directly to Microsoft Entra ID (formerly Azure AD), with no dependency on on-premises Active Directory. This enables modern authentication, seamless SSO, and passwordless options like Enterprise Passkey or FIDO2 security keys.
Key Benefits:
- No on-premises infrastructure required
- Simplified device management and onboarding
- Full support for passwordless authentication and conditional access
Important: The Enterprise Passkey/HYPR integration steps are identical for both Entra-only and Hybrid environments. This guide focuses on the Entra-only device join process. After completing device join, proceed to the Administrator Configuration guide for common HYPR/Entra integration steps.
For more information, see Device identity overview.
Prerequisites (Entra-only)
- Microsoft Entra ID tenant with at least one verified custom domain
- Global Administrator account in Entra ID
- Windows 10 (version 1709+) or Windows 11 devices
- Network connectivity to Microsoft cloud endpoints
- HYPR Control Center™ access with appropriate permissions
- Mobile devices for end users (iOS/Android) with HYPR One™ installed, biometrics enabled, camera and proximity permitted
- Optional: Microsoft Intune for device management and policy deployment
- Optional: Intune licenses for enabling FIDO2 security key login on Windows workstations
Workstation requirements (Entra-only)
- Operating System: Windows 10/11 (macOS not yet supported)
- Join Status: Entra-joined devices (cloud-only; no on-premises AD required)
- HYPR Passwordless Version: HYPR Passwordless for Windows™ 10.5.0+ recommended
- Patch Level: Meet Windows OS patch level requirements
- Account Type: Sign-in with an Entra account (e.g.,
user@domain.com) - MDM Considerations: Ensure MDM does not block passkey providers, Bluetooth proximity, camera access, or associated domains
References:
Create or Access Existing Entra ID Tenant
Creating a New Entra ID Tenant from an Azure Environment
If you have a production environment, you can follow this guide to set up a test environment where you can try out the HYPR platform and Enterprise Passkey before deploying to your production environment.
You need an existing Azure account with the ability to manage tenants. This is required so that you can create a new tenant to test HYPR without doing so in your main production tenant.
-
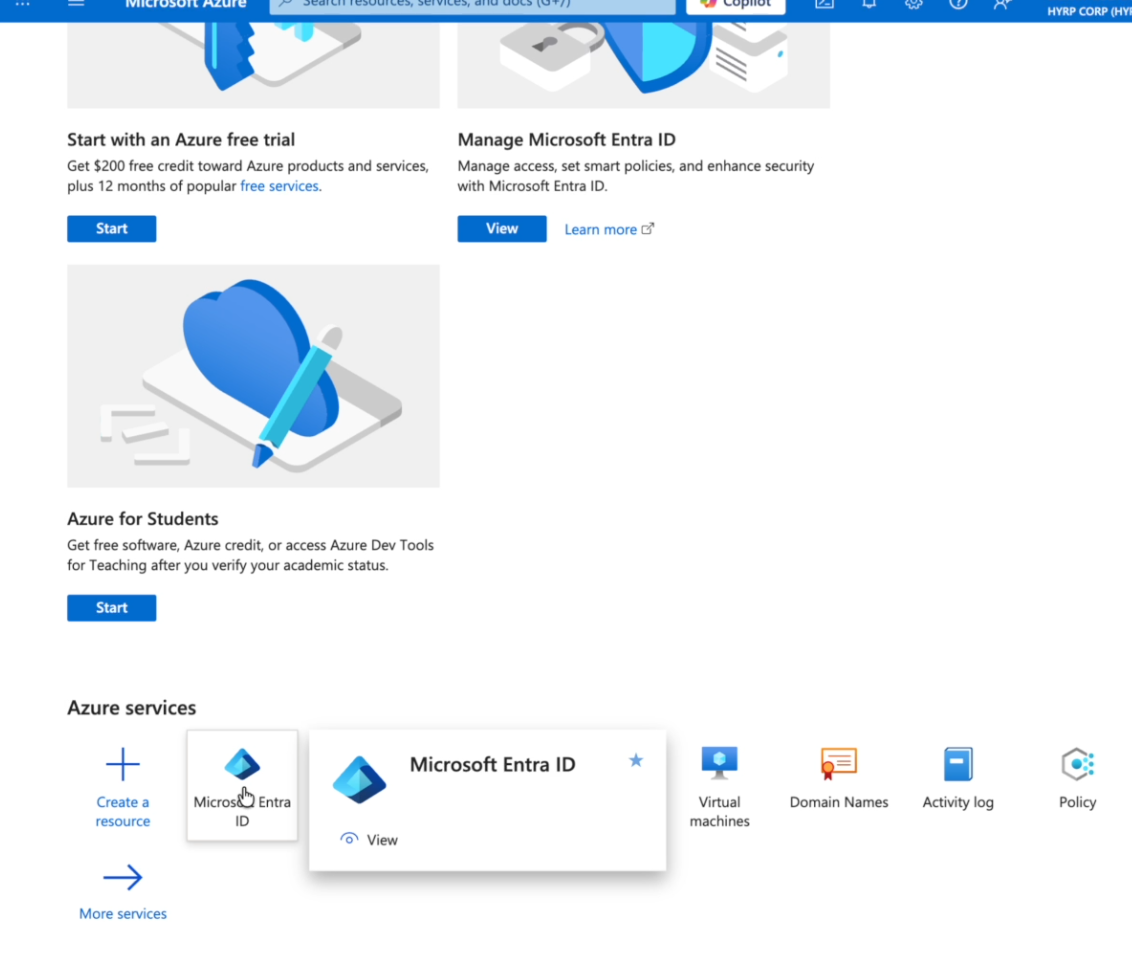
Access Azure Portal
- Navigate to portal.azure.com
- Sign in with an account that is able to manage tenants
-
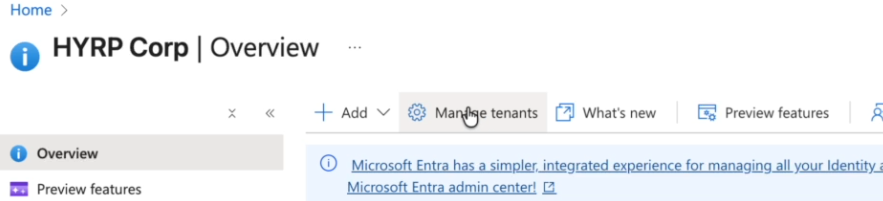
Navigate to Entra ID
-
Go to Azure services and select Microsoft Entra ID
-
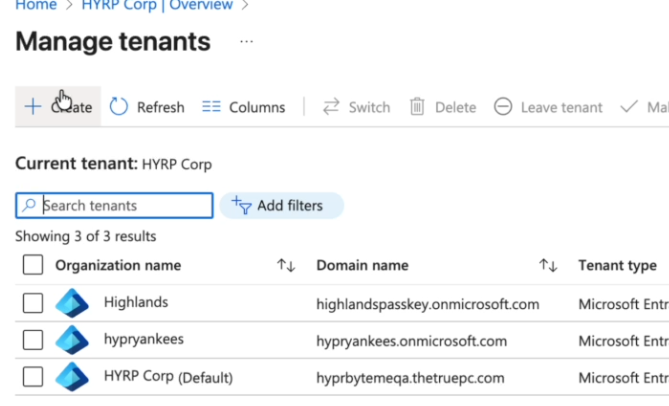
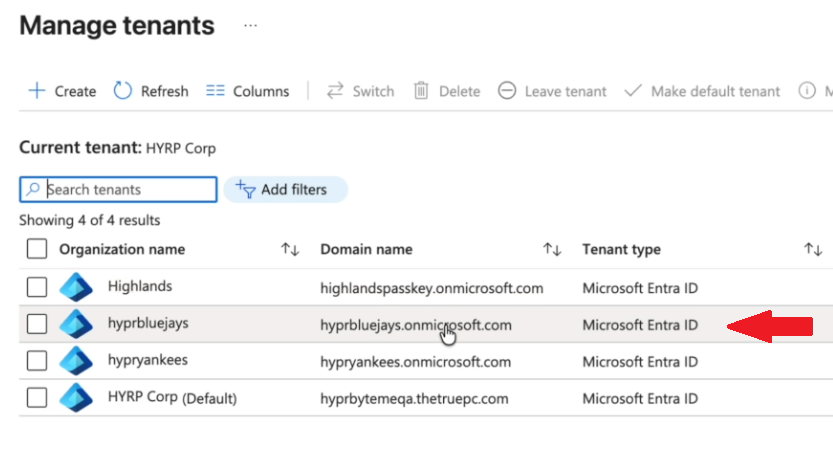
Click Manage tenants to view the available tenants
-
-
Create New Tenant
-
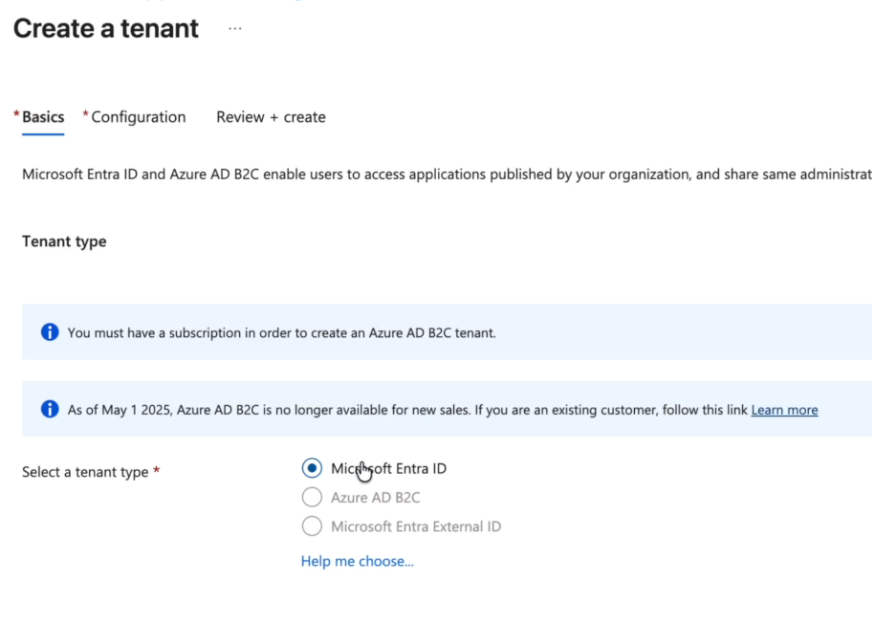
Click Create, select Microsoft Entra ID, and click Next.
-
Configure tenant details:
- Name: Choose a descriptive name
- Domain: Use the default
.onmicrosoft.comdomain - Country/Region: Select your region
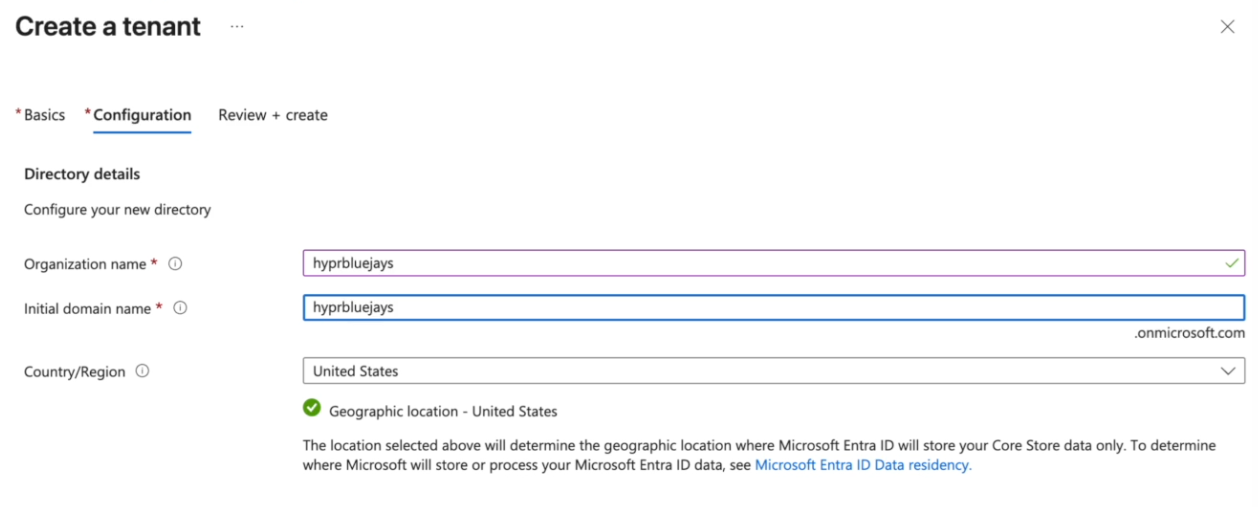
-
Click Next and then Create
-
Complete the "Prove you're not a robot" verification (if required) and wait for the tenant to be created
-
-
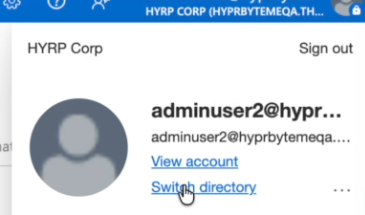
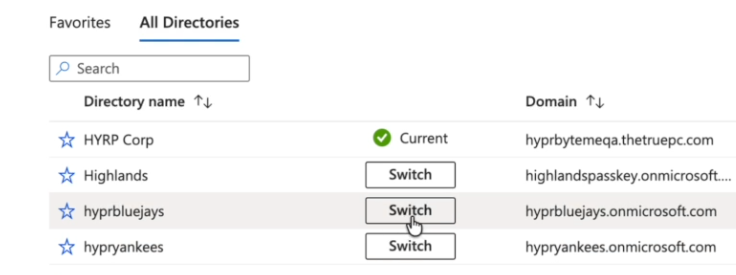
Switch to New Tenant
-
Click on your profile icon in the upper right corner of the screen and use the directory switcher to switch to your new tenant
-
Complete multi-factor authentication setup if prompted
-
Once you have switched to the new tenant, you can continue with the steps below to apply the configuration required by HYPR
-
-
Create Test Users
-
Navigate to Users > All users
-
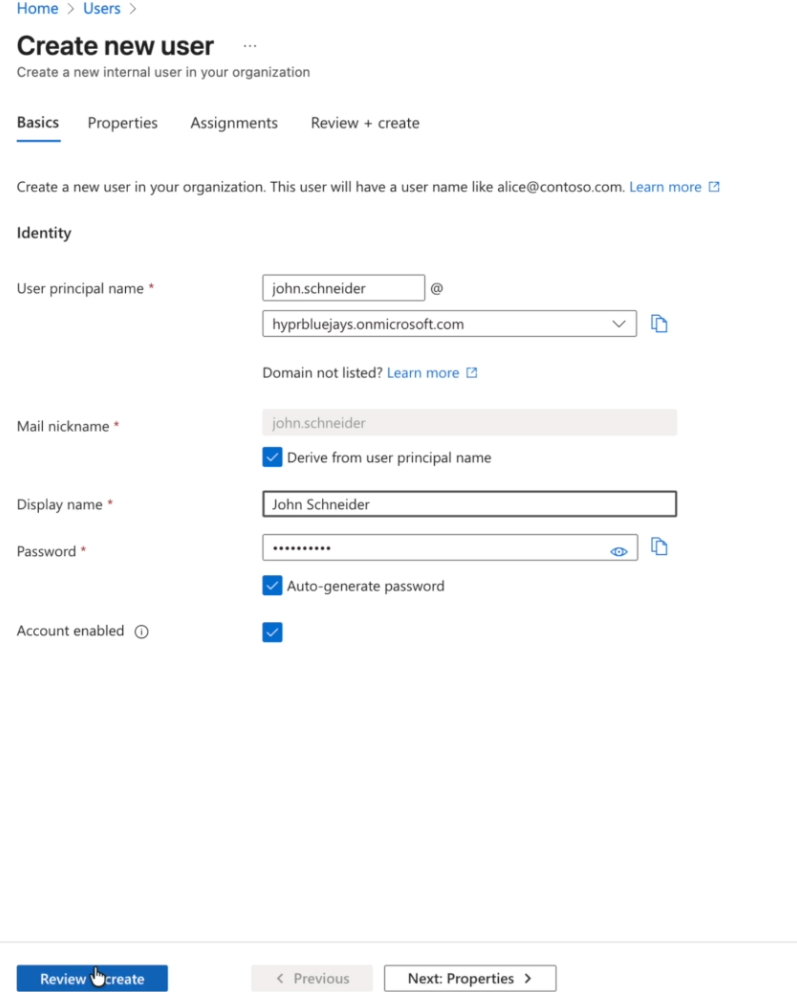
Create new users for testing:
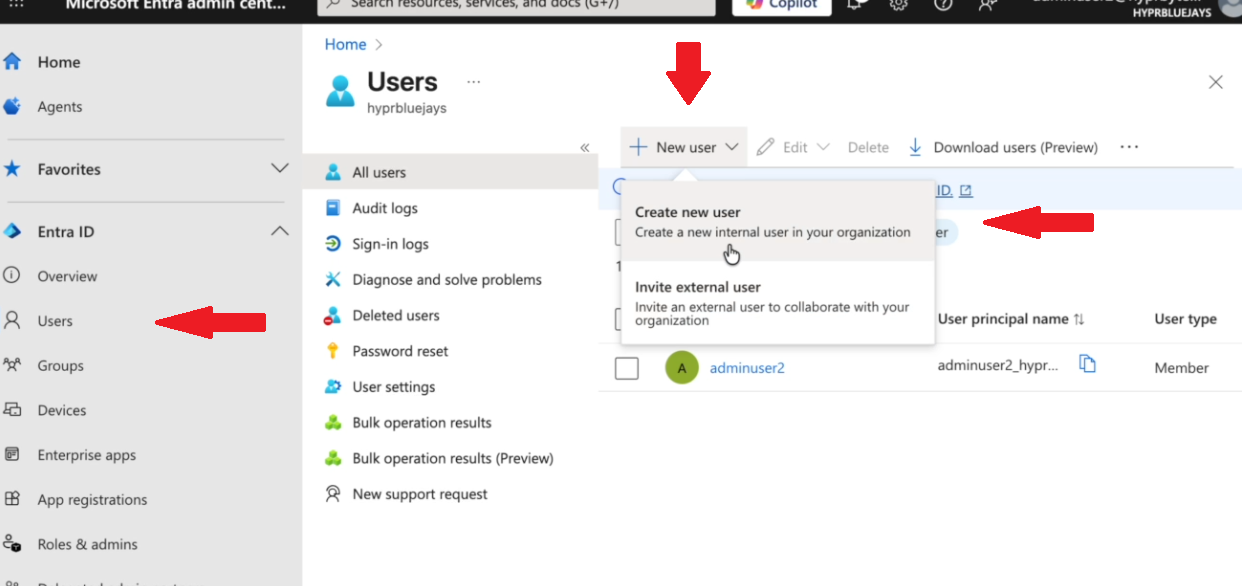
- Admin account: For administrating the tenant and setting up HYPR
- User account: For end-user testing
-
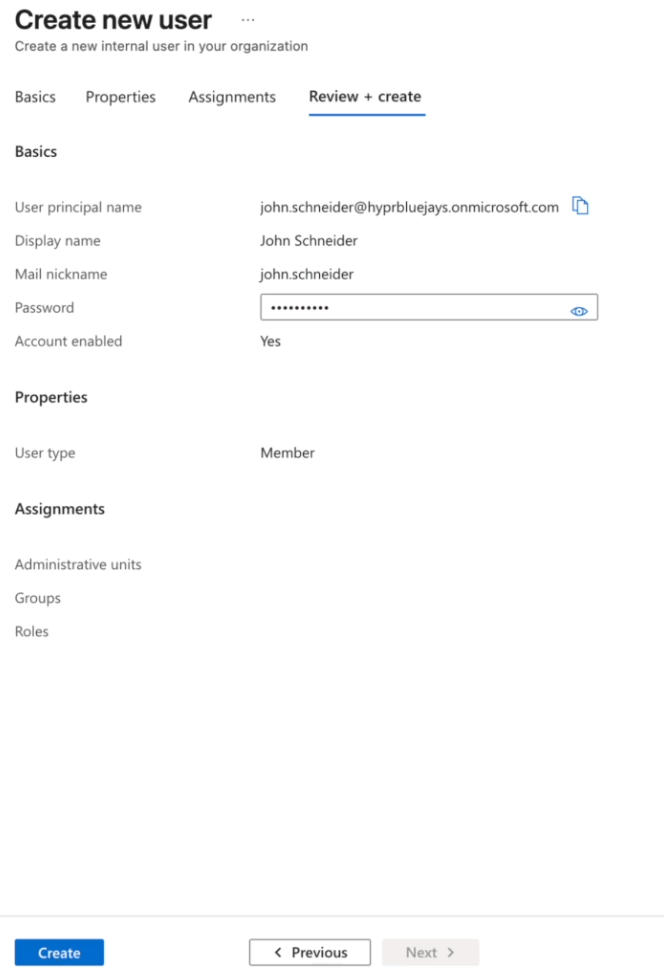
Specify information for each user and create them
-
Note the usernames and set up temporary passwords; make sure to take note of the passwords as they are required to log into the account
-
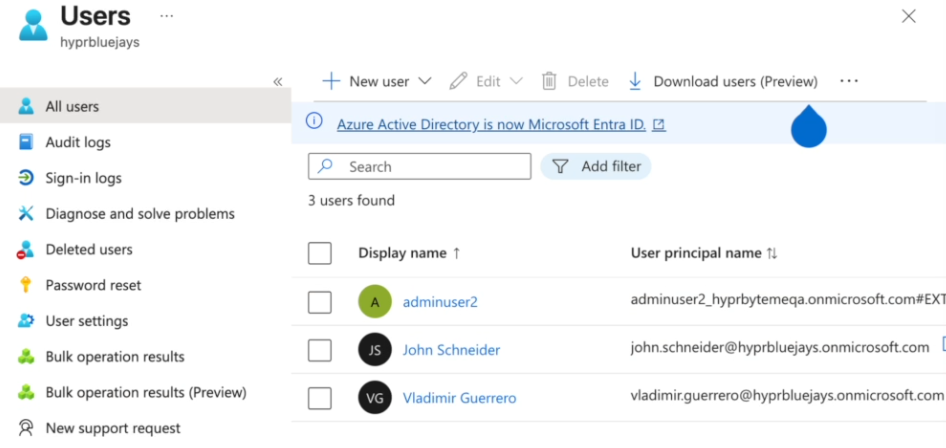
Refresh the users list until you see your new users
-
You have now created a usable test environment separate from your production tenant, allowing you to safely test the HYPR Enterprise Passkey integration without affecting your main environment. The admin user gets created by default as an extension of your Azure portal.
Add and Verify Your Custom Domain in Entra ID
- Go to the Microsoft Entra admin center.
- Navigate to Identity > Custom domain names.
- Click Add custom domain and enter your domain (e.g.,
contoso.com). - Add the provided TXT record to your DNS host.
- Click Verify after DNS changes propagate.
Additional information: Add and verify custom domain in Azure AD
Enable Device Registration and User Settings
- In the Entra admin center, go to Identity > Devices > Device settings.
- Under Users may join devices to Azure AD, select All or specify selected users/groups.
- (Optional) Configure Maximum number of devices per user as needed.
Additional information: Configure device settings in Azure AD
Join Windows Devices to Entra ID
This process joins a Windows machine to your Entra ID domain with the users you created.
-
Prepare Windows Machine
- Ensure Windows 10/11 is up to date
- Verify network connectivity
- Check system requirements
-
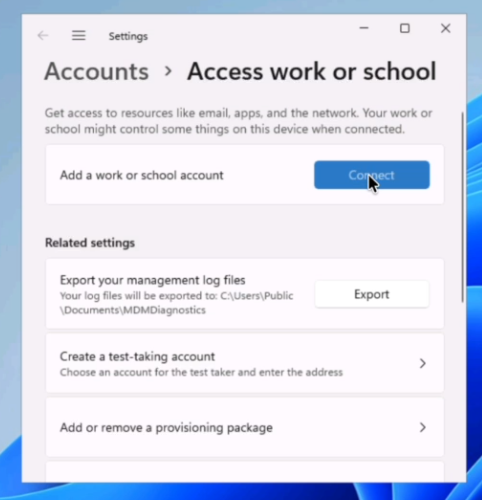
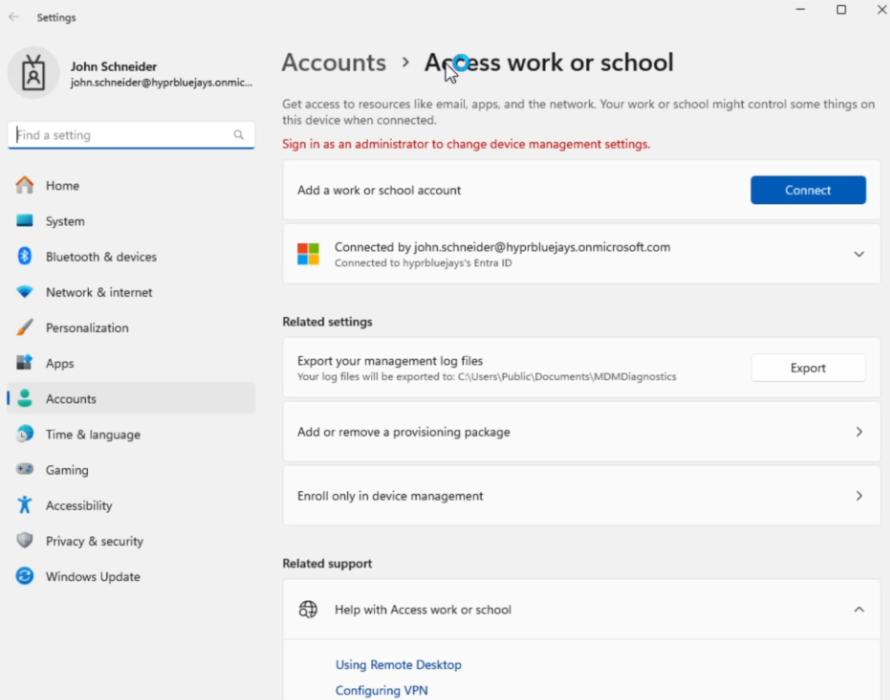
Access Work or School Settings
-
In Windows, select Settings > Accounts > Access work or school
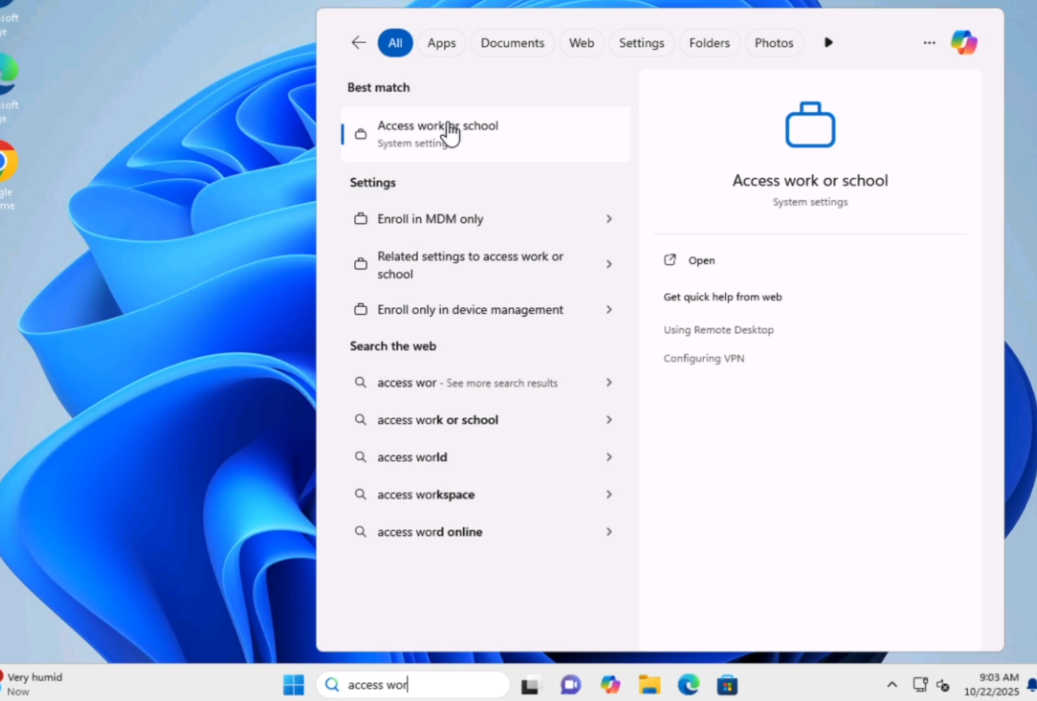
-
Click Connect
-
Select Join this device to Microsoft Entra ID
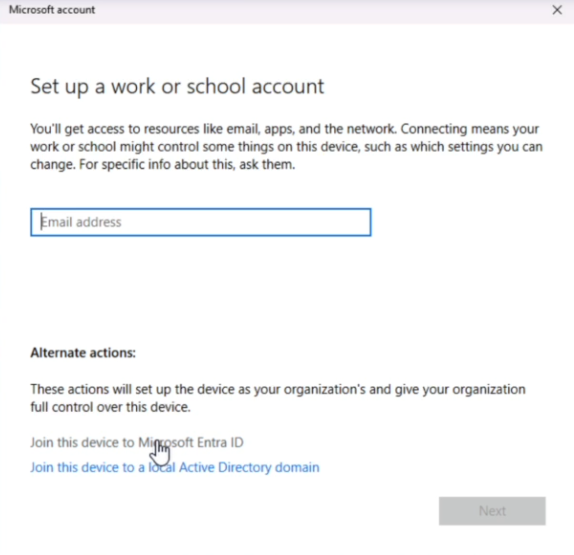
-
-
Complete Authentication
-
Enter your Entra ID username (e.g., one of your test users)

-
If you didn't take note of the password provided when creating the user, perform a password reset and generate a new one
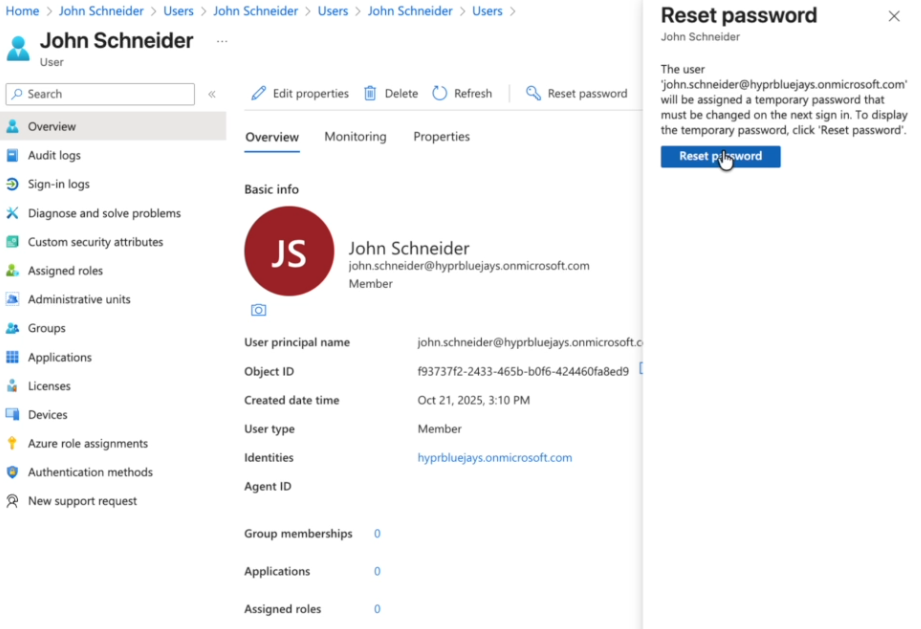
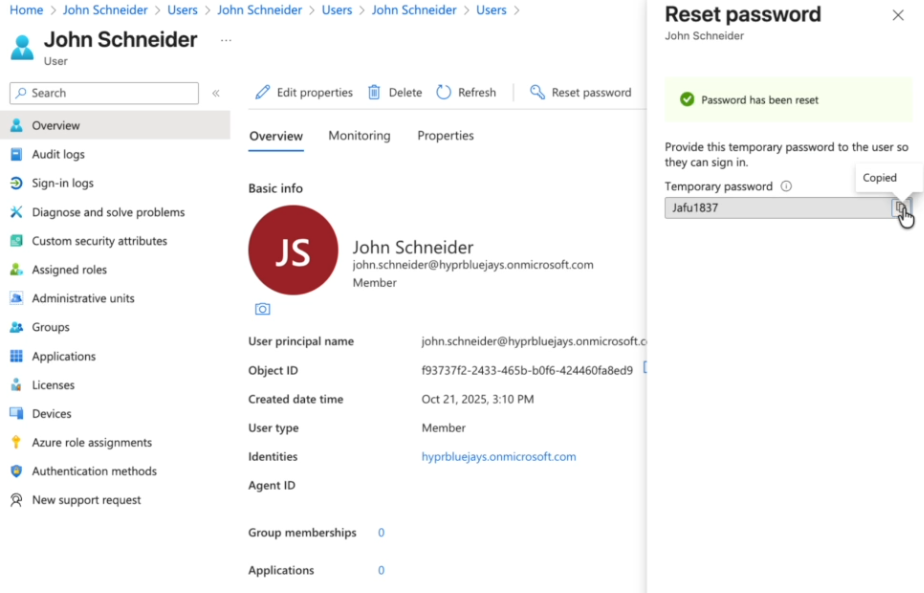
-
Use a working password to complete the sign-in process
-
-
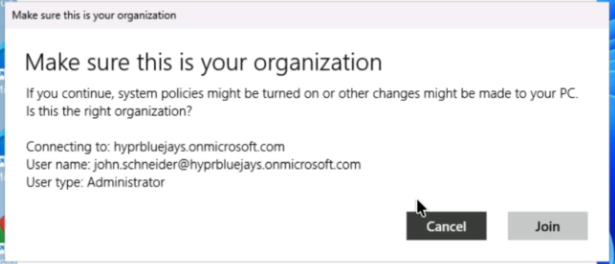
Specify an Administrator
-
During the join process, make sure that the account you want to have admin privileges in the tenant is correctly specified as the administrator (typically, this will be the first user you join)
-
Wait for the join process to complete and restart the computer
-
After the restart, Sign in as your test user and verify that your account is correctly joined to the domain in the Access Work or School dialog
-
You can also verify this by running the
dsregcmd /statuscommand in the command prompt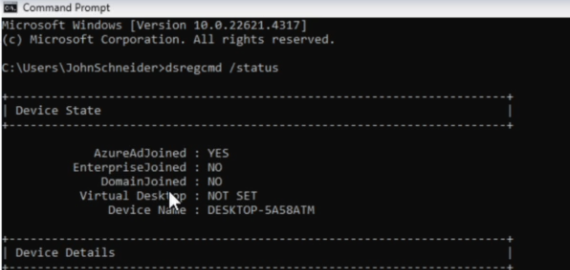
-
The dsregcmd /status command provides detailed information about the device's Entra ID join status and any potential issues.
Proceed to Administrator Configuration
At this point your environment setup is complete for Entra-only device join. Continue with the common HYPR/Entra integration steps in the Administrator Configuration guide. That guide covers:
- Entra ID app registration and API permissions
- HYPR Control Center™ integration configuration and feature flags
- Enabling FIDO2/Enterprise Passkey authentication in Entra
- Installing HYPR Passwordless for Windows™ and enabling security key sign-in
Troubleshooting
For additional troubleshooting guidance, see the Troubleshooting Guide for common Entra-only issues.
References:
Summary Table
| Step | Description | Key Links |
|---|---|---|
| Overview | Understand Entra-only setup | Device identity overview |
| Prerequisites | Required components | Join device to Azure AD |
| Step 1 | Create Entra tenant | Create tenant |
| Step 2 | Add custom domain | Add custom domain |
| Step 3 | Join devices | Join device to Azure AD |
| Next | Continue setup | Administrator Configuration |
| Troubleshooting | Common issues | Troubleshoot Azure AD Join |
Additional References
- Get started with phishing-resistant passwordless authentication in Entra ID
- How to enable passkey (FIDO2) authentication
Next steps
After completing device join to Entra ID, proceed to the Administrator Configuration guide for common HYPR/Entra integration steps:
- Entra ID app registration and API permissions
- HYPR Control Center™ integration configuration
- Feature flags setup
- FIDO2/Enterprise Passkey authentication enablement
- HYPR Passwordless for Windows™ installation
Then continue with:
- User Experience guide
- Troubleshooting guide for common Entra-only issues