Azure AD: HYPR Enterprise Passkey
Control Center Standard: Integrations
HYPR Enterprise Passkey (a.k.a. the FIDO2 Mobile Authenticator pattern) enables your HYPR Mobile App-enabled device to act as a FIDO2 security key when authenticating through Microsoft Azure AD.
What You’ll Need
- Make sure you have the Azure tenant available and an account that exists on the
\*.onmicrosoft.comdomain with Global Admin Access - You should have an Intune account on the
\*.onmicrosoft.comdomain with Global Admin Access with Intune licenses - Azure domain-joined VMs or physical laptops with which to test
- Currently the workstation/VM OS must be Windows, as macOS is not yet supported
Setting Up the Azure AD Tenant
Register Application
- From the Home screen, select Azure Active Directory > App registrations > New registration.
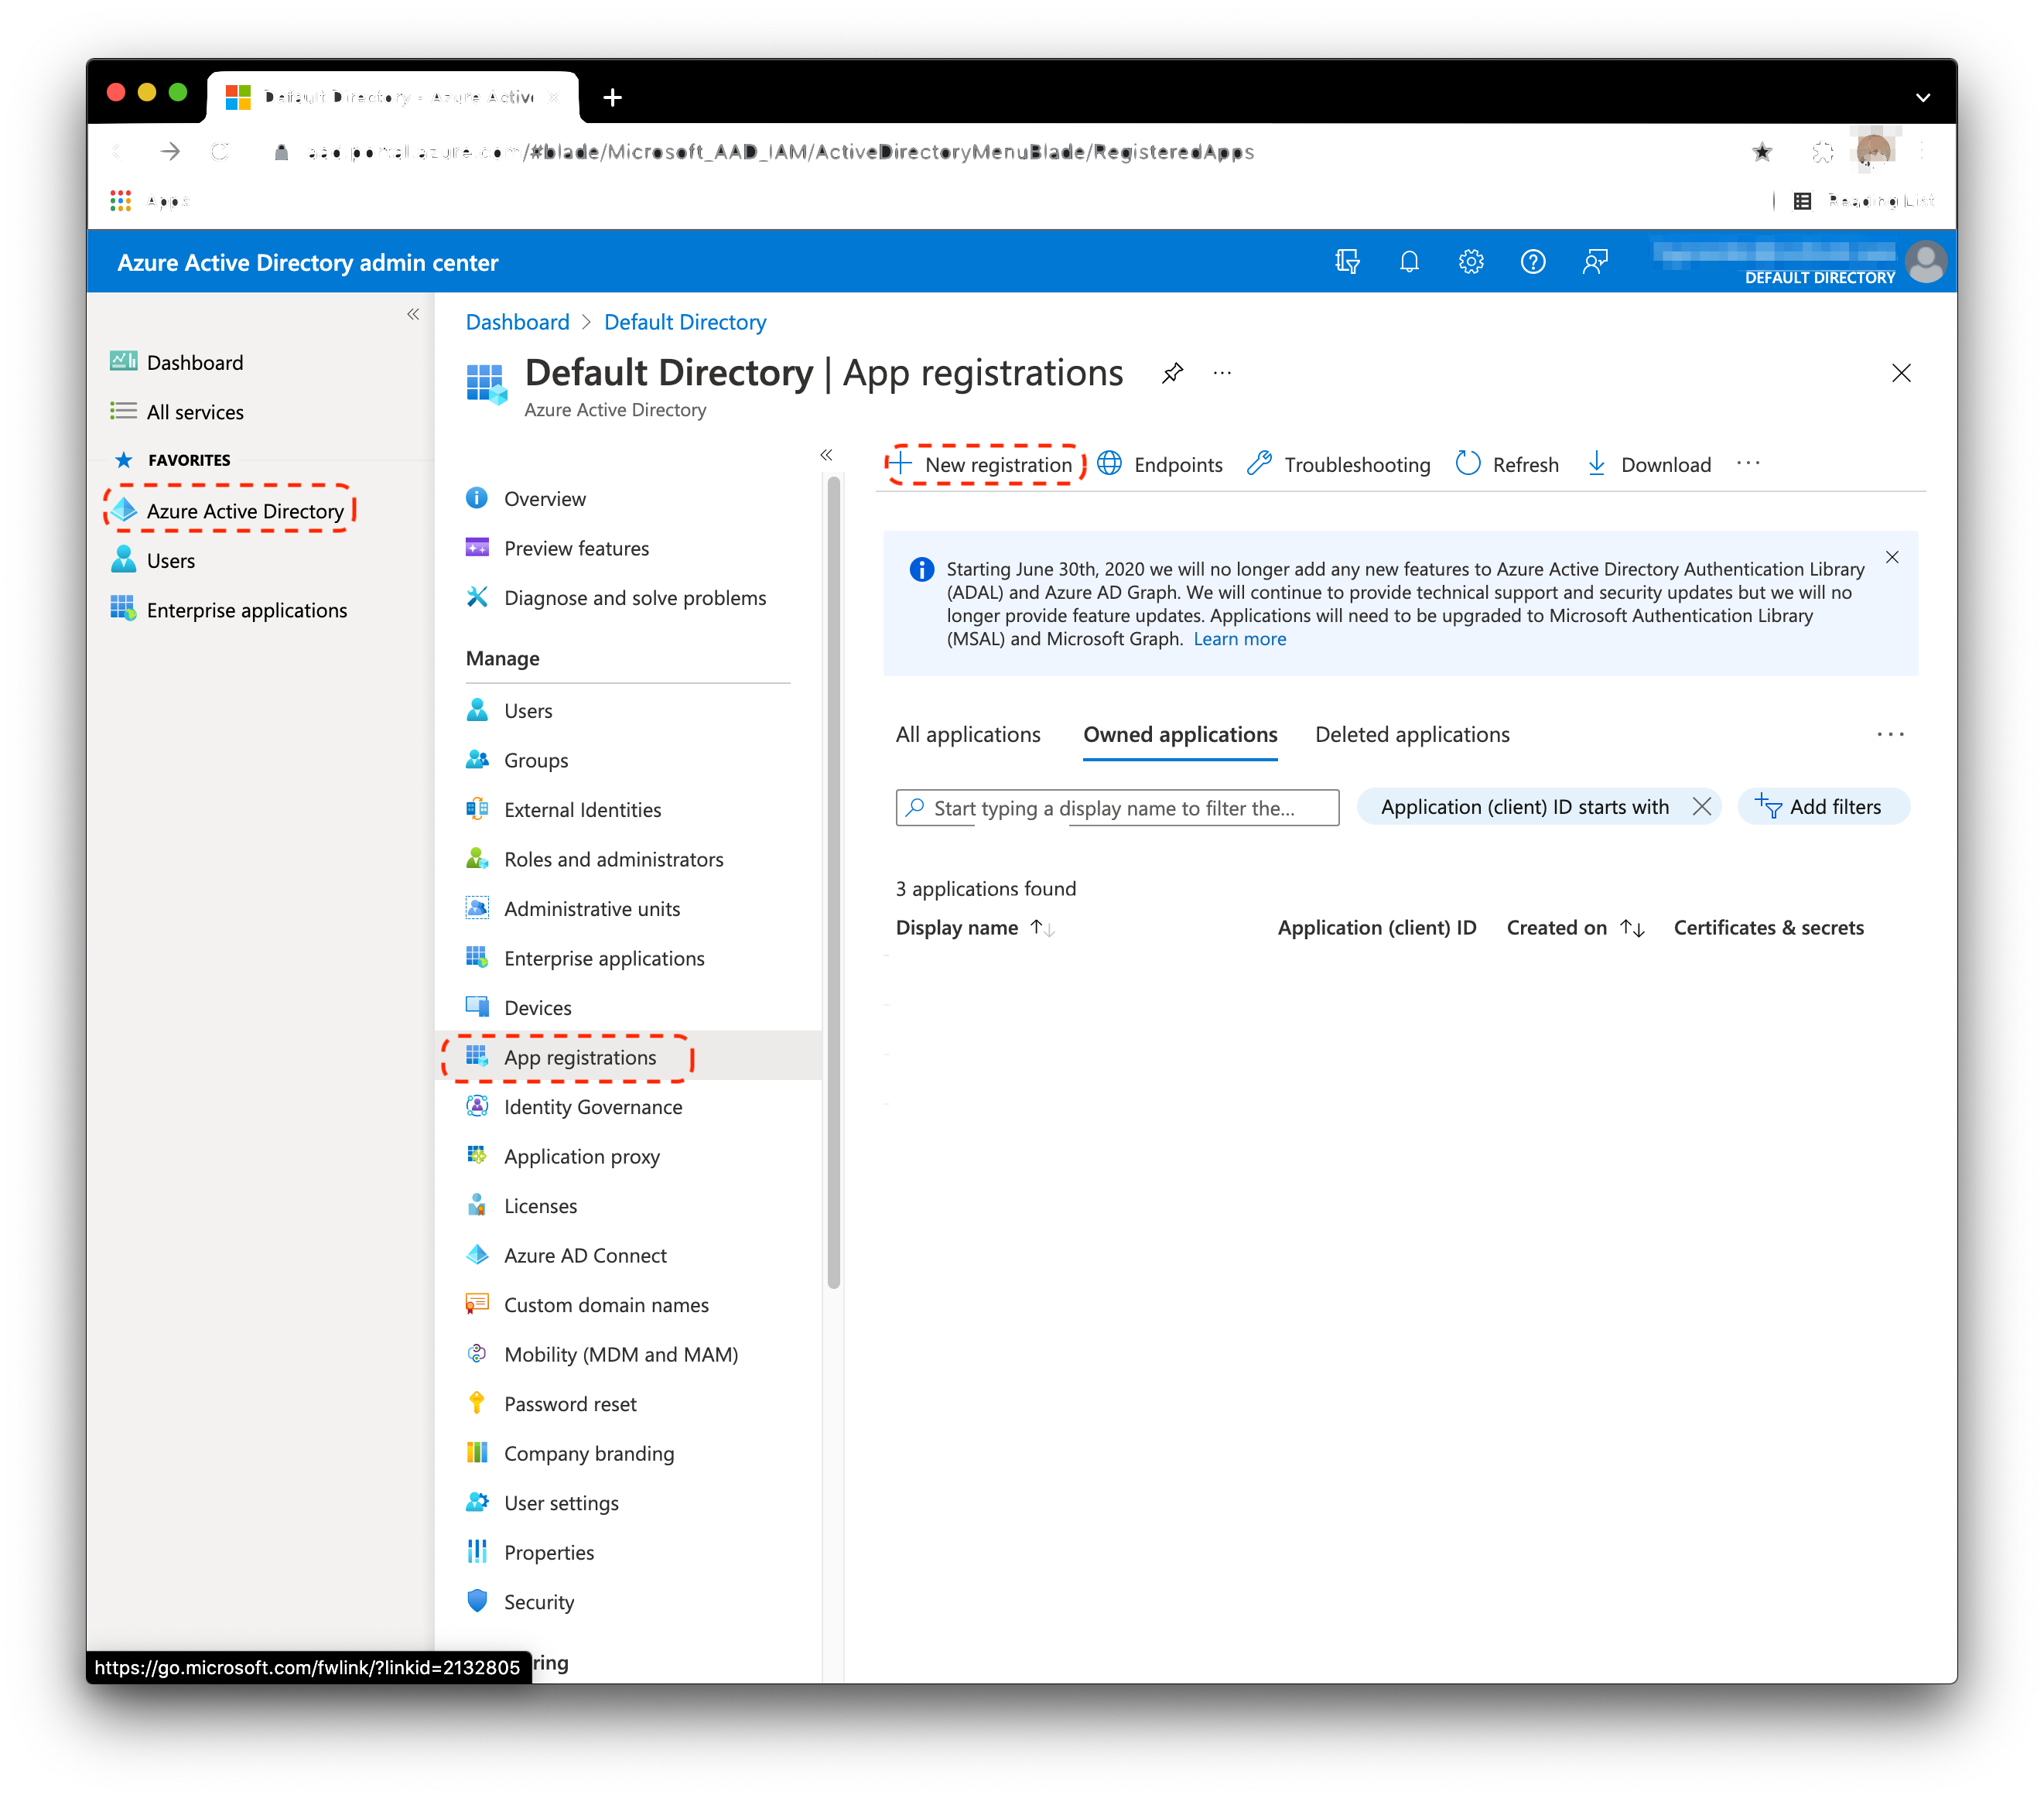
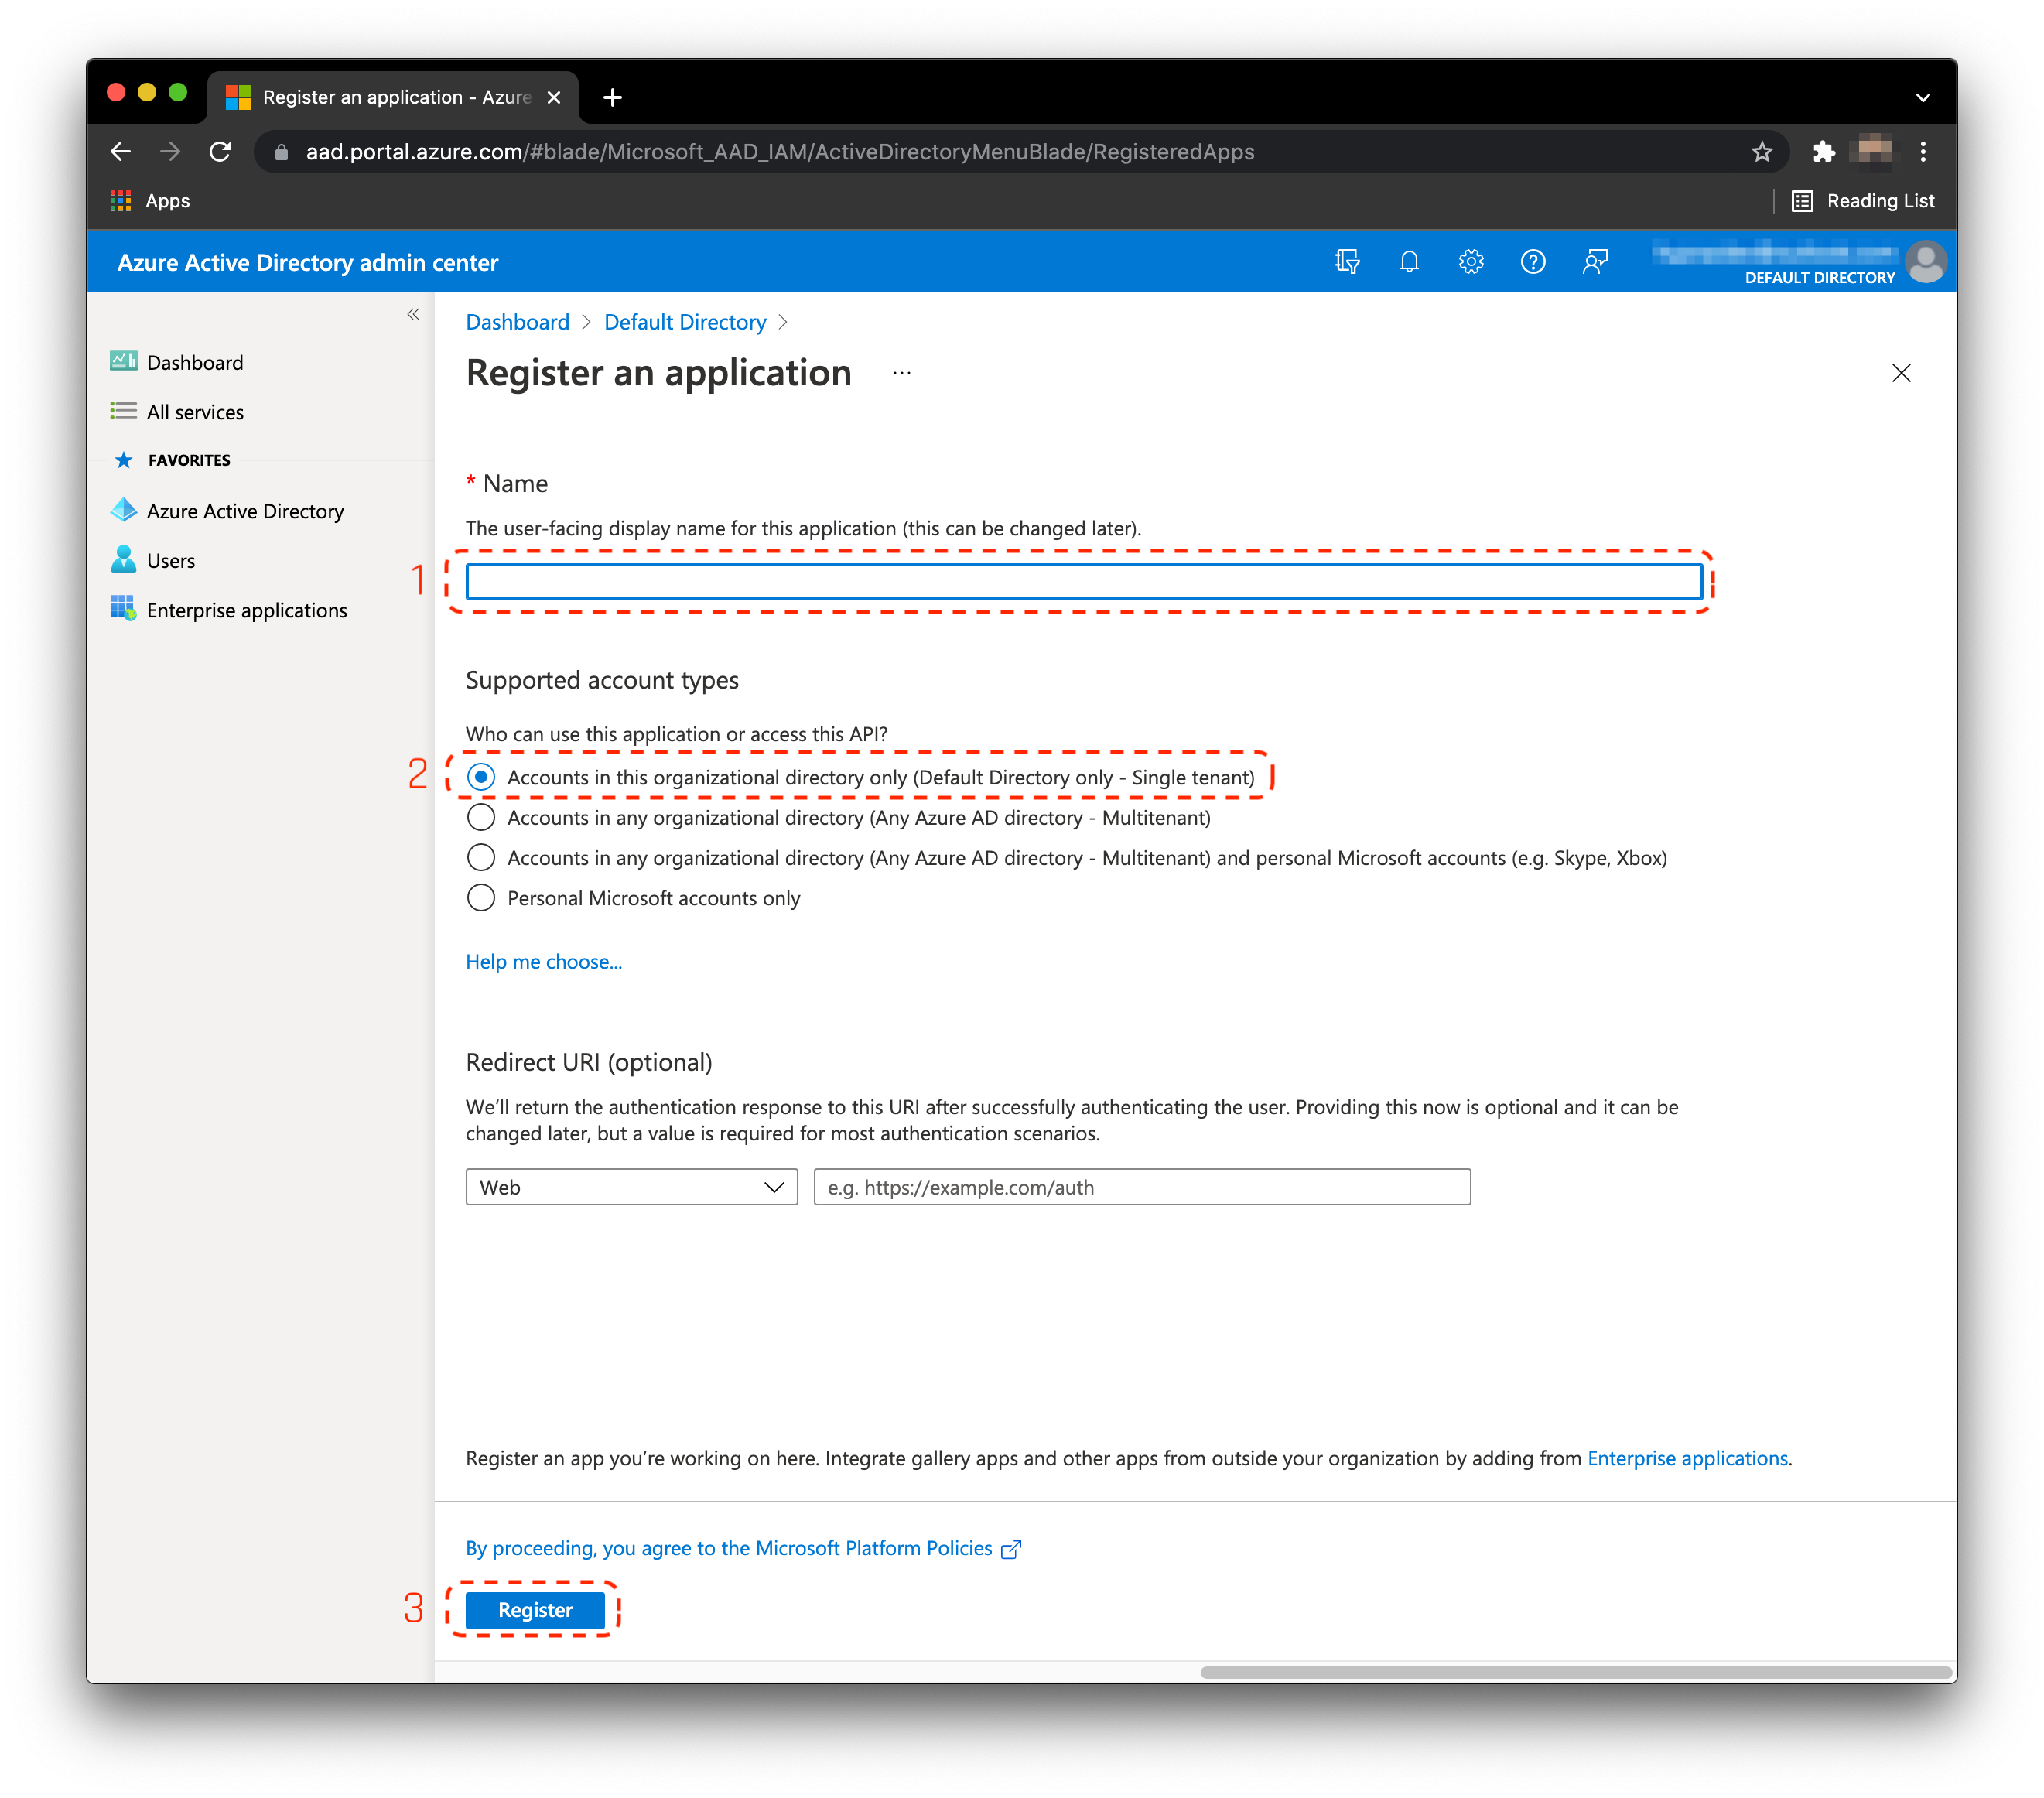
- Enter the application name: HYPRAuthApp.
Select Accounts in this organizational directory only.
Click Register when done.
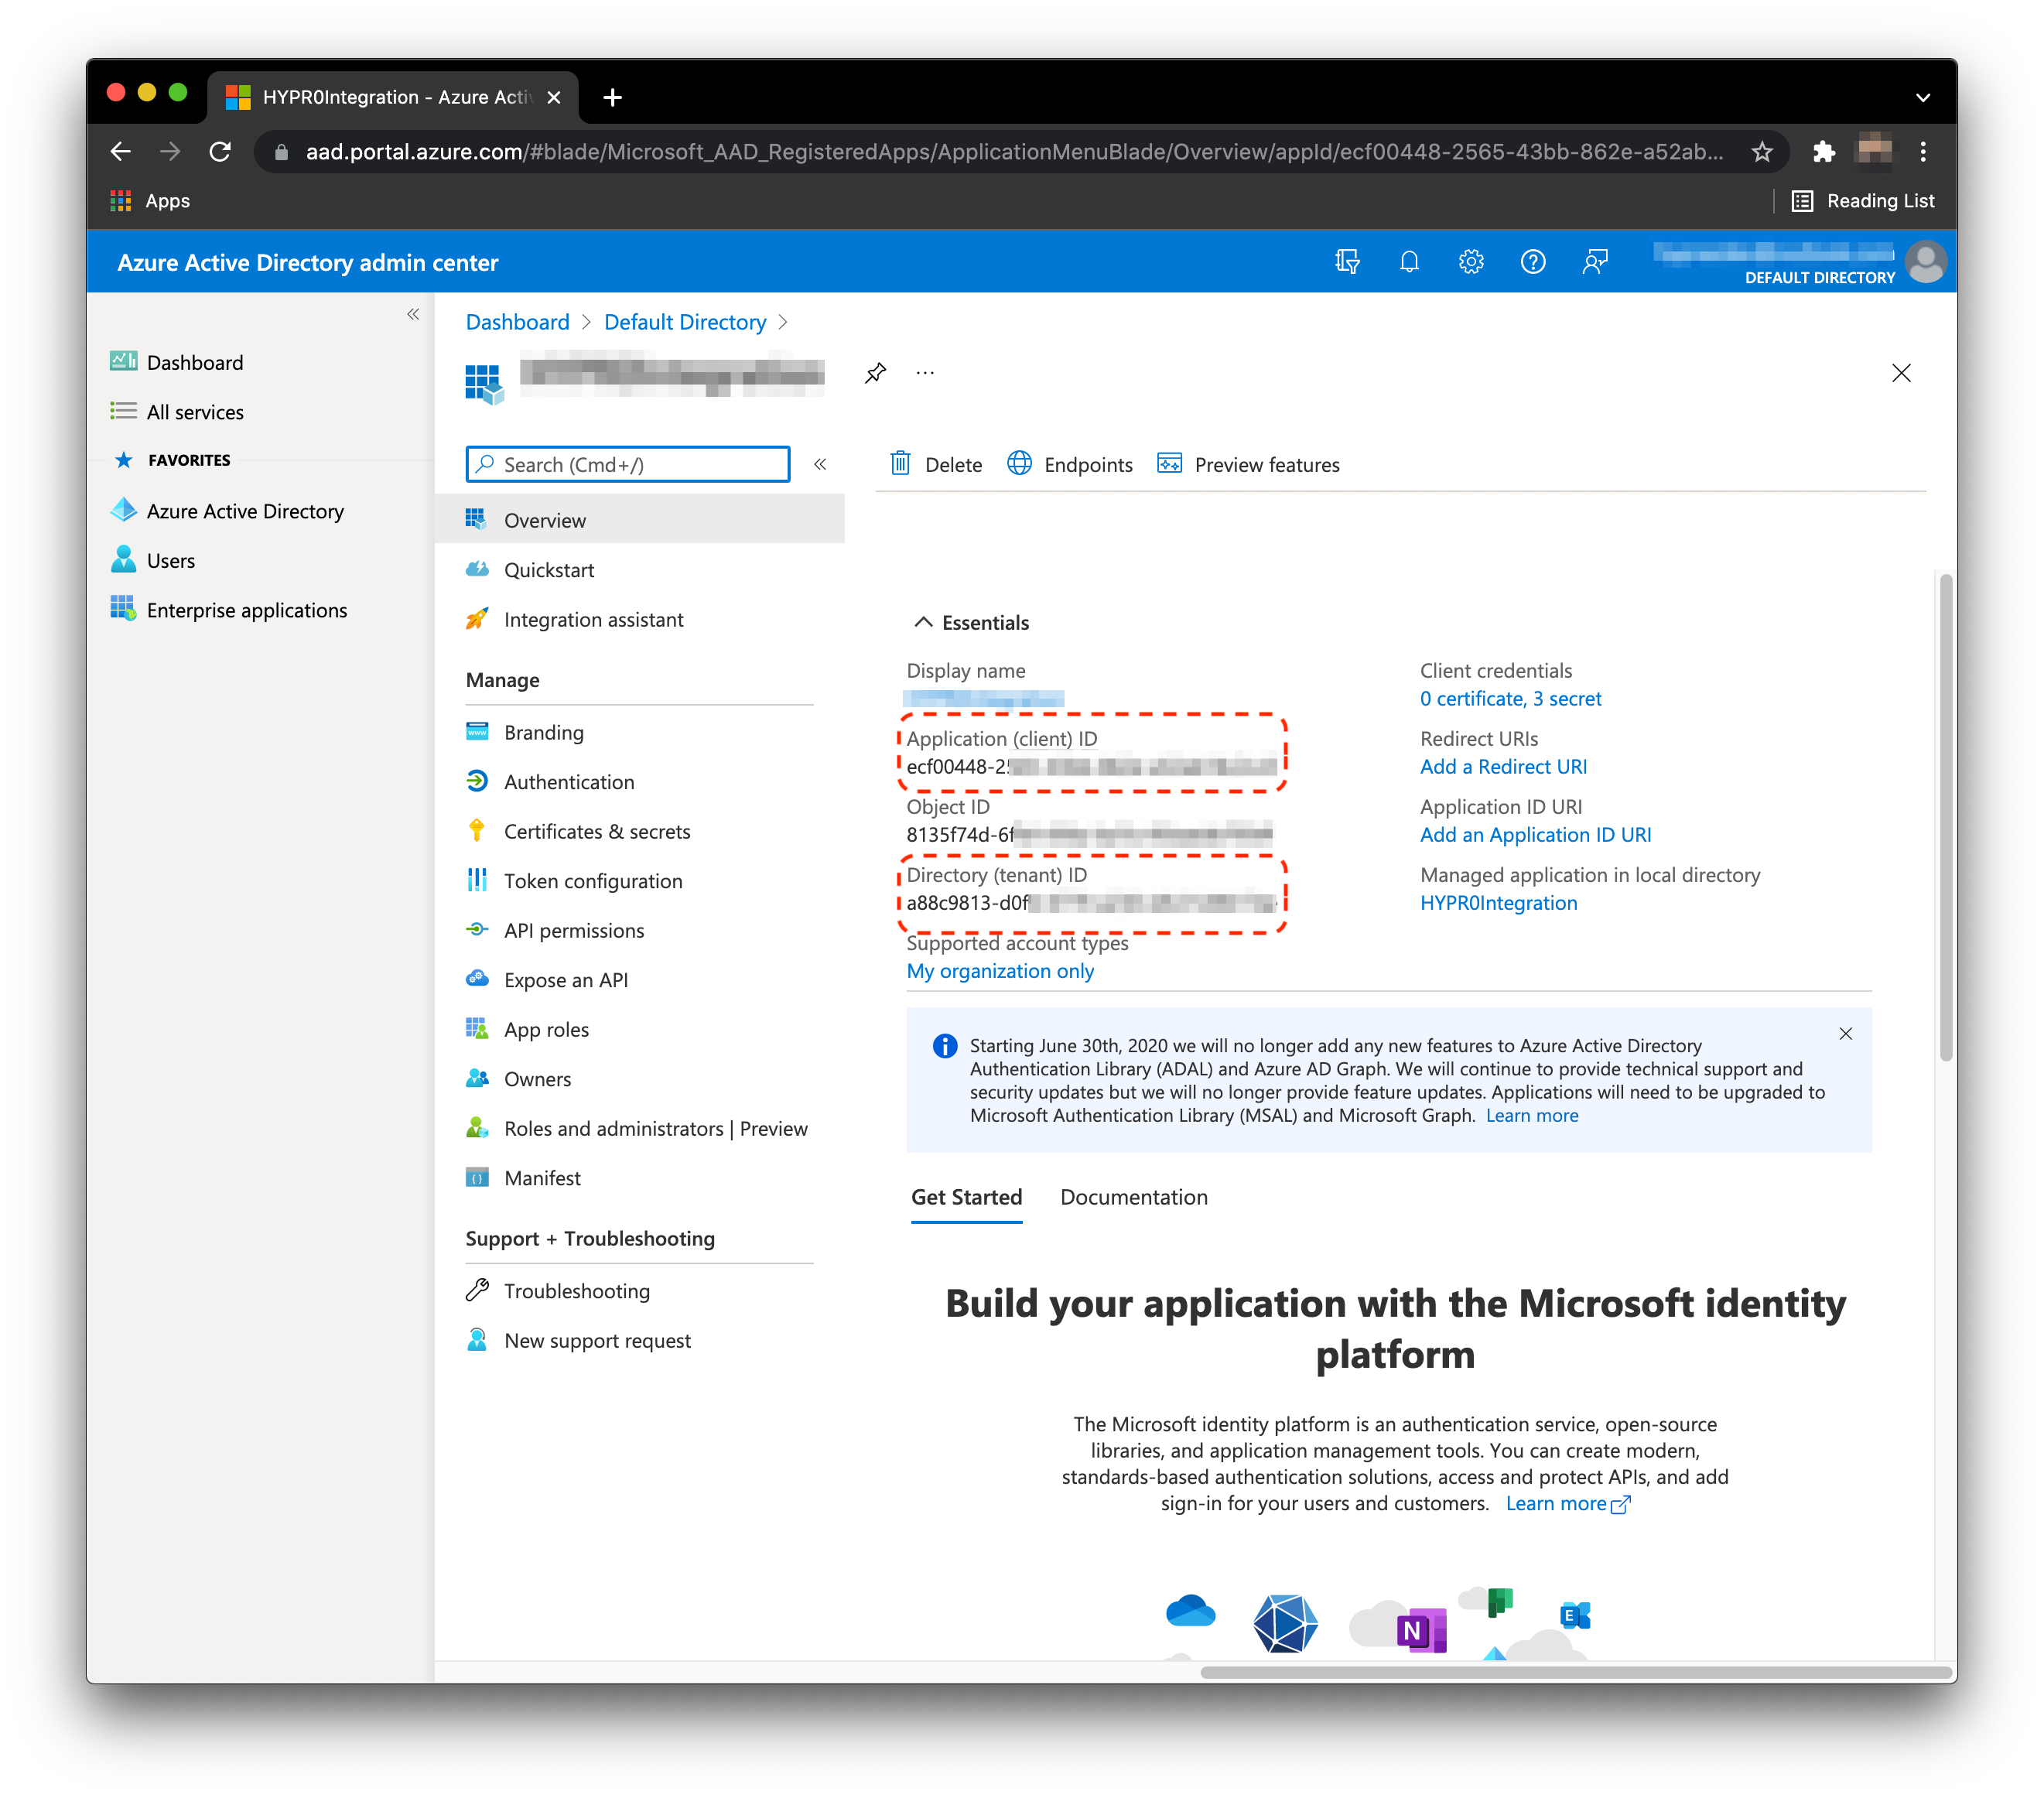
- Save the
clientIdandtenantId. You will need these later for PowerShell and HYPR's UX configuration.
Grant Application Required API Permissions
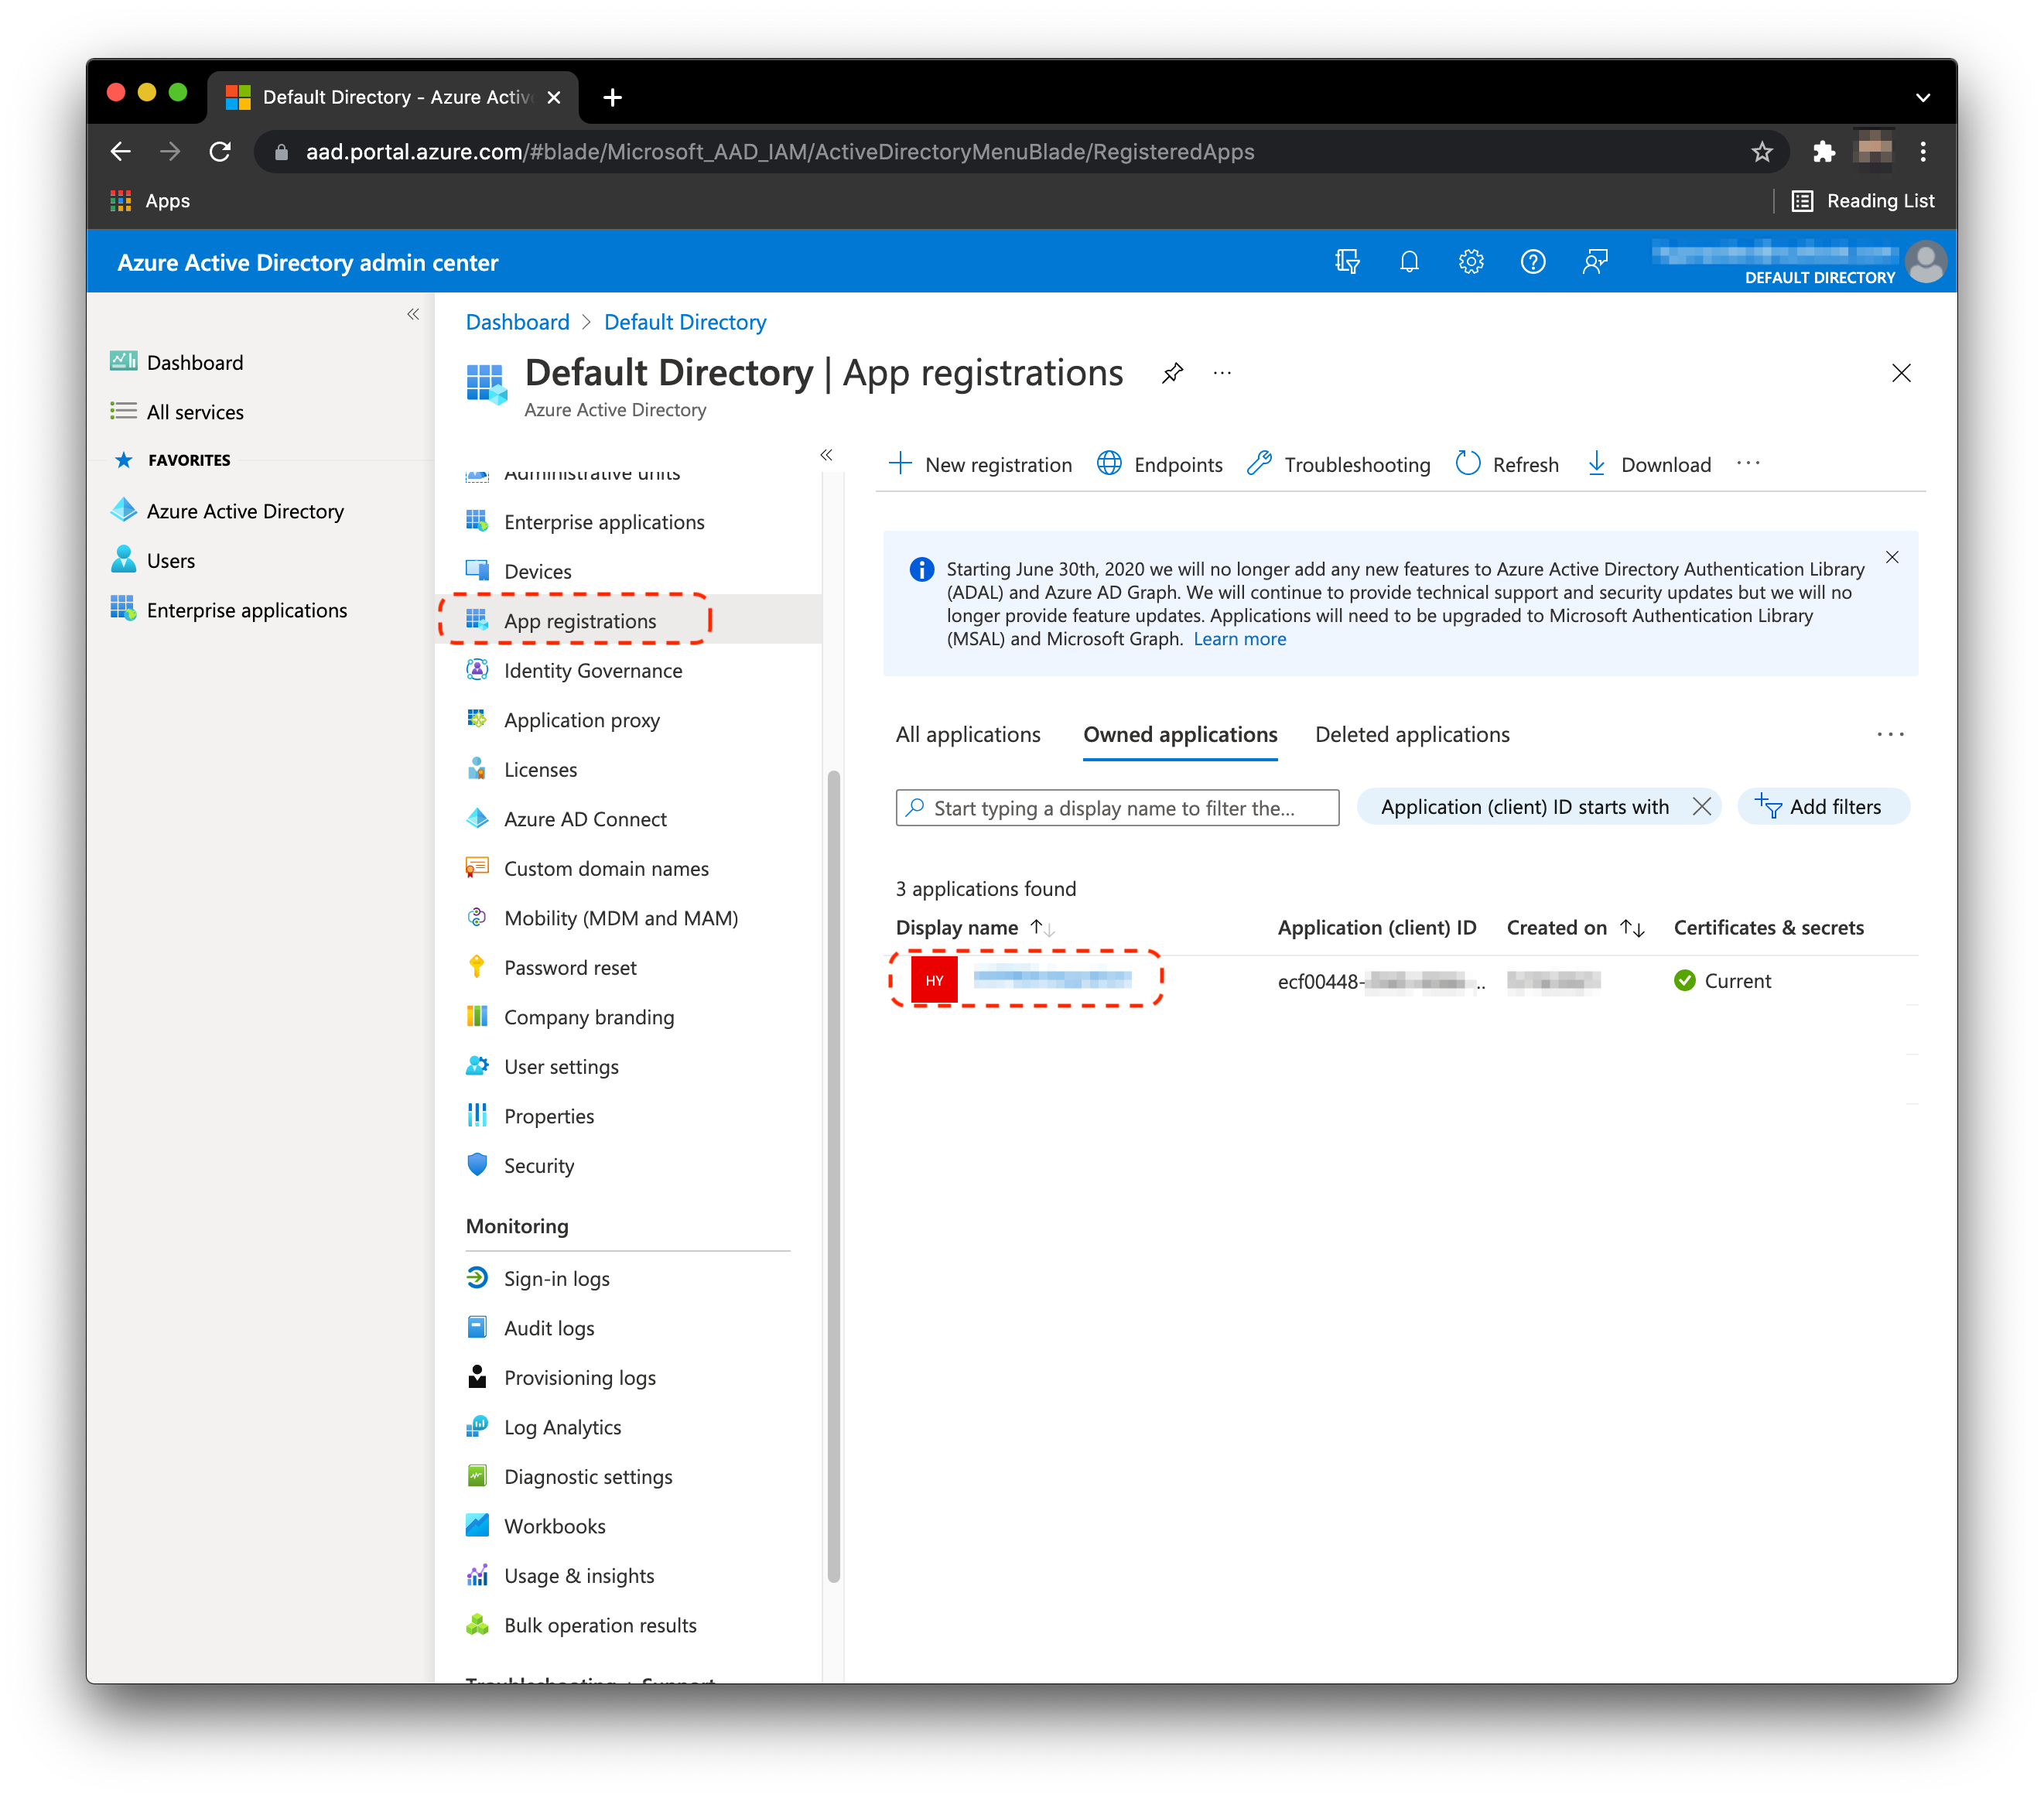
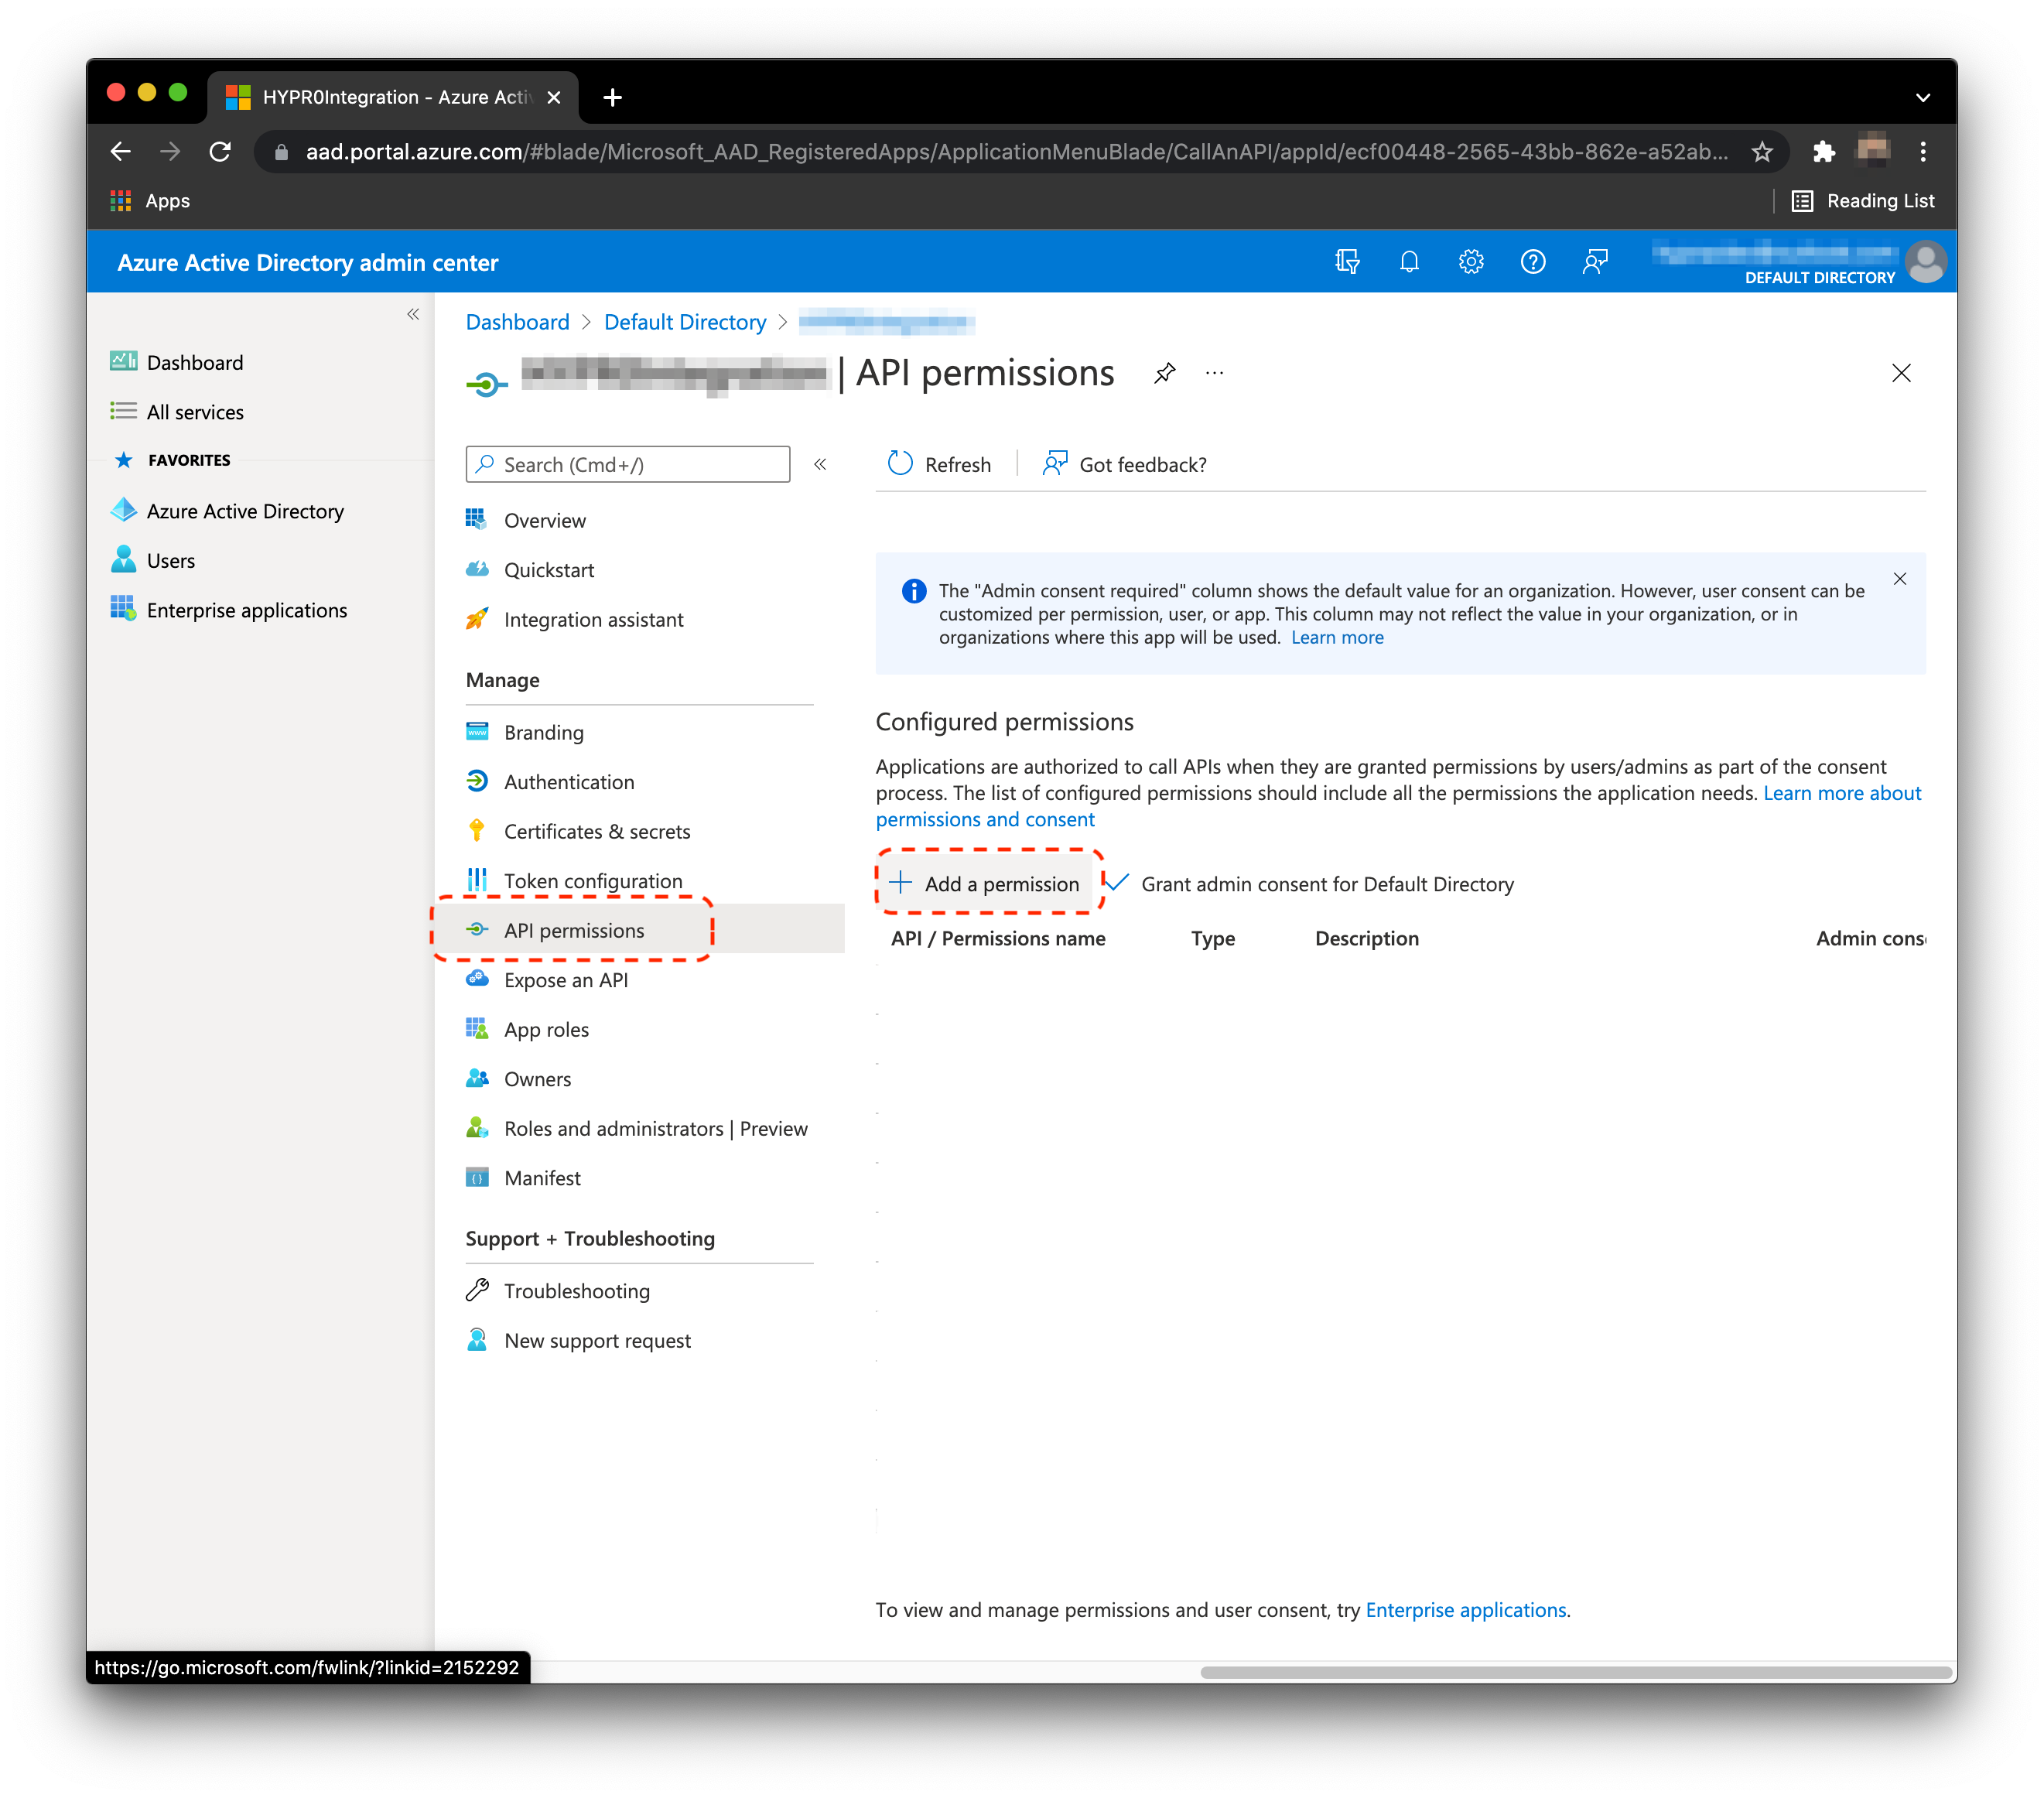
- From the home screen, select App registrations and select the app you just made.
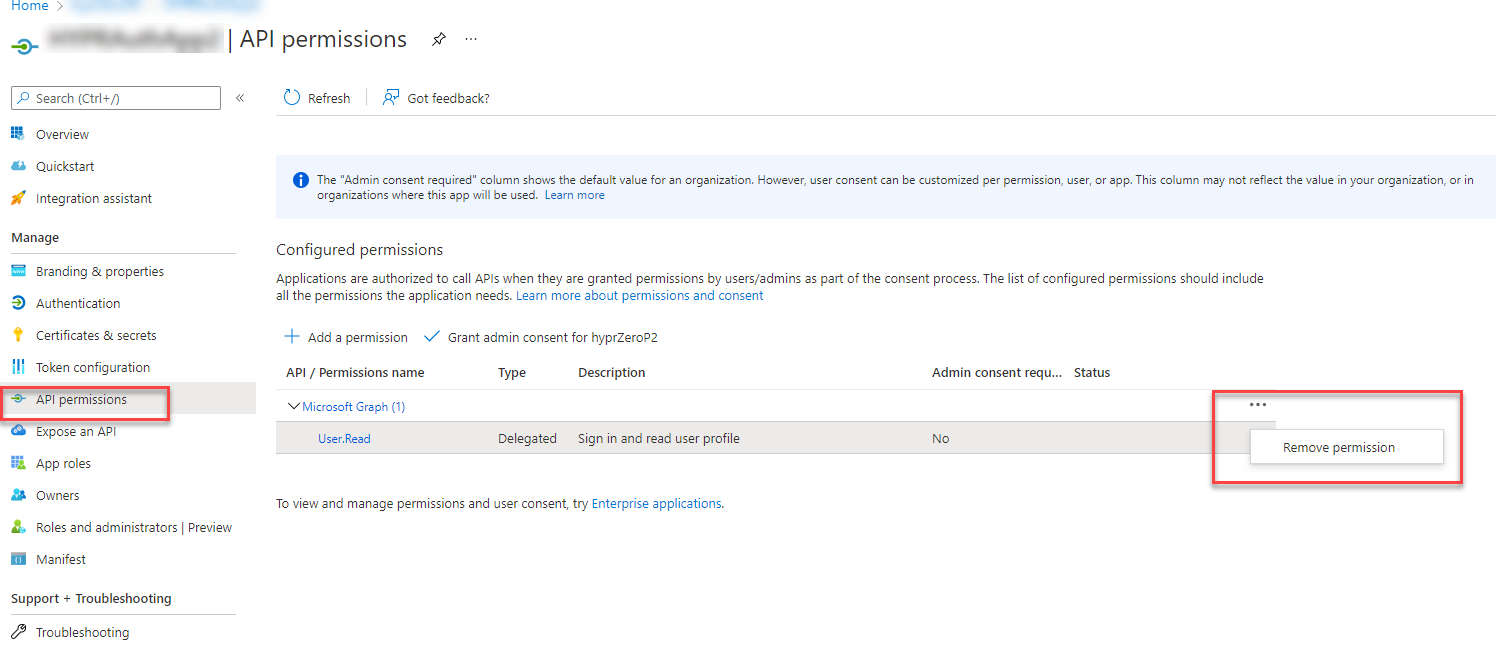
- While that app is selected, click API permissions. You will see that by default this application already has Microsoft Graph’s
User.Read. This is not required, so remove it by clicking ... next to the entitlement and selecting Remove Permission. Click Yes during the confirmation prompt.
- Select API permissions, then Add a permission.
- Select Microsoft Graph.
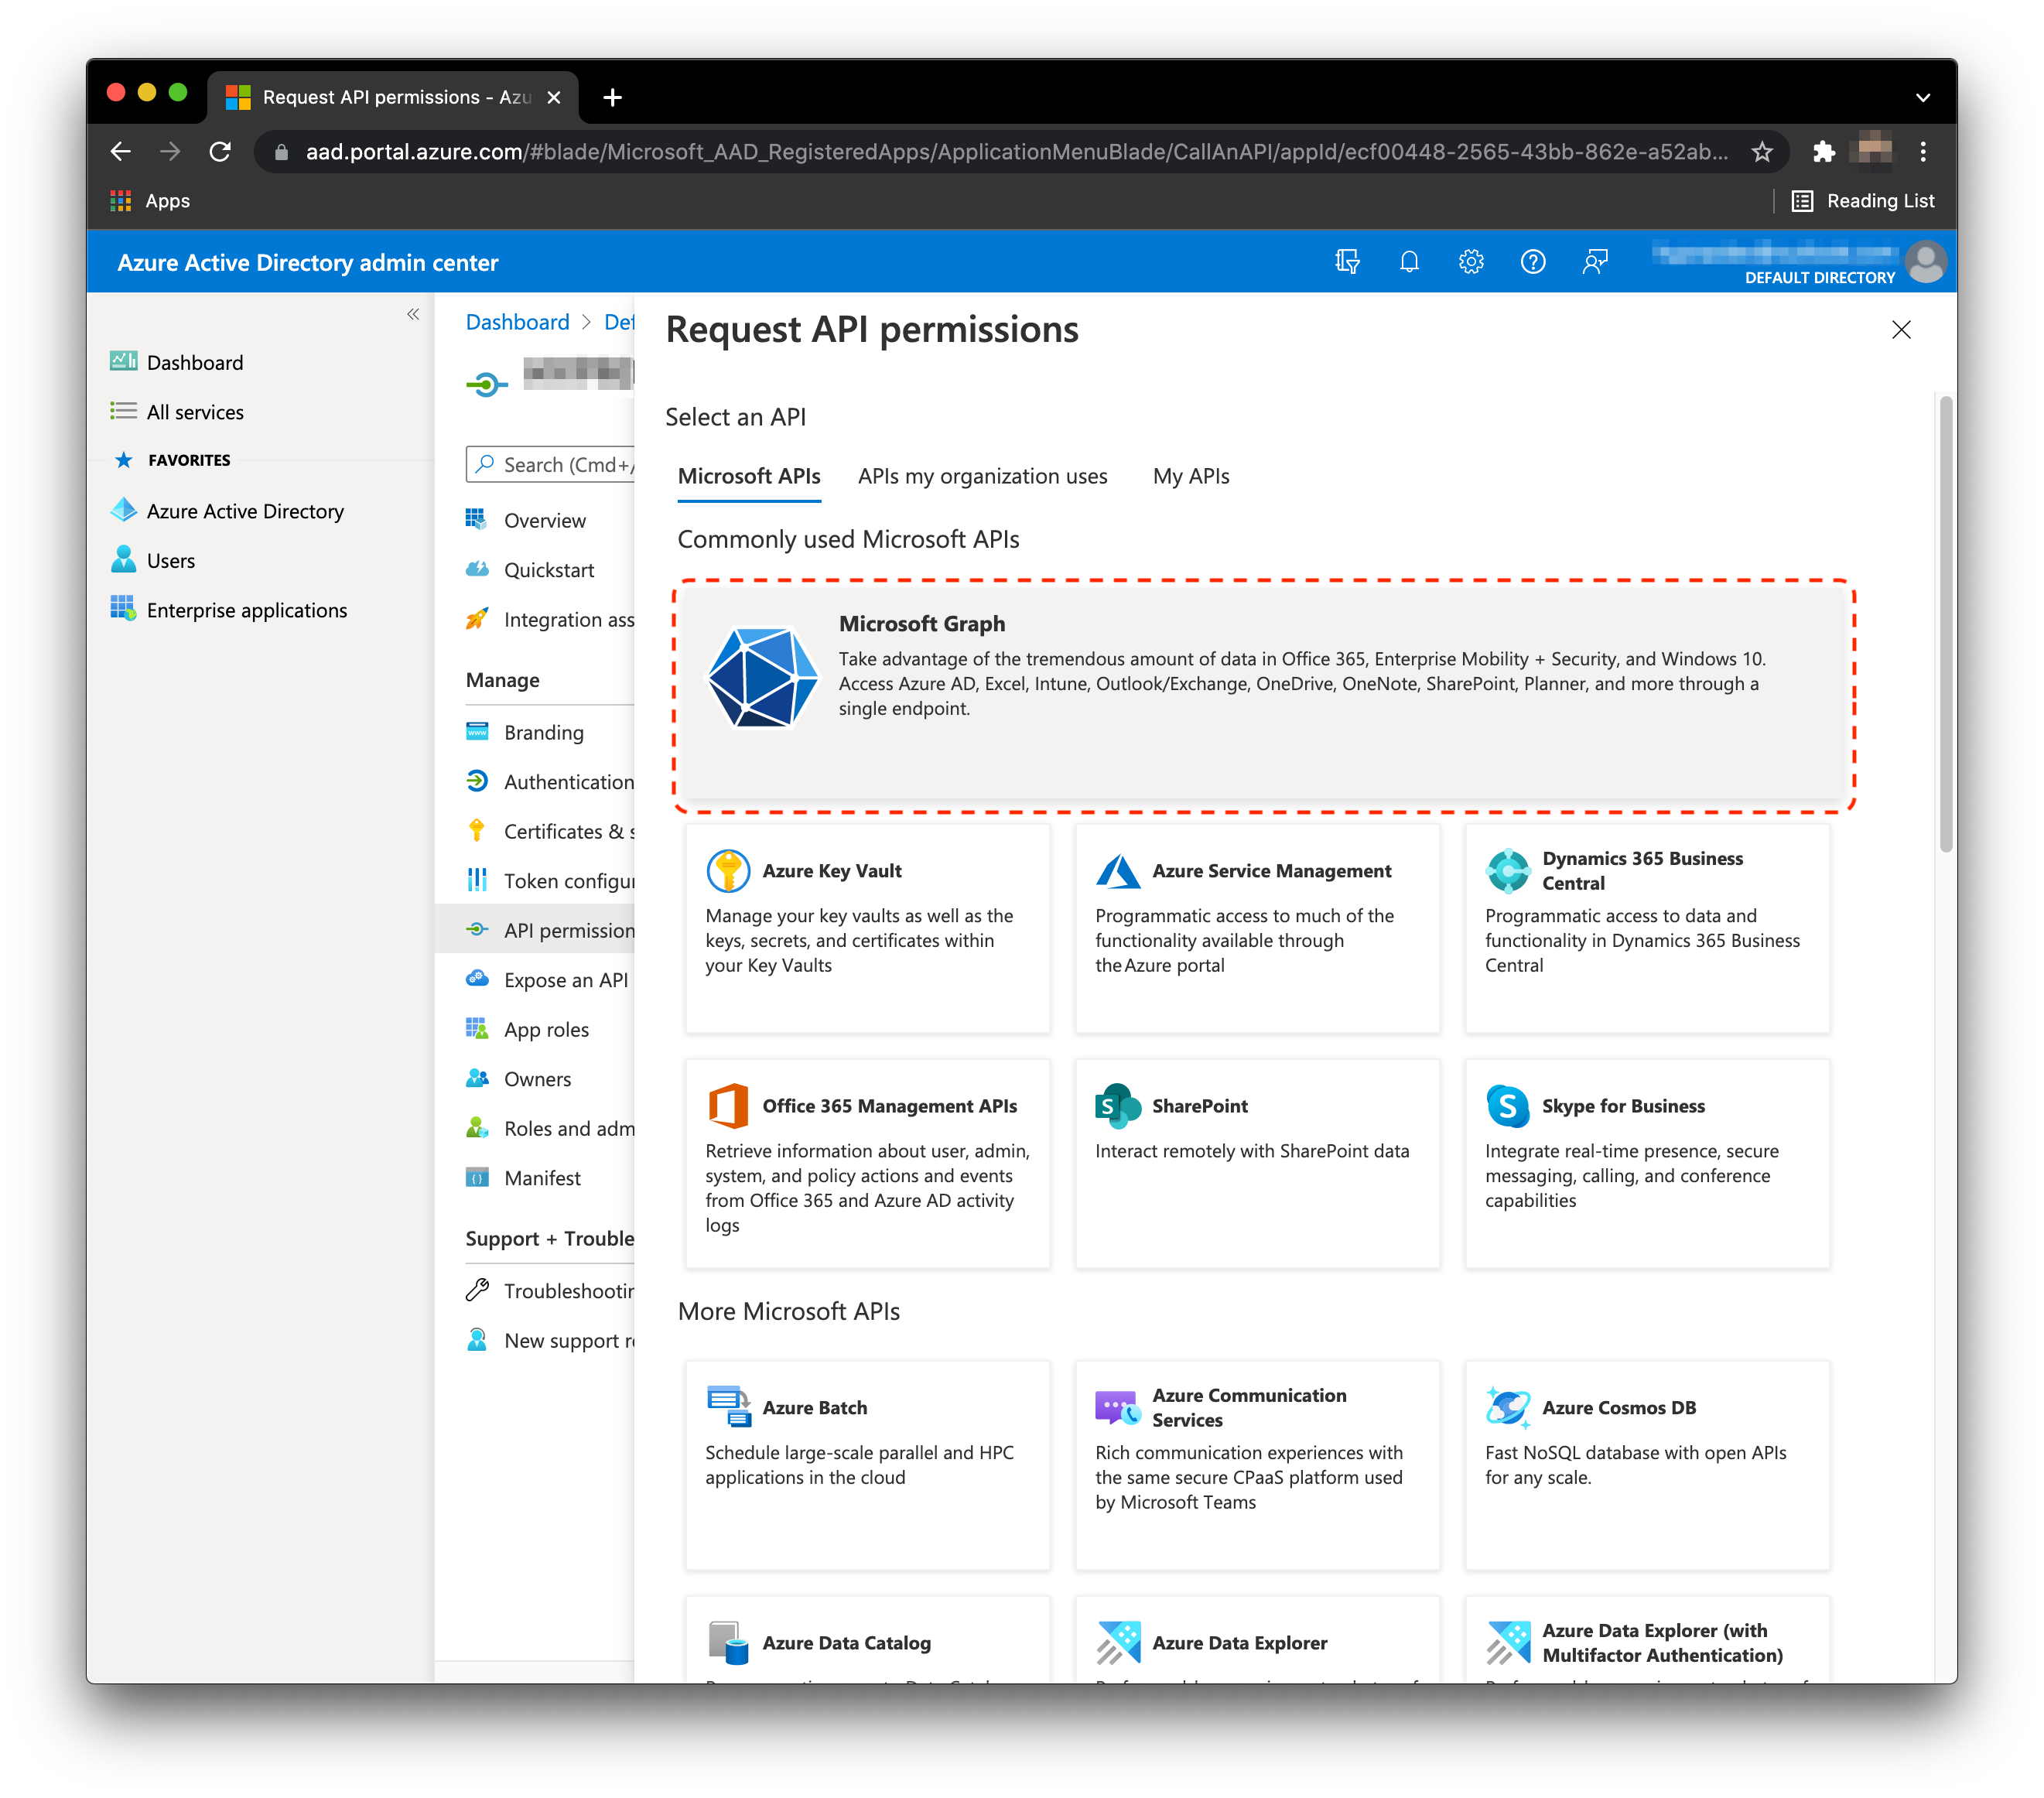
- Select Delegated permissions.
Delegated by Default
Sometimes Azure will not display the option for Delegated or Application permissions, and will immediately assume Delegated as the choice. As no Application permissions are required, this works in your favor. However, after you grant Admin Consent later in the process, you will be able to confirm/see which type of permission they are.

- Add the permissions Directory.AccessAsUser.All and UserAuthenticationMethod.ReadWrite.All.
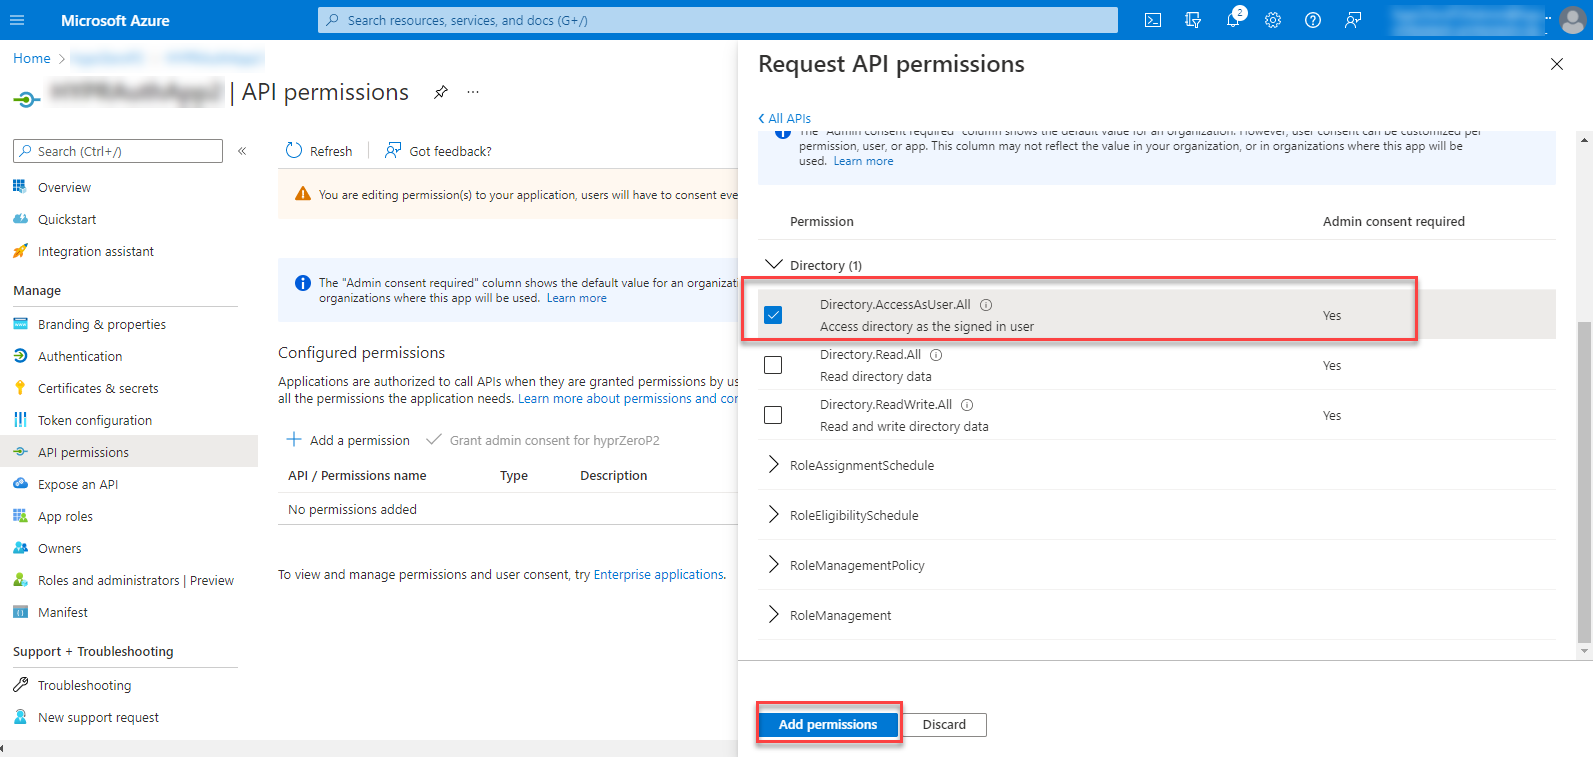
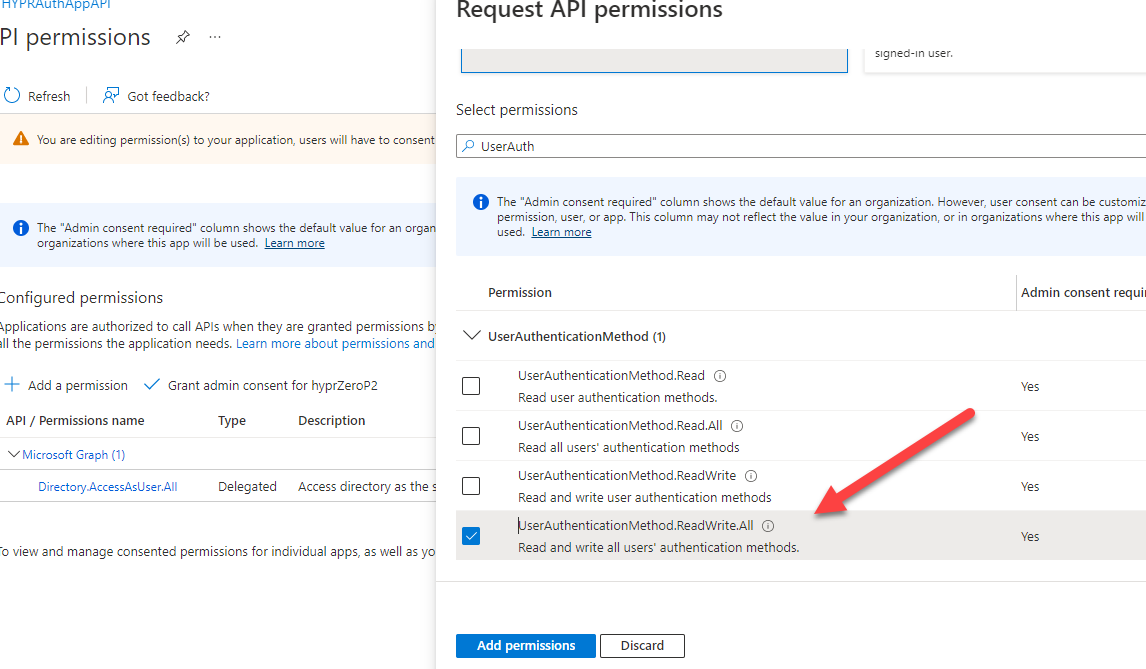
- Click Add Permissions when done.
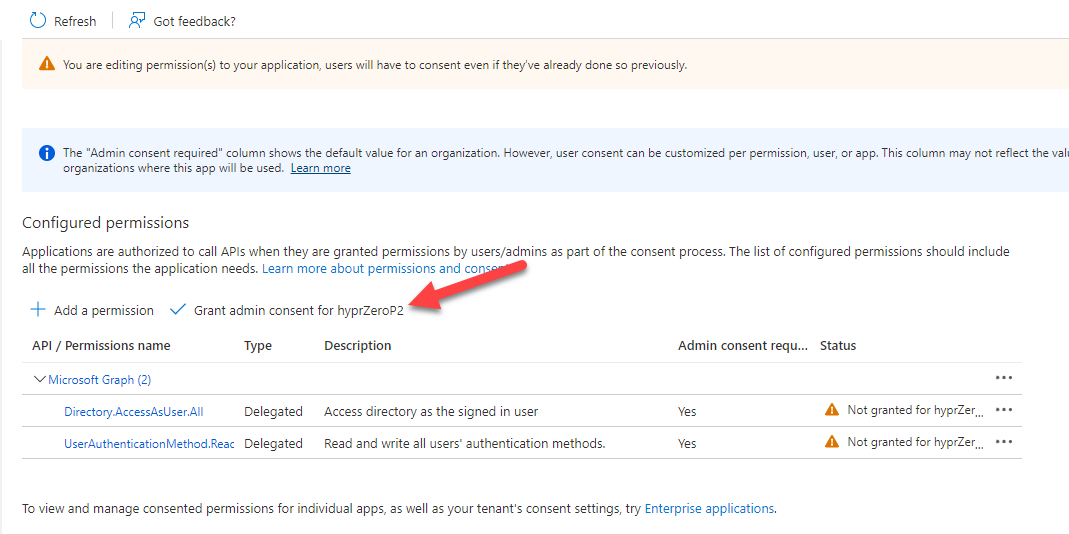
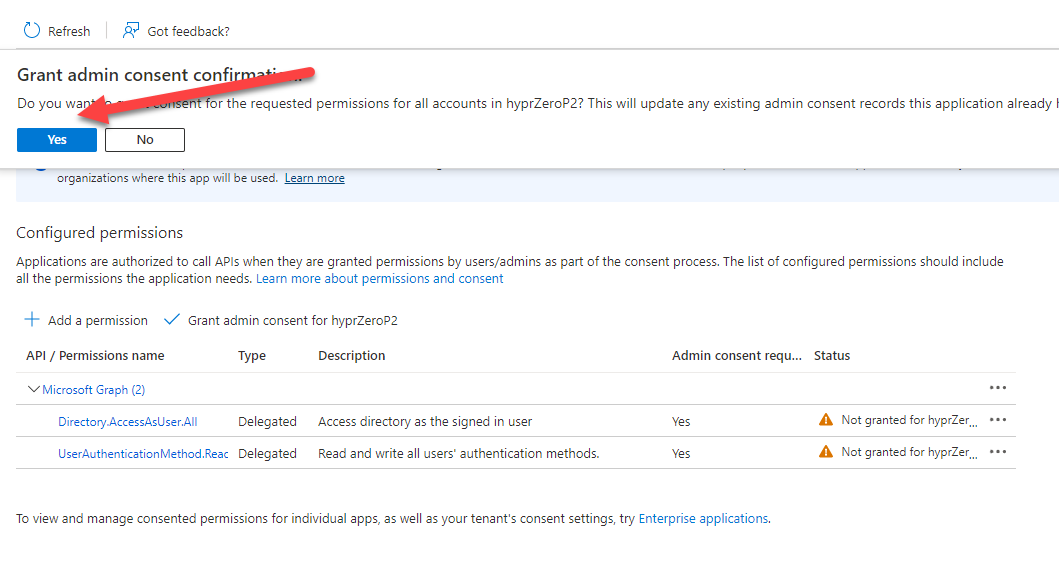
- You must now Grant admin consent for the permissions to take effect.
Create Client Secret
- In the Application menu, select Certificates & secrets.
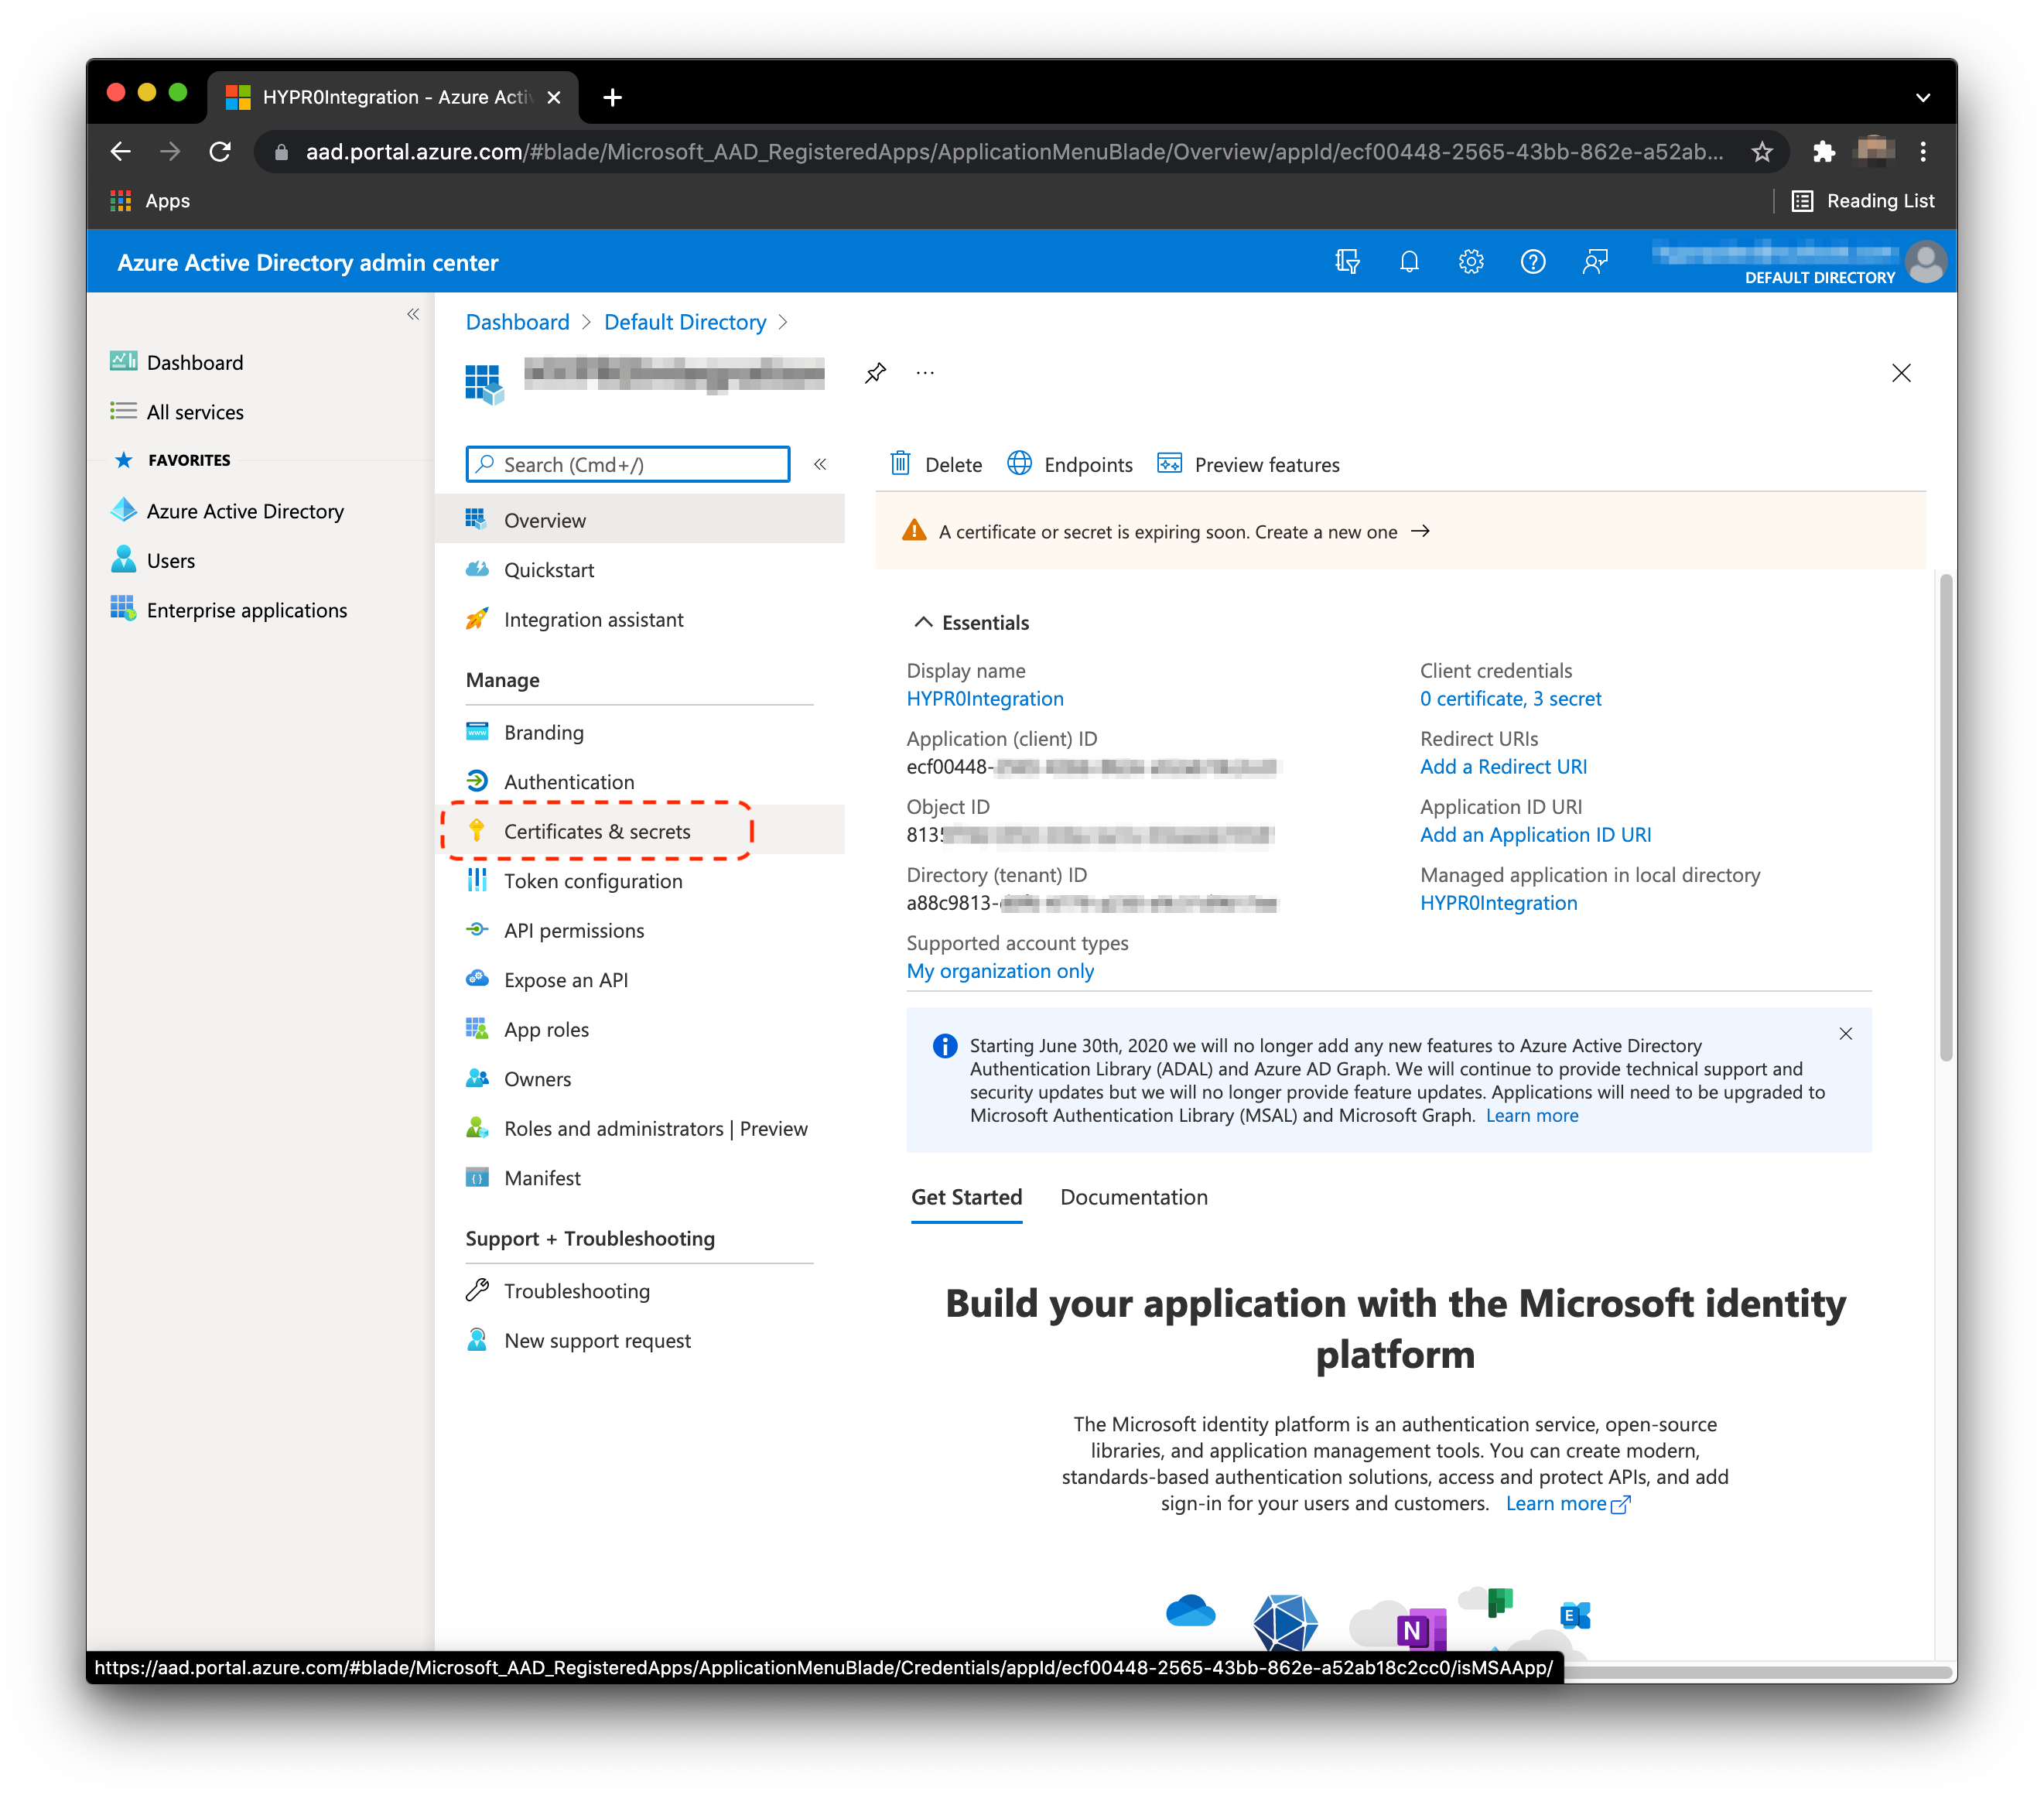
- Click New client secret.
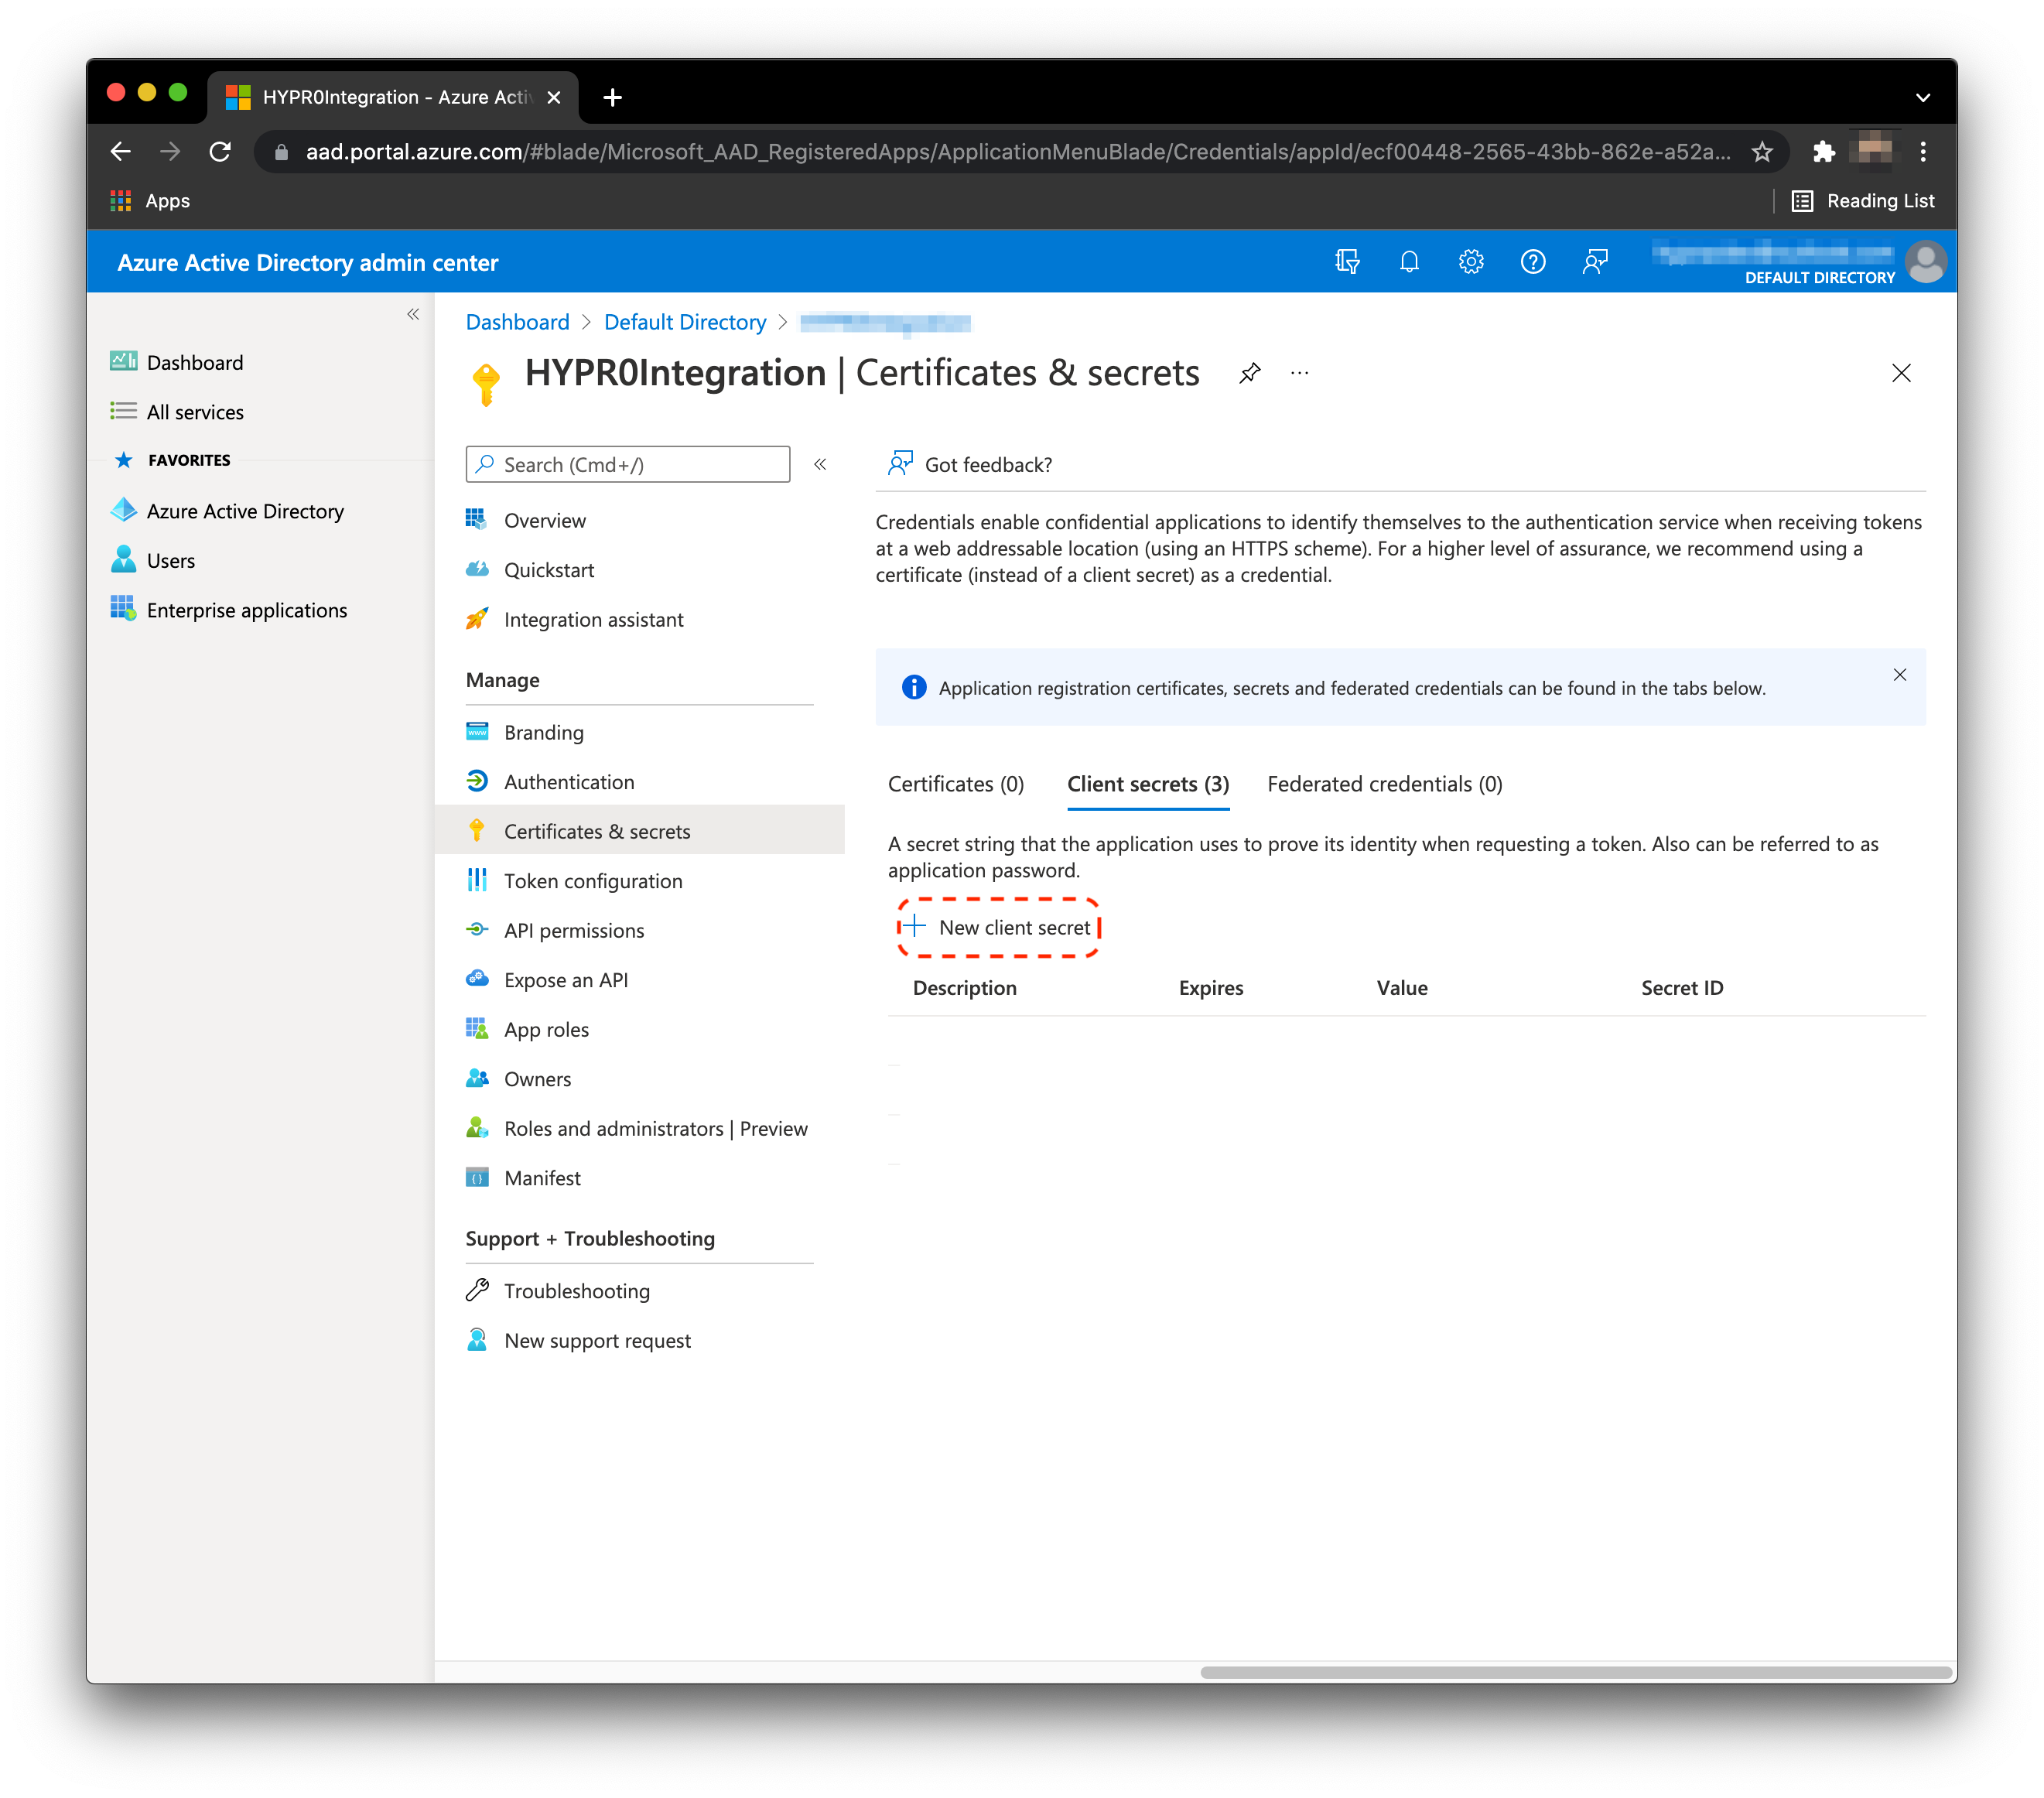
- Enter a Description and an Expires date. Click Add when finished.
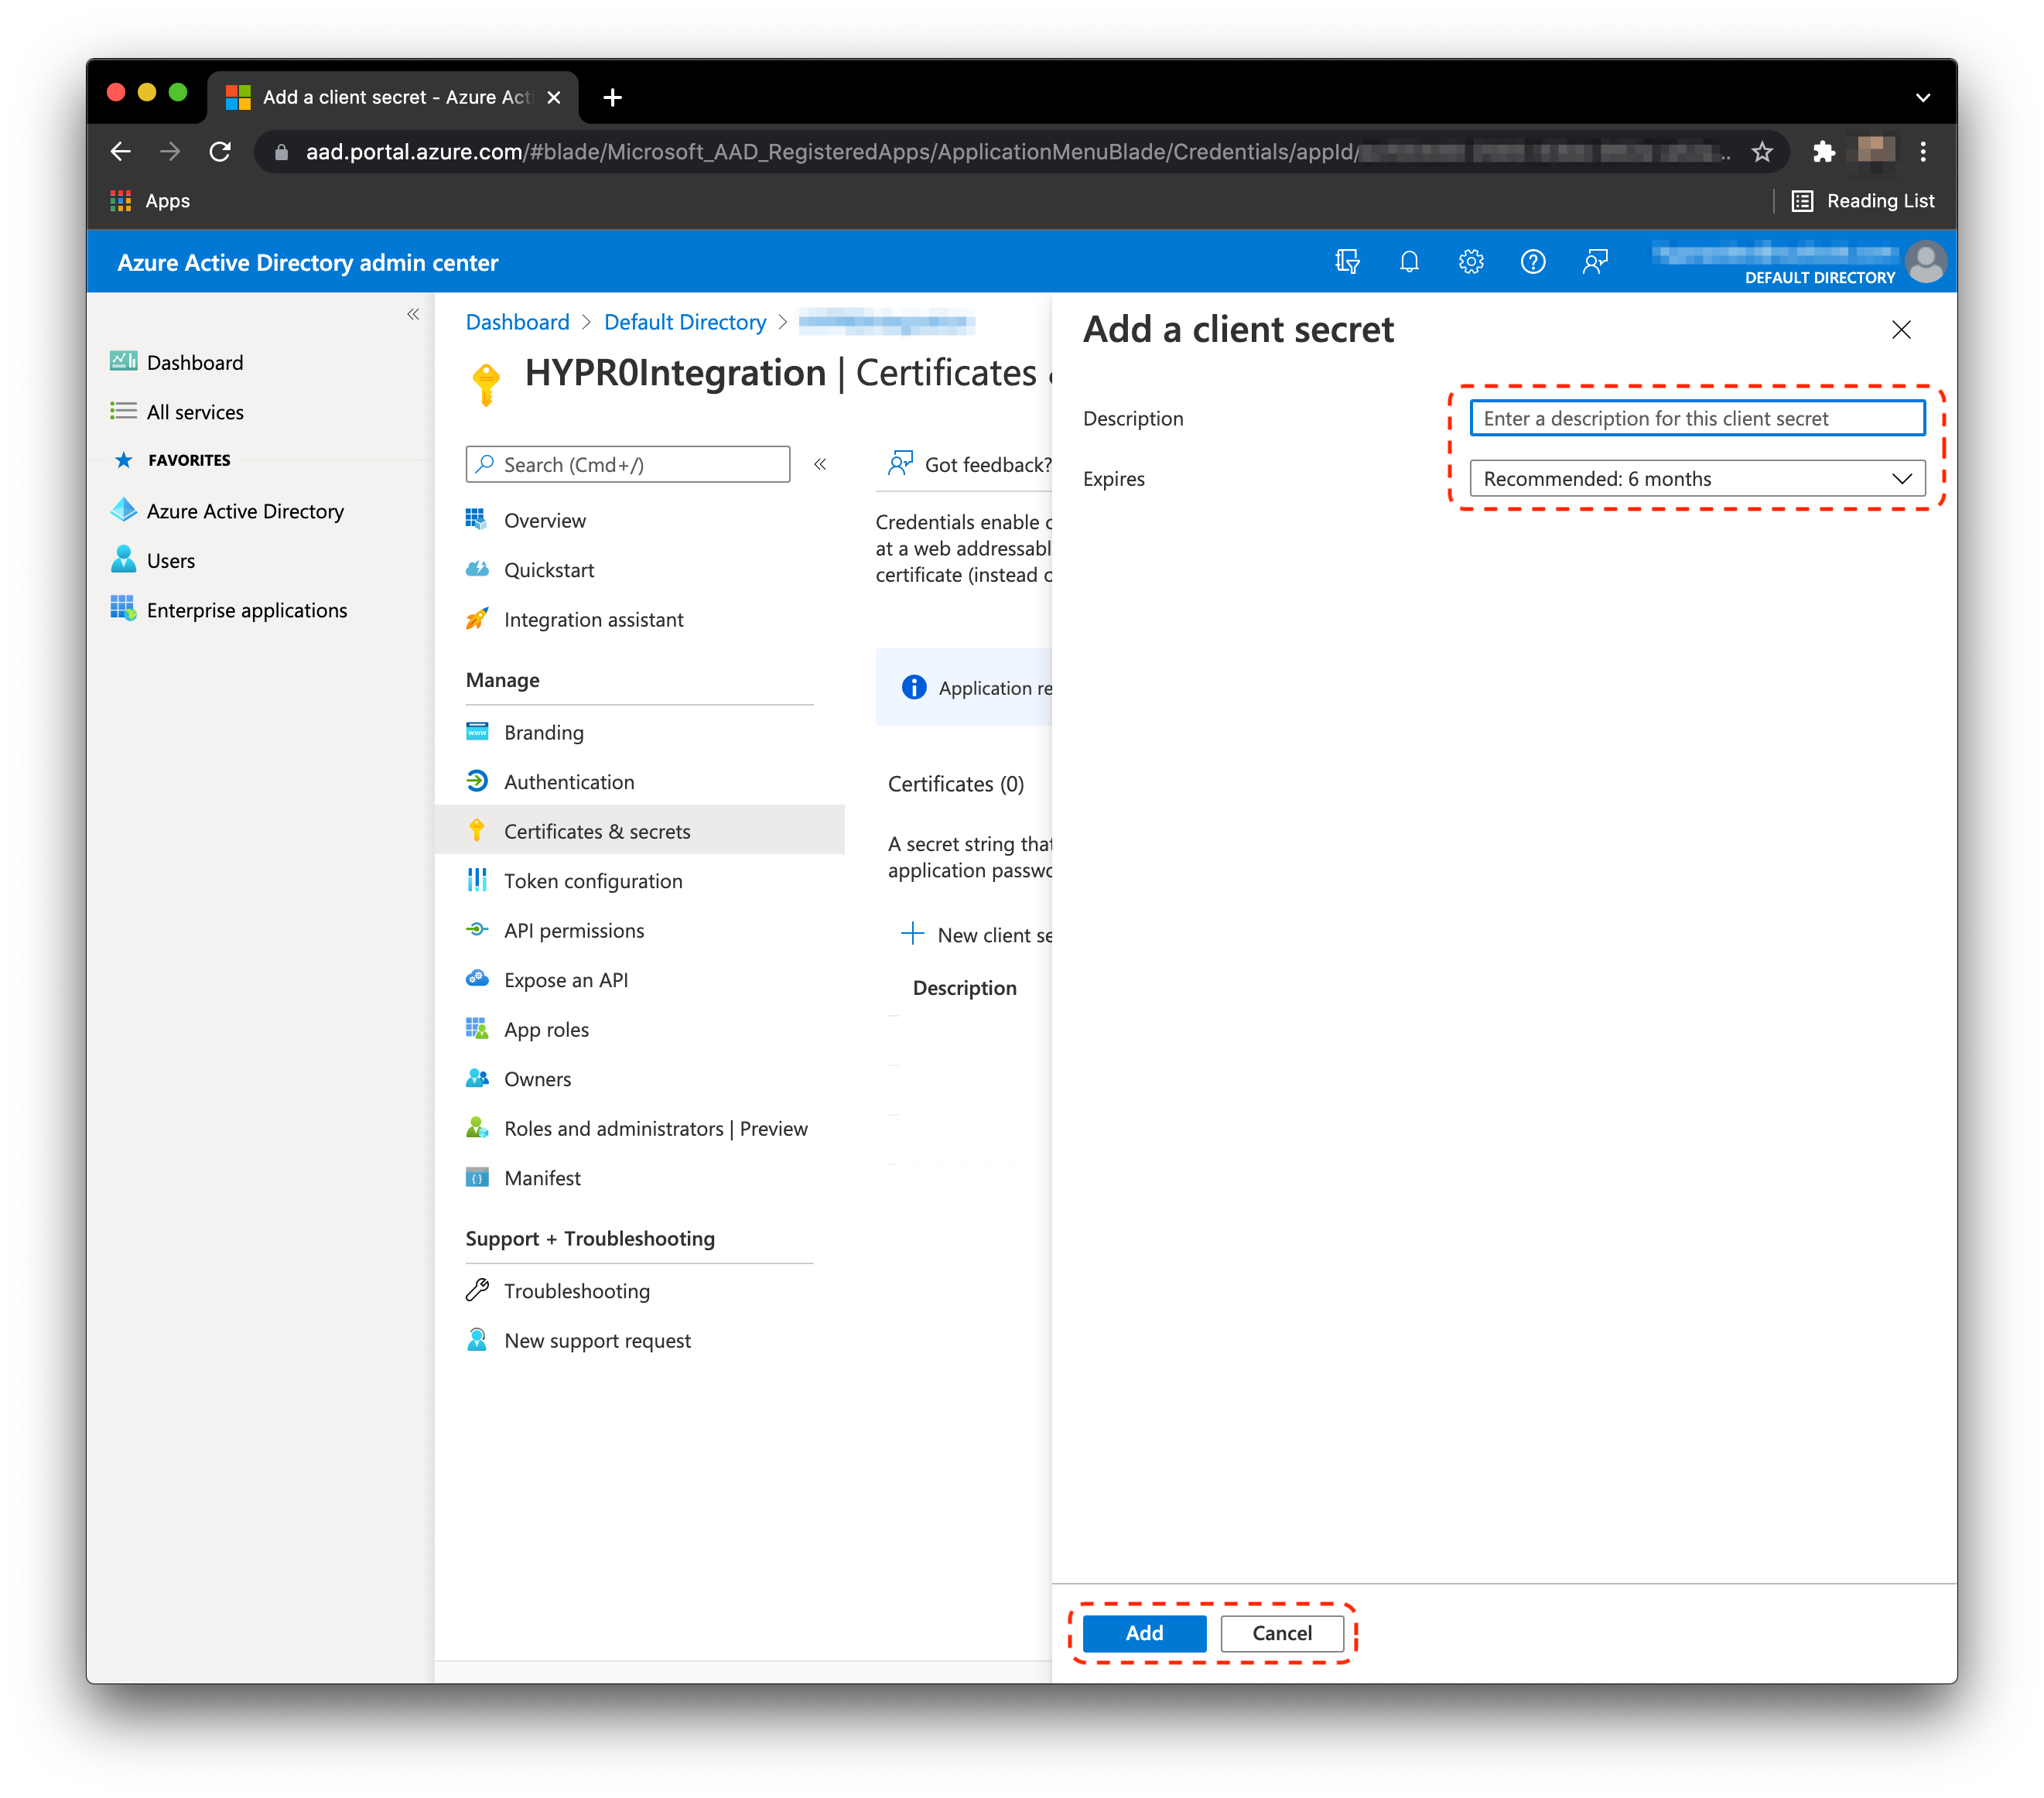
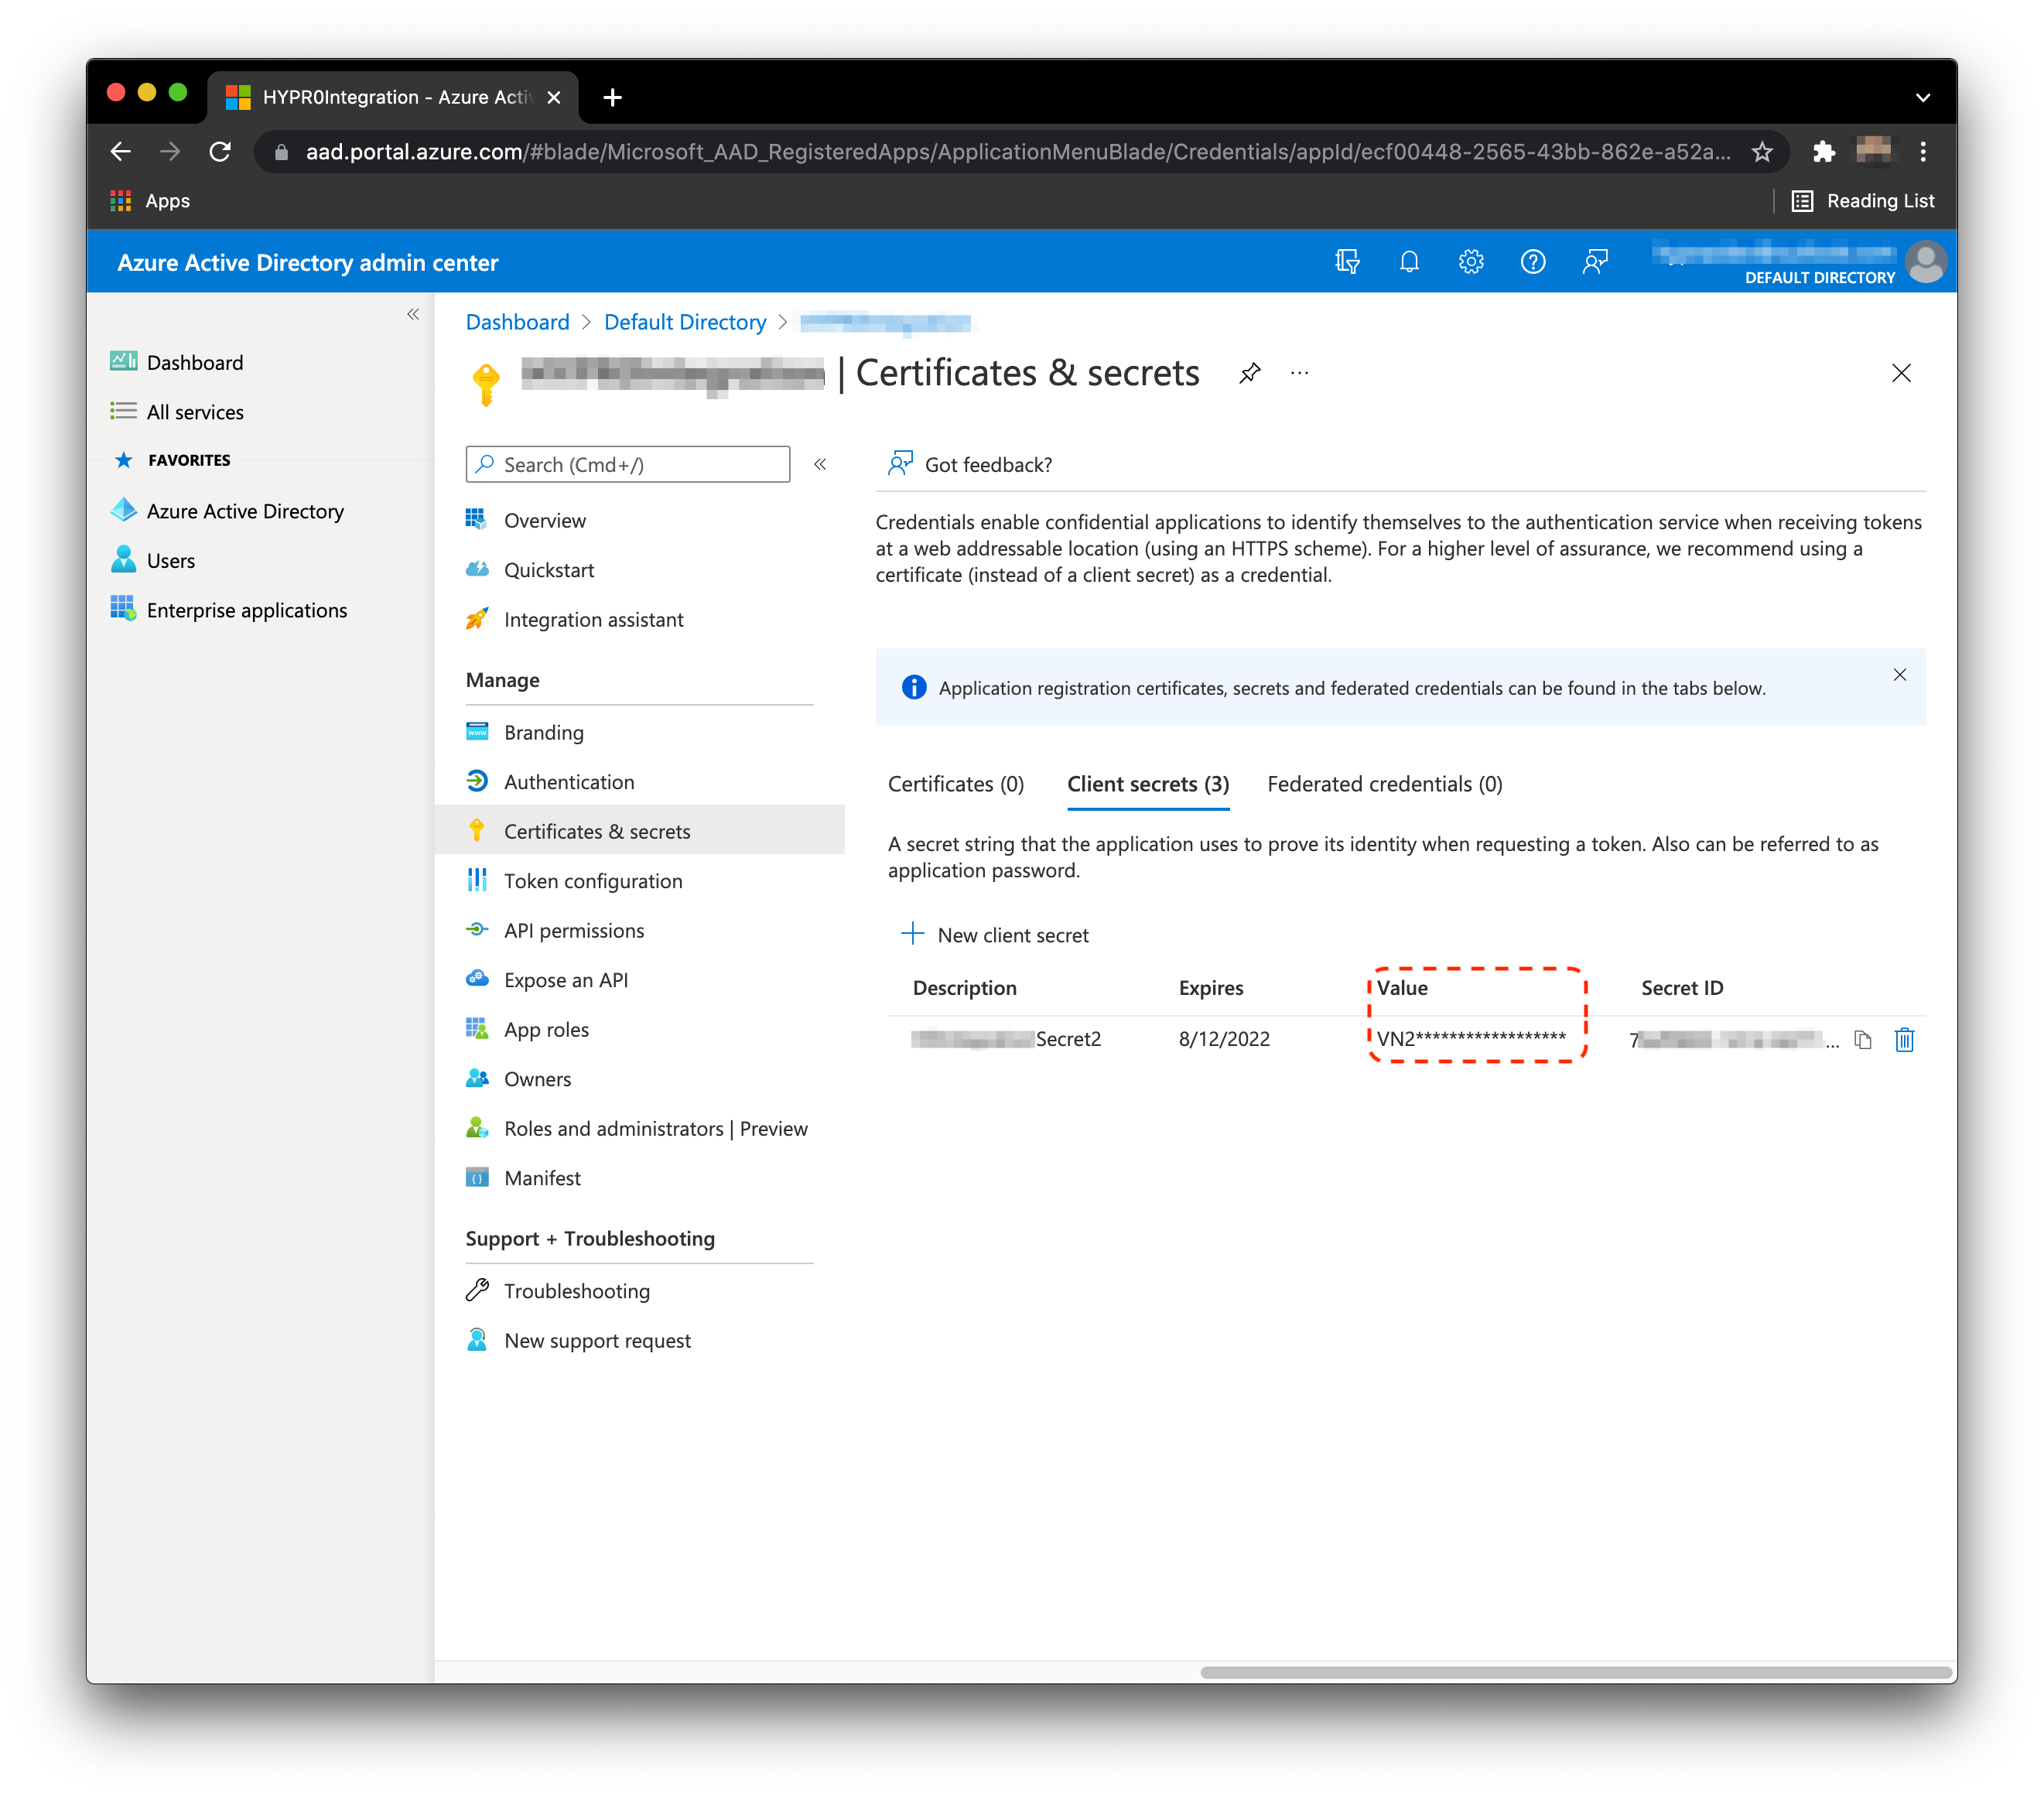
- HYPR will require the value of the secret during the integration flow. Save the value of the secret during this step, as it is not visible after. See the image below for an example.
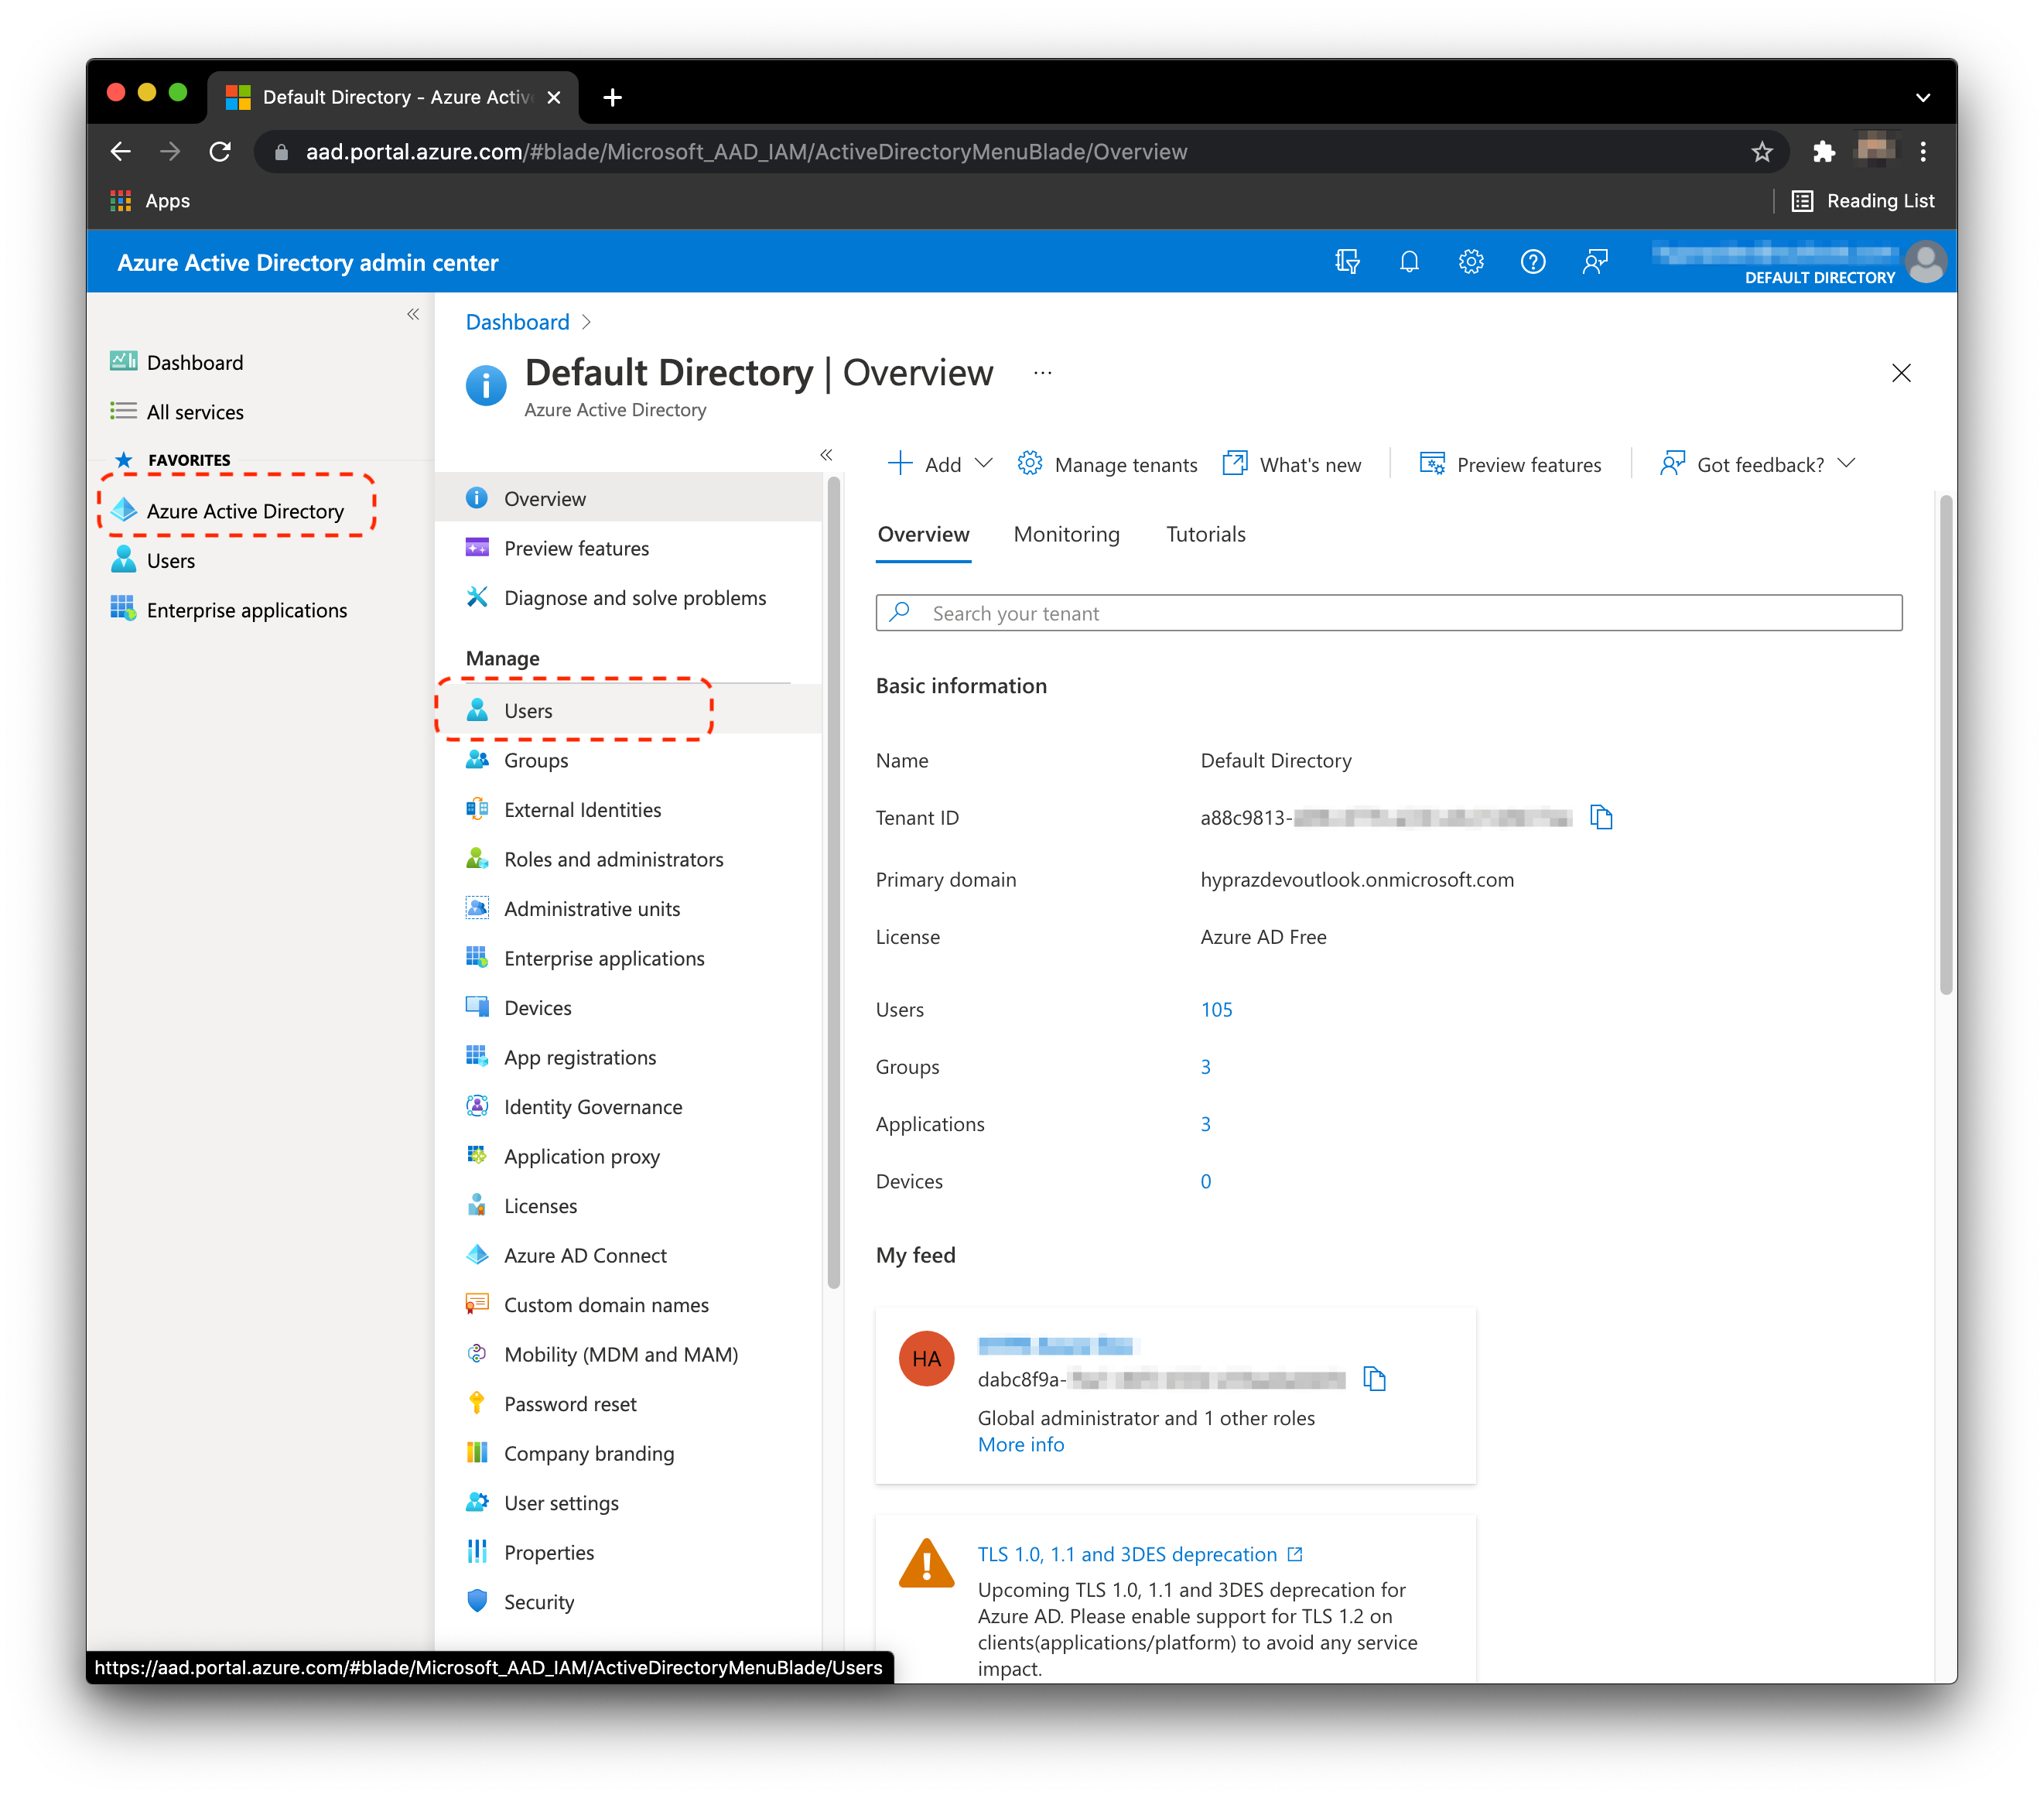
Create Service Account
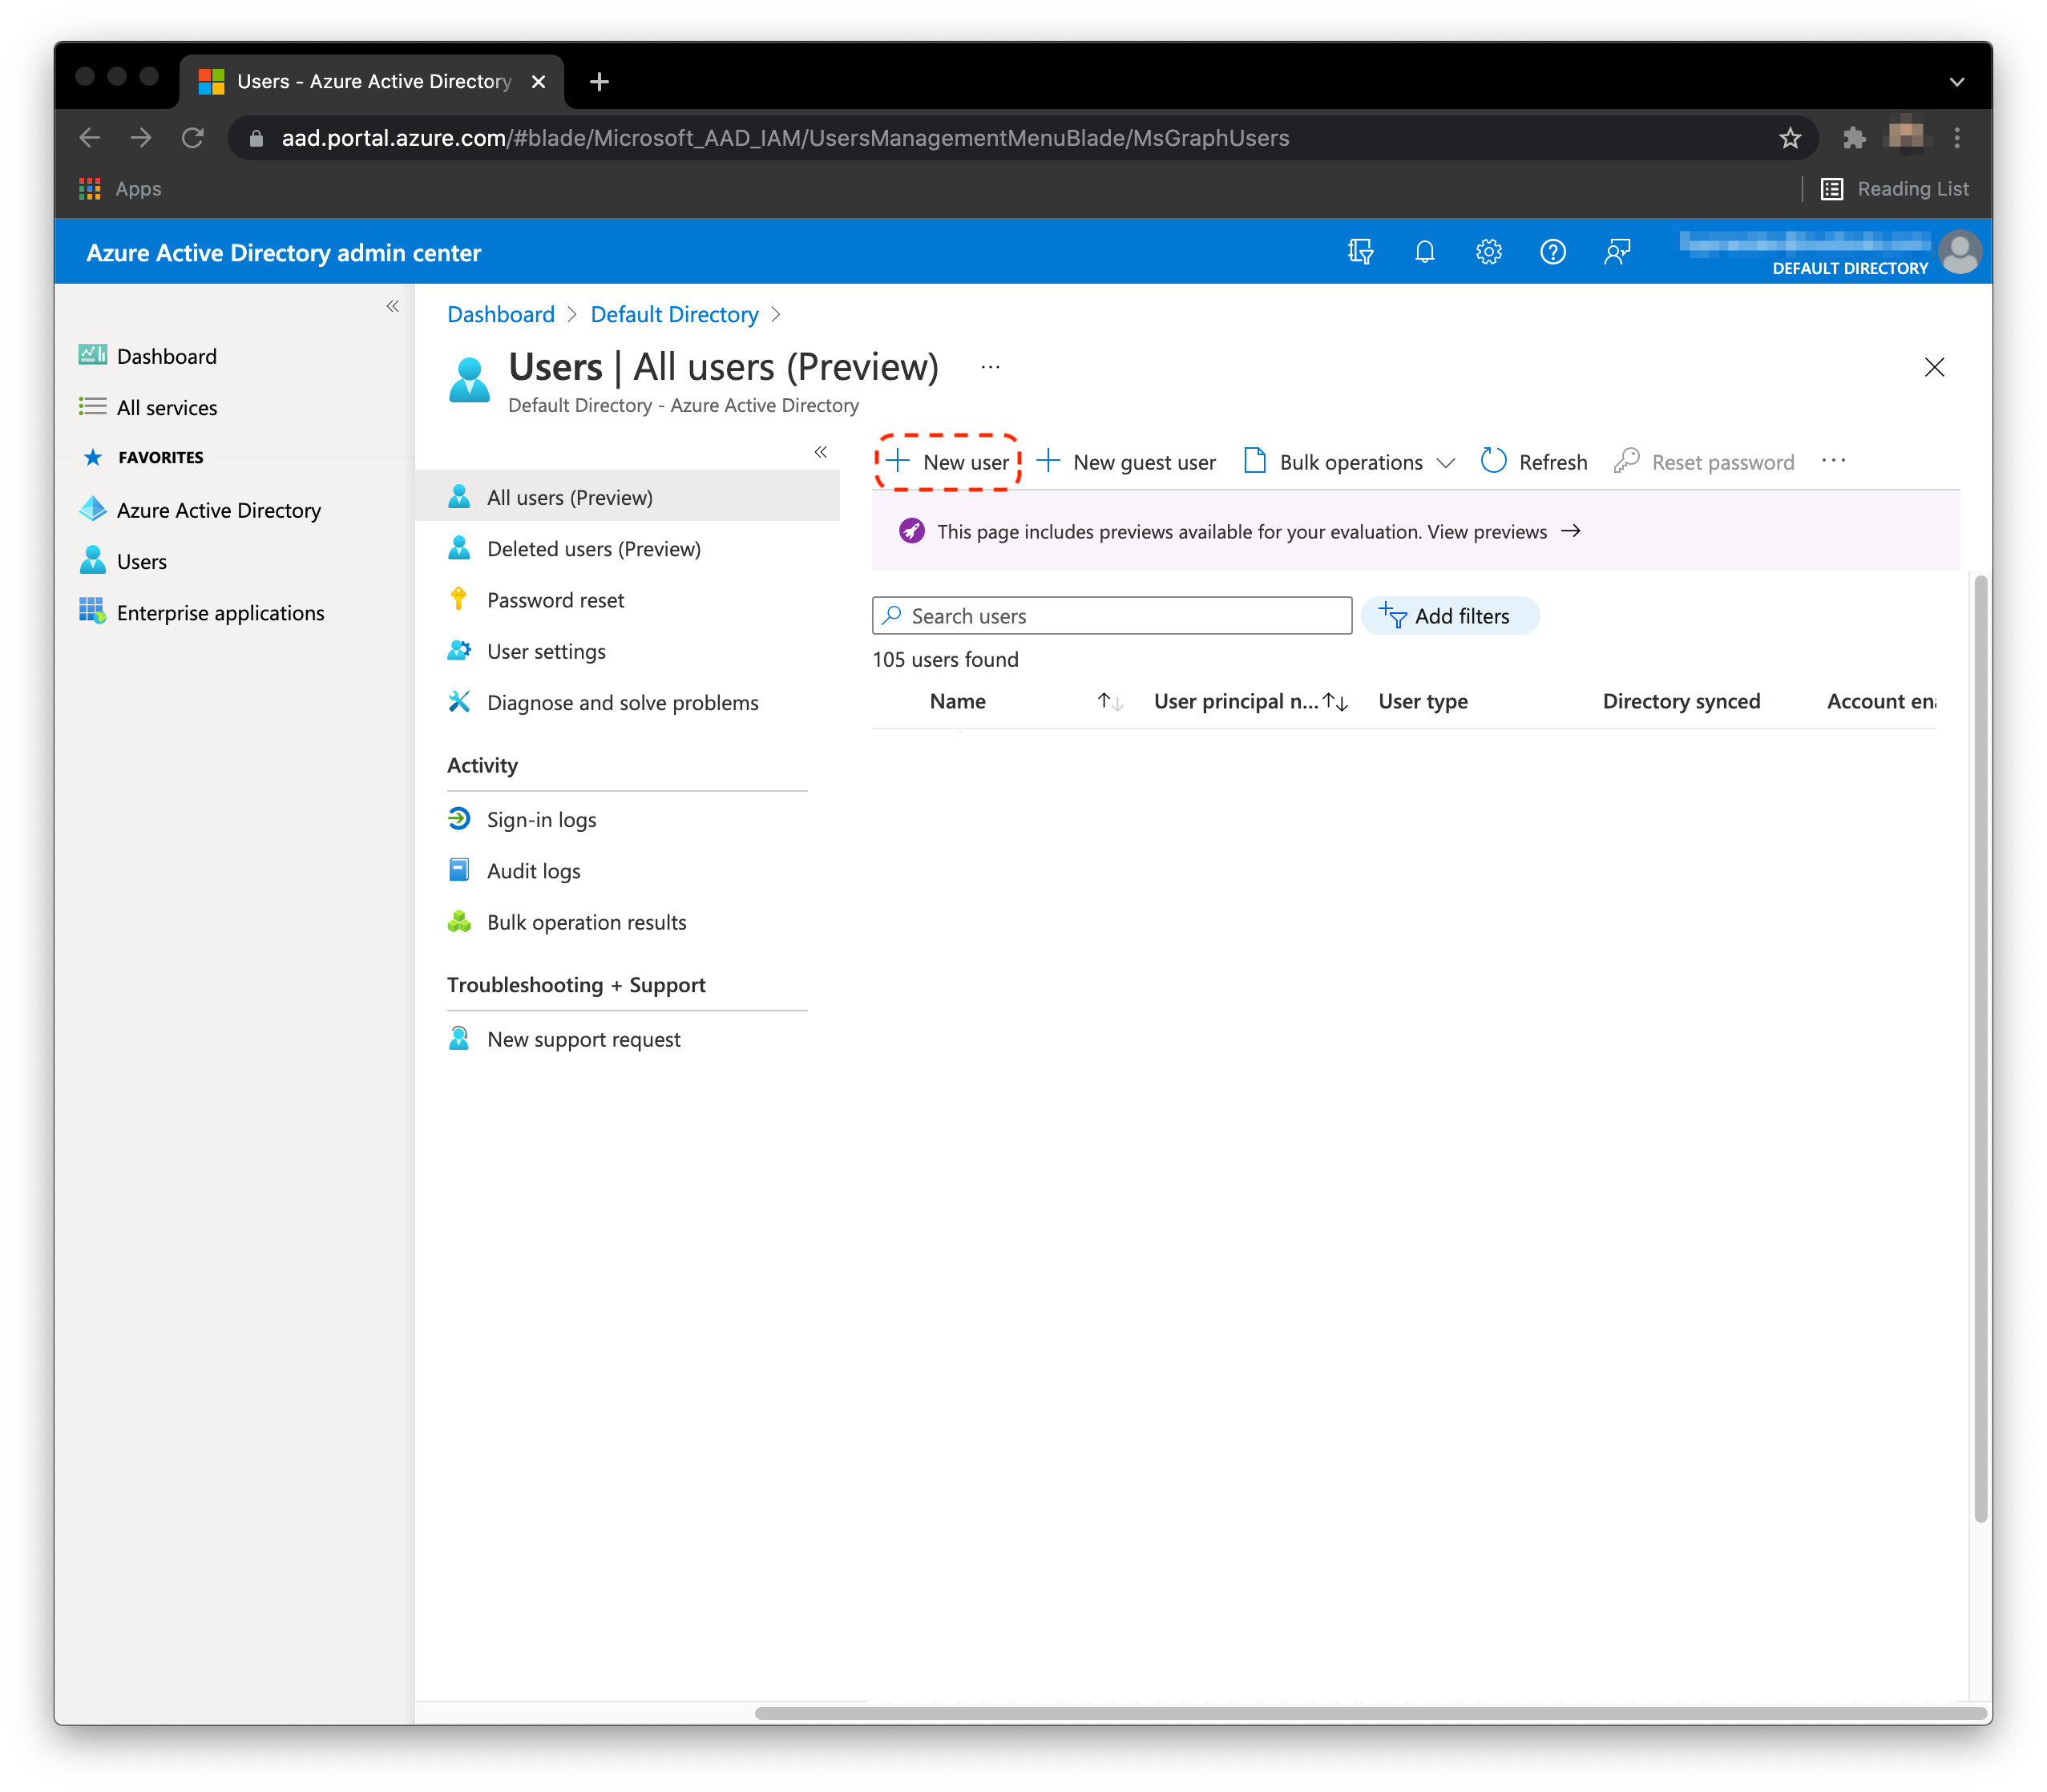
- From the Home page, Click Azure Active Directory, then Users.
- Click New user.
-
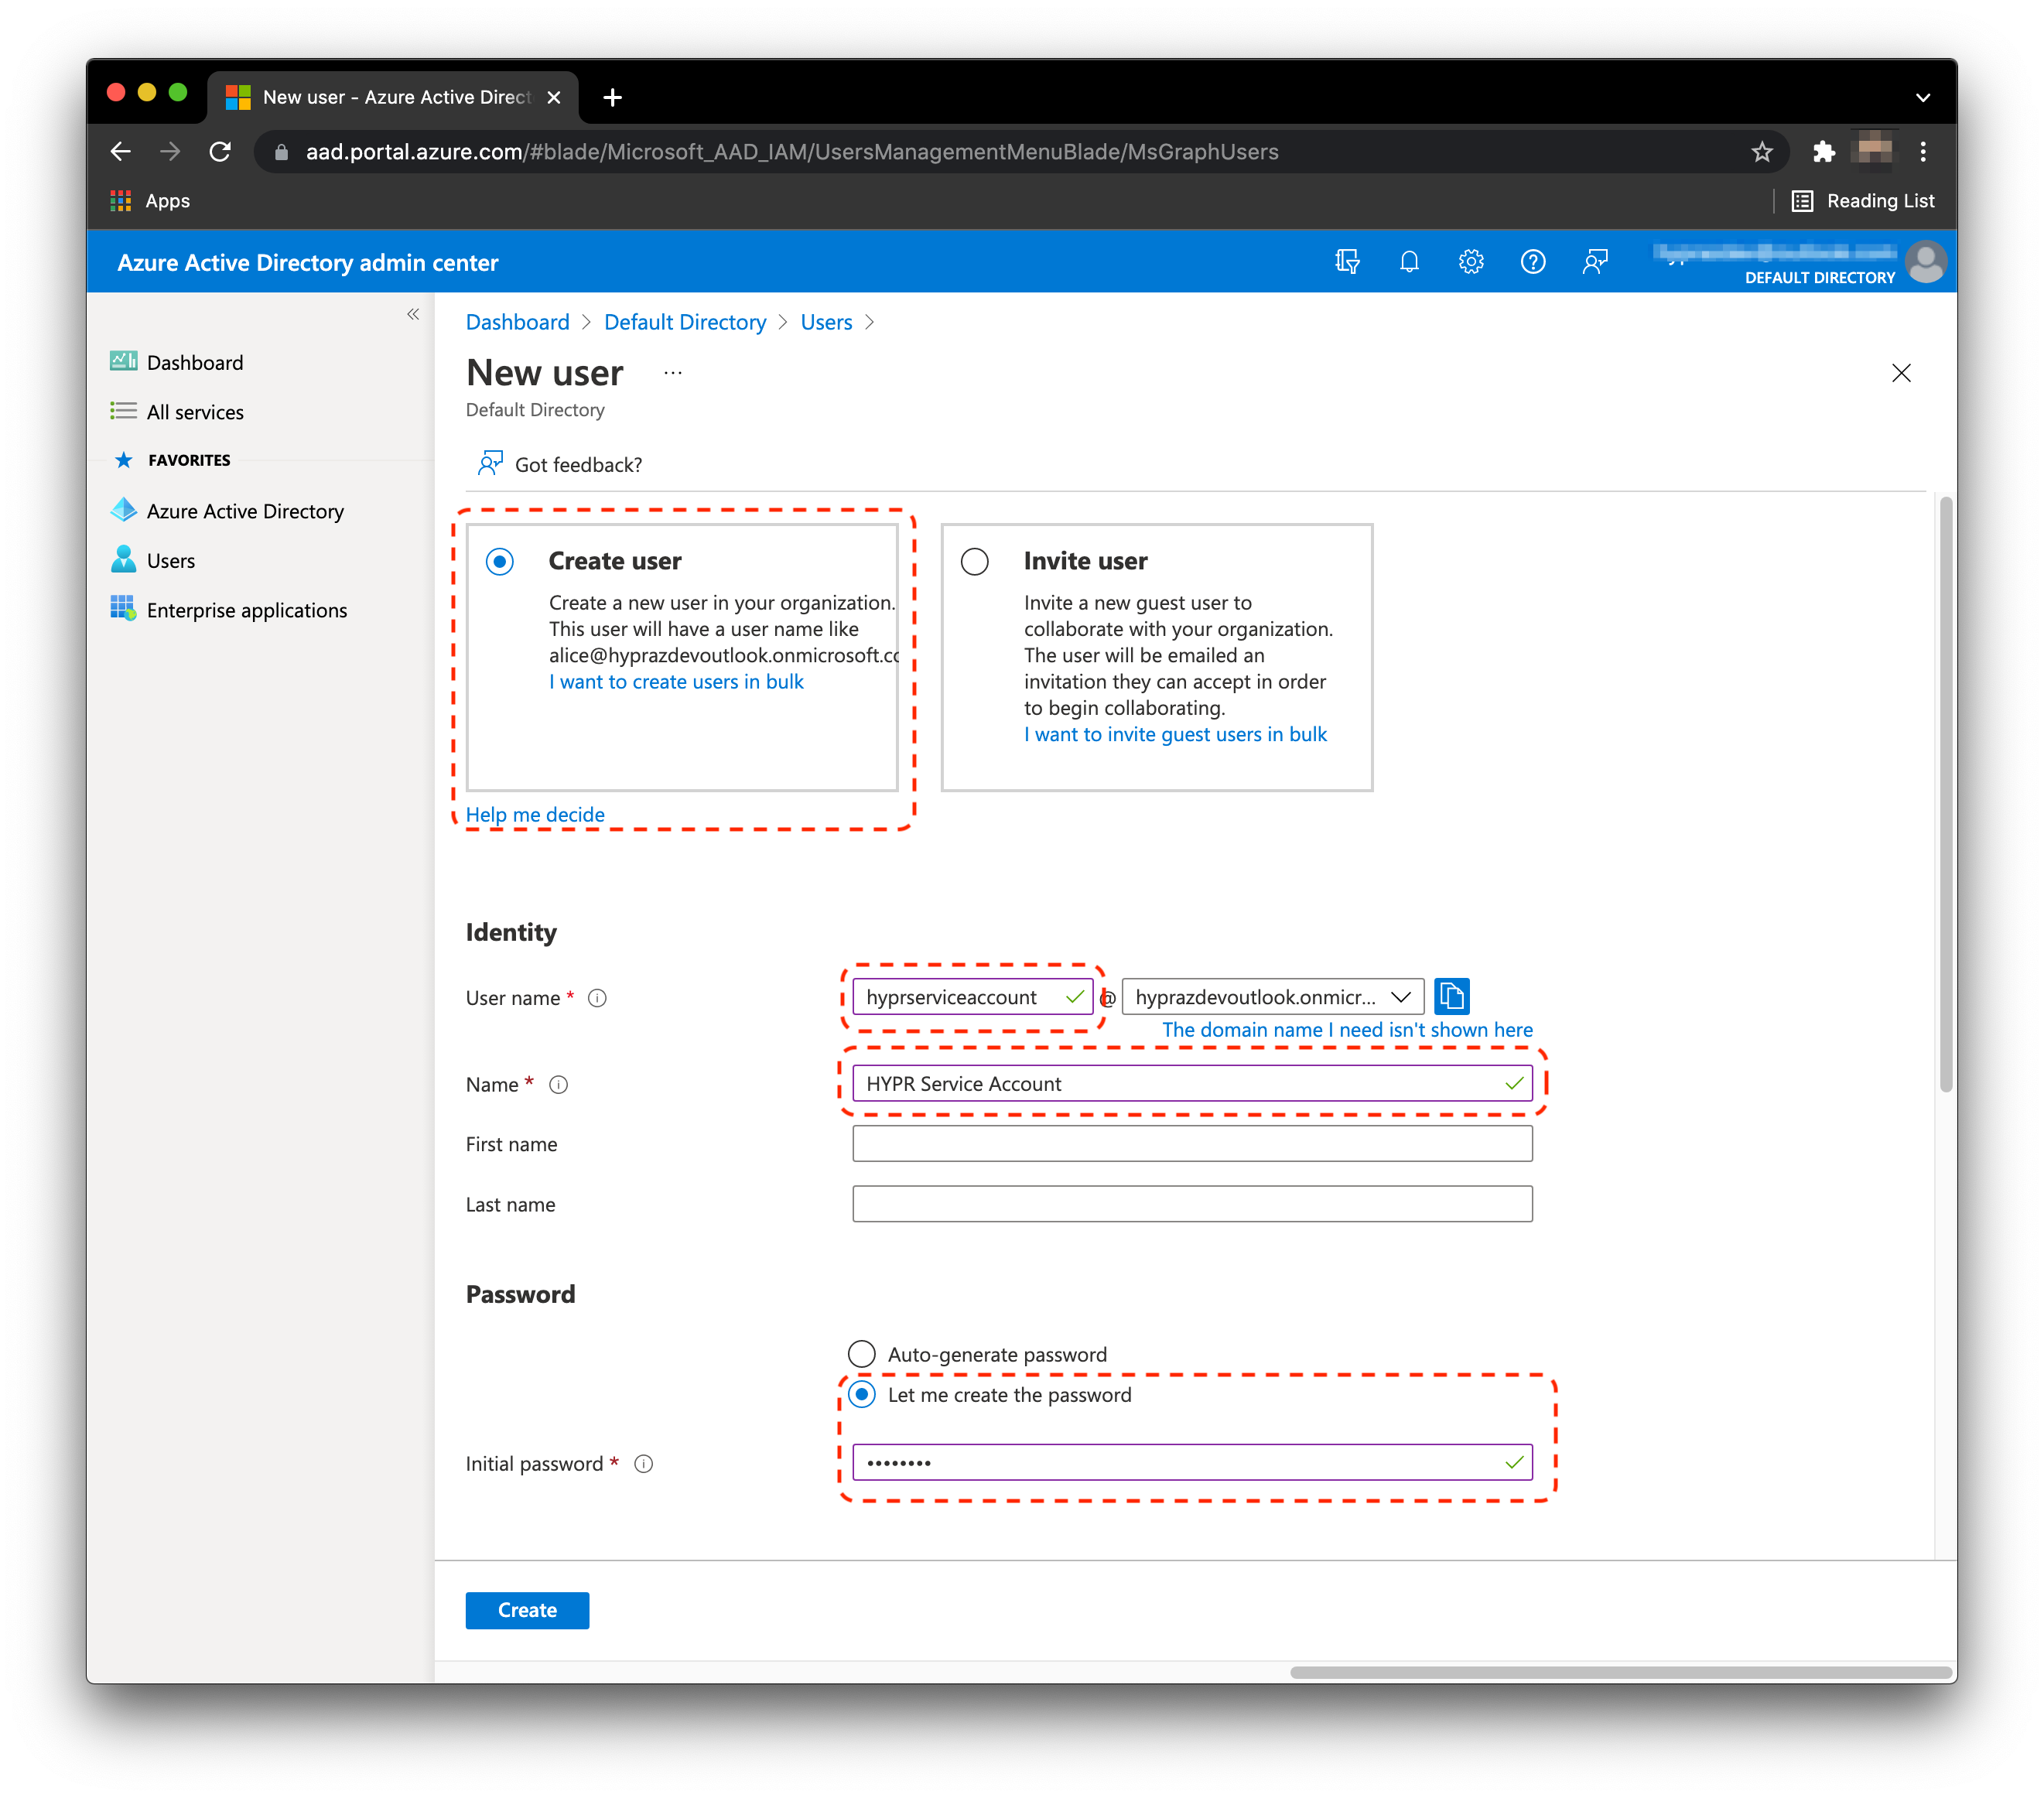
Click Create user.
-
In the User name area, type hyprserviceaccount.
-
In the Name area, type HYPR Service Account.
-
Click Let me create the password, then set and save the password.
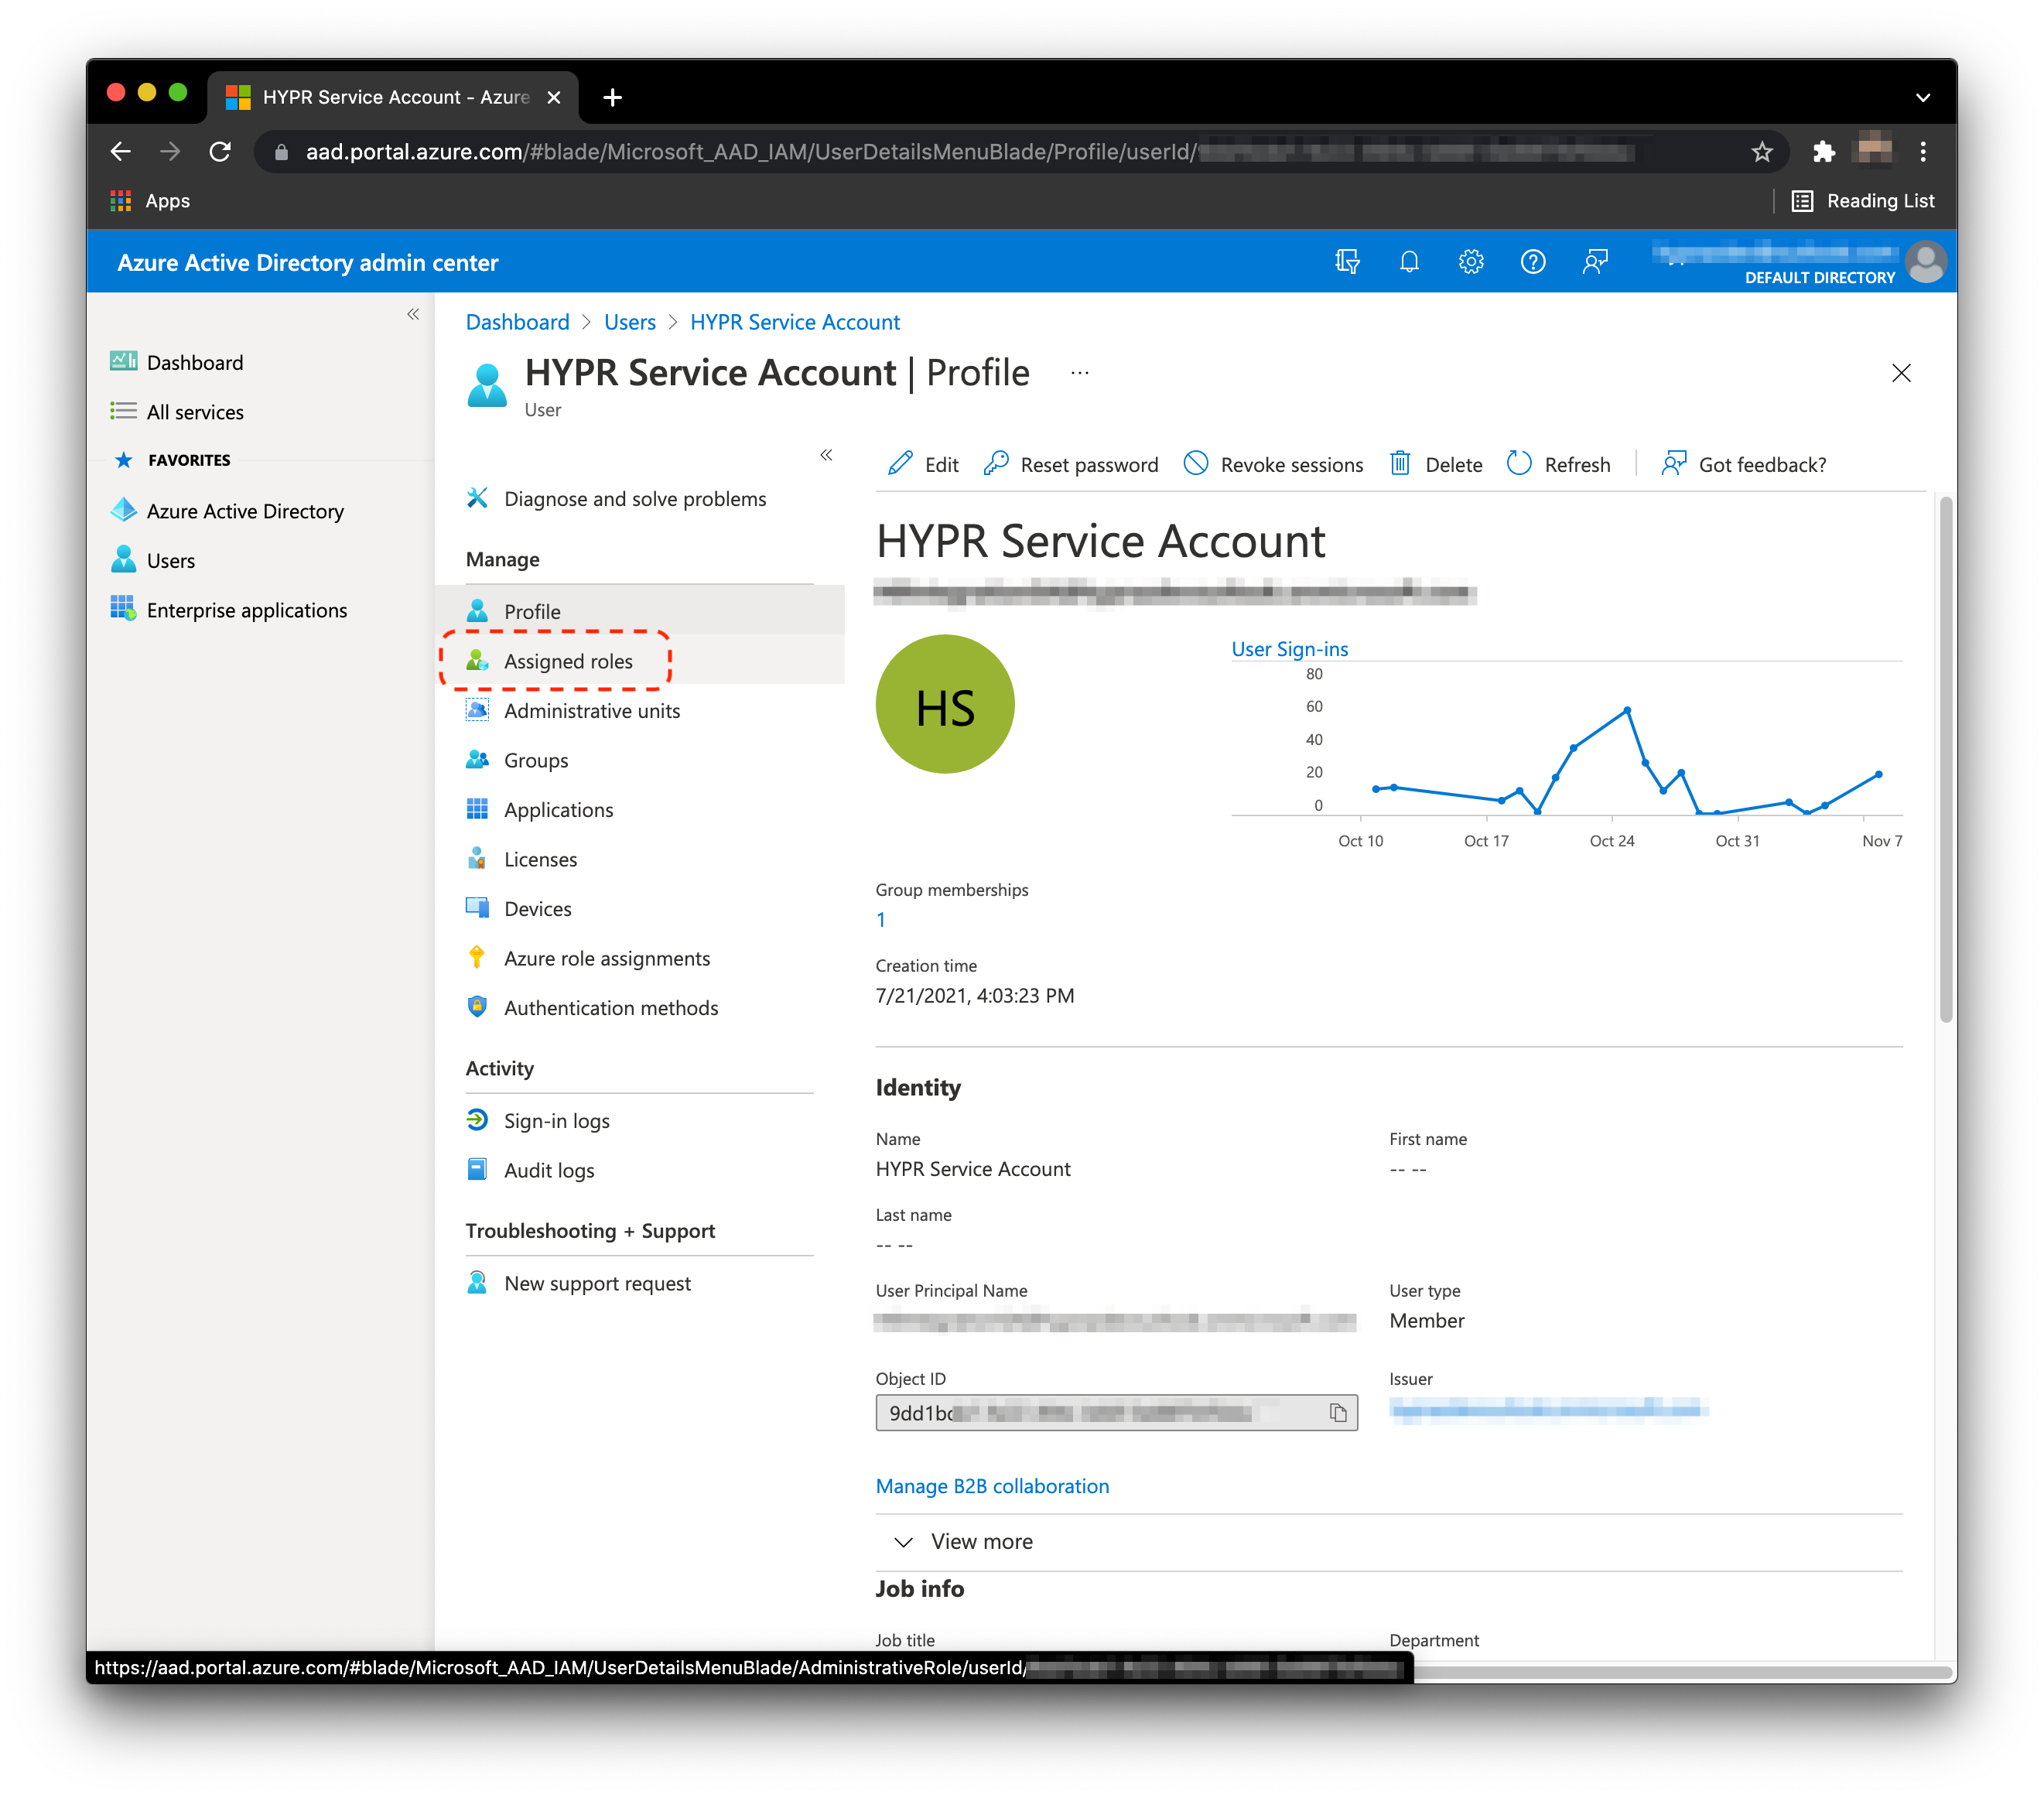
- Next we must assign roles to the service account. Click Assigned roles.
-
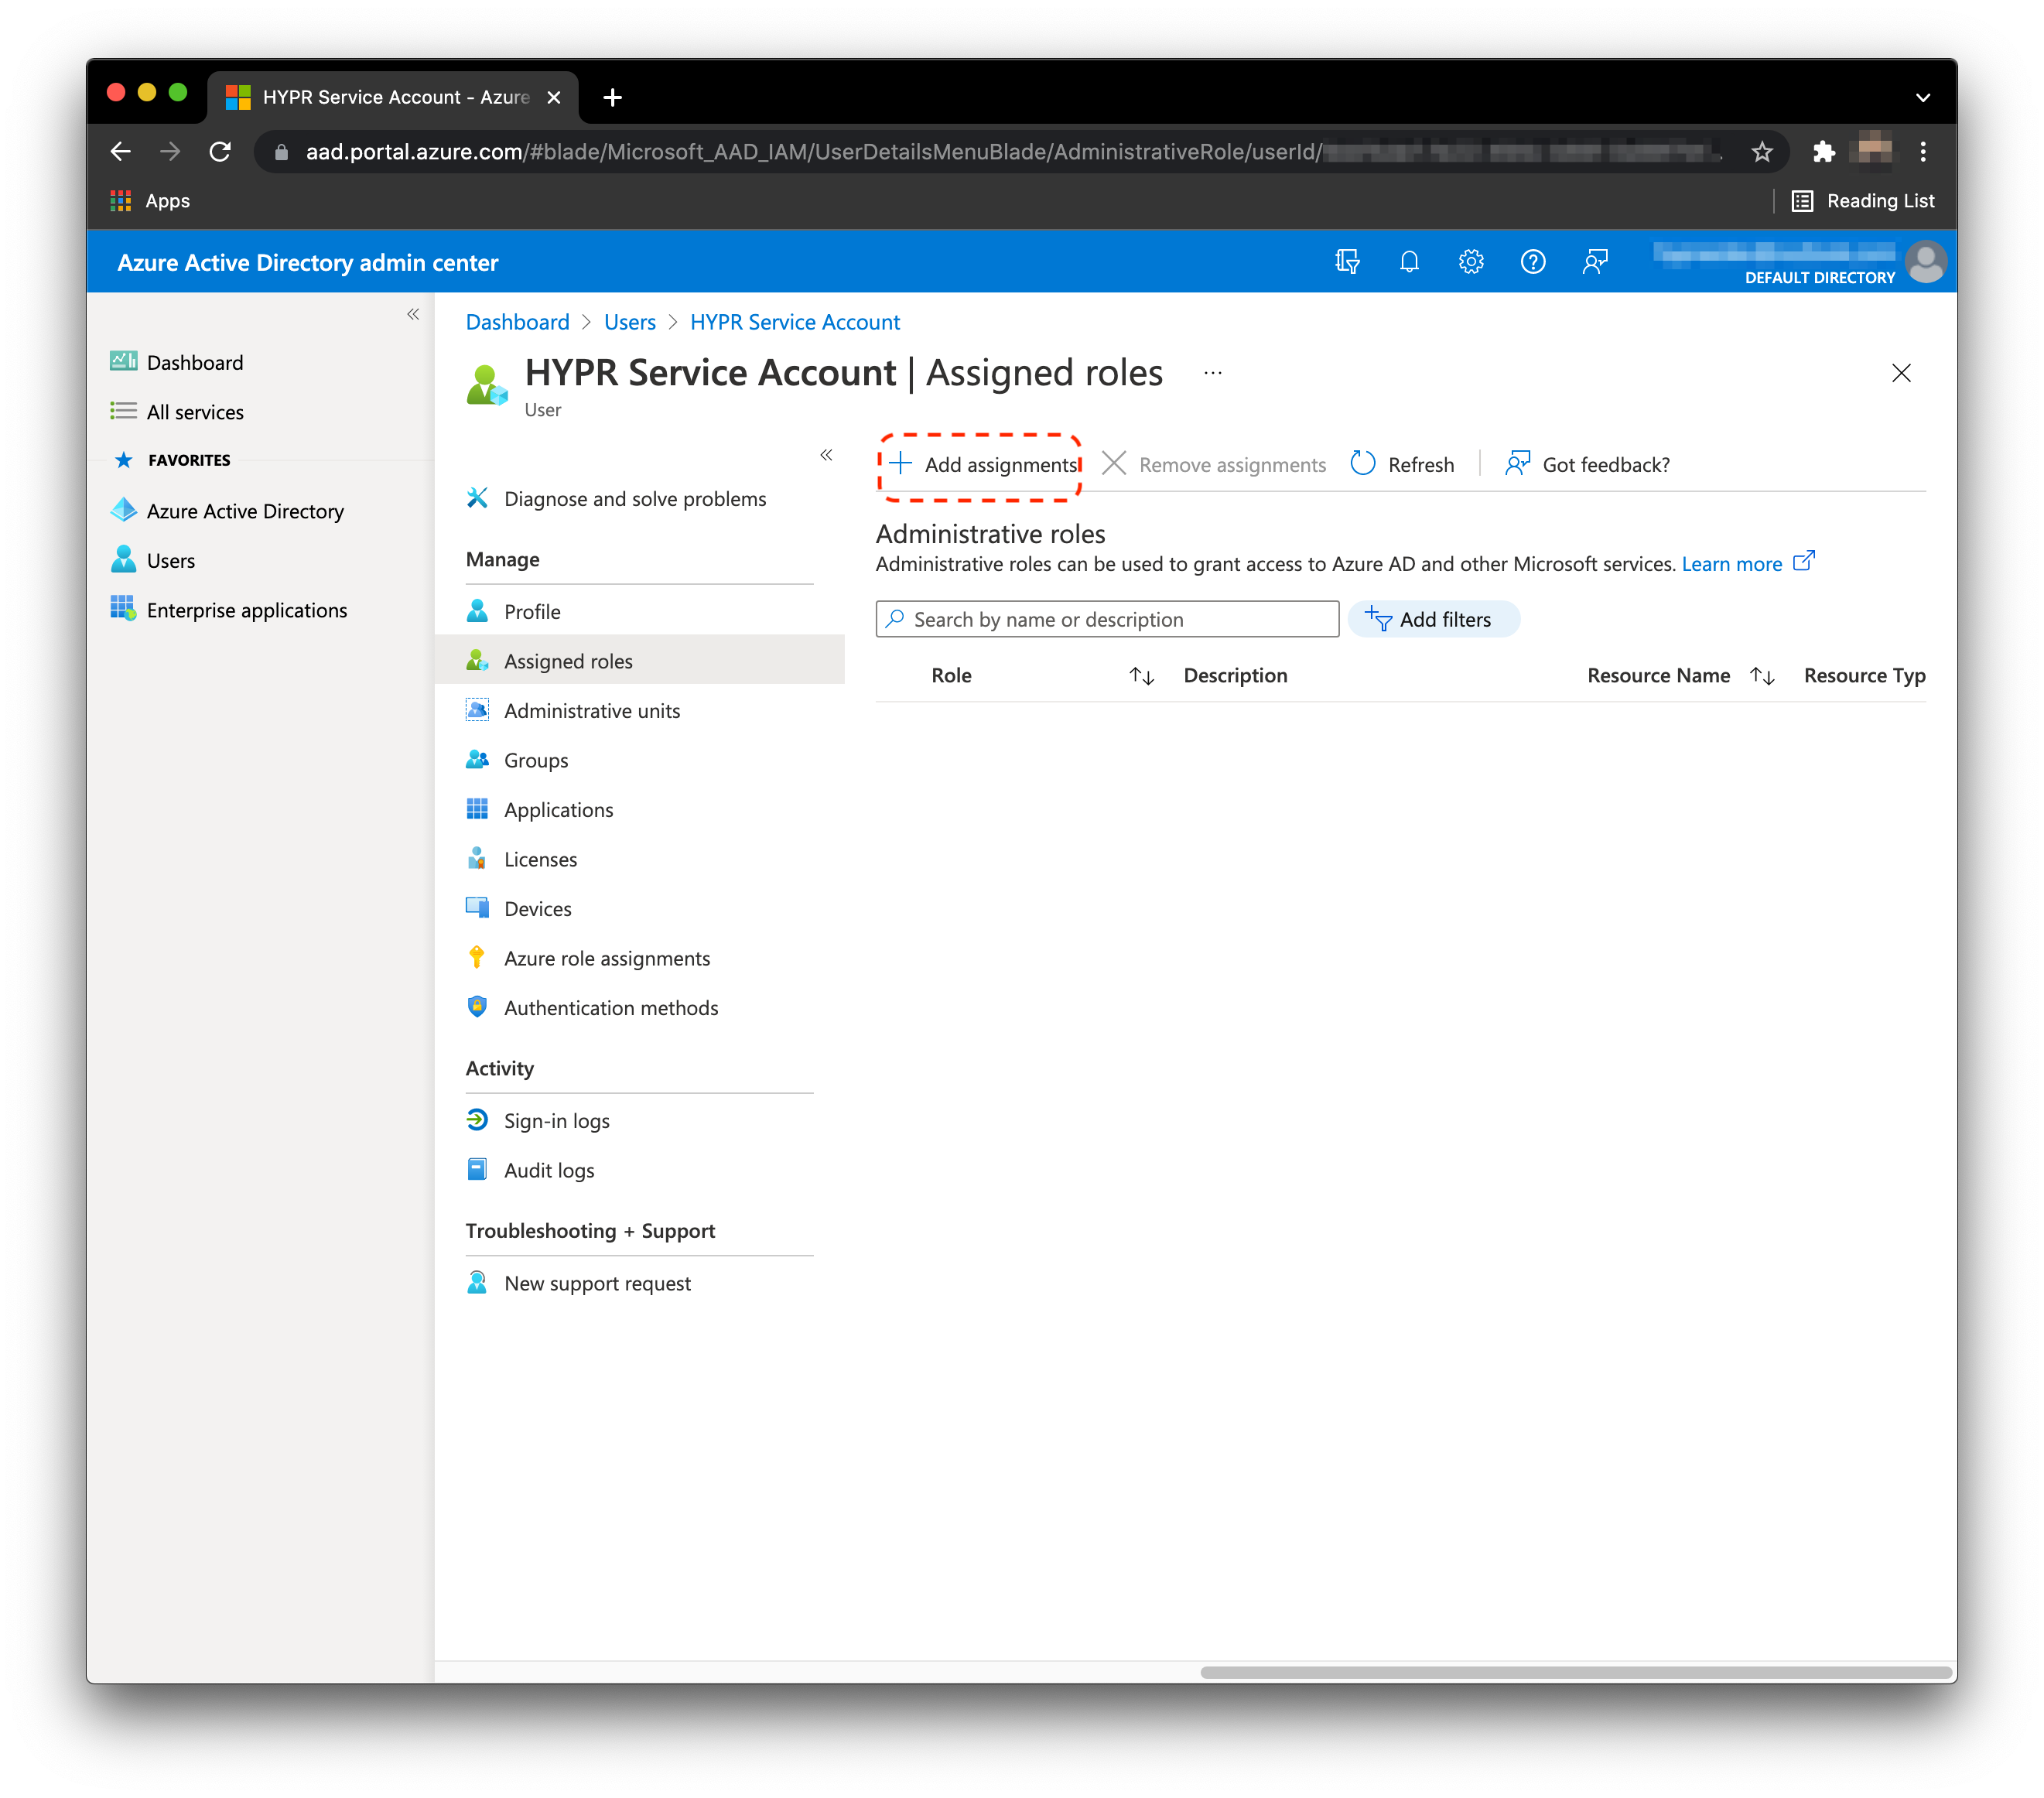
Click Add Assignments.
-
Search for and add the following roles:
- Directory Writers
Allows the necessary group creation/update and also handles getting the user data for syncing entries to HYPR; needed throughout the entire lifecycle of the HYPR-Azure integration - Privileged Authentication Administrator
Allows HYPR to manage the HYPR Enterprise Passkey on Azure; will be able to delete it when removed via phone or CC, and to have accurate data on the HYPR User Management list in the event it is deleted directly in Azure
- Directory Writers
-
Click Add when done.
Expect the Unexpected
This is the area in which Azure is very slow to replicate the changes. The Azure administrator may need to refresh the page many times for all to show up. Sometimes, they may need to add it twice. This is expected behavior.

Service Account
At this time, the prospect must open up an incognito browser and log into
portal.azure.com, as this service account. This is required to set the permanent password of the account.
One Condition
If during this login, the account gets prompted for MFA, it means that a Conditional Access Policy must be updated to exclude the
hyprserviceaccount.
Enable Security Keys in the Azure Tenant
- Login to
portal.azure.comas a global admin account. - Navigate to Azure Active Directory > Security > Authentication methods. Click FIDO2 security key.
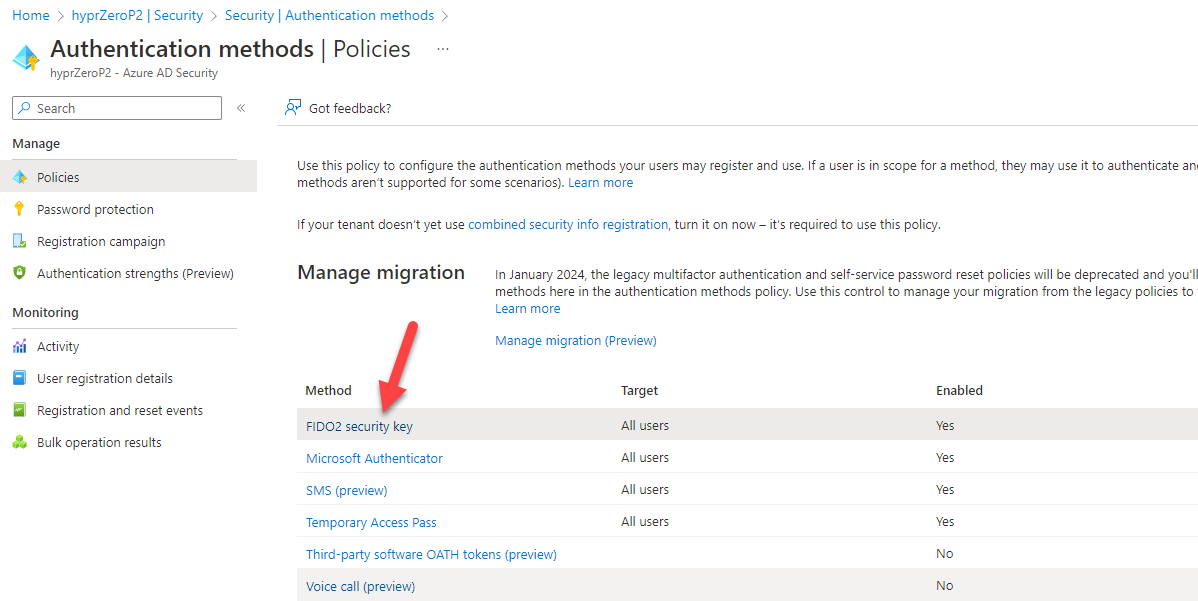
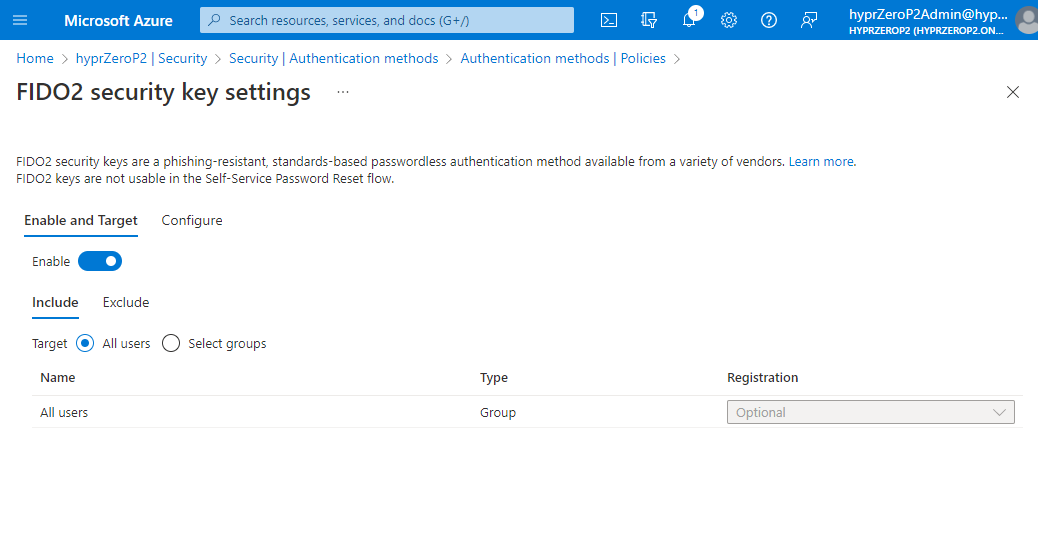
- Here you can enable security keys and define allowed users. Include All users and leave the registration as Optional.
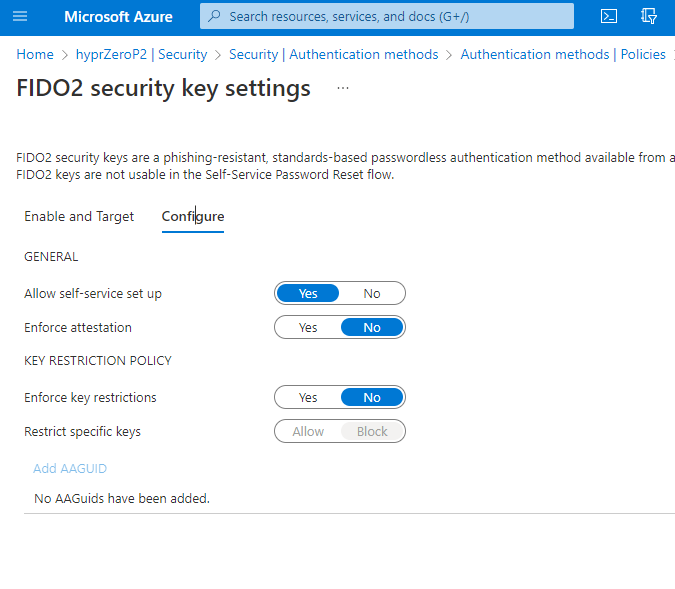
- On the Configure tab, make sure the settings are as depicted below. This is the only configuration we will support at this time.
Enforced Attestation
Microsoft uses the Enforce attestation feature to ensure the FIDO2 authenticator is certified by the FIDO Alliance and approved by Microsoft's team. HYPR's AAGUID was added as an approved FIDO2 Authenticator on March 2023. HYPR supports this setting as either True or False.
Enable Security Keys in Intune
Once security keys are enabled in Azure, you must set a policy in Intune (i.e., Endpoint Manger) which will allow for security key login on Windows OS. Follow Microsoft’s instructions on setting up Intune policies for security key-enabled logins.
Setting Up the HYPR Tenant
When up and running, be sure HYPR has enabled the necessary features to support HYPR Enterprise Passkeys.
To install a new Enterprise Passkeys integration in Control Center:
-
On a new tenant, navigate to Integrations > Add New Integrations > Azure AD.
-
You will be prompted to select your login experience. For the FIDO2 Mobile Authenticator, select Native Azure Login Experience, and click Next.

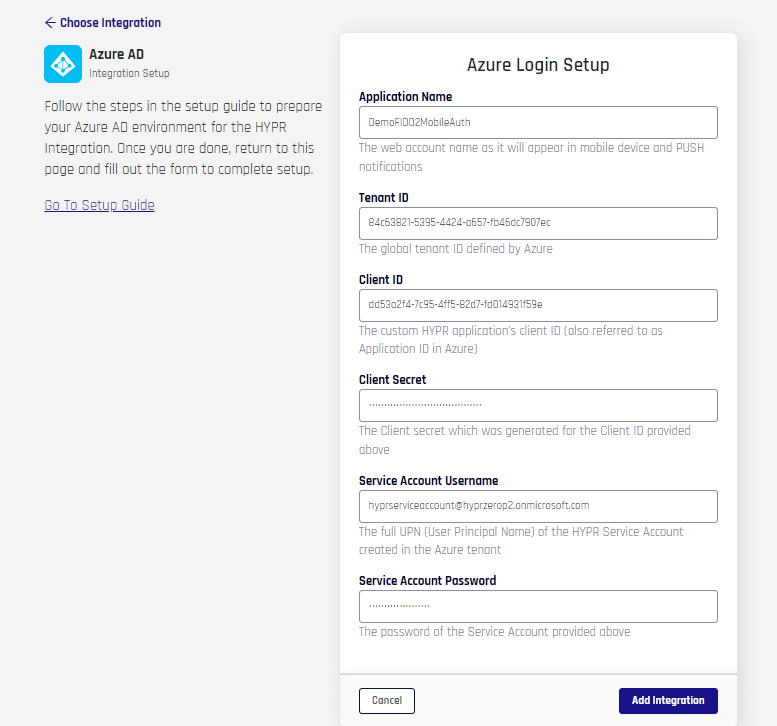
- You are presented a form which contains the HYPR Application Name and all of the Azure-related data needed for HYPR to connect to the Azure tenant. These are the items created/captured above; complete the fields as follows:
- Application Name: Only alphanumeric, spaces, dash, underscores, or trailing
-or_are allowed; this is the same validation rule for all HYPR RP Application names (rpAppId); the namespace is limited to 23 characters - Client ID: The ID of the client/application in Azure AD
- Tenant ID: The ID of the tenant
- Client Secret: The secret associated with the client/application
- Service Account Username: The user account with permissions which allow API calls
- Service Account Password: The Service Account password
When you are finished, click Add Integration; if Add Integration is successful, it confirms all of the parameters provided were validated and HYPR can now connect to Azure
- Application Name: Only alphanumeric, spaces, dash, underscores, or trailing
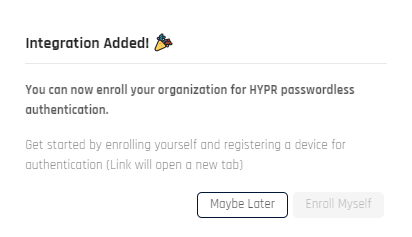
- You will be presented a popup box. Click Maybe Later.
HYPR Groups in Azure AD
When a new Enterprise Passkey integration is successfully created, HYPR automatically creates three groups in Azure AD. You do not need to take any action to maintain these, but may wish to apply policies specific to the HYPR Enterprise Passkey. They correspond to the different phases of pairing an Enterprise Passkey:
- HYPR Group (Eligible for Pairing) - Users who have only been invited
- HYPR Group (Client Paired with HYPR) - Users paired with HYPR authentication (but not Azure)
- HYPR Group (Client Paired with Azure) - Users with Enterprise Passkey authentication
-
With a new application in HYPR, you must make sure HYPR has enabled the necessary features; contact HYPR Support if you have not done so already to ensure full functionality.
-
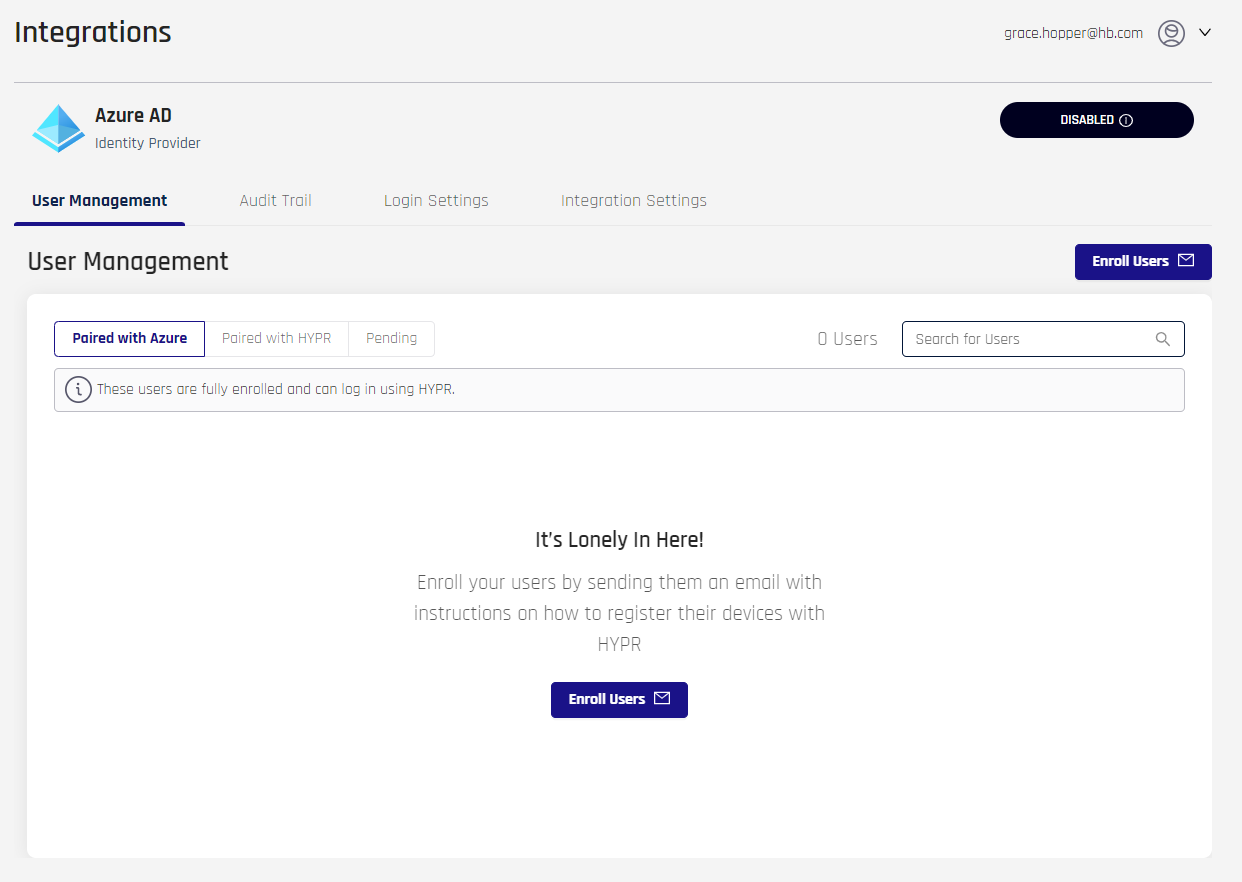
CC takes you to the Integration User Management page.
- Select the Integrations Settings tab. You will see a brief description of the Native Azure Login Experience. Note it is DISABLED. When DISABLED, the expectation is the end-user can pair with HYPR using a QR code, but cannot register or authenticate to Azure.
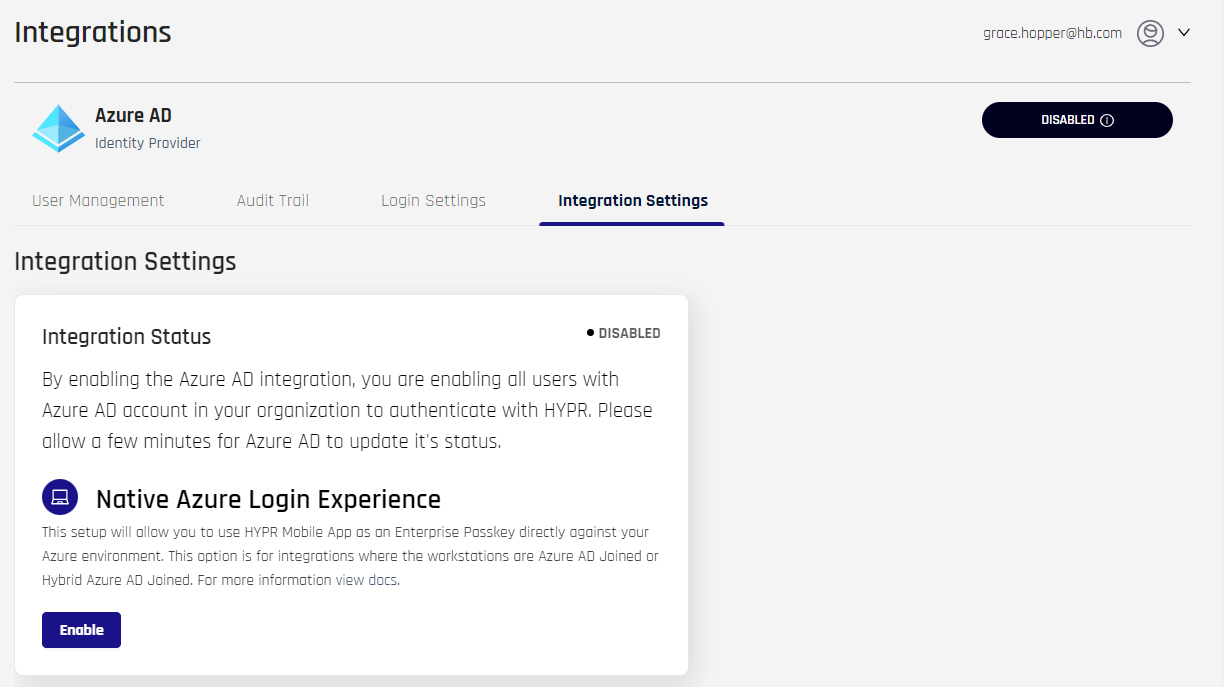
- Click Enable and a confirmation appears.
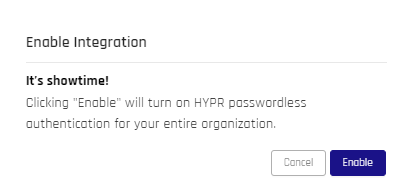
- Let the confetti fly, then click Close.
Configure and Download the Desktop Client
- Navigate to Login Settings. Here you can restrict domains and download the HYPR Passwordless client. Installation Guides and Access Control are currently being built.
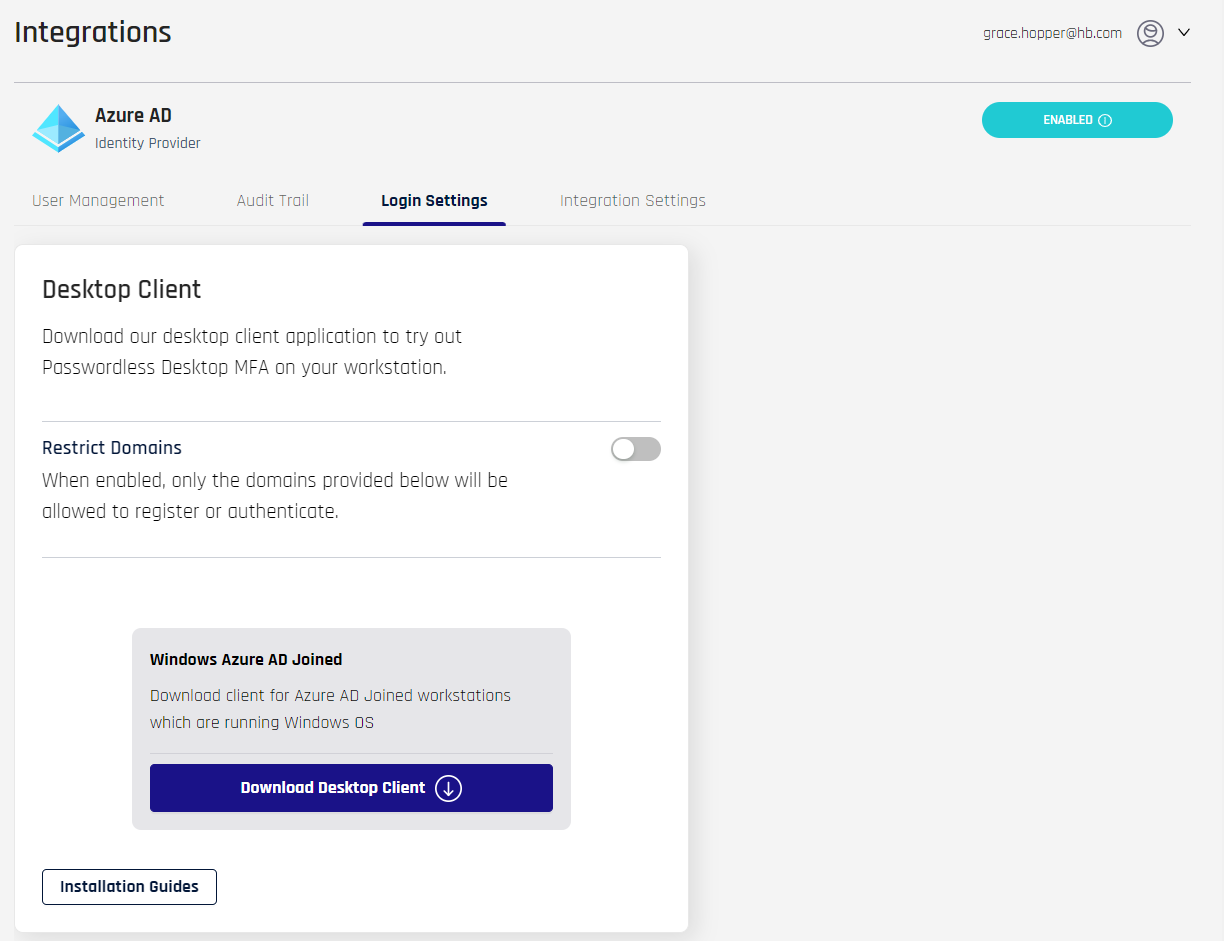
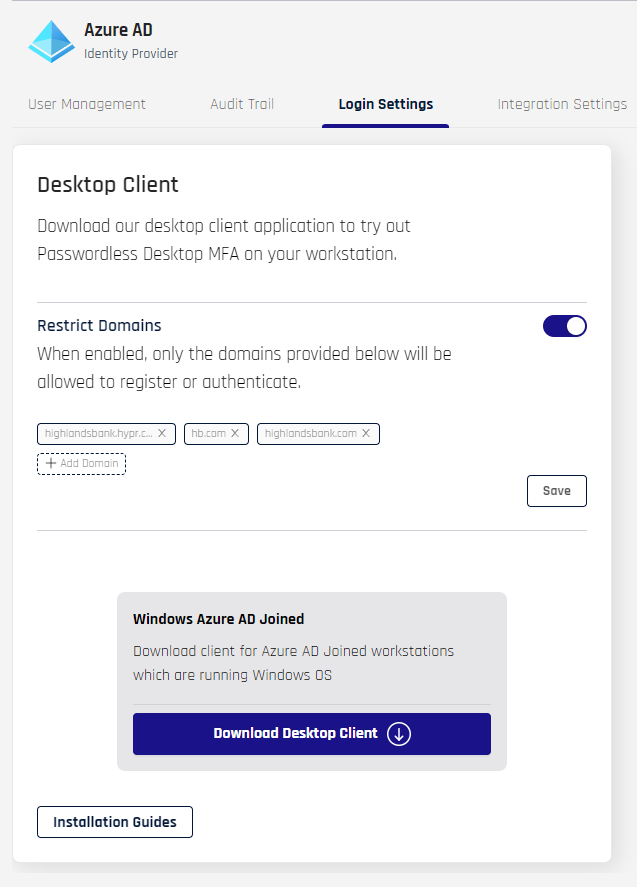
- To accept any domain name, leave the toggle off for Restrict Domains. To limit acceptable domains, toggle the switch to the On position. The dialog expands.
- Click +Add Domain and type the domain name (without
https://) in the resulting field. Press Tab or Enter to add another - To remove a domain from the list, click the x next to it
- Click Save when you are finished adding accepted domains; a confirmation message appears: "Restrict Domains saved successfully"
- Click +Add Domain and type the domain name (without
- Select Download Desktop Client and a confirmation popup displays.
- If you are unsure whether or not you should be downloading the HYPR Passwordless client in your environment, click Back and contact your support. Otherwise, click Download Now, and your browser will download a
.ziparchive containing the client installation file and ahypr.jsonfile.

- Unpack the archive. It contains two files:
hypr.json- JSON containing installation parametersWorkforceAccess-8.3.0_x64.msi- Microsoft installation file
- Install the HYPR Passwordless client on an Azure domain-joined workstation by double-clicking
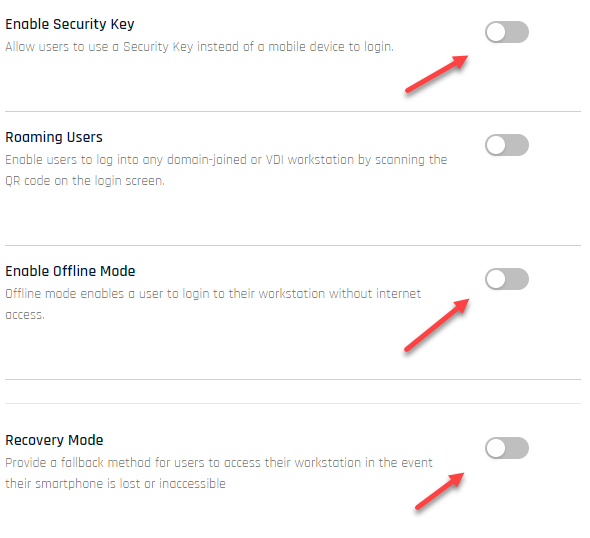
WorkforceAccess-8.3.0_x64.msi. Complete the instructions in Installing on Windows. - Change the CC UX to Advanced and navigate to the rpApp you created, then Workstation Settings. Disable the following:
- Enable Security Key
- Enable Offline Mode
- Recovery Mode
You will not need these settings. If they remain in their default state, you will see a security key option when you pair with HYPR (which will not work) and the Audit trail will report failures regarding the other two settings. Make sure to Save at the bottom of the page before continuing.
Now you are ready for users to start pairing.
Pairing a HYPR Enterprise Passkey
Single Access
Once paired in the HYPR Passwordless client, HYPR strongly recommends against adding other passkeys or login methods for this particular integration type until future releases of HYPR.
Pairing With HYPR
Pairing a workstation to a HYPR Enterprise Passkey will add the user to an Azure group (HYPR Group (Client Paired with HYPR)) that indicates they still need to pair their passkey with Azure. Administrators may wish to use this group for policy changes or email reminders to complete pairing. To help users through the Azure pairing afterward, notifications will show up in the HYPR Mobile App and HYPR Passwordless device management screens with instructions and links.
- Login to Windows as an Azure cloud-only account (i.e.,
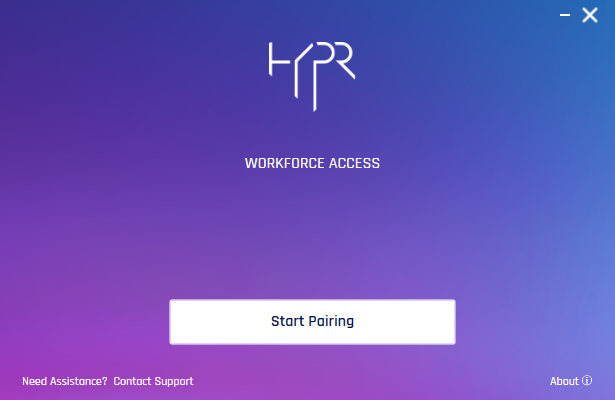
carol.shaw@highlands_azure.com). - Launch the HYPR Passwordless client.
- Click Start Pairing.
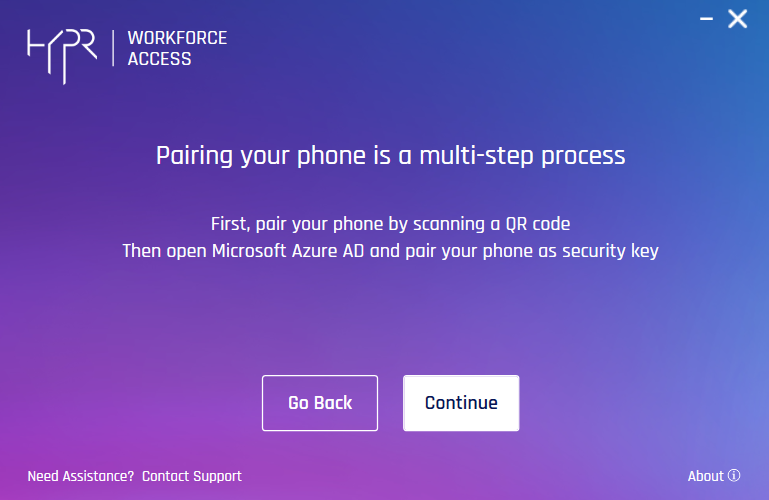
- HYPR Passwordless reminds you to open Microsoft Azure and pair your phone as a security key after pairing with HYPR. Click Continue.
- HYPR Passwordless presents a QR code. Using a device with the HYPR Mobile App installed and open, scan the QR code on the screen. You will be prompted to authenticate on your device.

Going Mobile
You may see both a mobile device and a security key as options. Choose the mobile device for this operation; the security key will not work with this version of HYPR.
- Once you are paired successfully, click Finish.

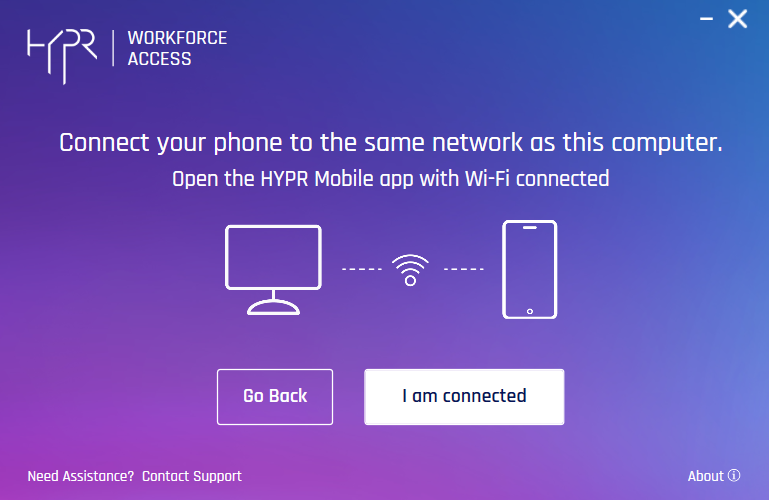
- Verify you are connected to the same network with the device and the workstation, then click I am connected.
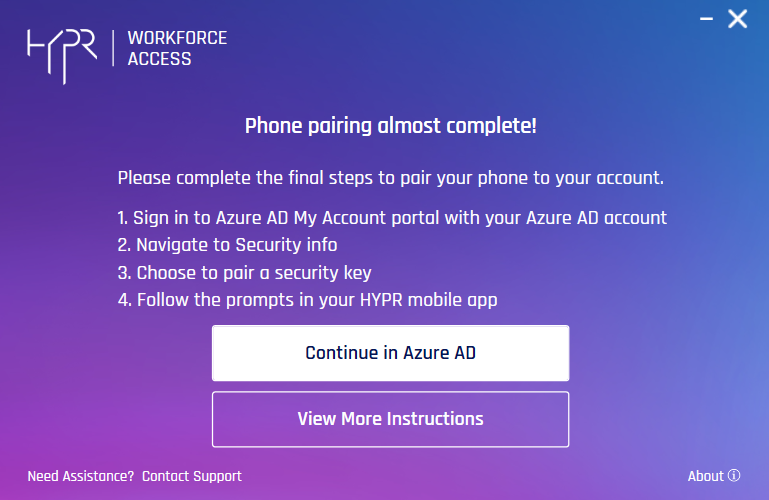
- A prompt appears to remind you to continue the process in Azure. Click Continue in AD to open https://mysignins.microsoft.com/security-info (see Pairing with Azure, below) licking View More Instructions opens this article).
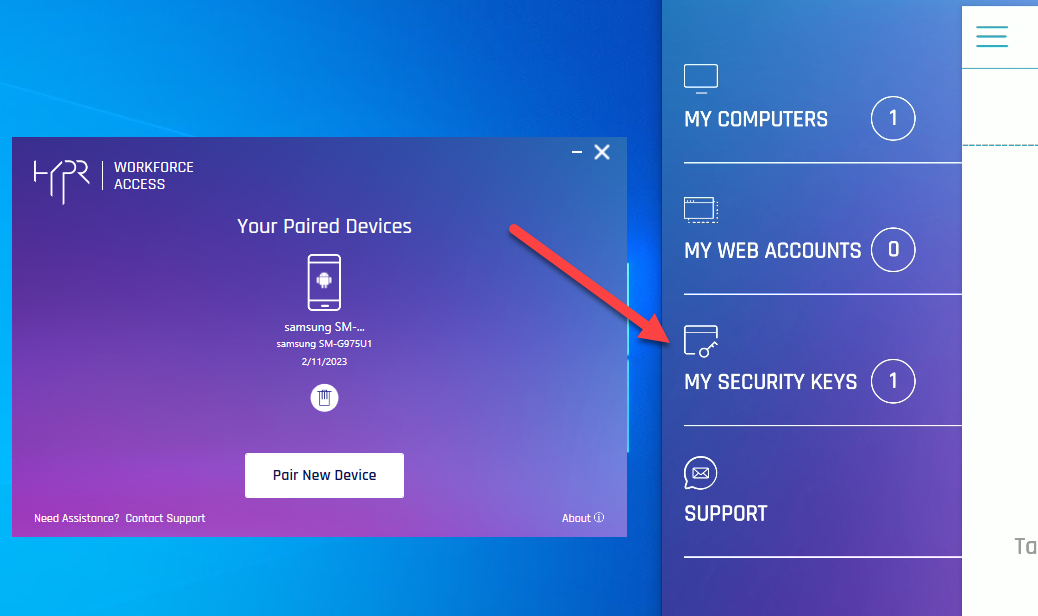
- The HYPR Passwordless client returns to the main screen , now displaying your paired device. The device’s HYPR Mobile App menu now includes a section for My Security Keys. Open it. Here you will see the same Azure cloud-only account with which you logged into Windows.
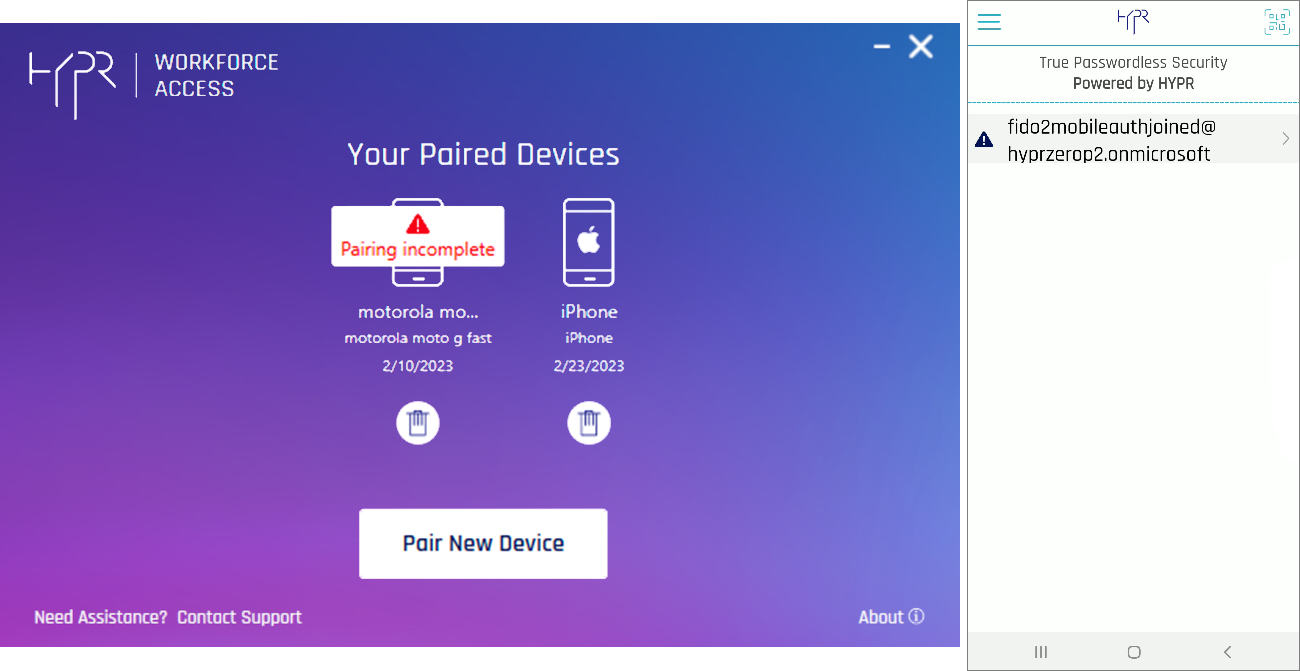
- The warning icon next to it indicates the user has not yet completed the pairing. Until pairing is completed, a Pairing incomplete warning will display in HYPR Passwordless for the mobile device, and the account shown in the HYPR Mobile App will bear a Pairing incomplete icon. The indicates the user is Paired with HYPR but not yet Paired with Azure. Clicking the red warning icon will re-open the Phone pairing almost complete! dialog.
Cache Returns
HYPR Passwordless client may not display a completed pairing right away. It may be necessary to close and restart HYPR Passwordless for the warnings to disappear.
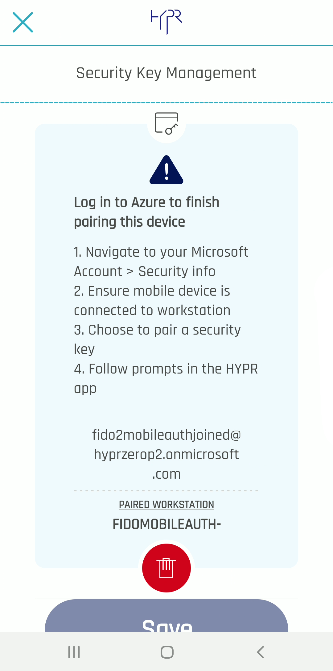
- On the HYPR Mobile App, tap the arrow next to the
userIdfor instructions on how to finish the pairing.
The user will now appear in the integration under User Management's Paired with HYPR tab. Continue to Pairing with Azure to complete your passkey registration.
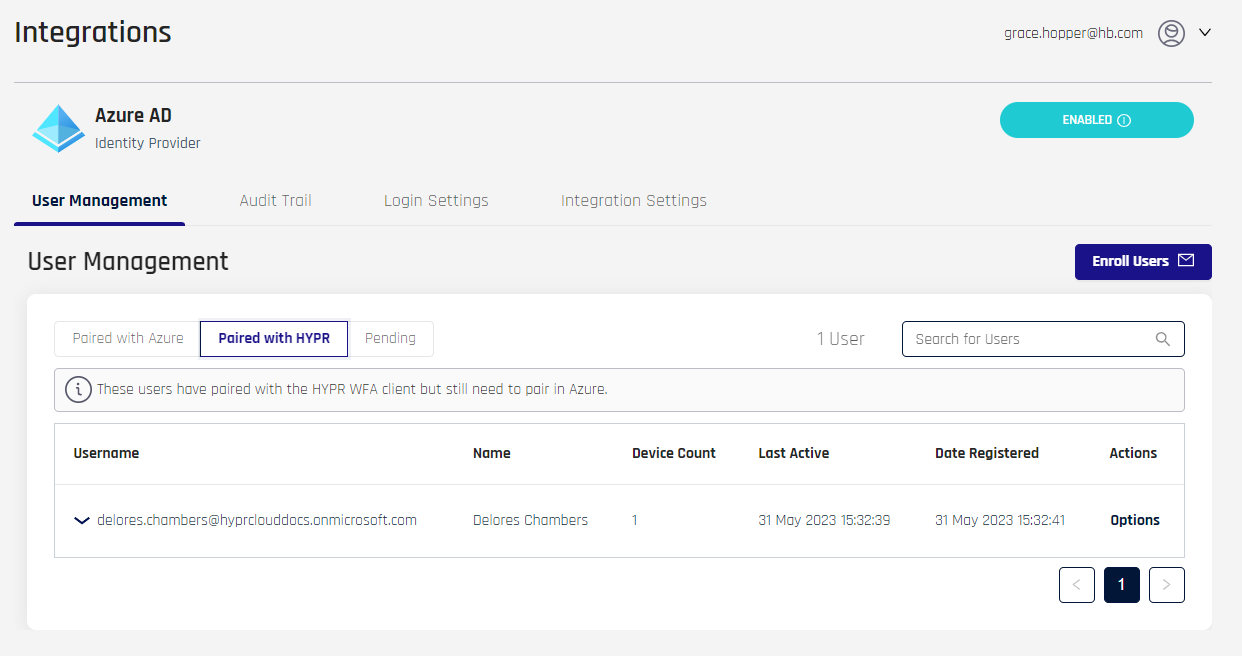
See Integration User Management in the main Integrations article for how to navigate User Management.
Pairing With Azure
Back on the Azure VM:
-
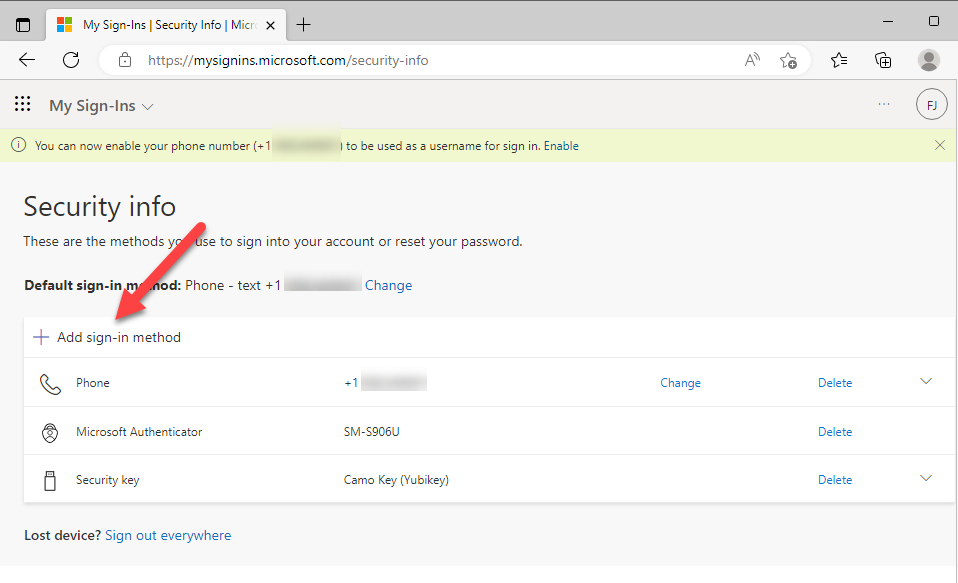
Login to https://mysignins.microsoft.com/security-info. This will take you to the screen below.
-
Select UPDATE INFO.
Get the Edge
If you do this using Microsoft Edge, you should not need to manually login. Edge will have a desktop SSO-like experience where you are not prompted. Chrome and FireFox will prompt you.
-
Here you see all of the authenticators registered for the user. Azure traditionally requires at least one authenticator, which depends on how the tenant is configured. Usually it will be phone and/or text. Click Add sign-in method.
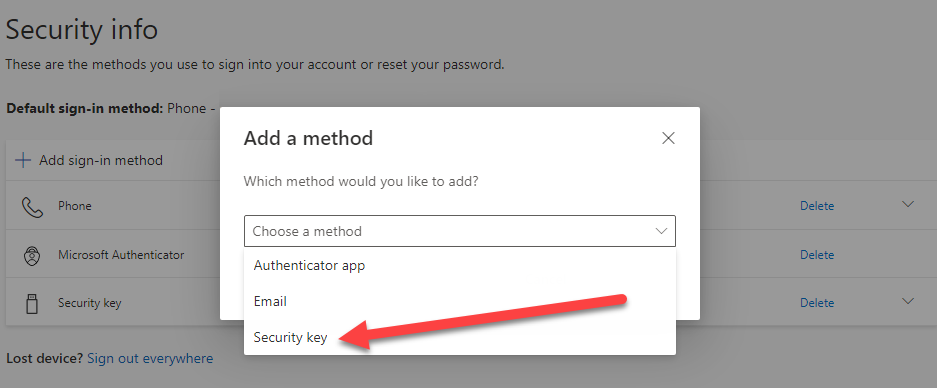
- The Add a method options will depend on the configuration of the tenant, but in this case, select Security key, then click Add.
Note
Microsoft may require MFA depending on how you logged in initially. You need to complete MFA to change authentication methods (add/delete).
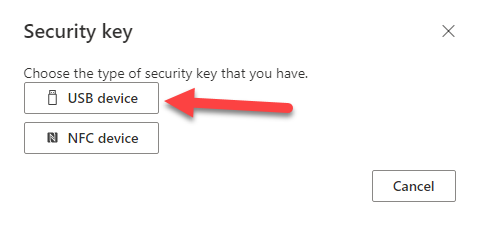
- Confirm the Security key type; select USB device.
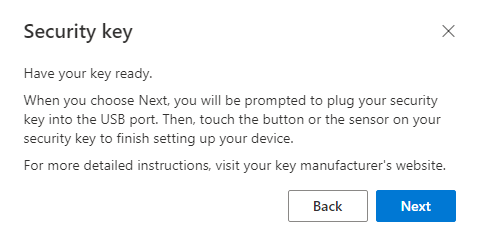
- Microsoft then prompts you to have your key ready. Open the HYPR Mobile App on your device. This is required for the HYPR Mobile App to virtually connect to the USB on the VM/workstation. Once the HYPR Mobile App is open, click Next.
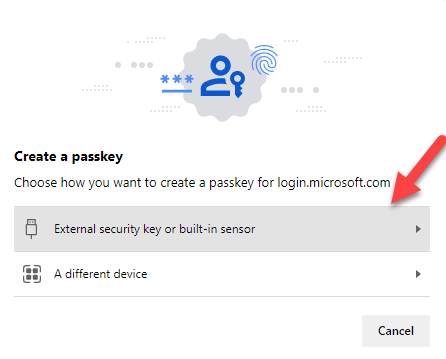
The next few prompts come from the browser and the Windows operating system as part of the FIDO2 protocol.
- If the browser version supports passkeys, this will appear. Click External security key or built-in sensor.
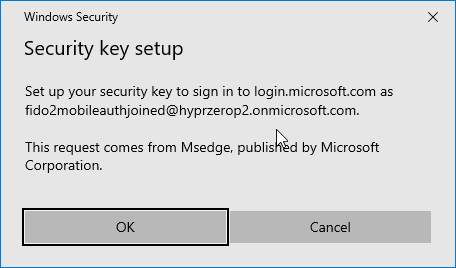
- On the Security key setup dialog, click OK.
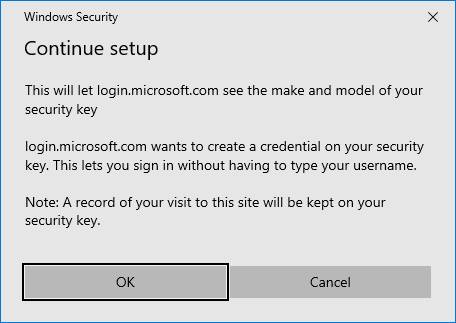
- On the Continue setup dialog, click OK.
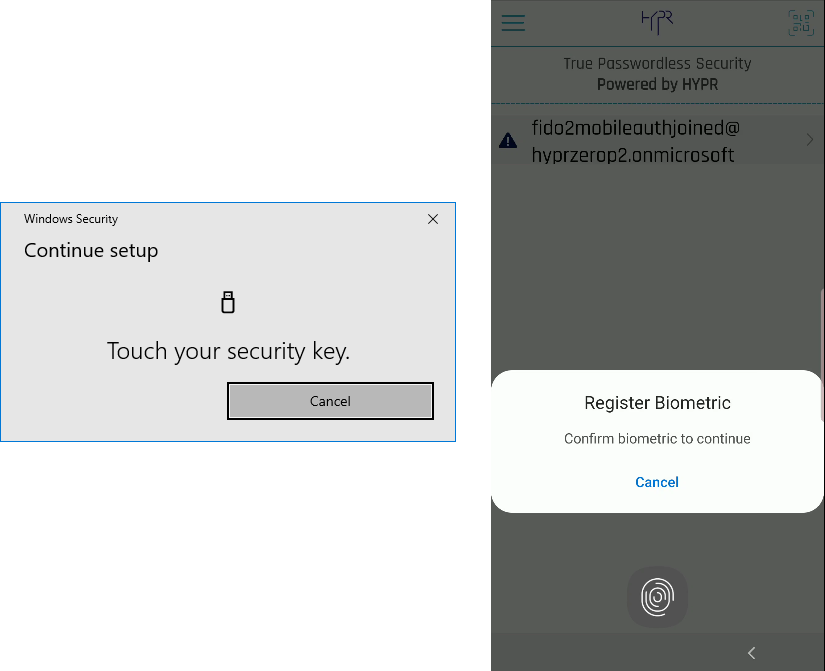
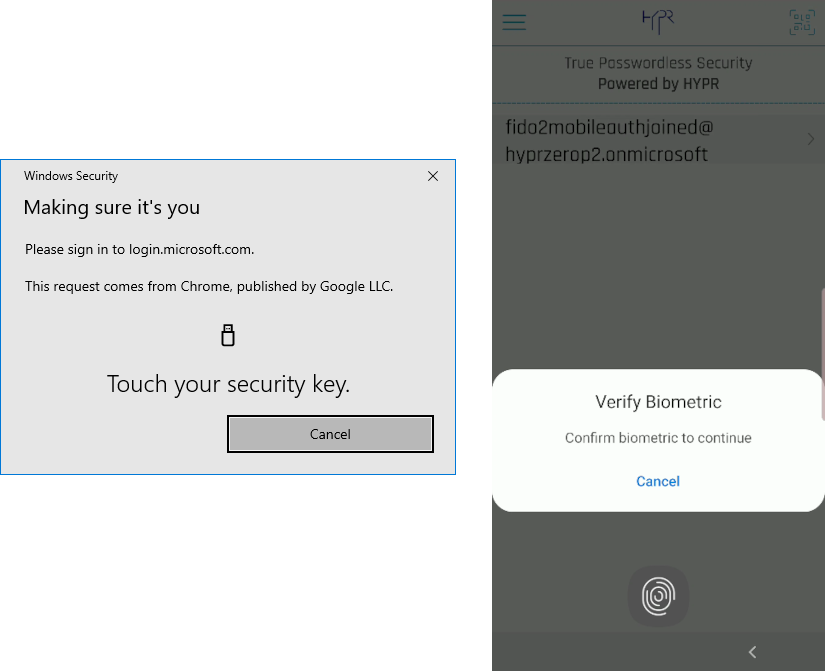
- Now Microsoft prompts you to touch your security key. You will see a verification screen to add this device on the HYPR Mobile App. Touch Accept.
Virtually Blind
If you see this message from Microsoft instead, it means that the VM did not discover the mobile device. You will not be able to continue until this is resolved.
- HYPR Mobile App will prompt you to register a biometric. Follow those instructions.
Separate Biometrics
This biometric is specific to Azure; it is not the same biometric requested for the HYPR QR code scan.
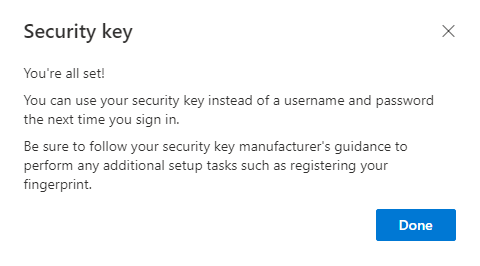
- Once the biometric is registered, Microsoft will ask you to name the new security key. Have at it.
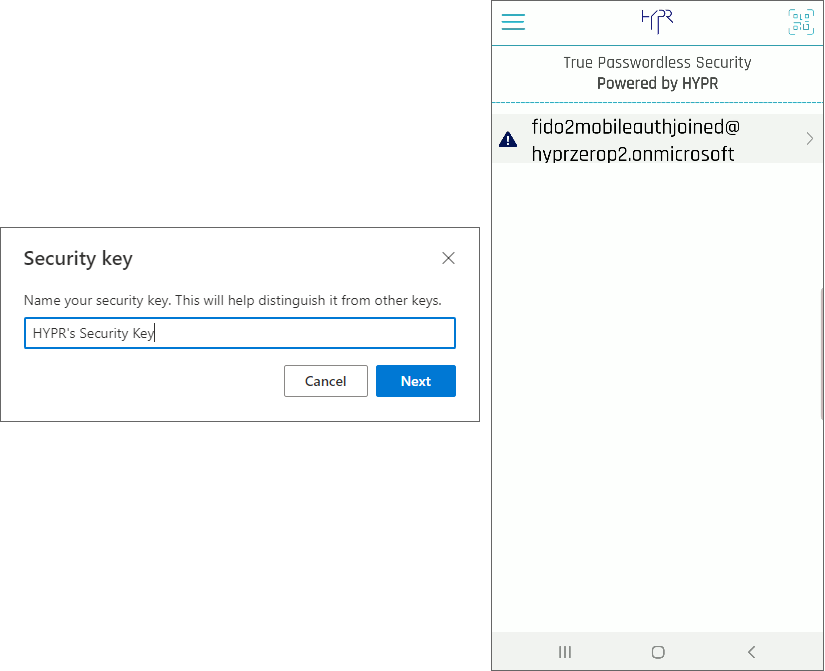
All set. You now are able to leverage HYPR’s FIDO2 Mobile Authenticator as a Security Key in Azure, and you will see it listed as an available authenticator:

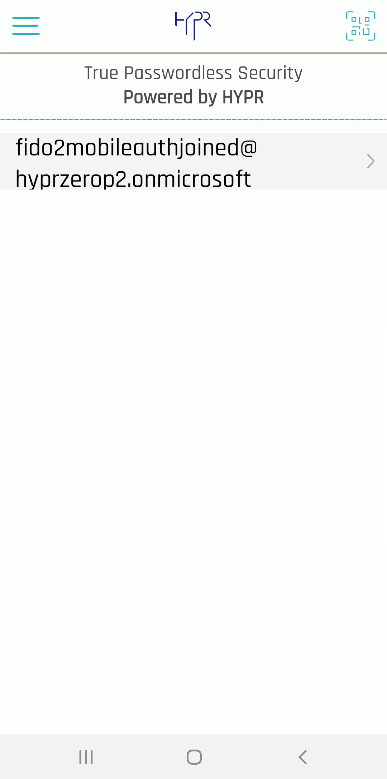
HYPR Mobile App Changes
Now that you are paired with Azure, the HYPR Mobile App will change. When you open and close the application and navigate to My Security Keys, you see the warning icon next to the username is now gone.
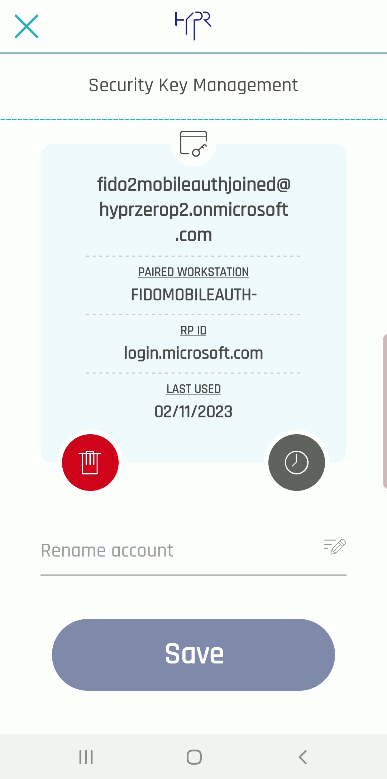
Selecting the arrow at right now shows the details of the pairing and allows you to rename it, delete it, or view the login activity; similar to My Computers or My Web Accounts.
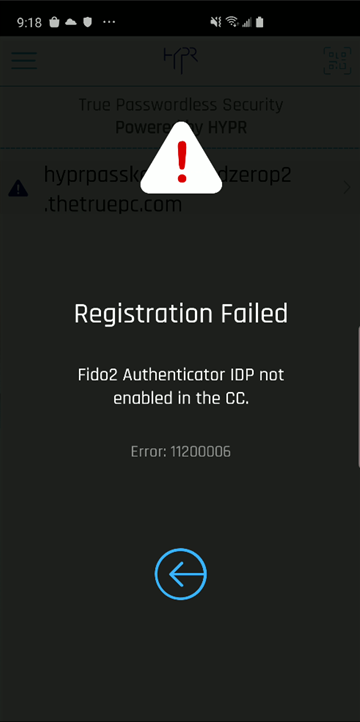
While the Integration is DISABLED, if a user attempts to pair with HYPR, the HYPR Mobile App will issue a warning.
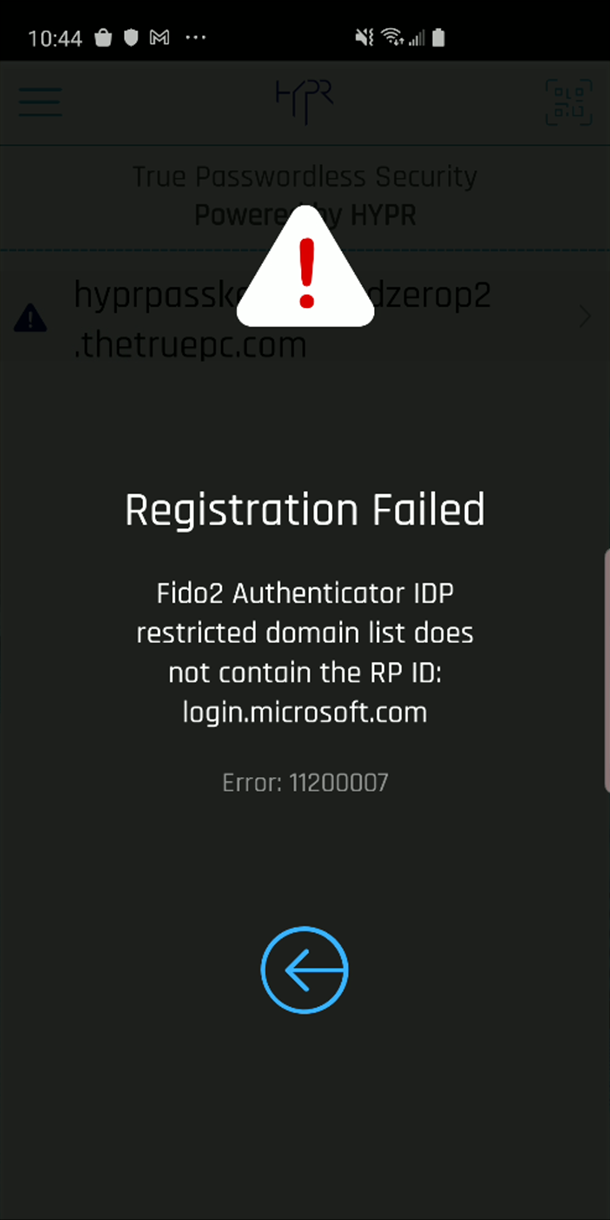
Likewise, if domains have been restricted in the Desktop Client tab, and the user is not part of an accepted domain, HYPR Mobile App will issue the following warning:
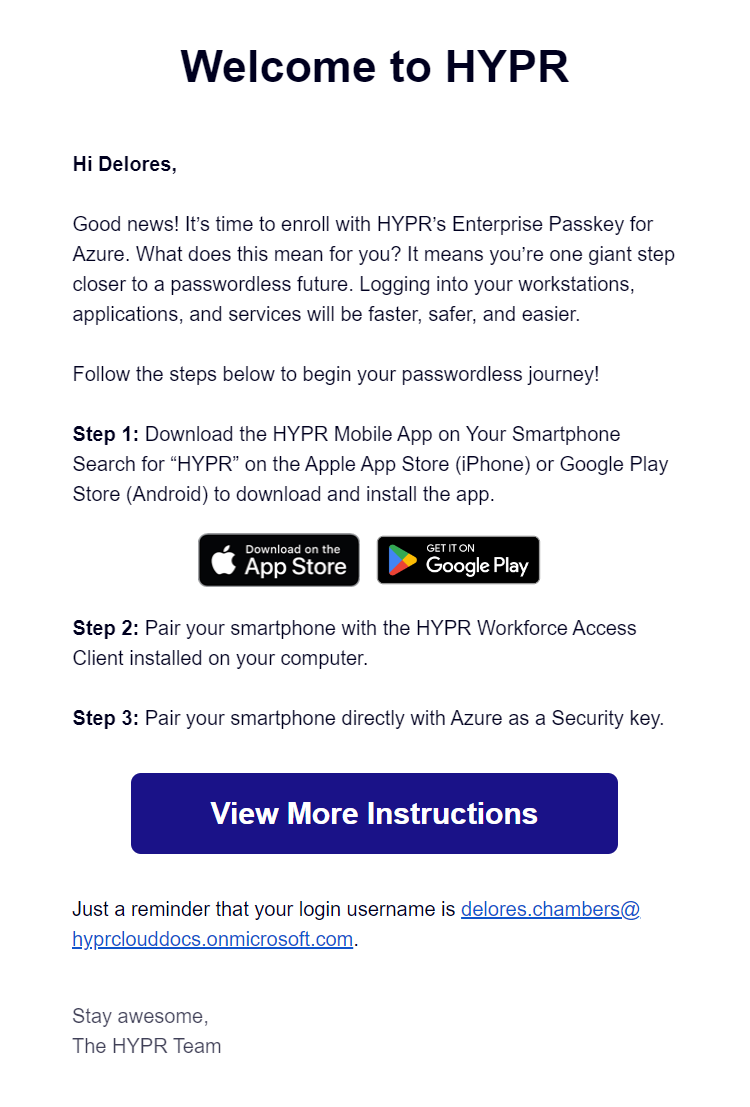
Invitation Emails
Unlike other integrations' enrollment processes, HYPR Enterprise Passkey does not send invited users a link to pair with Device Manager. Instead, the email is informational only, and the link provided connects to Pairing with HYPR in this article.
Logging In with HYPR Enterprise Passkey
Logging In to Windows
Lock the VM or workstation and then unlock it. Windows defaults to the last account and method used to successfully log in. The example shown here used a Windows Hello PIN, so that's what Windows is putting forth:
- Open HYPR Mobile App and select Sign-In options.
- Tap the security key icon.
- Microsoft will send the user presence (UP) verification to the HYPR Mobile App. On the HYPR Mobile App, tap Accept.

- Complete the biometric prompt (User Verification).

Once this is completed, you will be logged into Windows!
Note
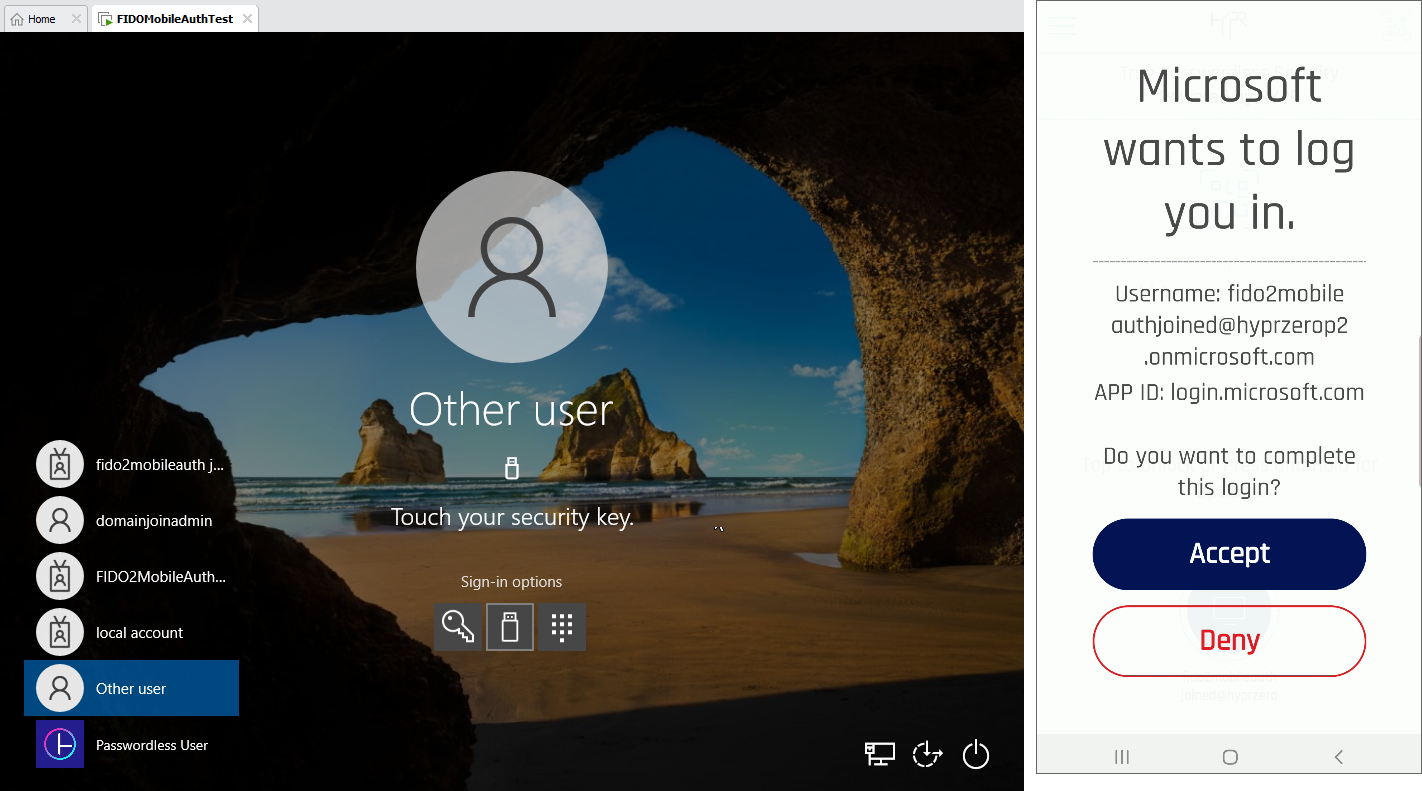
The Windows login experience depends on the state of the Windows OS.
Sometimes it will behave like above. Other times as soon as you wake it, it will start the FIDO authentication process and send the user presence (UP) verification to the mobile device for “Other User”. This is perfectly fine; after HYPR Mobile App’s Accept and biometric authentication, Microsoft will recognize for whom the FIDO keys are, and switch the username to the correct one.
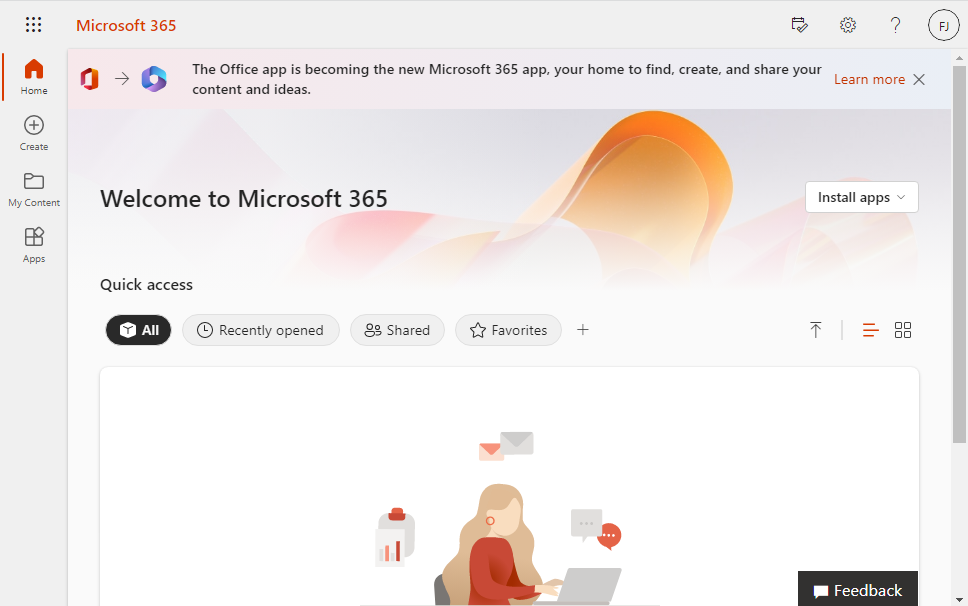
Logging In to Azure Protected Content (Like O365.com)
- Login with the paired user account in Chrome to ensure you get a login prompt (Edge will use SSO).

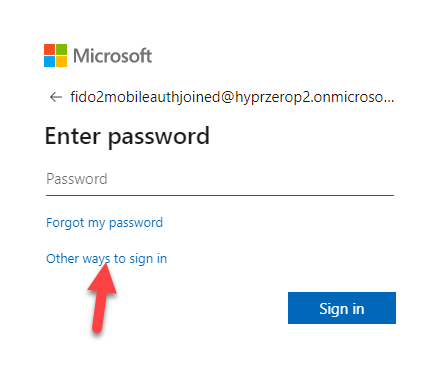
- You may get the default login screen with password or you may just get the FIDO2 prompt. It all depends on the browser and what Microsoft has recorded. If you see the password prompt, select Other ways to sign in.
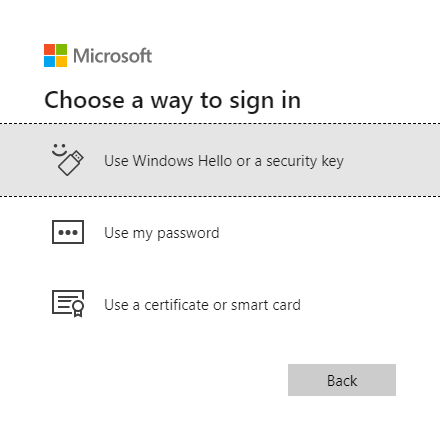
- Select Use Windows Hello or a security key.
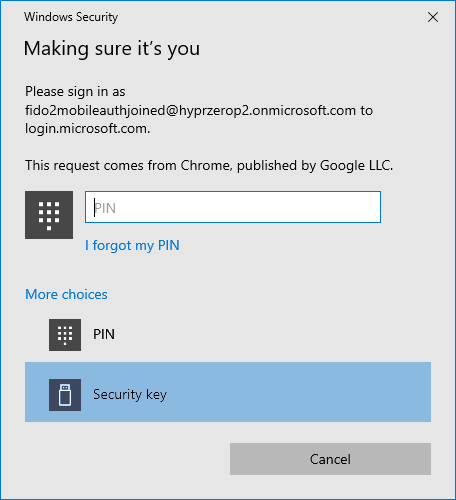
- Open the HYPR Mobile App and select Security key.
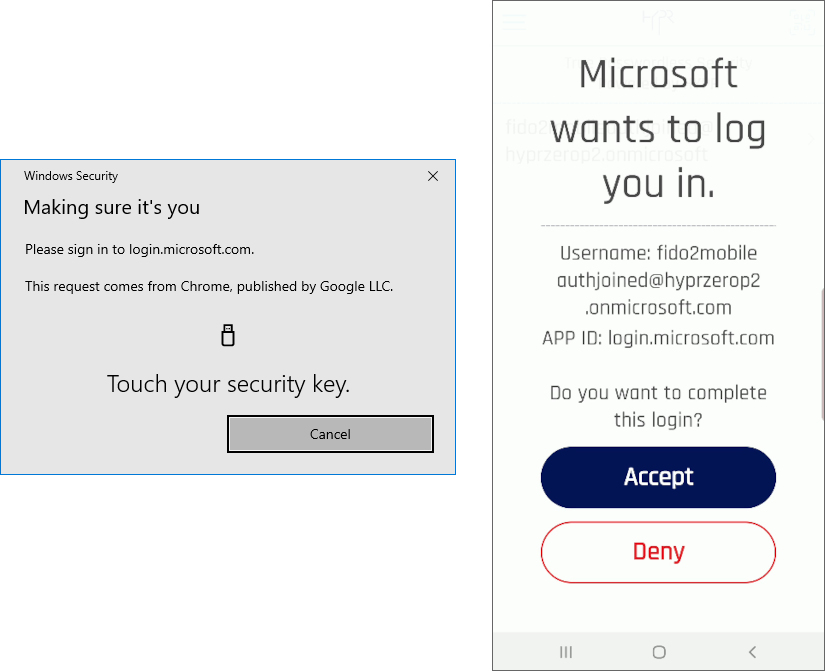
- Go through the motions for FIDO UP and User Verification (UV), and you are now in Microsoft Office.
Updated 6 months ago