Integrating with RADIUS
HYPR Control Center Standard: Integrations
The HYPR RADIUS server is created to facilitate authentication via the RADIUS protocol. Integrating HYPR with RADIUS lets you access your organization’s RADIUS connections and applications using HYPR passwordless authentication instead of the standard username + password login.
HYPR RADIUS Server is a Java Spring Boot microservice that runs on port 9077 on a separate physical machine than the HYPR Control Center (CC). The HYPR RADIUS Server contacts the HYPR CC for executing authentications through our APIs.
Getting the HYPR RADIUS integration up and running requires the following basic steps:
- Understand how the RADIUS login process changes for end users after you integrate with HYPR. See RADIUS Login Flow Changes.
- Make sure you have all the access you need, and that usernames have been prepared for the change. See What You'll Need.
- Configure the HYPR side of the integration, then download and install the server package. See Connecting RADIUS to HYPR.
- Understand the controls governing your HYPR RADIUS Server integration. See Administering RADIUS.
- Enroll Users. This process is explained on the Integrations main page.
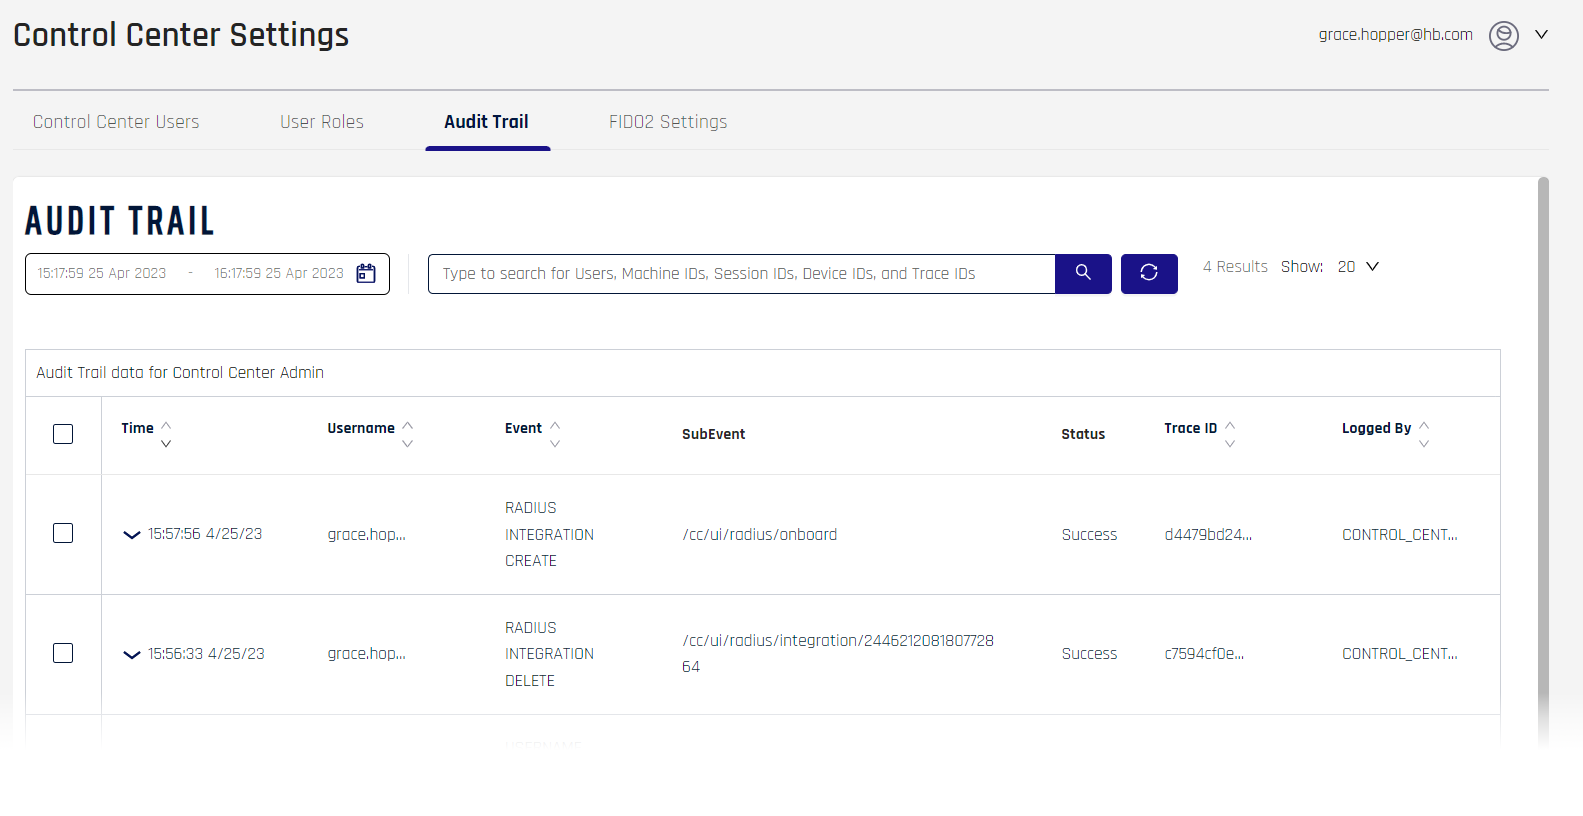
Additionally, you can now monitor integration-specific activity with the Audit Trail in Control Center. For a list of RADIUS Events and their descriptions, see Event Descriptions.
RADIUS Login Flow Changes
Once you activate the HYPR RADIUS integration, users will experience the following RADIUS login flow.
Users who have been enrolled via the HYPR Control Center will no longer need to provide a password to login via RADIUS. When they access an application through their RADIUS connection, they’ll provide their RADIUS username as usual, and then they’ll be redirected to the HYPR passwordless authorization flow using the HYPR Mobile App.
Passwordless
HYPR recommends users leave the password field blank if it cannot be disabled. This will require educating users to ignore the field if it cannot be hidden; plan accordingly for onboarding.
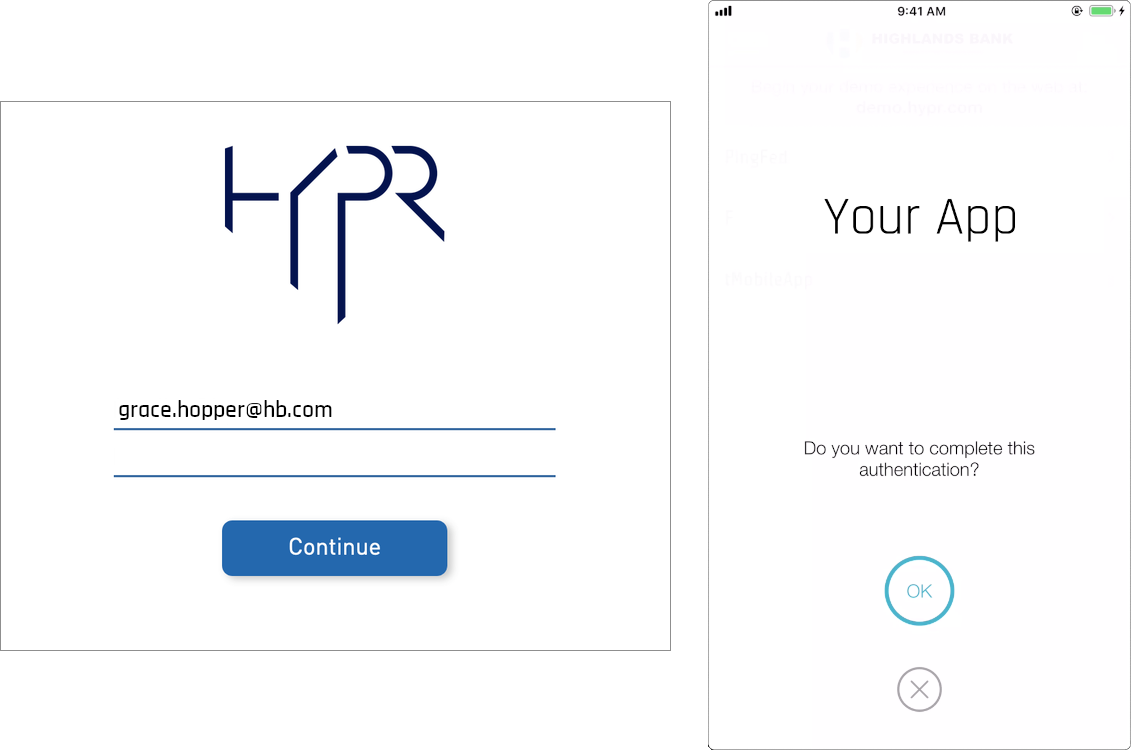
Essentially, HYPR intercepts the default RADIUS login process and replaces the password step with passwordless access.
Shared HYPR RADIUS integration users will receive a push notification when attempting to login with RADIUS; it will correspond to the IdP. Users should be instructed to accept this push notification.
What You'll Need
HYPR RADIUS Server Recommended Minimums
HYPR recommends HYPR RADIUS Server host hardware at minimum matches the model on which it was tested:
| Model | vCPU | Memory (GiB) | Instance Storage (GB) | Network Bandwidth (Gbps) | EBS Bandwidth (Mbps) |
|---|---|---|---|---|---|
| c5.2xlarge | 8 | 16 | EBS-Only | Up to 10 | Up to 4,750 |
Administrator Access to the HYPR RADIUS Server
You must be able to access and install .war files on the HYPR RADIUS Server.
HYPR Control Center Admin Account
Since you’re setting up the HYPR RADIUS integration through the HYPR Control Center, you should have already registered for an account, paired your mobile device with HYPR, and used your new passwordless login to access the Control Center. If this isn’t the case, please contact us at [email protected] and we’ll help you out.
IdP Usernames Are Email Addresses
If you plan to integrate RADIUS with an existing HYPR IdP Integration, users' names must all be in email address format. Any users who are not using an email address format will need to change to use the HYPR RADIUS Integration. IdP-independent integrations are not subject to this limitation.
Control Center Settings
HYPR RADIUS Server does not support FIDO authentication or QR Login, and requires that push notifications are turned on.
- HYPR Control Center will automatically configure Independent integrations with appropriate settings; altering any of these settings is strongly discouraged
- Shared integration RP Applications will retain their FIDO2, QR, and Push settings
- FIDO does not convey across RADIUS, so will be unusable by default
- QR Login attempts will default back to a Tap to Login or Push Authentication
Connecting RADIUS to HYPR
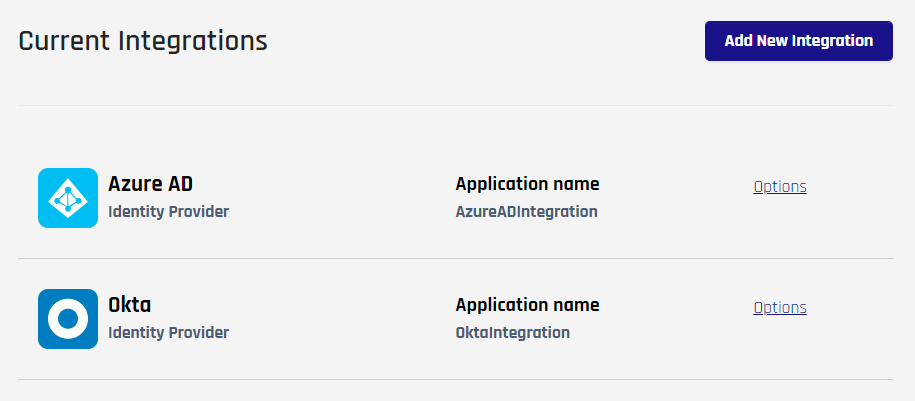
- Go to the Integrations screen in the HYPR Control Center. Existing integrations are listed here. Click Add New Integration to show a list of available integration types.
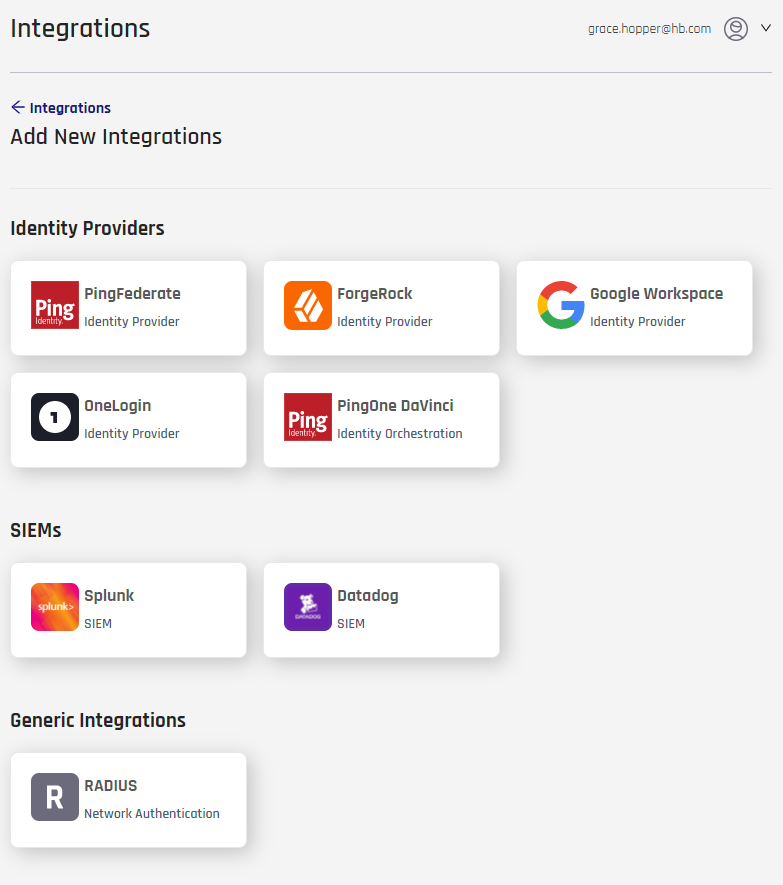
- At the bottom of the Add New Integrations pane, under Generic Integrations, select the RADIUS Network Authentication integration.
- Choose how to implement your HYPR RADIUS integration.
- Shared User Enrollments: Allow enrolled users from another HYPR integration to authenticate with HYPR RADIUS Server
- Choosing this option displays a drop-down of live IdP integrations at the bottom of the dialog; select an IdP integration to use for enrollment
- RADIUS will use the RP Application associated with the IdP
- Users will not be required to re-enroll if already enrolled in the IdP
- Independent Enrollments:
- Use only HYPR RADIUS Server authentication; choosing this option will display a field to name the Integration; type a RADIUS Integration Friendly Name for your integration
- RADIUS will use its own, new RP Application
- Users must enroll normally via Magic Link; this will be the only time they use Device Manager
- Shared User Enrollments: Allow enrolled users from another HYPR integration to authenticate with HYPR RADIUS Server
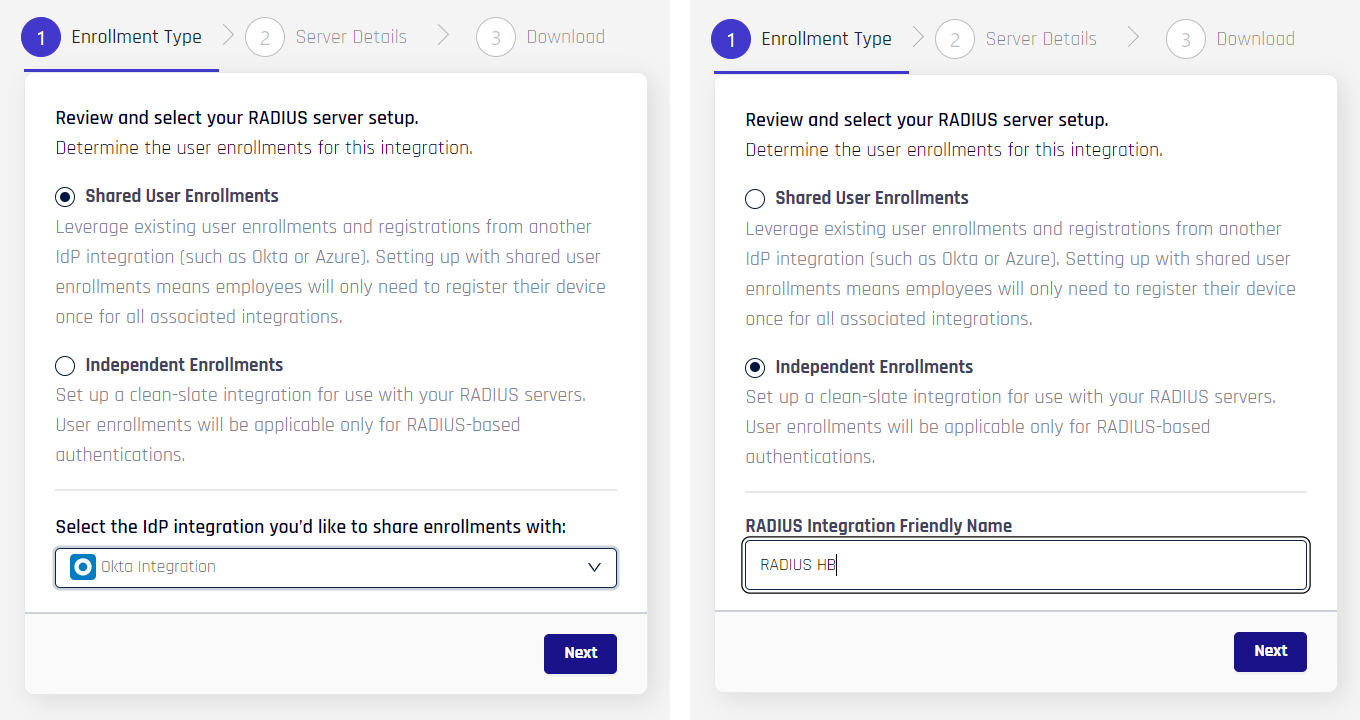
- Once you have made your choices, click Next. The Integration Setup pane opens.
Add More Servers Later
If you have more than one HYPR RADIUS Server instance, you will have the option to add more servers to your integration later.
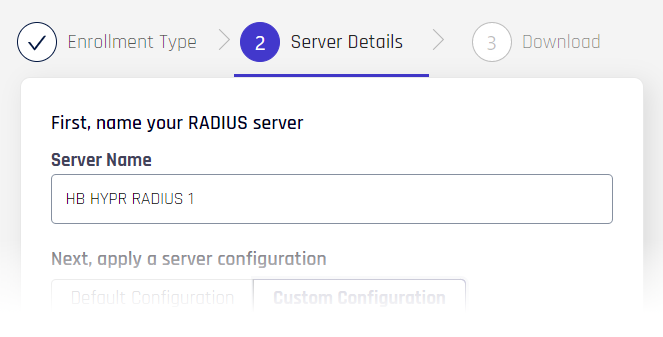
- At least one HYPR RADIUS Server must be defined. Name your RADIUS server.
hypr-radius.confThe values entered on this dialog are reflected in the package download's
hypr-radius.conffile.
Guilty by Proxy
You will only need to download and redeploy the server if you are making changes to the proxy configuration. For all other settings, the settings will propagate to the RADIUS servers automatically. The reason for this is because a proxy configuration affects how the RADIUS server communicates to the outside world.
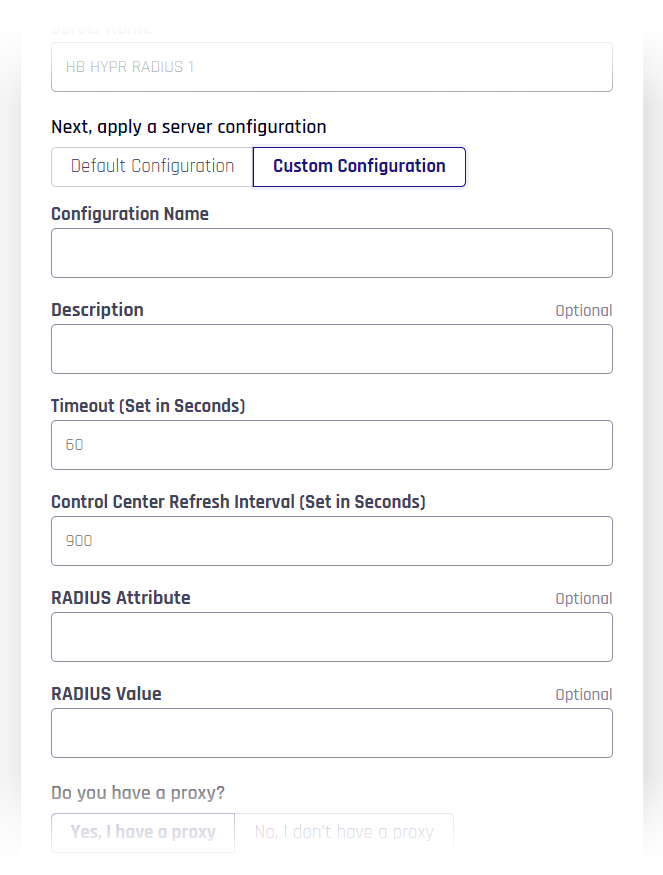
- Enter the server configuration values. Choosing Default Configuration will use the default values that are present in the Custom Configuration fields. Later you will be able to define multiple configurations and assign them to different servers.
| Field | Description |
|---|---|
| Configuration Name | A label for this configuration. |
| Description (Optional) | A description of this configuration. |
| Timeout (Set in Seconds) | Timeout value in seconds for API requests to Control Center for both authentication and configuration events. Default: 60 (1 minute) |
| Control Center Refresh Interval (Set in Seconds) | Time in seconds affected RADIUS servers should wait until the next poll to the HYPR Control Center for status updates. This value can be changed in Configuration Settings. Each Control Center Refresh resets the Last Checked value. Default: 900 (15 minutes) |
| RADIUS Attribute (Optional) | Used to define specific authentication, authorization, and accounting (AAA) elements in a user profile. See the HYPR RADIUS Custom Attributes article for options. |
| RADIUS Value (Optional) | The value associated with the Attribute, above. This field must comply with the datatype for the chosen Attribute. |
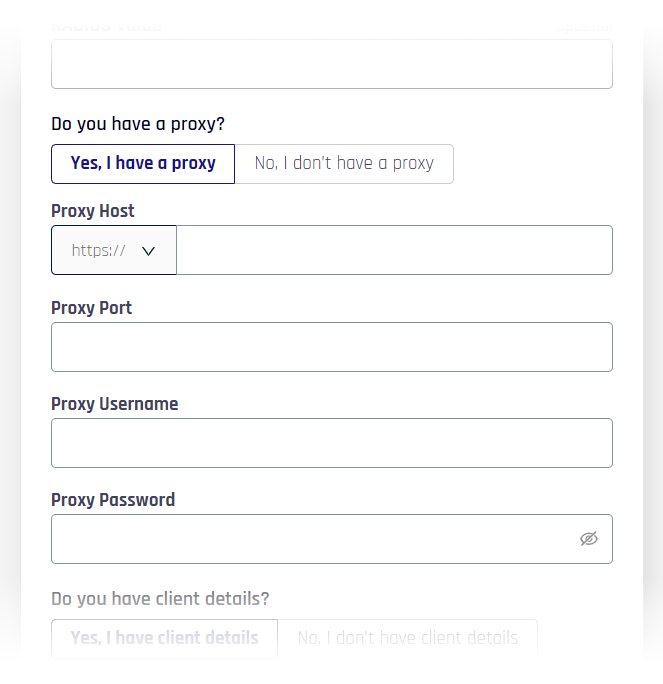
- If you require the use of a proxy server to reach services on the internet. Fill in the information under Do you have a proxy? in accordance to your proxy requirements.
If you do not require a proxy server, click No, I don't have a proxy.
| Field | Description |
|---|---|
| Proxy Host | The proxy server URL without https:// . |
| Proxy Port | The port on which the proxy server will be communicating. |
| Proxy Username | The username required for access to the proxy server. |
| Proxy Password | The password for the above username. |
- Complete the Client Details. You will still be able to create the integration if you choose No, I don't have client details, but it will be unable to function without a client. You can change these values in Integration Settings after the integration is configured.

| Field | Description |
|---|---|
| Client Alias | A label that will appear in the HYPR Mobile App as part of the Application identifier. |
| Description (Optional) | A description of the client. |
| Client IP | IP address or range of addresses to identify the client machine. Valid formats for this field include the following: - A single IPv4 address - A single IPv6 address - IPv4 CIDR notation - IPv6 CIDR notation - A comma-separated list of IPv4 or IPv6 addresses - A range of IPv4 or ipv6 addresses expressed with a dash |
| RADIUS Secret | An arbitrary value assigned by you for use by the HYPR RADIUS ServerA |
- Click Submit. A dialog confirms your RADIUS integration is configured.

- Click Download Package to obtain the HYPR RADIUS Server deployment files.
- A pop-up displays with instructions for installing the HYPR RADIUS Server. Follow the instructions.
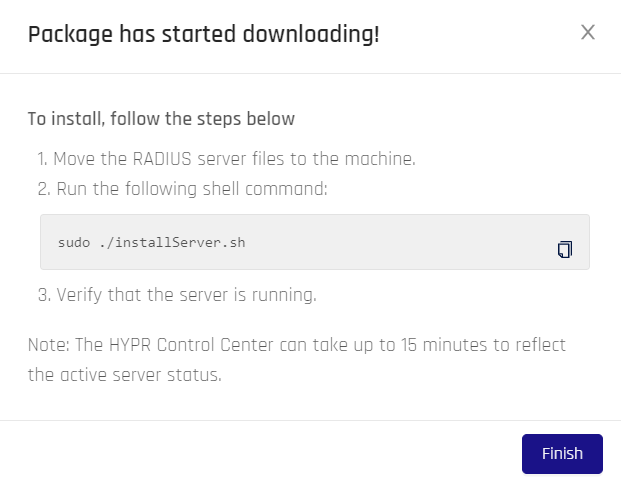
- Click Finish when you are done. Control Center returns to the integration's RADIUS Servers tab.
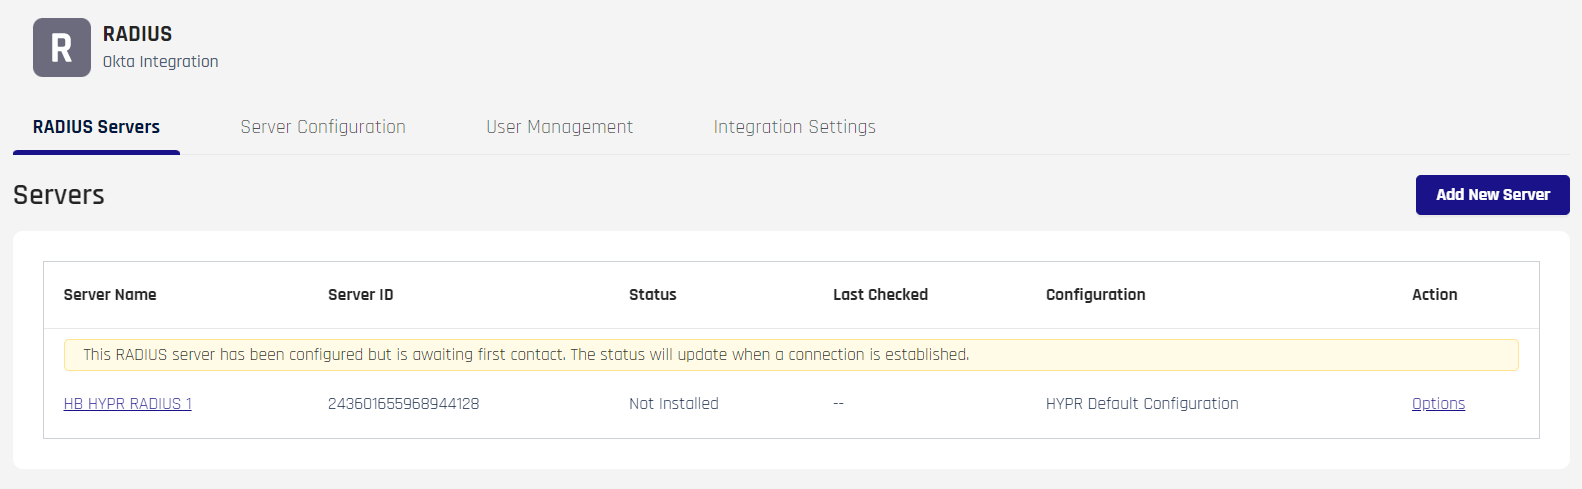
The associated Application name will be listed under RADIUS, reflecting your choice of Enrollment Type. If you chose Shared, the IdP's RP Application name will display; if you chose Independent, the name you typed will display.
After finishing server setup, a message displays above the Servers list: "This RADIUS server has been configured but is awaiting first contact. The status will update when a connection is established." It will stop displaying once users have connected with the integration.
Administering RADIUS
Four tabs govern the Integration:
- RADIUS Servers (Default): The list of HYPR RADIUS Servers; here you can:
- Add a new server
- View server data
- Rename the server
- Download the server installation package
- View or switch configuration assignments
- Delete the selected server
- Server Configuration: Manage the configuration settings for a given server:
- Add a new configuration
- View configuration data
- Rename the configuration
- Assign a configuration to this server (only one per server)
- Delete the selected configuration
- User Management: Enroll users and grant/revoke permissions or access.; this behaves as detailed in the Integrations article
- Integration Settings: Delete the entire integration
RADIUS Servers Tab
In addition to the Add New Server button, a list of RADIUS servers is shown here with the following columns:
| Server Name | The label provided during the Server Details step of server creation; clicking the name will open the Server Information pane. |
| Server ID | A unique number representing the server. |
| Status | Installed | Not Installed |
| Last Checked | The most recent Control Center Refresh. The Control Center Refresh Interval can be changed in Configuration Settings. |
| Configuration | The configuration used with this server. This value can be changed in Server Configuration. |
| Actions | Hovering over the Options button opens a menu containing View Server Details and Rename Server. |
The Options menu choices behave as follows:
- View Server Details: Opens the Server Information pane
- Rename Server: Give the server a new label
Add New Server
Individual Integrity
Each RADIUS server package is specific to that unique RADIUS server, and requires downloading and installation of the server deployment package.
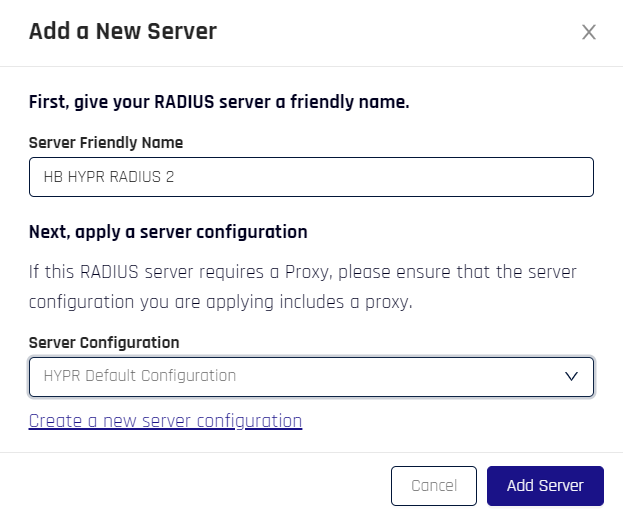
Clicking Add New Server opens a dialog. Name the server and assign an existing configuration to it, then click Add Server when complete. CC will return you to the RADIUS Servers tab.
You may also Create a new server configuration, which will open the Server Configuration tab.
Patience
The default Control Center Refresh Interval is 900 seconds, or 15 minutes. Whenever a new server is added to the integration, it will take until the next refresh interval passes before the changes are visible. Adjusting this value is accomplished using the Configuration Settings tab under Server Configuration.
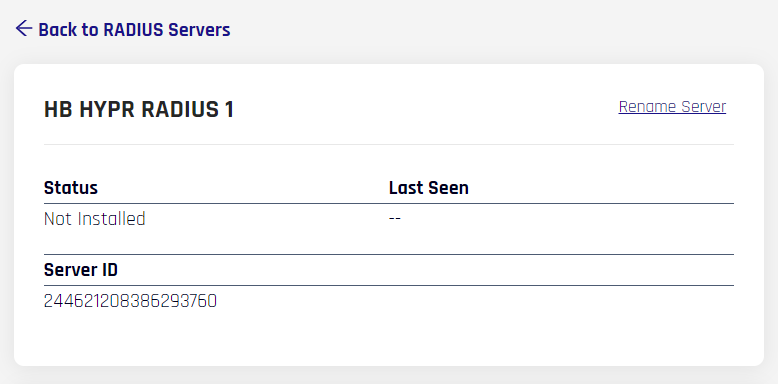
Server Information
The top pane displays basic information about the selected server. The header is the Server Name value from above; the Server ID, Last Seen (a.ka. Last Checked), and Status are likewise displayed. In the upper right of this pane is an option to Rename Server. Click it to change the server name; once the server has been renamed, CC will return you to this tab.
Server Package / Server Configuration
The next pane includes the Server Package, a button to Download Package, and some links to View Configuration and Change Configuration.

- Download Package will download a
.zipfile to your local machine; once clicked, a pop-up displays with a short set of instructions for installing the package on your designated server

- View Configuration opens the Configuration Information tab for this server's assigned configuration
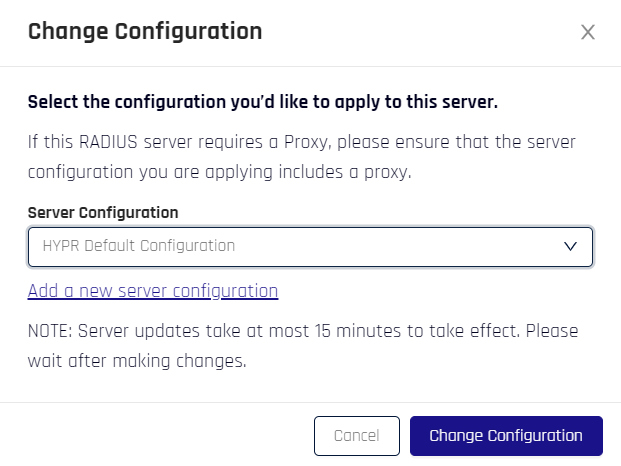
- Change Configuration allows a different configuration to be assigned to this server; choose the desired configuration and click Change Configuration; you can also Add a new server configuration, which takes you to the Server Configurations tab.
Delete Server
The Delete Server pane offers a set of instructions to enact before removing a server from the Integration. To remove a RADIUS server:
- Complete the instructions.
- Click Delete RADIUS Server.
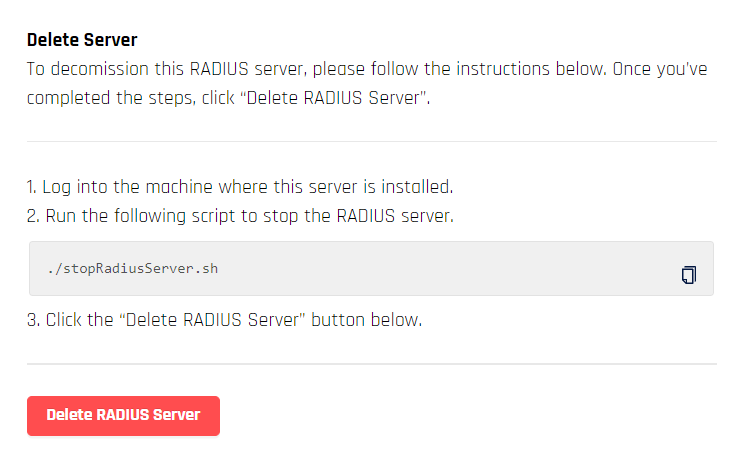
- A confirmation appears requiring you to type RADIUS before you can click Delete RADIUS Server again to complete removal.
Server Configuration Tab
In addition to the Add New Configuration button, a list of RADIUS configurations is shown here with the following columns:
| Configuration | The label provided during the Server Details step of server creation; clicking the name will open the Configuration Information pane. |
| Clients | The number of clients using this configuration. |
| Proxy | The associated proxy server, if any. |
| Applied Servers | The number of servers using this configuration. |
| Actions | Hovering over the Options button opens a menu containing View Configuration Details, Apply to Server, and Rename Configuration. |
The Options menu choices behave as follows:
- View Configuration Details: Opens the Configuration Information pane
- Apply to Server: Opens a pop-up with server choices in a drop-down; choose the desired one and click Apply Configuration; a server can only have one assigned configuration
- Rename Configuration: Opens a pop-up with a field for typing the new name; when finished, click Update Configuration to return to the Server Configuration tab
Add New Configuration
Clicking Add New Configuration at the top of the Server Configurations pane opens the following dialog:
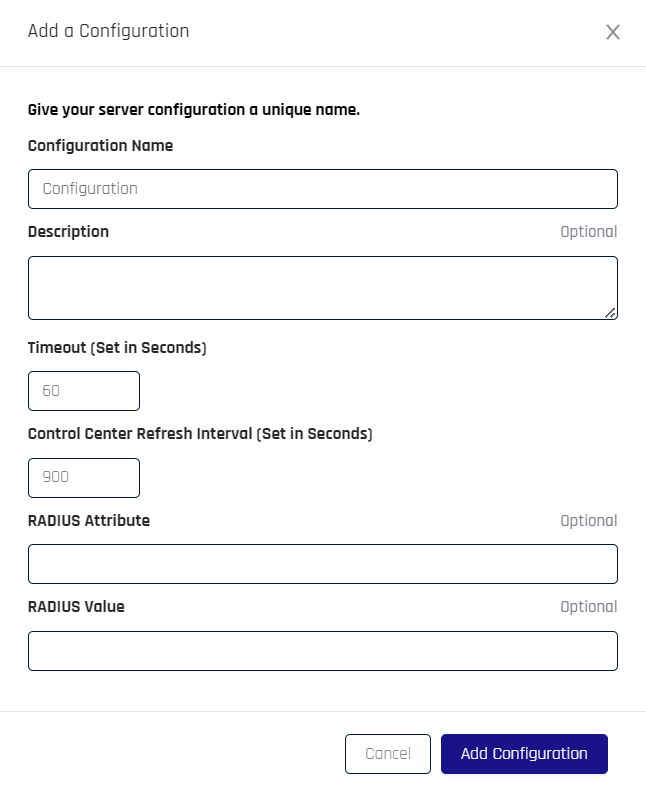
The fields are identical to the ones you completed when creating the initial server configuration:
| Field | Description |
|---|---|
| Configuration Name | A label for this configuration. |
| Description (Optional) | A description of this configuration. |
| Timeout (Set in Seconds) | Timeout value in seconds for API requests to Control Center for both authentication and configuration events. Default: 60 (1 minute) |
| Control Center Refresh Interval (Set in Seconds) | Time in seconds affected RADIUS servers should wait until the next poll to the HYPR Control Center for status updates. This value can be changed in Configuration Settings. Each Control Center Refresh resets the Last Checked value. Default: 900 (15 minutes) |
| RADIUS Attribute (Optional) | Used to define specific authentication, authorization, and accounting (AAA) elements in a user profile. See the HYPR RADIUS Custom Attributes article for options. |
| RADIUS Value (Optional) | The value associated with the Attribute, above. This field must comply with the datatype for the chosen Attribute. |
Configuration Information
This pane is accessible by clicking the value in the Configuration column on the Server Configuration tab, or by hovering over Options and choosing View Configuration Details.

Client & Proxy Settings (Default)
RADIUS Clients
This pane is a list of clients assigned to this configuration; and an Add New Client button. The columns reflect the following information about the selected client:
| Field | Description |
|---|---|
| Client Alias | A label used by the HYPR Mobile App as part of the Application identifier. |
| Client IP | IP address or range of addresses to identify the client machine. Valid formats for this field include the following: - A single IPv4 address - A single IPv6 address - IPv4 CIDR notation - IPv6 CIDR notation - A comma-separated list of IPv4 or IPv6 addresses - A range of IPv4 or ipv6 addresses expressed with a dash |
| RADIUS Secret | An arbitrary value assigned by you for use by the HYPR RADIUS Server. |
| RADIUS Attribute | Specific authentication, authorization, and accounting (AAA) elements in a user profile. See the HYPR RADIUS Custom Attributes article for options. |
| RADIUS Value | The value associated with the Attribute, above. This field must comply with the datatype for the chosen Attribute. |
| Actions | Hovering over the Options button opens a menu containing Edit Client Details and Delete Client. |
The Options menu choices behave as follows:
- Edit Client Details: The matching fields described in the above table (Client Alias, Client IP, and RADIUS Secret) reflect the same-name values that should be entered. Description is an optional free-type field not shown above.
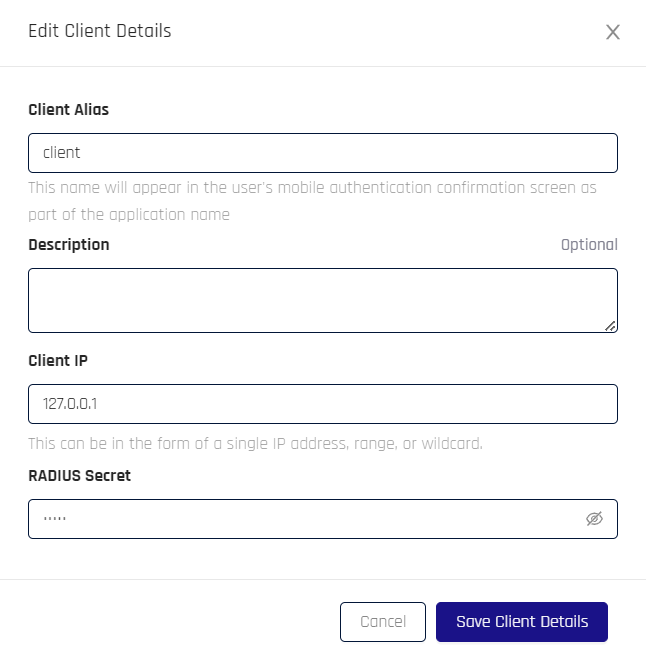
- Delete Client will remove the selected client, offering a simple confirmation dialog. Click Delete Client on the dialog box, and CC will return to the Configuration Information pane
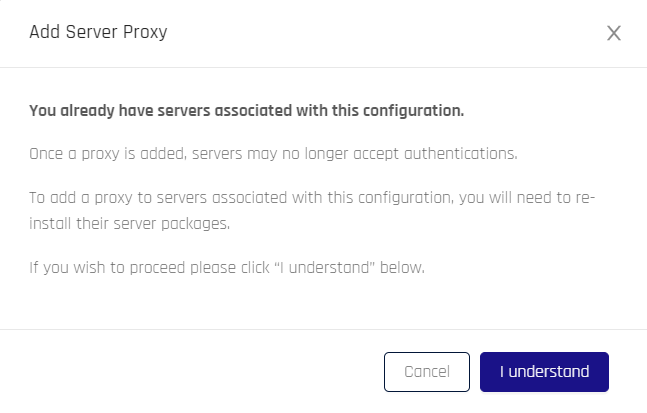
Proxy To HYPR Server (Optional)
Displays the proxy server, if any. To add a new proxy server:
- Click Add Proxy Server to open the following confirmation dialog. Click I understand to continue.
- The Add Server Proxy dialog proper opens. Complete the fields according to the table below, then click Add Server Proxy.
Changing Proxies
Once you’ve added (or removed) a server proxy, re-download the RADIUS Server package and reinstall it on any of the machines that are configured to use the affected RADIUS configuration.
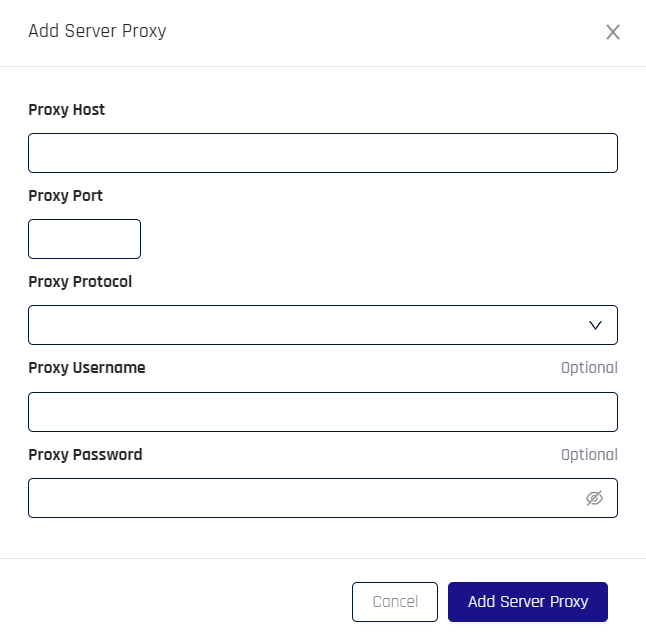
| Field | Description |
|---|---|
| Proxy Host | The proxy server URL without https:// . |
| Proxy Port | The port on which the proxy server will be communicating. |
| Proxy Protocol | http | https |
| Proxy Username | The username required for access to the proxy server. |
| Proxy Password | The password for the above username. |
| Actions | Hovering over the Options button opens a menu containing Edit Proxy Details and Delete Proxy. |
Once created, the proxy server will be listed in the Proxy To HYPR Server (Optional) pane with values reflective of the table above. The Options menu choices behave as follows:
- Edit Proxy Details: Opens a Save Server Proxy dialog that is otherwise identical to the Add Server Proxy dialog shown above; when finished adding values to the fields, click Update Server Proxy
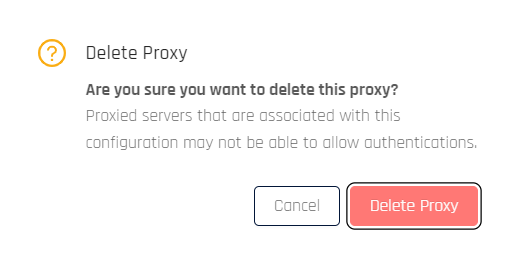
- Delete Proxy: Allows deletion of the client with a confirmation dialog
Associated Servers
This tab offers an Apply to Server button, and lists all servers using this configuration, if any. You can also change to which server a Configuration is associated.
- Clicking Apply to Server, a dialog appears with a drop-down containing all the available servers that are not the currently assigned server. Choose the desired server and click Apply to Server. CC returns you to the Associated Servers tab.
- The Options column contains a Change Association link for each configuration. If clicked, a dialog appears with a drop-down containing all the available servers that are not the currently assigned server. Choose the desired server and click Apply to Server. CC returns you to the Associated Servers tab.
Configuration Settings
Update configuration settings and delete configurations.
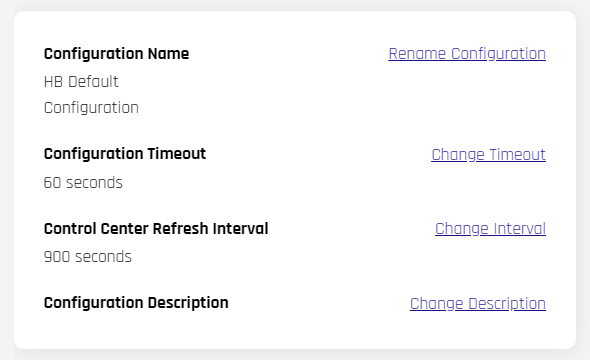
- Update Configuration governs the settings for the selected configuration; each link offers a dialog to change the values for that field, and returns to the Configuration Settings tab once confirmed
| Field | Description |
|---|---|
| Configuration Name | A label for this configuration. |
| Timeout (Set in Seconds) | Timeout value in seconds for API requests to Control Center for both authentication and configuration events. Default: 60 (1 minute) |
| Control Center Refresh Interval (Set in Seconds) | Time in seconds affected RADIUS servers should wait until the next poll to the HYPR Control Center for status updates. Each Control Center Refresh resets the Last Checked value. Default: 900 (15 minutes) |
| Configuration Description (Optional) | A description of this configuration. |
- Delete Configuration
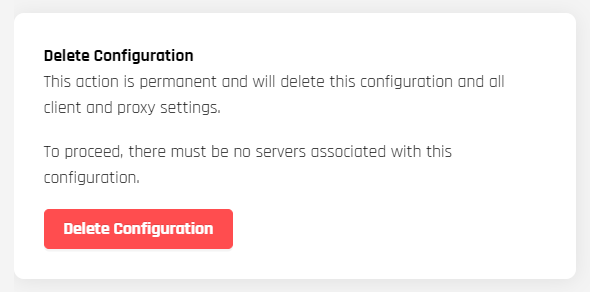
- Click Delete Configuration. A confirmation dialog displays.
- Type RADIUS to enable the button.
- Once it is enabled, click Delete Configuration to complete removal.
- CC returns to the Configuration Settings tab.
User Management Tab
This tab allows admins to Enroll Users, and lists Enrolled and Pending users, allowing admins to re-invite them and delete them as needed. See the main Integrations article under Enrolling Users for how this feature works.
Integration Settings Tab
The top pane here is just the integration name, and below that is a pane for deleting the entire integration.
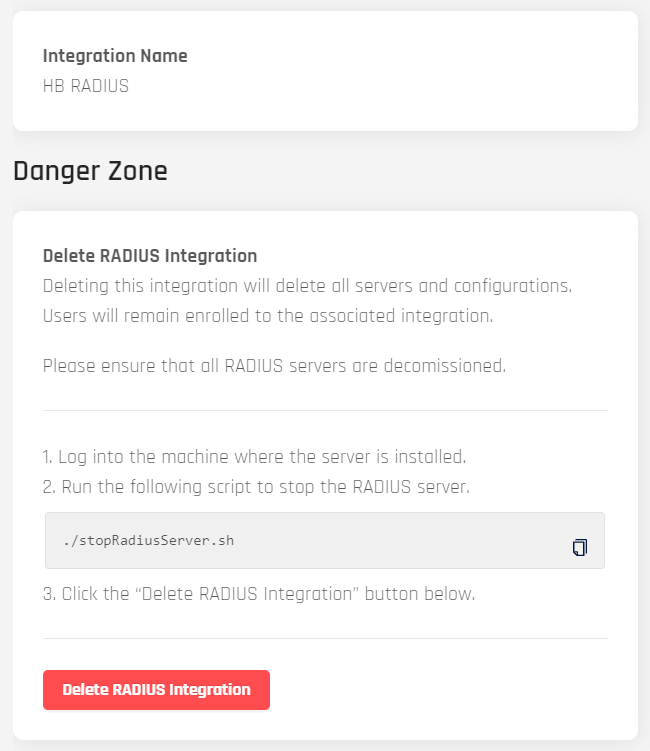
Delete the Integration
- Follow the instructions to run the
stopRadiusServer.shscript on the RADIUS server. - Click Delete RADIUS Integration. A confirmation dialog displays.
- Type RADIUS to enable the button.
- Once it is enabled, click Delete RADIUS Integration to complete removal.
CC returns to the Add New Integrations tab.
Migrating from Older Versions
Contact Support if you wish to migrate from an older version of HYPR RADIUS Server. Support can help you appropriately configure your RADIUS settings in CC.
Migration does not require user re-registration. The basic outline of events is as follows:
- Create servers
- Mimic configurations
- Download packages and install
Benefits of Migration
- 8.0+ HYPR RADIUS Servers are more stable because they are not reliant on a Vault instance
- Maintenance and configuration is easier:
- No logon to Vault to make configuration changes
- Can be managed via the API
- New metrics and Events are reported back to CC (e.g., number of authentications; rejected authentications; how long they are taking; etc.) to appear in the server-level CC Audit Trail
Updated 4 months ago