Affirm to Enterprise Passkey Seamless Integration Guide
This playbook ties HYPR Affirm identity verification to Enterprise Passkey provisioning so that a successfully verified user immediately receives a Magic Link button on the Affirm verification end screen. Tapping the link kicks off passkey pairing for that user — eliminating manual Magic Link generation and providing an end-to-end passwordless onboarding experience.
End-to-end flow
- The user completes identity verification in HYPR Affirm.
- An Affirm Outcome API Call customization fires on the verified outcome and calls the HYPR Magic Link API for that user.
- The Magic Link returned by the API is rendered as a button on the Affirm verification end screen.
- The user taps the link on their mobile device.
- The HYPR Mobile App opens, completes pairing using the Web-to-Workstation flow, and provisions an Enterprise Passkey.
Prerequisites
This integration assumes both Affirm and Enterprise Passkey are already configured and operational:
- HYPR Affirm: tenant configured, verification flows tested (Creating and Managing Verification Flows), Injectable Outcomes available (Configuring Injectable Outcomes & Retry Limits), Control Center admin access.
- HYPR Enterprise Passkey: setup completed (Enterprise Passkey and HYPR Passkey Setup Guide), Magic Link functionality enabled (Magic Links), Web-to-Workstation flow configured and tested.
- HYPR Mobile App installed on user devices, with the current supported version.
When EPK is already deployed for authentication, the Entra application from that integration already carries the Microsoft Graph API permissions Affirm needs. No additional Entra permission changes are required.
If EPK is not used for Entra authentication in your environment, see App Registration Patterns for minimum-permission options.
Configuration
The integration is wired up entirely in HYPR Control Center via:
- An Outcome API Call code customization that calls the Magic Link API.
- Two custom attributes (
HYPR_ACCESS_TOKEN,HYPR_TENANT_URL) referenced by the customization. - A verification flow that surfaces the customization on the Verified Outcome step.
For the underlying UI walkthroughs, see:
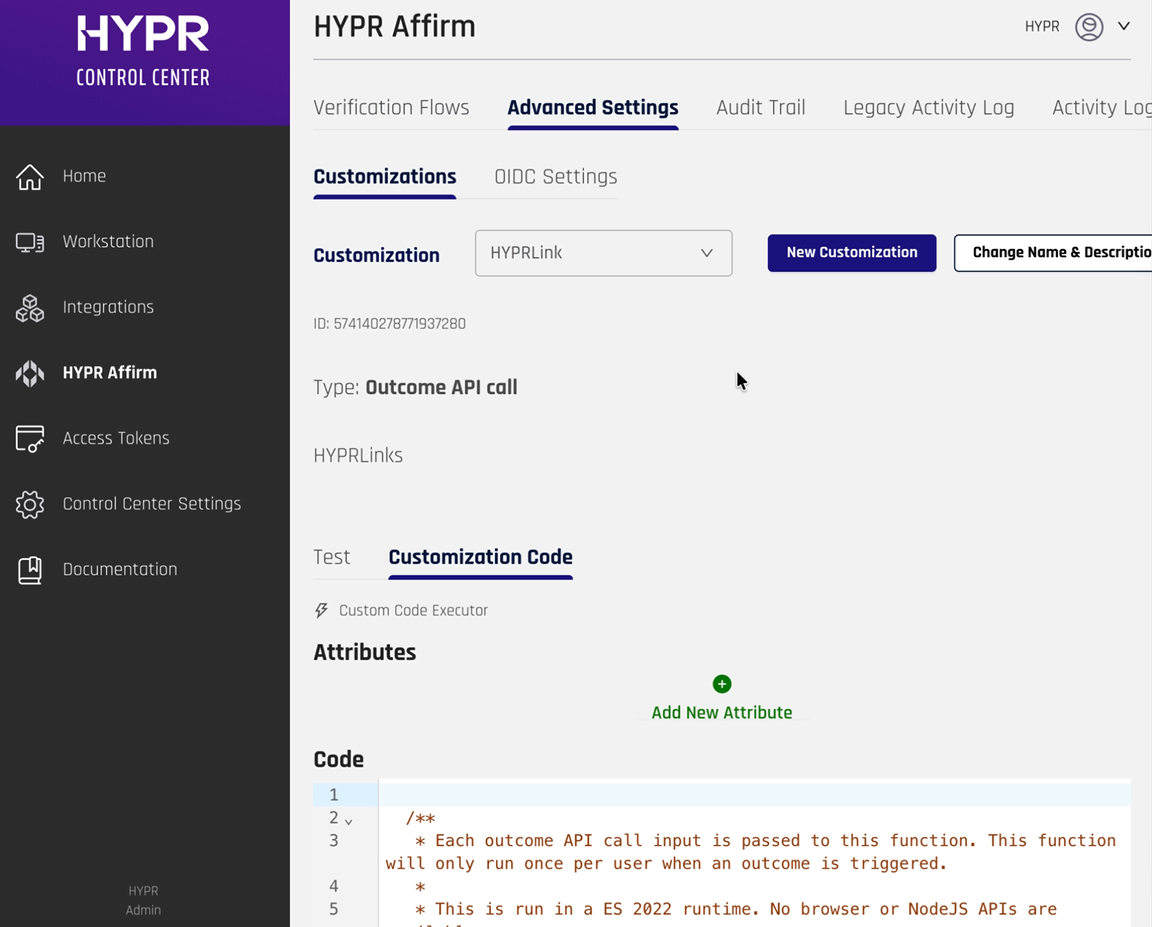
- Adding a Code Customization (Outcome API Call type) — how to navigate to Affirm → Advanced Settings → Customizations and create a new customization.
- Creating an Access Token — how to mint a Bearer Token with Control Center + Application permissions for the customization to use.
- Configuring Injectable Outcomes & Retry Limits — how to attach the customization to a verification flow's Verified Outcome step.
Integration-specific values
When you create the customization, set:
-
Customization Type: Outcome API Call
-
Custom attributes:
HYPR_ACCESS_TOKEN— the Bearer Token created above. Mint it as an API Token with Bearer Token type and both Control Center and Application permissions.HYPR_TENANT_URL— your HYPR tenant base URL.
If you rename HYPR_ACCESS_TOKEN or HYPR_TENANT_URL, update the script below to match.
Code
Paste the following into the customization's Code section. It calls the HYPR Magic Link endpoint for the verified user and returns a button-styled link on success:
function handle(inputJson) {
let input = JSON.parse(inputJson);
const hyprTenantUrl = ctx.getAttribute("HYPR_TENANT_URL");
const hyprAccessToken = ctx.getAttribute("HYPR_ACCESS_TOKEN");
const hyprApiPayload = {
   username: input.loginIdentifier,
   hyprServerUrl: hyprTenantUrl,
};
const httpHeaders = {
   Accept: "application/json",
   "Cache-Control": "no-cache",
   Authorization: `Bearer ${hyprAccessToken}`,
};

ctx.log("FINE", "Custom handler input=" + JSON.stringify(input));

// Only proceed if user is approved
if (!input.isApproved) {
   ctx.log("FINE", "User not approved, skipping magic link retrieval");
   return {
      isSuccess: true,
      outcomeToDisplay: "Verification not approved",
   };
}

try {
   const magiclinkUrl = hyprTenantUrl + "/rp/api/versioned/magiclink";
   const res = ctx.httpPost(
      magiclinkUrl,
      httpHeaders,
      JSON.stringify(hyprApiPayload)
   );

   const response = JSON.parse(res);
   ctx.log("FINE", "httpPost response =" + JSON.stringify(response));

   if (response.statusCode === 200) {
      const magiclinkResponse = JSON.parse(response.body);
      const hyprLink = magiclinkResponse.firebaseDynamicLinkForHyprApp;
      const linkText = "Register HYPR App";
      const outcomeMessage = `<a class="idv-primary-btn" href="${hyprLink}">${linkText}</a>`;
      return {
         isSuccess: true,
         outcomeToDisplay: outcomeMessage,
      };
   } else if (response.statusCode === 404) {
      return {
         isSuccess: true,
         outcomeToDisplay:
            "Received 404 response. Please contact your administrator.",
      };
   } else {
      ctx.log("WARNING", "API call failed with status: " + response.statusCode);
      return {
         isSuccess: false,
         outcomeToDisplay:
            "Unable to retrieve magic link. Please try again or contact support.",
      };
   }
} catch (error) {
   ctx.log("WARNING", "Exception HYPR link retrieval: " + error.message);
   return {
      isSuccess: false,
      outcomeToDisplay:
      "Error retrieving magic link. Please contact support.",
   };
}
}

handle(ctx.getInputAsJson());
Click Save, then use the customization's Test section to verify the Magic Link is produced for a valid user.
Attach the customization to your verification flow
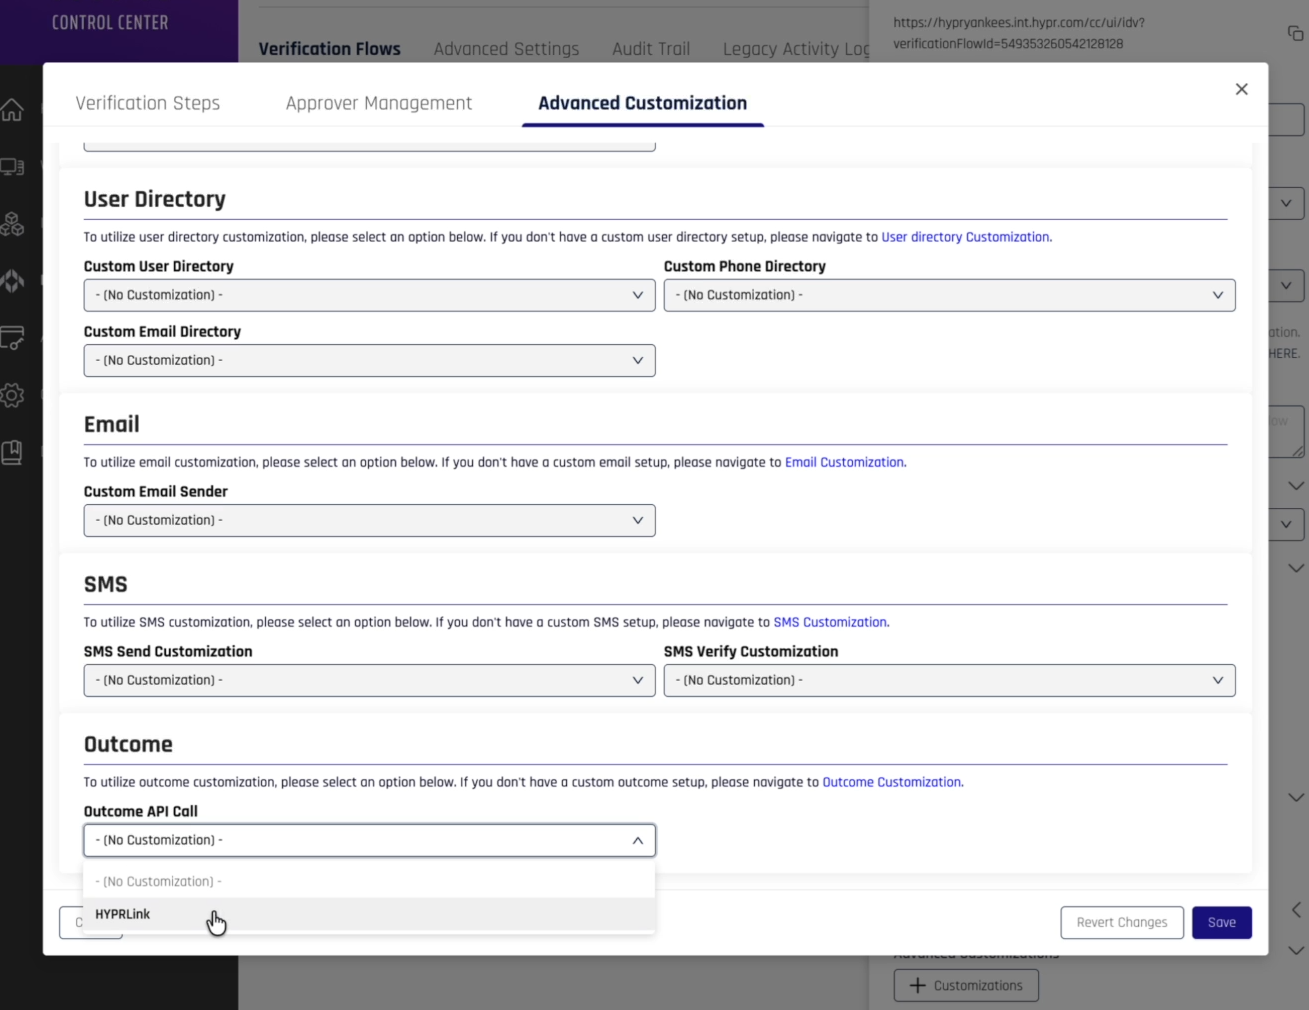
Open the verification flow used to onboard your users, scroll to Verified Outcome, select Display verification result to the end user, switch to Advanced Customization, and pick your customization in the Outcome API Call drop-down. Save the flow.
End-user experience
When a verified user reaches the end of the Affirm flow on a mobile device, they see the link rendered as a button (default text Register HYPR App, configurable in the script):
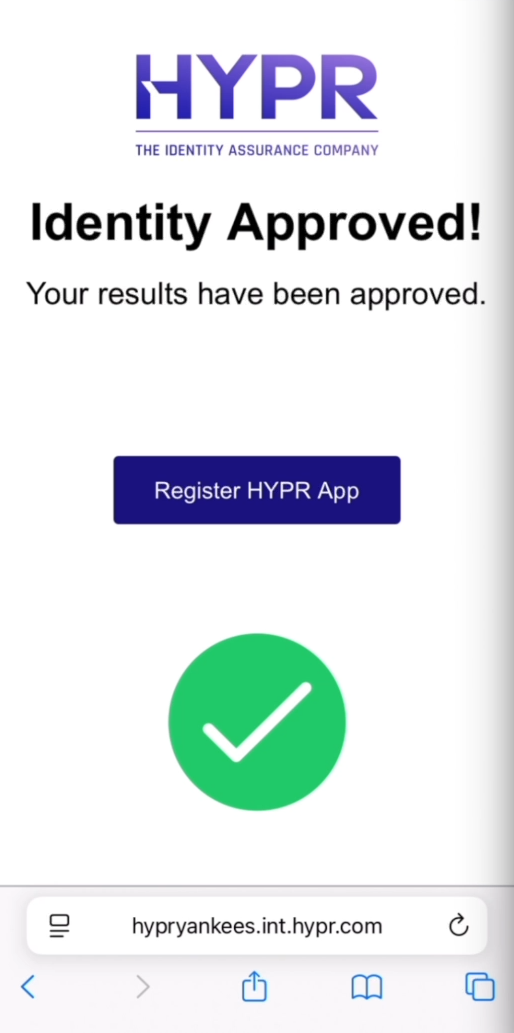
Tapping the button opens the HYPR Mobile App, completes the pairing flow, and provisions a passkey that appears in My Passkeys. For the pairing walkthrough, see Enterprise Passkey User Experience Guide.