PingOne DaVinci: OIDC Integration in CC
Integration Overview
The PingOne DaVinci integration adds HYPR passwordless authentication to PingOne DaVinci identity orchestration journeys. The PingOne DaVinci HYPR Connector provides the communication layer between DaVinci and HYPR, so a DaVinci flow can invoke HYPR authentication at the point in a journey where you need it, receive the result, and branch on it.
With the connector in place, you can:
- Add passwordless authentication to DaVinci authentication journeys.
- Reduce or remove your reliance on password-based authentication.
- Verify users through their HYPR enrolled devices and biometric authentication.
- Build journeys that support passwordless login, step-up authentication, and risk-based authentication.
- Keep orchestration centralized in DaVinci while HYPR performs the authentication.
Integration Architecture
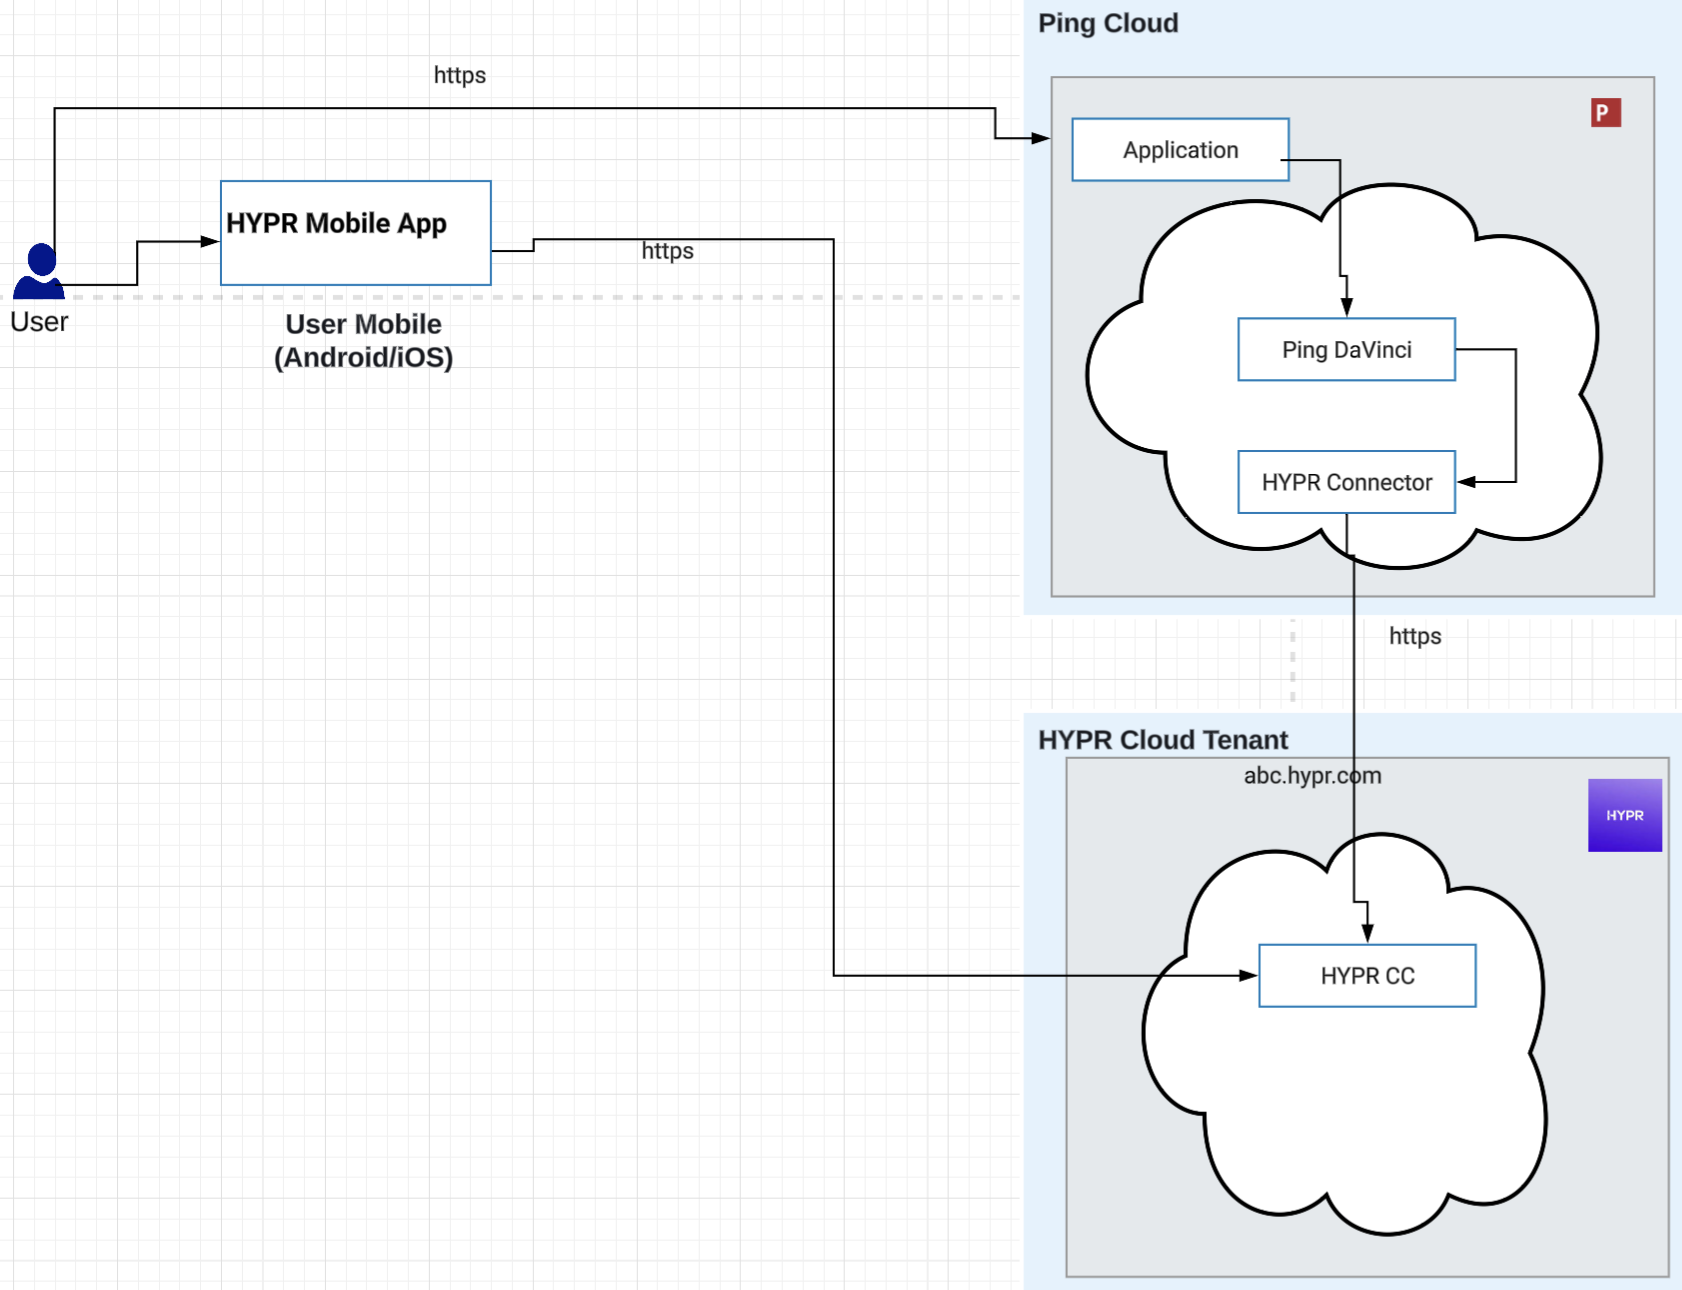
Authentication Flow
-
The user starts an authentication request from an application integrated with PingOne DaVinci.
-
DaVinci runs the configured authentication flow.
-
The flow invokes the HYPR Connector at the authentication step.
-
The HYPR Connector communicates with HYPR using the configured integration credentials.
-
HYPR prompts the user to complete passwordless authentication on their enrolled device.
-
HYPR returns the authentication result to DaVinci.
-
DaVinci evaluates the result and continues the authentication journey.
-
DaVinci completes the flow and returns the authentication response to the requesting application.
Prerequisites
In PingOne DaVinci:
- A DaVinci tenant in a running state.
- Administrator access to the PingOne DaVinci Admin Console.
- The ability to create connectors.
- The ability to create and edit flows.
In the HYPR Control Center:
- A Control Center tenant in a running state.
- HYPR administrator access.
- Integration creation enabled for your tenant.
Connecting PingOne DaVinci to HYPR
-
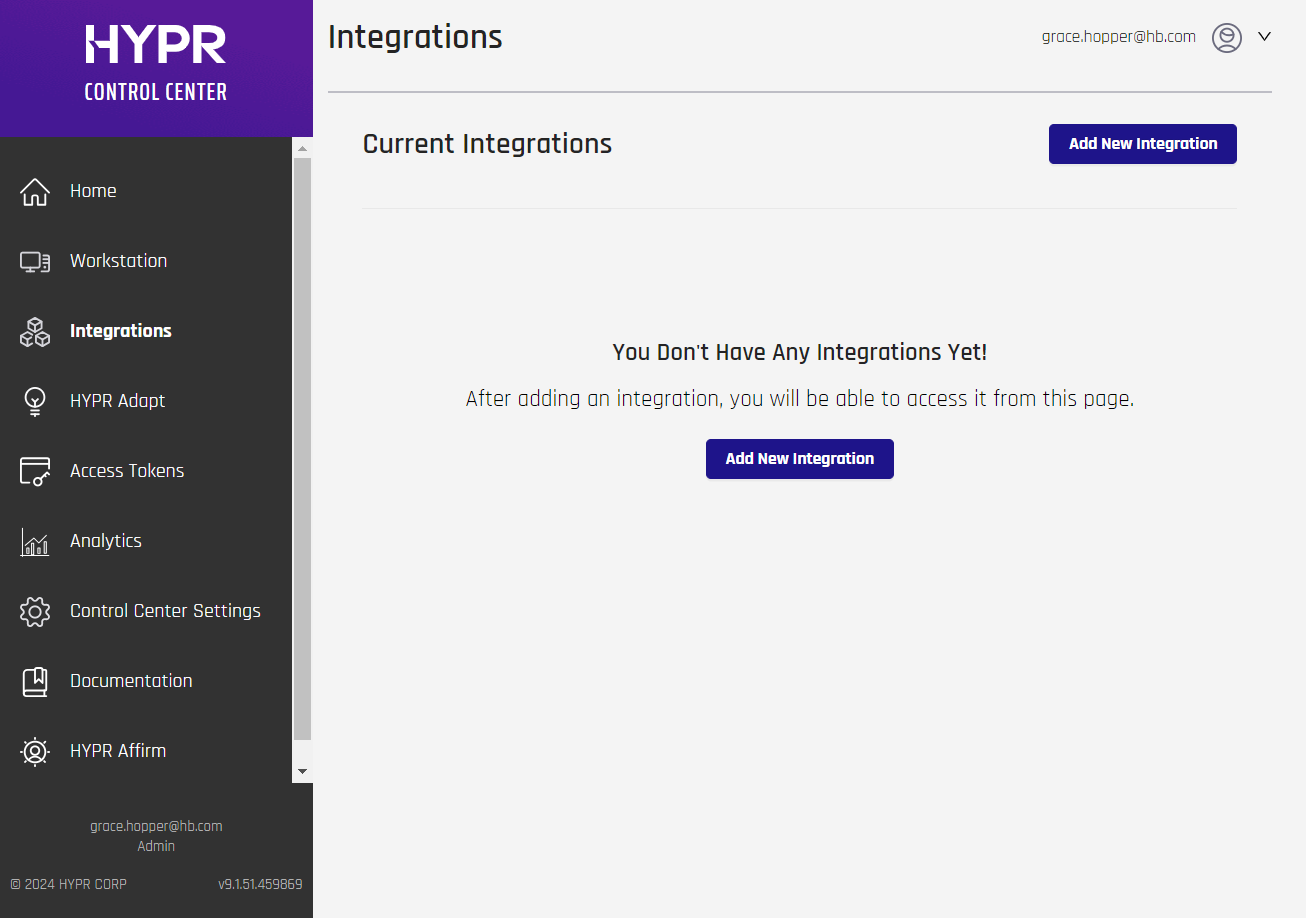
Go to the Integrations screen in the HYPR Control Center and click Add New Integration to show a list of available integration types.
-
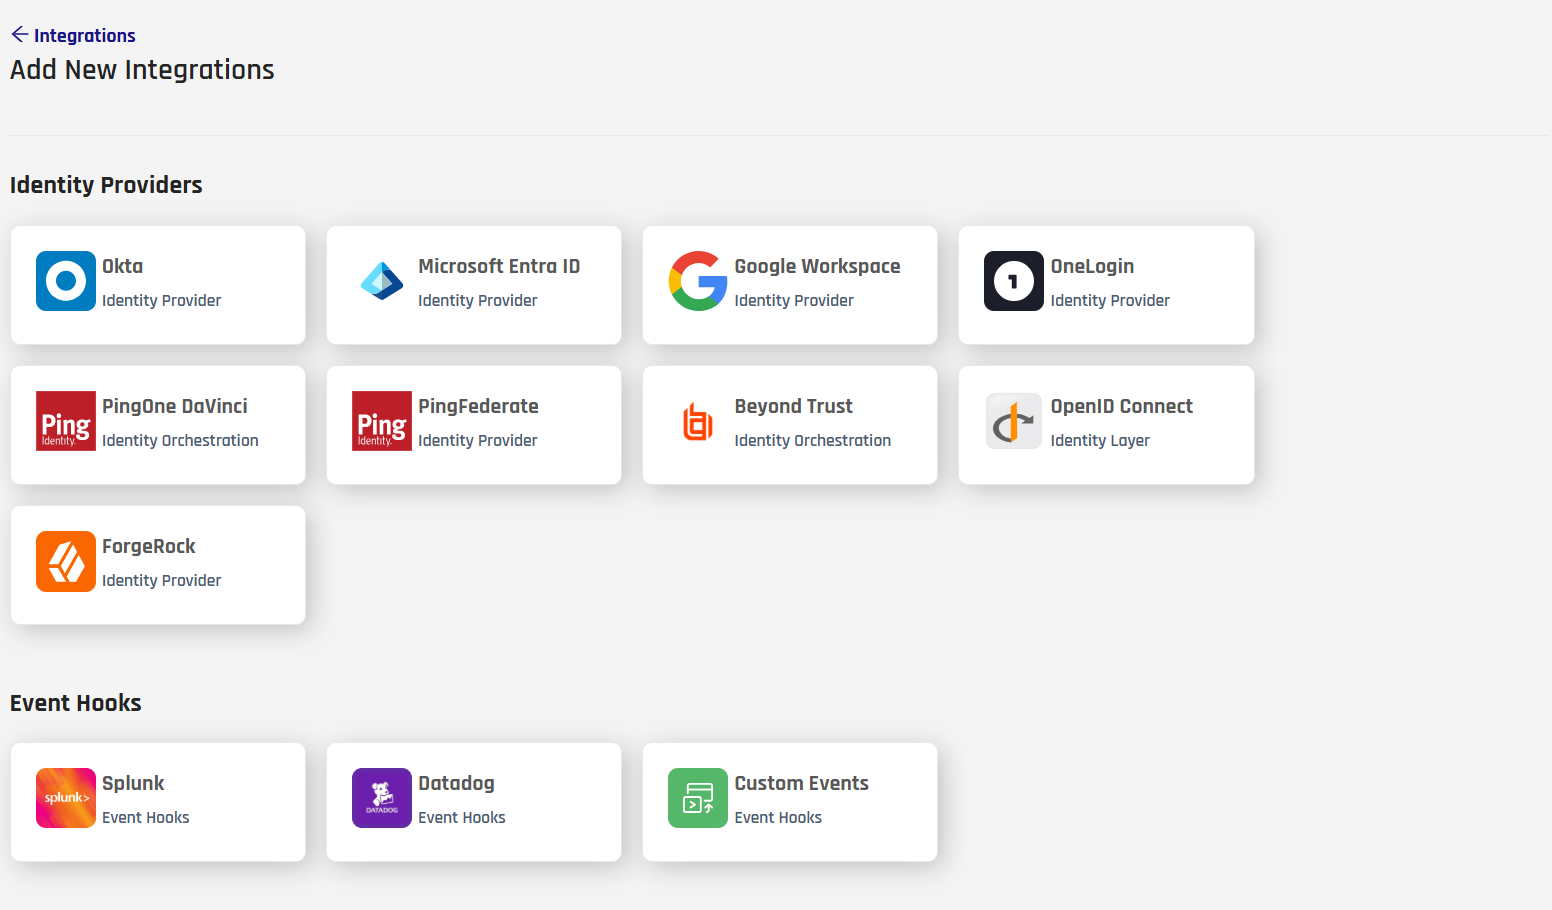
Select the PingOne DaVinci Identity Orchestration integration.
-
To integrate HYPR and PingOne DaVinci, you just need to provide some basic information on the Integrations screen.
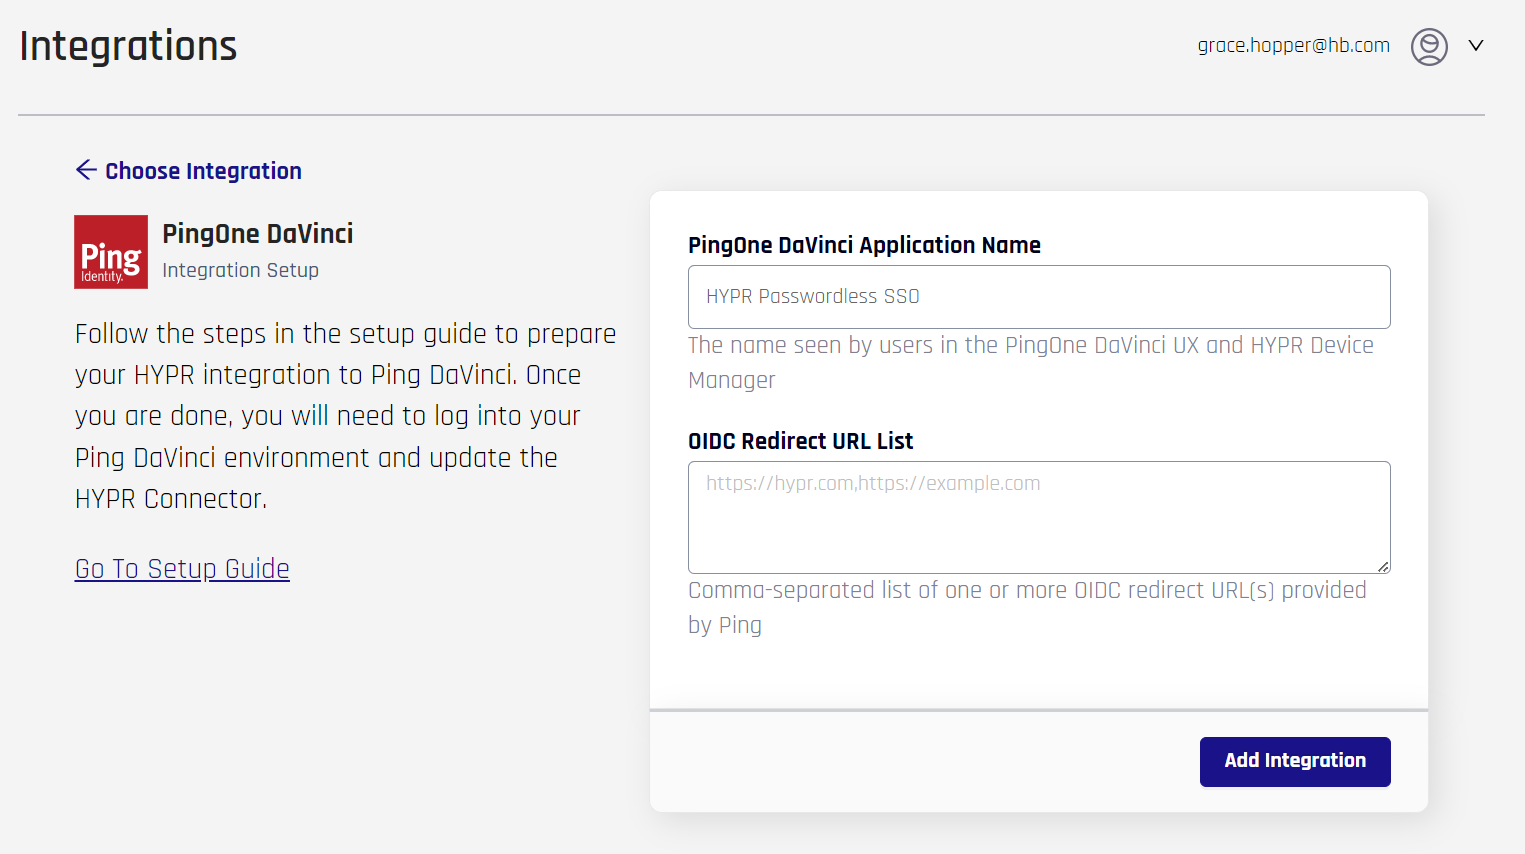
Field Value PingOne DaVinci Application Name The name you provide here will be used in four places:
- For an application that HYPR auto-creates in the PingOne DaVinci Admin Console
- For the web account name that users will see in the HYPR Mobile App
- For the HYPR Device Manager page where users register their devices
- For internal identification of this integration within the HYPR platform
You can use any name you like, but it’s best to go with something that indicates the purpose of the application. For example:
HYPRPingOneDaVinciSSO
Note that any spaces or special characters will be automatically removed from the name you supply. The namespace is limited to 23 characters.OIDC Redirect URL List The OIDC URL where HYPR will redirect the authorization code. -
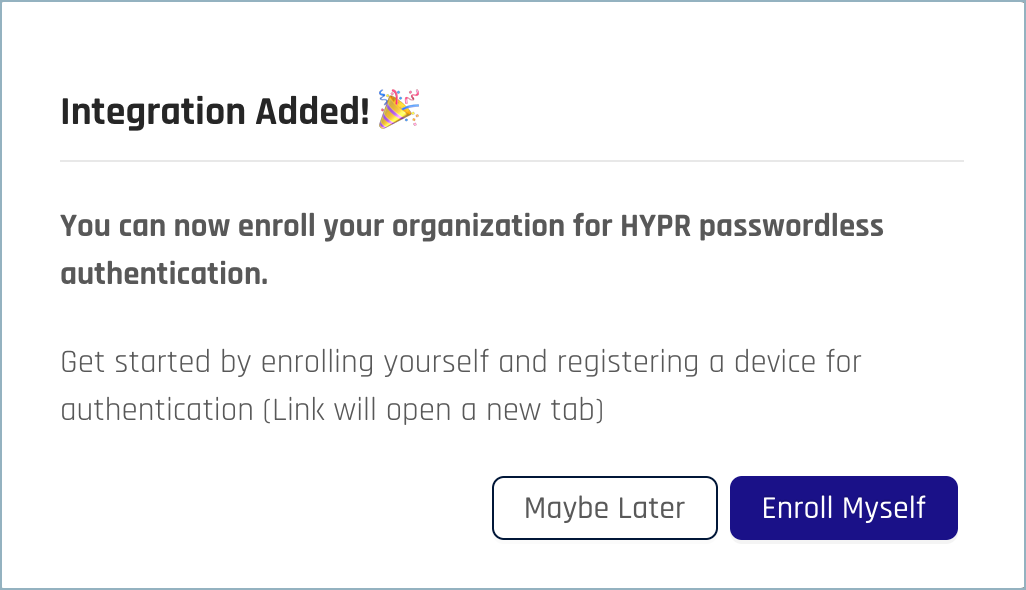
Click Add Integration to begin. If the action is successful, you’ll see the Integration Added confirmation dialog.
-
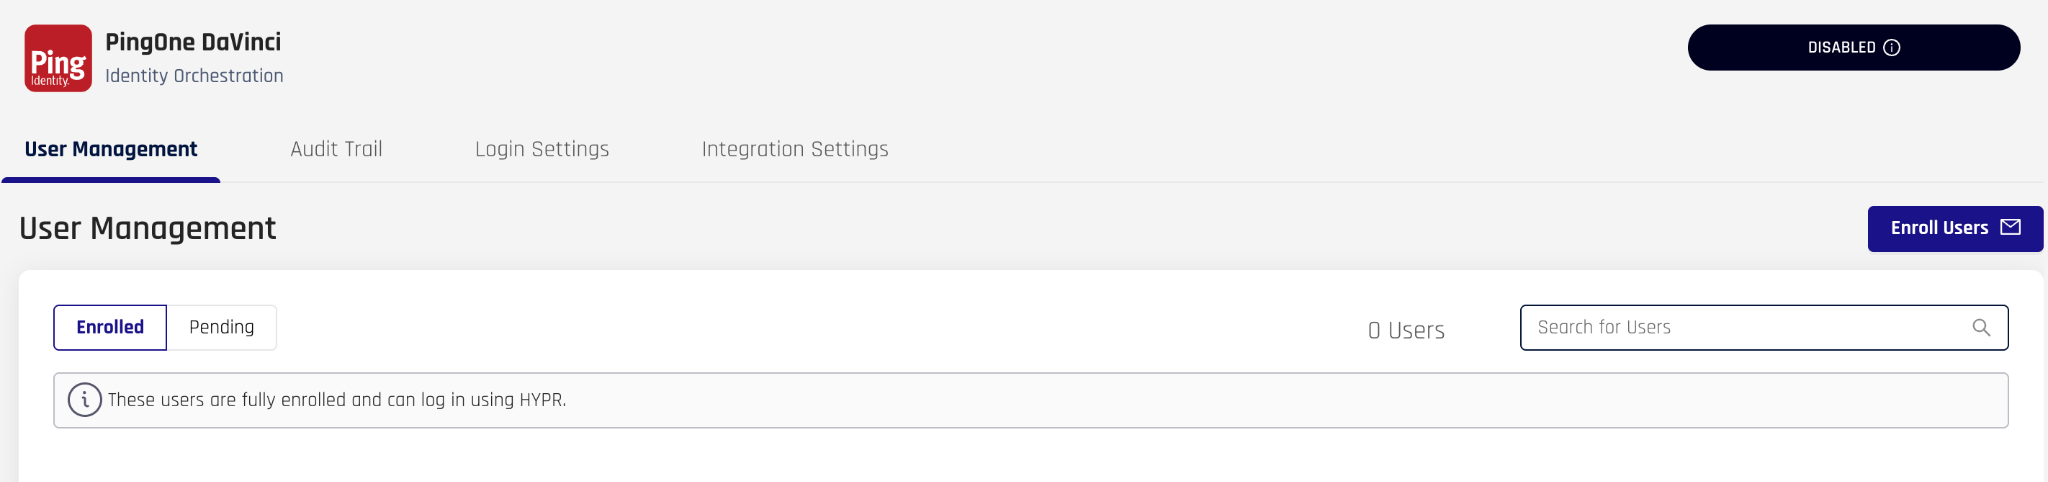
Click Maybe Later to exit back to the main PingOne DaVinci integration page.
-
Open the Integration Settings tab. In addition to the application name and OIDC redirect URL list you supplied, three fields now display, populated with values HYPR generates for this integration. You need all three when you configure the HYPR Connector in PingOne DaVinci, so leave this tab open or copy the values now. Each field has a copy icon beside it.
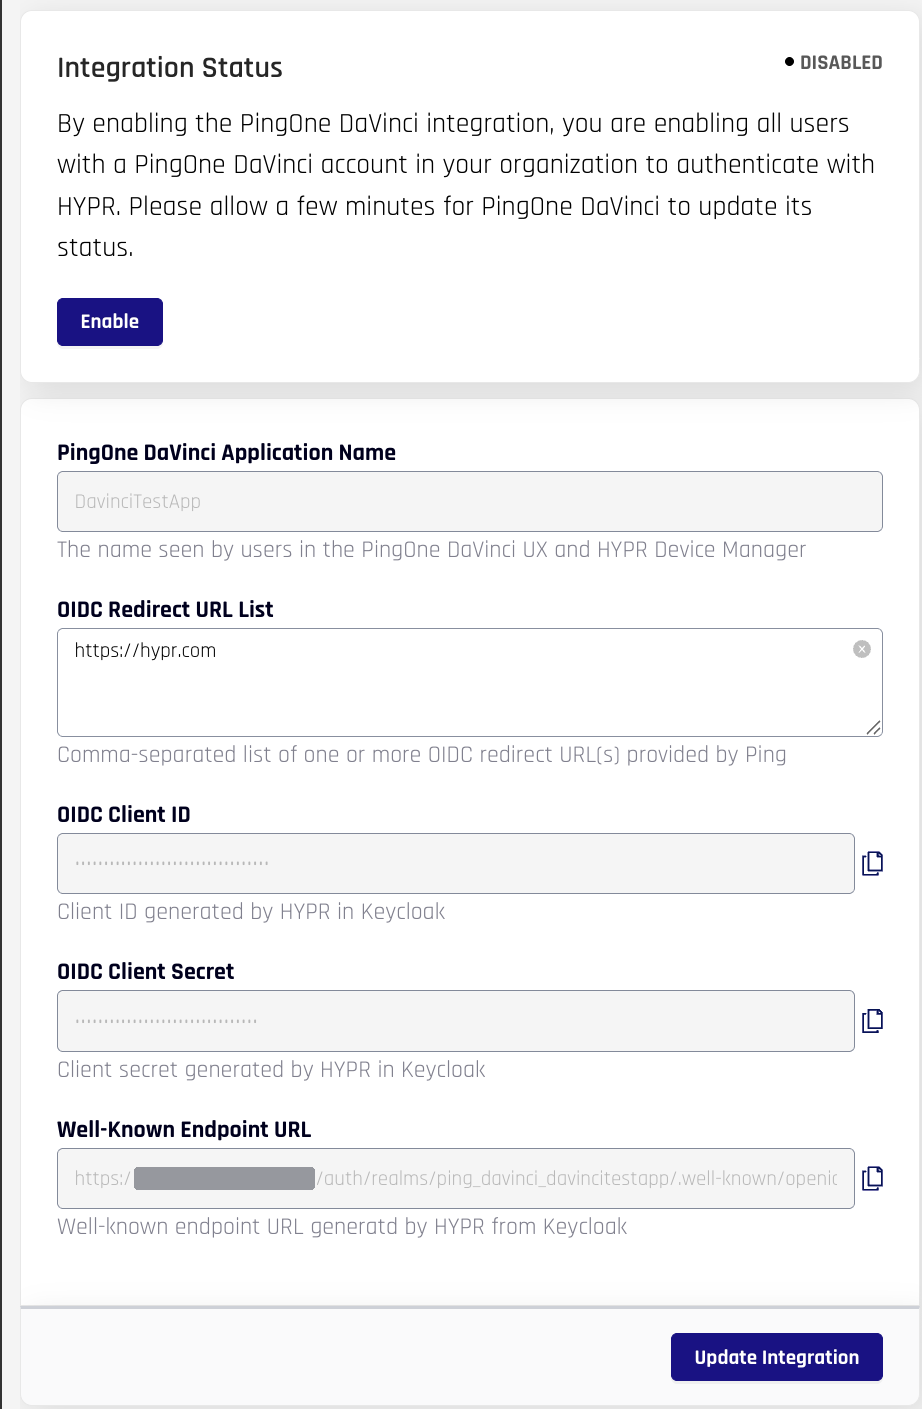
Field Value OIDC Client ID The client identifier HYPR generates for this integration. OIDC Client Secret The client secret HYPR generates for this integration. Handle it as you would any other credential. Well-Known Endpoint URL The OpenID Connect discovery endpoint HYPR generates for this integration. It incorporates your tenant address and the application name you supplied.
The Integration Status panel at the top of the Integration Settings tab shows the integration as Disabled until you enable it. Enabling it allows every user with a PingOne DaVinci account in your organization to authenticate with HYPR, and PingOne DaVinci can take a few minutes to reflect the change. See Enabling the Integration.
PingOne DaVinci HYPR Connector
Using the values from the Integration Settings tab, complete the PingOne DaVinci HYPR Connector deployment by following the steps here. The sections below summarize the sequence and identify which HYPR values each DaVinci field takes.
Adding the Connector
DaVinci connectors are added from the Connectors section and then configured as connector instances.
In the PingOne DaVinci Admin Console, go to Connectors > Add Connector, search for HYPR, then click Create.
Configuring the Connector Instance
| Field | Value |
|---|---|
| API URL | The address of your HYPR Control Center tenant. |
| Client ID | The OIDC Client ID from the Integration Settings tab. |
| Client Secret | The OIDC Client Secret from the Integration Settings tab. |
| Scope | The OpenID Connect scopes the flow requests, for example openid email profile. |
The Well-Known Endpoint URL on the Integration Settings tab is this integration's OpenID Connect discovery document. HYPR builds it from your tenant address and the application name you supplied.
Where the connector asks for a discovery or well-known URL rather than a base address, supply that value.
Building the Authentication Flow
-
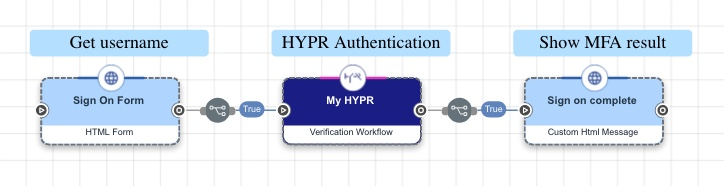
Import the Marketplace flow template. A DaVinci template provides a starting flow that you can modify. On import, DaVinci either creates or references the connector instances the template requires, depending on what already exists in your environment.
-
Configure the HYPR Connector node. The connector exposes an authentication capability that accepts a username as input and returns the authentication and token response data.
-
Customize the flow as needed. This step is optional.
Enrolling Yourself in the PingOne DaVinci Integration
Before users can authenticate through this integration, they must be enrolled in HYPR. Enrollment establishes the user's identity, registers one or more trusted devices, and creates the cryptographic credentials that passwordless authentication requires.
The HYPR Connector does not enroll users. It relies on the enrollment state held by HYPR: during authentication, HYPR verifies that the user has an active enrollment and a registered device.
Follow the enrollment instructions in the main Integrations article. Adding yourself as an admin and adding other users to the integration are performed in the same manner.
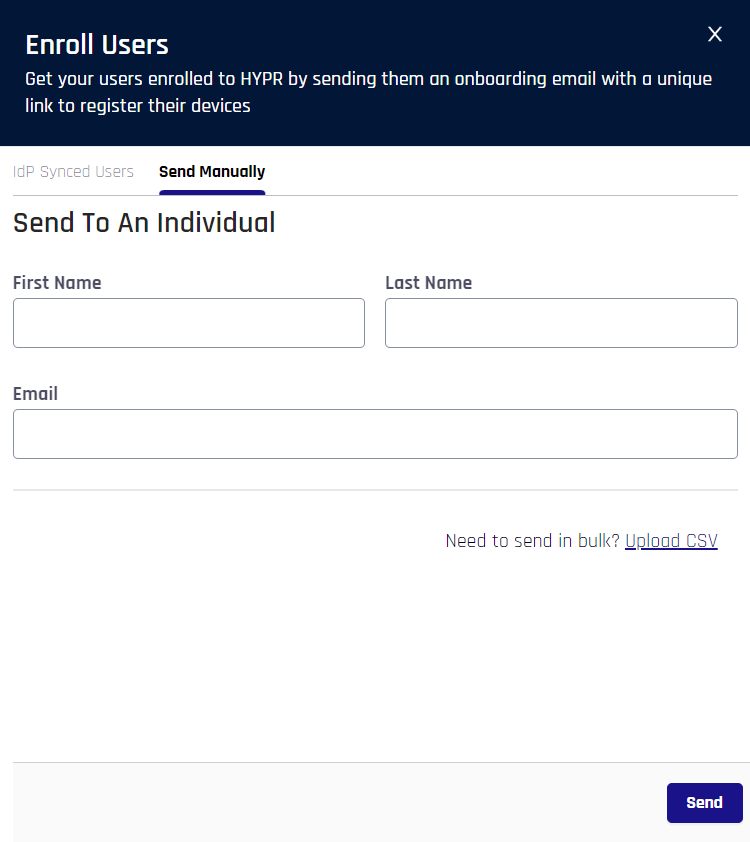
The PingOne DaVinci integration does not synchronize users from an identity provider, so there is no Sync Users option. Enroll users from the Send Manually tab, either one at a time or with Upload a CSV. Either method sends the user a Magic Link they use to complete enrollment.
Validating the Integration
Preparing a Test User
-
Create a HYPR user.
-
Enroll the HYPR Mobile App for that user.
-
Confirm the device registration.
-
Assign the user to the PingOne DaVinci integration.
Running the Flow Test
Run the DaVinci flow end to end: enter the username, follow the redirect to HYPR, complete authentication on the enrolled device, return to DaVinci, and confirm that the flow completes.
Logs and Audit Trail
Authentication activity for the integration is recorded in its Audit Trail, which HYPR administrators can review in the Control Center. Open Integrations, click the PingOne DaVinci integration, then select the Audit Trail tab.
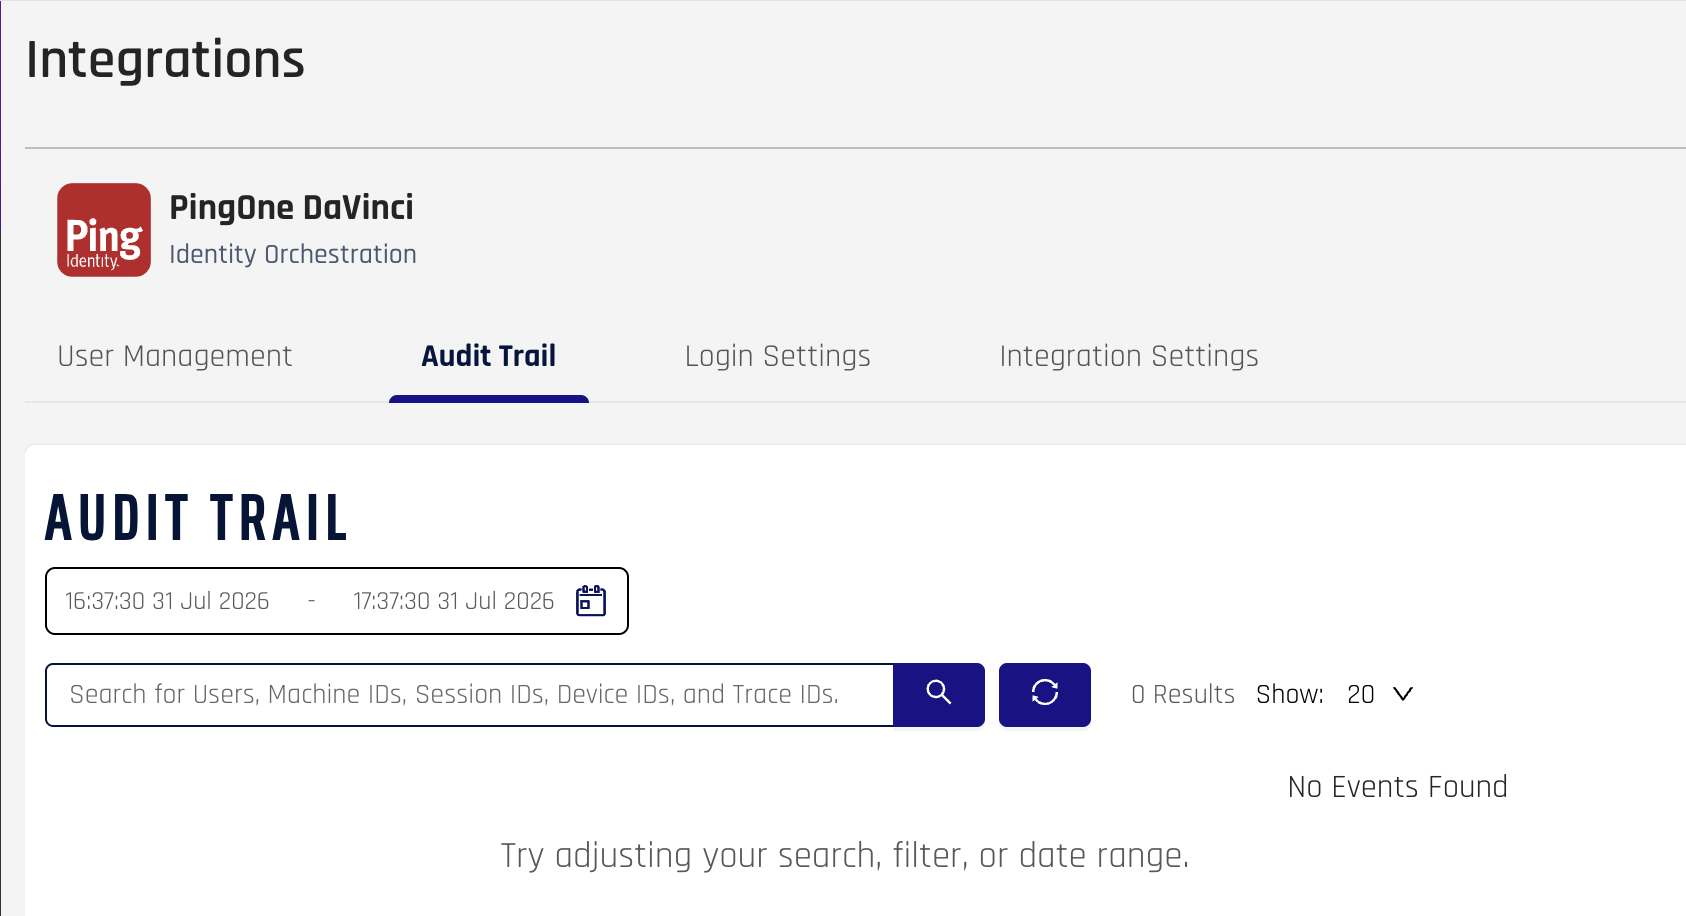
For the columns, filters, and export options, see Audit Trail.
For the shared Control Center integration experience — enabling and disabling the integration, user management, and Audit Trail detail — see the Integrations main page.
If you want to route sign-in attempts into a HYPR Affirm verification flow, configure the optional [Affirm] Authenticator in the integration's Login Settings (see Using Affirm as an Authenticator).