AD FS Plugin: Manual Installation
HYPR AD FS Plugin allows HYPR passwordless authentication to be used instead of username/password for accessing applications protected by AD FS. HYPR AD FS Plugin gives users the ability to manage their own devices without the need for assistance or additional websites. For administrators, it grants the freedom to apply HYPR Control Center (CC) policies to any AD FS users across the entire federation. HYPR AD FS Plugin supports AD FS 2019, 2022 and later.
Supported Authentication Methods
HYPR AD FS Plugin supports registration and authentication for two device types:
-
Mobile — a user approves a push notification or scans a QR code with the HYPR Mobile App. Push or QR is controlled by the
qrAuthsetting (see Configurehypr.json). -
FIDO2, Security Key — a user registers and authenticates with FIDO2 or a Security Key. FIDO2 registration must be performed on the same domain used for FIDO2 authentication; this is a requirement of the FIDO2 standard.
Independently, Desktop SSO lets a user with a registered device sign in without further action when the HYPR Passwordless client on their workstation already has an active session for them. See Desktop SSO for setup details.
For what a user sees once the plugin is in place — choosing HYPR Authentication, completing a login, and pairing devices — see User Experience.
Installation
This section describes how to integrate the HYPR AD FS Plugin into an AD FS 2019, 2022 or later environment.
Assumptions
-
AD FS 2019, 2022 or later is up and running supporting at least username/password authentication for domain users. Standing up AD FS itself is outside the scope of this page; see Microsoft's AD FS deployment guidance.
-
You have Administrator privileges to the AD FS machine
-
You have AD FS externally accessible
-
You have a valid SSL certificate - please see SSL Requirements
- You can use a wildcard certificate if you have one
-
You have Administrator privileges to the HYPR CC
-
You have obtained the installation package for the AD FS Plugin from HYPR
-
The AD FS service can access the HYPR CC server directly
-
The AD FS service user requires write access to the registry so HYPR AD FS Plugin can generate entries and assign permissions to the created keys and values; this step is performed automatically if using the
.msiinstallation method
HYPR does not keep state on a server and can be used without additional requirements beyond baseline Microsoft requirements, such as with AD FS Server Farm. See Deploying a Federation Server Farm for Windows Server 2012 R2 AD FS | Microsoft Learn.
Configure HYPR for AD FS Plugin
The following processes must be completed before installing HYPR AD FS Plugin:
-
Add an Application. Name it something meaningful, like ADFS. Record that value for later.
-
Select the new Application from the Applications list
-
Click App Settings (the gear) in the upper right corner of Control Center
-
Copy the name next to APP ID and save it for later use
-
-
In the left navigation pane, under Advanced Config, click Login Settings
-
Confirm that Enable Push Notifications is off and QR Authentication [Web Clients Only] is on. Both settings are on the application's Login Settings page, under Advanced Config in the left navigation pane. A newly created application has QR Authentication off, so expect to turn it on here. The
.msiinstallation method applies these settings for you; set them manually if you install another way.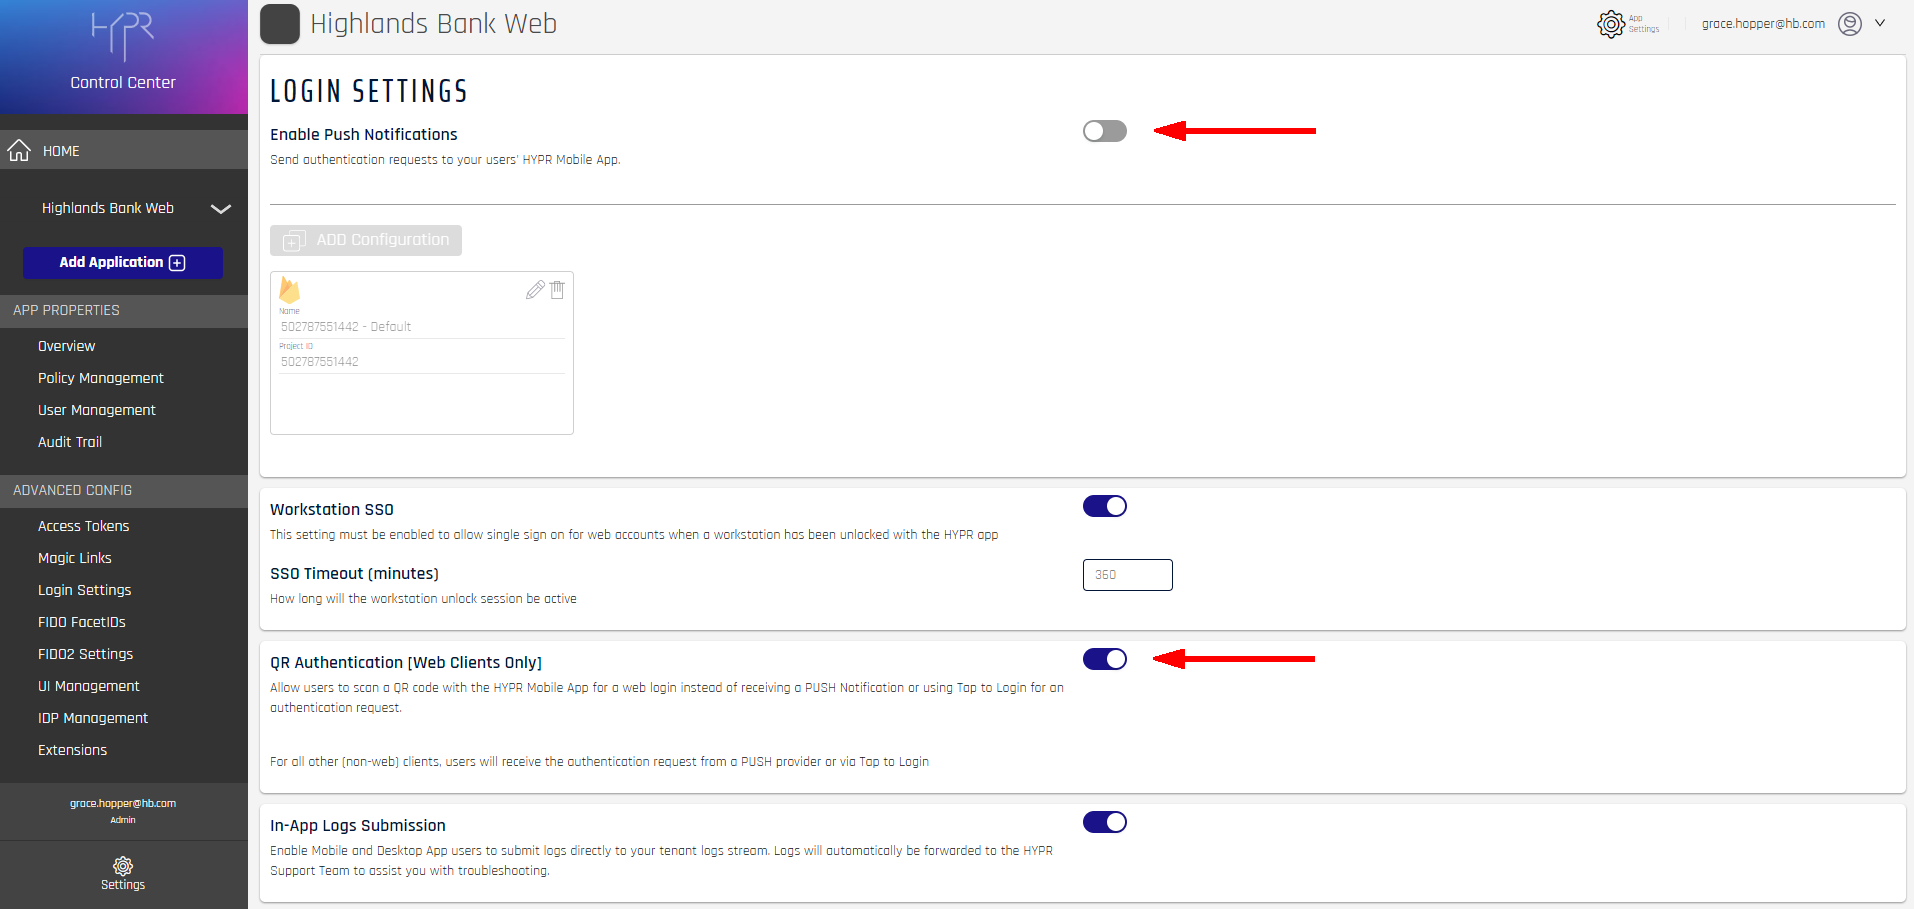
-
If your users will authenticate with FIDO2 or a security key, enable FIDO2 for the application:
-
Under Advanced Config, click FIDO2 Settings
-
Slide Enable FIDO2 to the On position. A newly created application has FIDO2 off unless your deployment enables it by default. The remaining FIDO2 fields become active once it is on.
-
Set Client Origin URL to your AD FS domain — see the warning below.
-
The other fields — discoverable credentials, user verification, attestation, the enforced settings and any AAGUID allow or deny policies — behave the same here as everywhere else in HYPR. See FIDO2 Settings for each field and its default, and FIDO2 Enforced Settings for the allowances HYPR applies regardless of the browser.
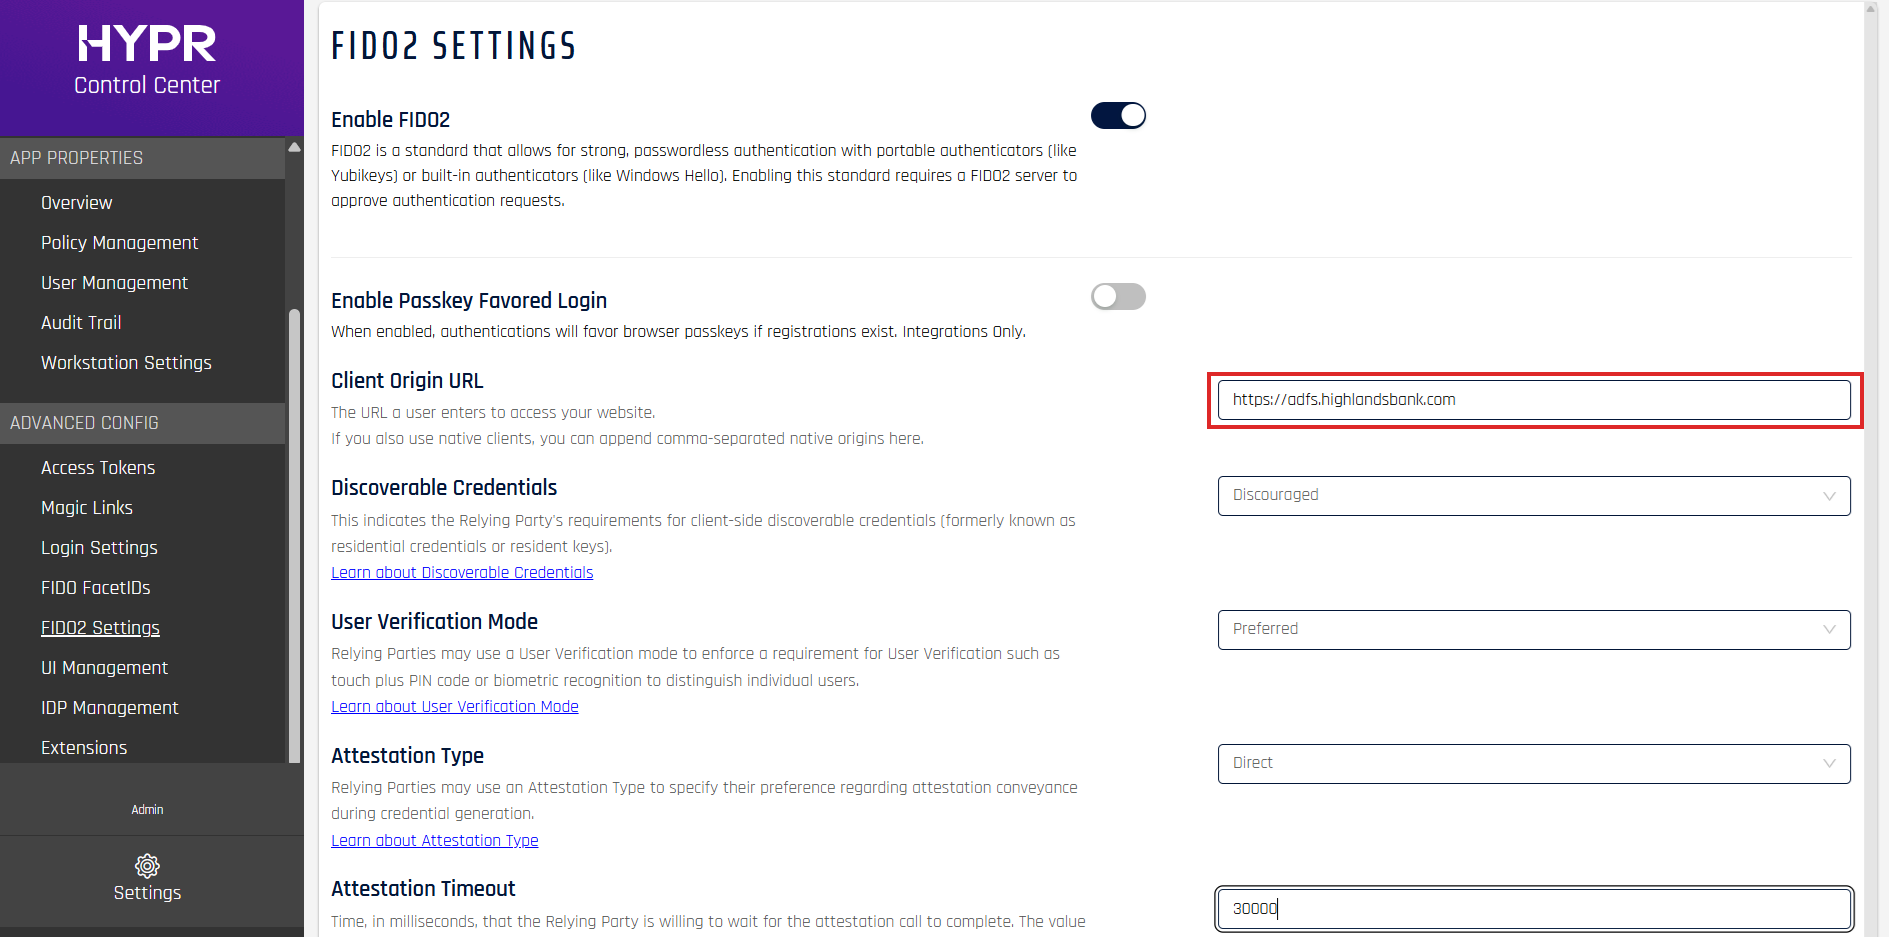 Client Origin URL must be your AD FS domain
This is the setting FIDO2 registration and authentication depend on. Set Client Origin URL (highlighted above) to the domain your users reach the AD FS sign-in page at — for example
https://adfs.yourcompany.com.The field arrives pre-filled with a default for your HYPR deployment, which is a HYPR address, not your AD FS one. Leaving it at that default means the browser's origin will not match and FIDO2 registration and authentication fail.
HYPR compares the origin the browser reports against this value by domain suffix, so the AD FS domain also covers its subdomains. This is the setting behind the same-domain requirement described in Supported Authentication Methods.
Do not add your AD FS domain alongside an unrelated one on the same application. The comma-separated field is for variations of a single domain — ports, subdomains, native app associated origins — not for unrelated domains. A FIDO2 relying party allows one relying-party ID per application, so where two unrelated domains are listed only one can work, and a passkey registered under one is not usable from the other. Give each unrelated domain its own HYPR Application.
A mismatch surfaces in the browser rather than in HYPR: registration fails with a WebAuthn
SecurityErrorreading "The relying party ID is not a registrable domain suffix of, nor equal to, the current domain."
-
-
Generate an Access Token to be used for the AD FS Plugin:
-
In Control Center, click ADVANCED CONFIG > Access Tokens
-
In the Access Tokens page, click Generate Token
-
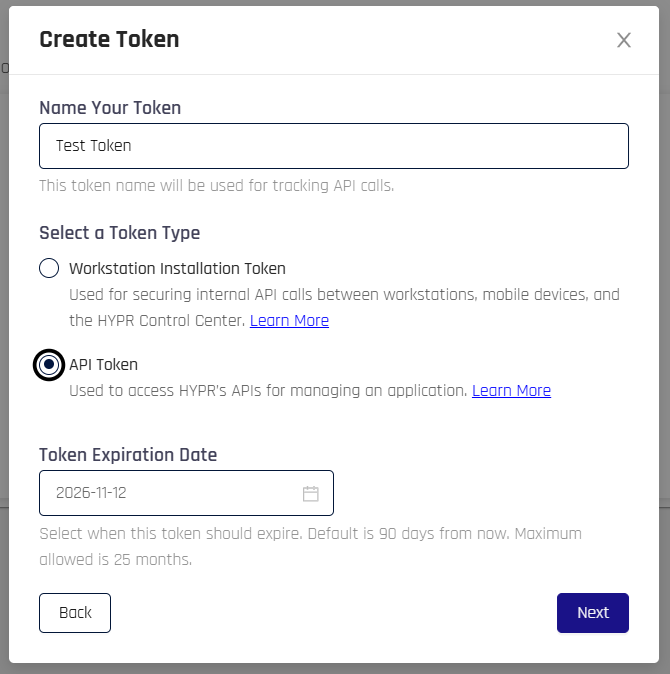
Name the token (e.g., adfs) and select the API Token radio button; then click Next
-
Leave Token Type set to Bearer Token on the next screen. The AD FS Plugin authenticates with the token directly, as
hypr.jsonholds a singleapiKeyvalue; the OAuth option issues a credential that must first be exchanged for an access token, which the plugin cannot do. -
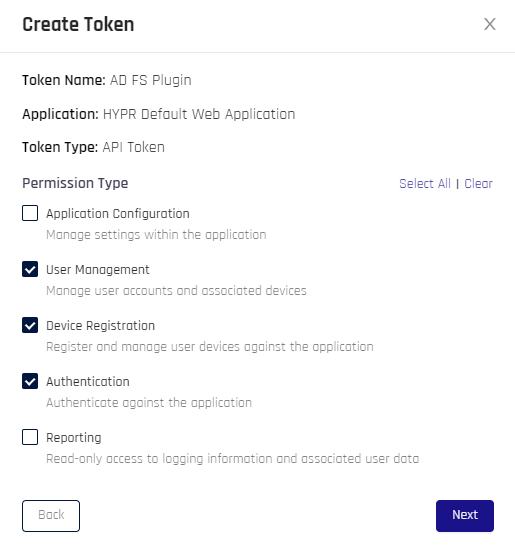
On the Permissions screen, check the Device Registration, Authentication, and User Management boxes; then click Next. For what each permission grants, see Token Permissions
-
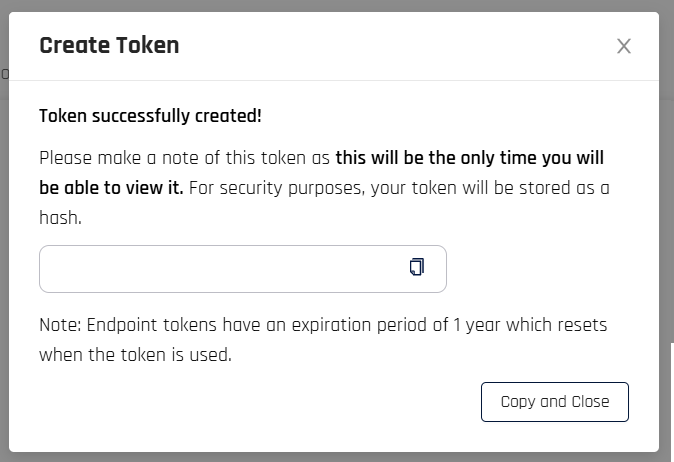
Copy the store the generated token in a password manager for later
-
-
Create another API Access Token with administrator (all) privileges, which will be used in the next step for the cURL command:
-
In Control Center, click ADVANCED CONFIG > Access Tokens
-
In the Access Tokens page, click Generate Token
-
Name the token (e.g., adfs) and select the API Token radio button; then click Next
-
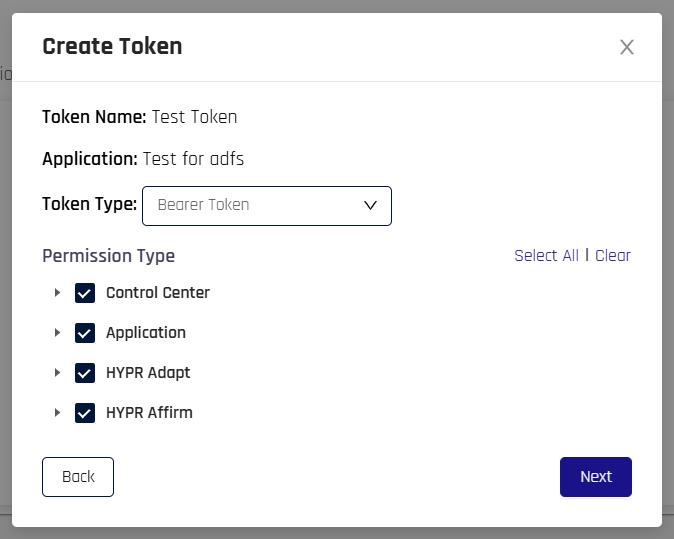
On the Create Token screen, click Select All, leaving Token Type set to Bearer Token
-
Copy the store the generated token in a password manager for later use
-
Enable QR Code Authentication by running this cURL command, replacing the following values:
-
<rp url>with your tenant URL (e.g.,https://<tenant>.hypr.com) -
<access token>with the admin token you just created -
<app id>with the rpAppId of your Application (e.g., “adfs”)
curl
--location
--request PUT "<rp url>/cc/api/appconfig/devicemanager"
--header "Authorization: Bearer <access token>"
--header "Content-Type: application/json"
--data-raw '{
    "baseURL": "<rp url>",
    "rpAppId": "<app id>"
}' -
-
Once all of these are completed, HYPR Control Center is configured and ready for the AD FS Plugin Installation.
Configure hypr.json
The settings .json file looks like this.
  "ccUrl": "https://<your-hypr-tenant>",
  "appId": "XXXXX",
  "apiKey": "hypap-XXXXXXXX-XXXX-XXXX-XXXX-XXXXXXXX",
  "logFile": "C:\\HyprADFS\\HyprADFS.log",
  "logLevel": 5,
  "qrAuth": true,
  "qrFallback": false,
  "dynamicLink": true,
  "asyncReg": false,
  "desktopSSO": false,
  "authCompletionTimeout": 60,
  "desktopSSOWfaPort": 51992,
  "proxyServer": "",
  "proxyBypass": "",
  "proxyAutoConfigUrl": "",
  "pluginName": "HYPR Authentication"
}
The values are as follows:
| Field | Description |
|---|---|
| ccUrl | URL for the HYPR tenant to which this machine will connect. EX: https://{your-hypr-tenant} |
| appId | The rpAppId for the HYPR RP application HYPR Passwordless will access. |
| apiKey | The workstation installation access token. If will start with hypap and continue in the followinf format: hypap-XXXXXXXX-XXXX-XXXX-XXXX-XXXXXXXX |
| logFile | The path for where to generate the log. Default is C:\HyprADFS\HyprADFS.log. |
| logLevel | The amount of logging to be generated. Default is 5. See Logging and Log Levels for a full description of the Log Levels. |
| qrAuth | Enable QR Authentication? Set to true in the installed template; if this field is omitted entirely, the plugin falls back to false. [ true | false] |
| qrFallback | Enable QR Fallback/Manual QR entry? Defaults to false. [ true | false] |
| dynamicLink | Enable HYPR Mobile App to use dynamic links for this RP Application? Set to true in the installed template; if this field is omitted entirely, the plugin falls back to false. [ true | false] |
| asyncReg | Enable Asynchronous Registration? Defaults to false. [ true | false] |
| desktopSSO | Is Desktop SSO enabled? Defaults to false. [ true | false] |
| authCompletionTimeout | Time in seconds before the authentication attempt times out. Default: 60 |
| desktopSSOWfaPort | The local loopback port used for Desktop SSO. Default: 51992 (More details in the Desktop SSO section) |
| proxyServer | The hostname or URL of a proxy server to use for outbound connections. Defaults to empty (no proxy). |
| proxyBypass | Hosts to bypass the proxy server for. Defaults to empty. |
| proxyAutoConfigUrl | The URL to auto-configure proxy settings. Defaults to null. |
| pluginName | The label that will appear in the AD FS Intranet and Extranet Primary Authentication Methods. Default: HYPR Authentication |
| clientIpDetectionSequence | One or more of the following values separated by semicolon None,StandardProxyHeader,AdfsProxyHeader,RemoteIP. Default: AdfsProxyHeader;StandardProxyHeader;RemoteIP (More details in Client IP Address Reporting and Validation section) |
Make a copy of the original before making edits. Make sure to save the edited file before continuing.
HYPR AD FS Plugin Installation (Powershell)
-
Login to your AD FS server machine as an administrator.
-
Create the folder,
c:\HyrpADFS. -
Unpack and copy the contents of the HYPR AD FS Plugin package to
C:\HyrpADFS. -
Select everything in this folder and copy the contents to
C:\HyrpADFS.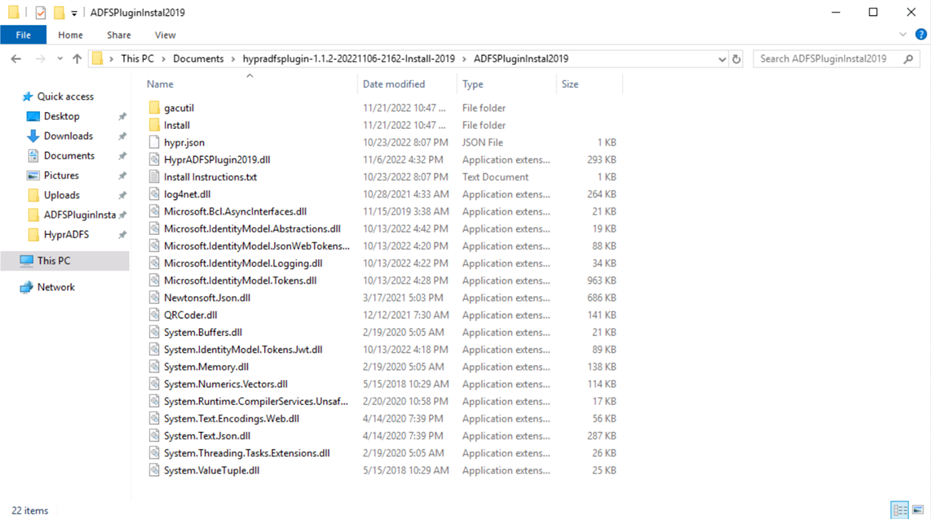
-
Open
C:\HyrpADFS\hypr.jsonin a text editor and enter the appropriate values as described above. -
Open PowerShell as an administrator.
-
Change directory to
C:\HyrpADFSand run.\Install\InstallADFSHyprProvider2019.ps1. The output of the script should look something like the following. Note this output is from the pre-production release of HYPR AD FS Plugin:PS C:\HyprADFS> .\install\InstallADFSHyprProvider2019.ps1
For better protection of the ApiKey which is stored in
HKLM\Software\HYPR\HYPRAuthentication\Config registry key, make sure that
a user used to run 'Active Directory Federation Services' service has full
access right to this registry.
Please modify this script for your particular ADFS deployment.
=================================================================================
Are you Sure You Want To Proceed:: y
=================================================================================
=================================================================================
1. Save HYPR configuration to registry ...
=================================================================================
=================================================================================
2. Adding HYPR binaries to Global Assembly Cache ...
=================================================================================
Microsoft (R) .NET Global Assembly Cache Utility. Version 4.0.30319.0
Copyright (c) Microsoft Corporation. All rights reserved.
Assembly successfully added to the cache
Microsoft (R) .NET Global Assembly Cache Utility. Version 4.0.30319.0
Copyright (c) Microsoft Corporation. All rights reserved.
Assembly successfully added to the cache
Microsoft (R) .NET Global Assembly Cache Utility. Version 4.0.30319.0
Copyright (c) Microsoft Corporation. All rights reserved.
Assembly successfully added to the cache
Microsoft (R) .NET Global Assembly Cache Utility. Version 4.0.30319.0
Copyright (c) Microsoft Corporation. All rights reserved.
Assembly successfully added to the cache
Microsoft (R) .NET Global Assembly Cache Utility. Version 4.0.30319.0
Copyright (c) Microsoft Corporation. All rights reserved.
Assembly successfully added to the cache
Microsoft (R) .NET Global Assembly Cache Utility. Version 4.0.30319.0
Copyright (c) Microsoft Corporation. All rights reserved.
Assembly successfully added to the cache
Microsoft (R) .NET Global Assembly Cache Utility. Version 4.0.30319.0
Copyright (c) Microsoft Corporation. All rights reserved.
Assembly successfully added to the cache
Microsoft (R) .NET Global Assembly Cache Utility. Version 4.0.30319.0
Copyright (c) Microsoft Corporation. All rights reserved.
Assembly successfully added to the cache
Microsoft (R) .NET Global Assembly Cache Utility. Version 4.0.30319.0
Copyright (c) Microsoft Corporation. All rights reserved.
Assembly successfully added to the cache
Microsoft (R) .NET Global Assembly Cache Utility. Version 4.0.30319.0
Copyright (c) Microsoft Corporation. All rights reserved.
Assembly successfully added to the cache
Microsoft (R) .NET Global Assembly Cache Utility. Version 4.0.30319.0
Copyright (c) Microsoft Corporation. All rights reserved.
Assembly successfully added to the cache
Microsoft (R) .NET Global Assembly Cache Utility. Version 4.0.30319.0
Copyright (c) Microsoft Corporation. All rights reserved.
Assembly successfully added to the cache
Microsoft (R) .NET Global Assembly Cache Utility. Version 4.0.30319.0
Copyright (c) Microsoft Corporation. All rights reserved.
Assembly successfully added to the cache
Microsoft (R) .NET Global Assembly Cache Utility. Version 4.0.30319.0
Copyright (c) Microsoft Corporation. All rights reserved.
Assembly successfully added to the cache
Microsoft (R) .NET Global Assembly Cache Utility. Version 4.0.30319.0
Copyright (c) Microsoft Corporation. All rights reserved.
Assembly successfully added to the cache
Microsoft (R) .NET Global Assembly Cache Utility. Version 4.0.30319.0
Copyright (c) Microsoft Corporation. All rights reserved.
Assembly successfully added to the cache
Microsoft (R) .NET Global Assembly Cache Utility. Version 4.0.30319.0
Copyright (c) Microsoft Corporation. All rights reserved.
Assembly successfully added to the cache
Microsoft (R) .NET Global Assembly Cache Utility. Version 4.0.30319.0
Copyright (c) Microsoft Corporation. All rights reserved.
No assemblies found matching: HyprADFSPlugin2019
Number of assemblies uninstalled = 0
Number of failures = 0
Microsoft (R) .NET Global Assembly Cache Utility. Version 4.0.30319.0
Copyright (c) Microsoft Corporation. All rights reserved.
Assembly successfully added to the cache
Microsoft (R) .NET Global Assembly Cache Utility. Version 4.0.30319.0
Copyright (c) Microsoft Corporation. All rights reserved.
The Global Assembly Cache contains the following assemblies:
HyprADFSPlugin2019, Version=1.1.2.2162, Culture=neutral, PublicKeyToken=3cab6fe929ebf634, processorArchitecture=AMD64
Number of items = 1
=================================================================================
3. Register HYPR Authentication provider ...
=================================================================================
WARNING: PS0114: The authentication provider was successfully registered with the policy store. To enable this
provider, you must restart the AD FS Windows Service on each server in the farm.
=================================================================================
4. Restarting ADFS service ...
=================================================================================
The Active Directory Federation Services service is stopping.
The Active Directory Federation Services service was stopped successfully.
The Active Directory Federation Services service is starting..
The Active Directory Federation Services service was started successfully.
=================================================================================
Please refer to the product documentation to complete the AD FS configuration.
=================================================================================
HYPR AD FS Plugin Installation (MSI)
-
Login to your AD FS server machine as an administrator.
-
Locate the installation package that corresponds to the AD FS release you are using; the year is contained in the filename; EX:
HyprADFS2019.msi. -
Unpack and copy the contents of the HYPR for AD FS Plugin package to the desired folder. The contents will be a single
.msifile (HyprADFS<year>.msi) and ahypr.jsonfile. -
Open
C:\HyrpADFS\hypr.jsonin a text editor and enter the appropriate values as described above. -
Double-click the
HyprADFS<year>.msifile to launch the installation.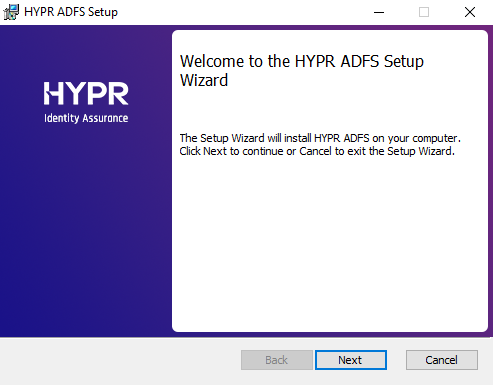
-
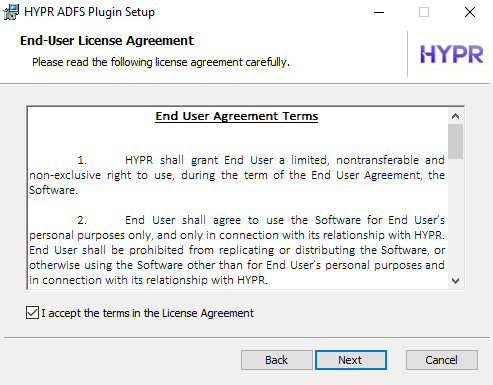
Check the box next to I accept the terms of the License Agreement, then click Next.
-
The Environment Settings dialog reflects the values from the
hypr.jsonfile.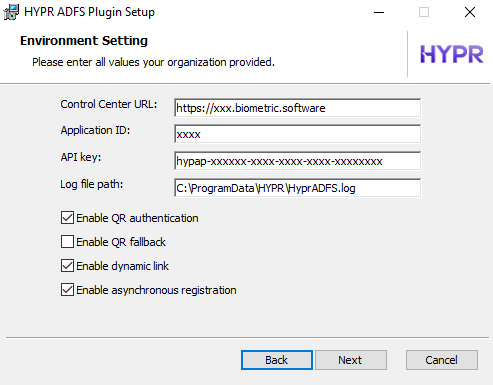
-
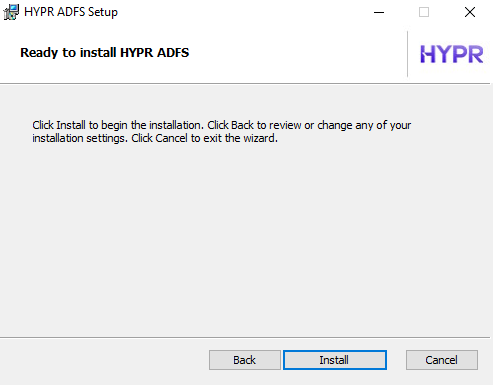
Click Install.
-
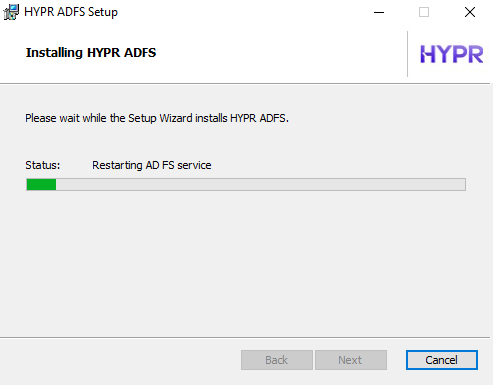
Be patient as the progress bar advances.
-
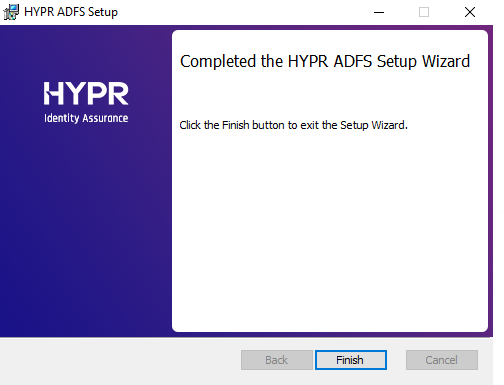
Click Finish.
Post-installation
After installation, some of the configuration information is stored in the registry under Computer\HKEY_LOCAL_MACHINE\SOFTWARE\HYPR\HYPRAuthentication.
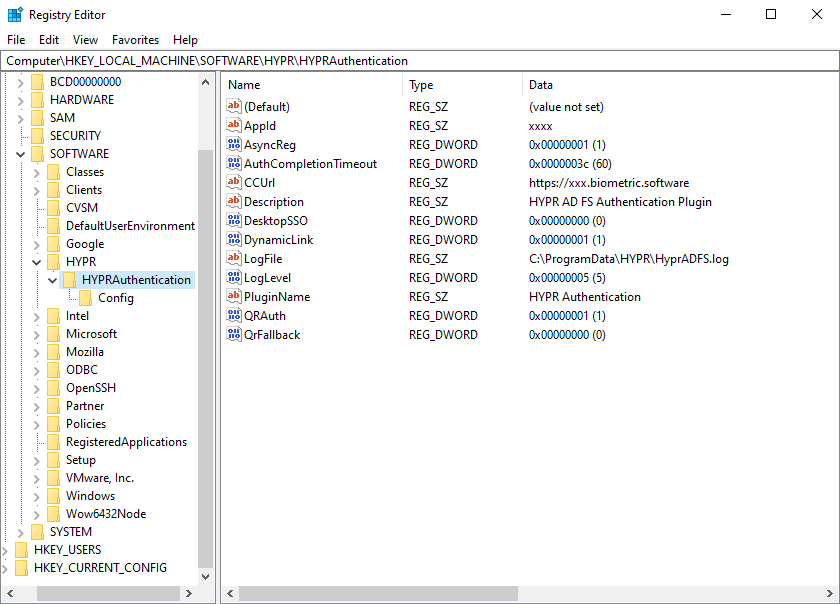
HYPR AD FS Plugin's toggling of the QR Authentication and Push Notification features can be controlled by changing the following registry settings:
| Key | Description |
|---|---|
Computer\HKEY_LOCAL_MACHINE\SOFTWARE\HYPR\HYPRAuthentication\DoNotRefreshFeatureFlags | Turns off the refresh of the QR Authentication and Push Notification features, which occurs based on the RefreshFeatureFlagsFreq setting. [ true | false ] |
Computer\HKEY_LOCAL_MACHINE\SOFTWARE\HYPR\HYPRAuthentication\RefreshFeatureFlagsFreq | How often does the HYPR AD FS Plugin refresh the feature toggles? Default is 5 minutes. |
If you are running the Active Directory Federation Services service under a service account, that account must have full access rights to this registry entry.
HYPR AD FS Plugin will make this change when it is installed.
All installation files can safely be deleted once the installation is completed. Because AD FS Plugin .DLL files are registered with .NET Global Assembly Cache (GAC), they can be deleted with rest of the AD FS files.
Retain the uninstall script so the plugin can be removed if desired.
Enablement
The installation script does not enable the HYPR AD FS Plugin authentication, as each AD FS deployment has its own environmentally dependent authentication requirements. HYPR Authentication must be enabled in the AD FS Server Manager.
The steps here are an example of a very plain AD FS authentication flow. Even if you have a default AD FS flow similar to the one presented here, you will still need to adapt your specific post-installation configuration.
-
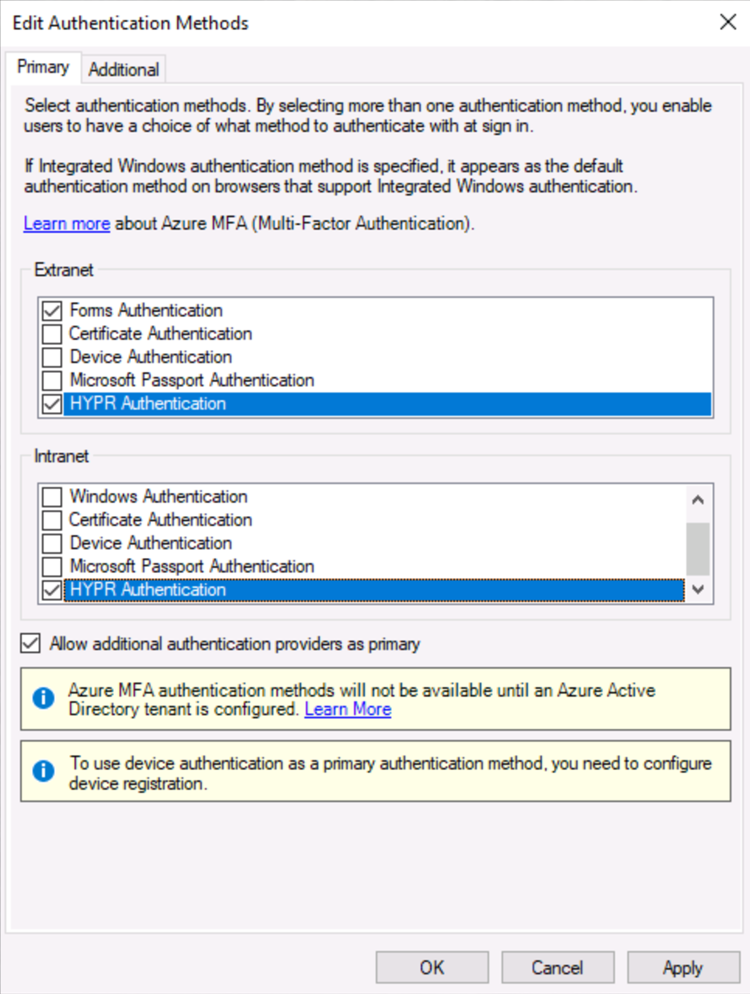
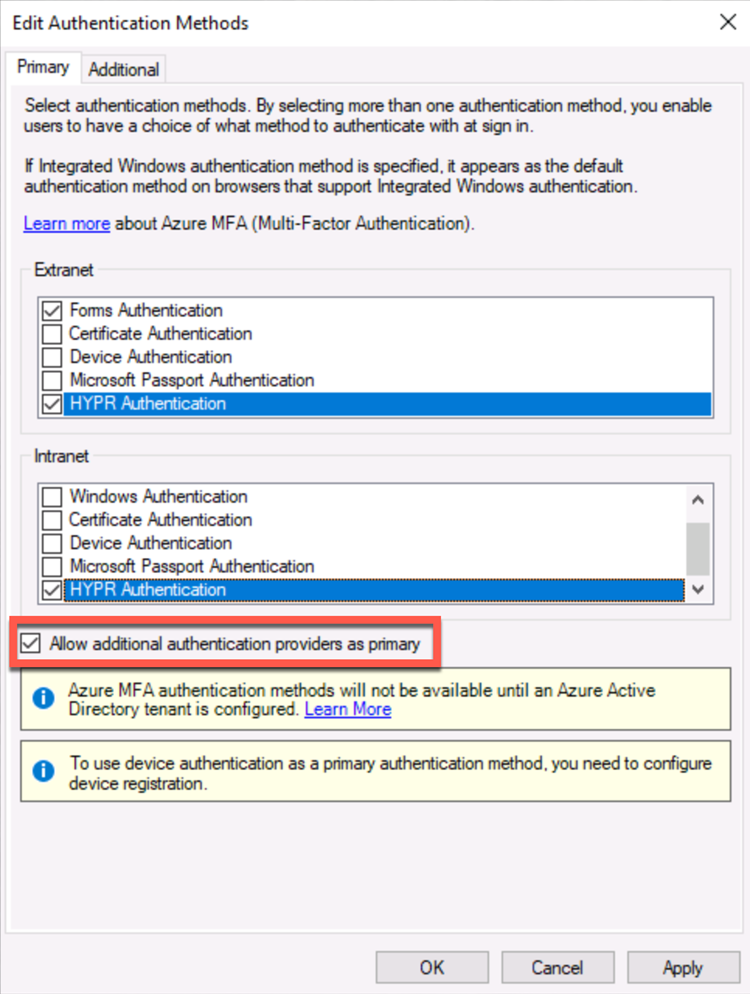
Start the AD FS Server Manager, expand Service, select Authentication Methods, and click Edit Primary Authentication Methods… on the right.
-
You will see HYPR Authentication as an unchecked option. Scroll down to find it if necessary.
-
Under both Intranet and Extranet, check the box next to HYPR Authentication according to your authentication policies. Click OK when finished.
-
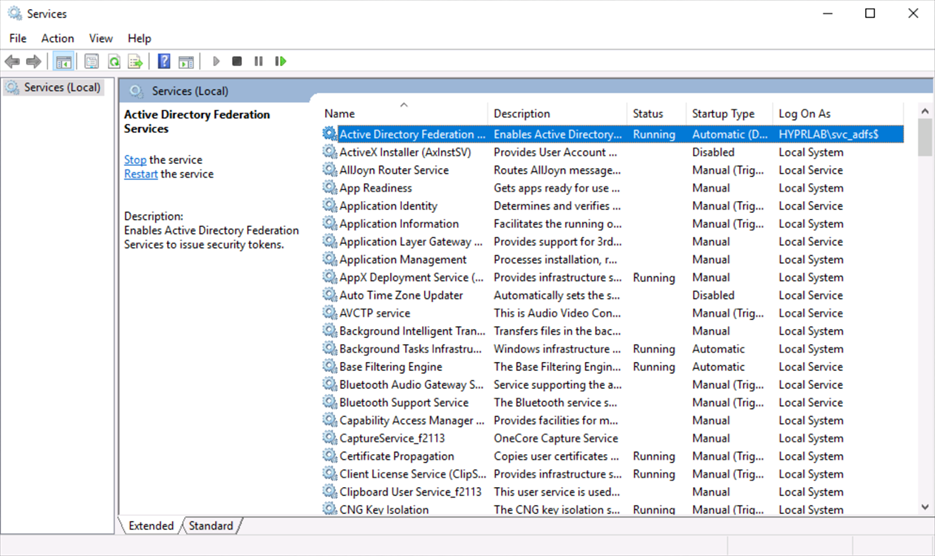
Restart the AD FS server using the Services application.
-
Make sure the Allow additional authentication providers as primary option is checked.
SSL Requirements
AD FS requires a certificate for Secure Socket Layer (SSL) server authentication on each federation server in your federation server farm. The same certificate can be used on each federation server in a farm. You must have both the certificate and its private key available. For example, if you have the certificate and its private key in a .pfx file, you can import the file directly into the Active Directory Federation Services Configuration Wizard. This SSL certificate must contain the following:
-
The subject name and subject alternative name must contain your federation service name, such as
fs.contoso.com -
The subject alternative name must contain the value enterpriseregistration that is followed by the User Principal Name (UPN) suffix of your organization; for example,
enterpriseregistration.corp.hb.com
Client IP Address Reporting and Validation
HYPR AD FS Plugin always reports Client IP address to control center during Mobile authentication, which will be used to minimize risk of spoofing or man in the middle attack. By default, HYPR AD FS Plugin will try to determine Client IP address by using following heuristic:
- Use the IP address in
X-Forwarded-ForHTTP header if it is found, otherwise ... - Use the IP address in
X-MS-Forwarded-Client-IPHTTP header if it is found, otherwise ... - Use HTTP connection remote IP address
Administrator can change the order of that heuristic, or disable it completely steps by adding HYPR AD FS Plugin registry value called ClientIpDetectionSequence, and selecting one or more steps in arbitrary order:
-
None- will not attempt to get ClientIp -
AdfsProxyHeader- will getX-Forwarded-ForHTTP header, split it by "," and take very last item -
StandardProxyHeader- will getX-MS-Forwarded-Client-IPHTTP header, split it by "," and take last item -
RemoteIP- will get http request connection remote IP address
For example, the default behavior can be configured using AdfsProxyHeader;StandardProxyHeader;RemoteIP for the registry value. If the Client IP collection and reporting needs to be suppressed, one can use None value.
Desktop SSO
Desktop SSO lets a user sign in without further action when the HYPR Passwordless client on their workstation already has an active session for them. Enable it by setting desktopSSO to true in hypr.json (see Configure hypr.json).
When Desktop SSO is available for a sign-in attempt, the browser hands the sign-in challenge to the HYPR Passwordless client through a local connection on the workstation. Because this connection is initiated from the AD FS sign-in page running in the browser, the AD FS server's Content Security Policy (CSP) must allow it. Run Set-AdfsCspForDesktopSso.ps1, included in the install package, on each AD FS server to add the required CSP allowance.
The local connection uses port 51992 by default; change it with the DesktopSSOWfaPort registry value if that port is unavailable on your workstations.
Use Reset-AdfsCspToDefault.ps1 to remove the CSP allowance, rather than AD FS's own Set-AdfsResponseHeaders -RemoveHeaders. That command removes the CSP header entirely instead of restoring its default value, which is more permissive than either configured state.
Authentication Polling
By default, HYPR AD FS Plugin holds the authentication request open on the server while it waits for the user to complete push notification or QR authentication.
Administrator can instead configure HYPR AD FS Plugin to check authentication status periodically rather than holding the request open, which some browser and network environments handle more reliably. This may be needed for compatibility with Android 15 or later mobile devices. To enable this behavior, add a DWORD registry value named PollingAuth under HKEY_LOCAL_MACHINE\SOFTWARE\HYPR\HYPRAuthentication, set it to 1, and restart the AD FS server using the Services application.
Authentication Polling is not enabled by default. PollingAuth defaults to 0 when not present, which preserves the original single-request behavior.
User Experience
The sequence below follows a user's own order: the first sign-in, registering a device, and then signing in with a device once one is paired.
Starting a sign-in
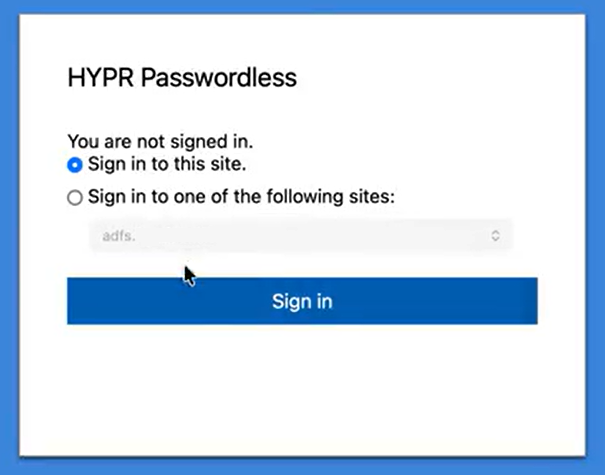
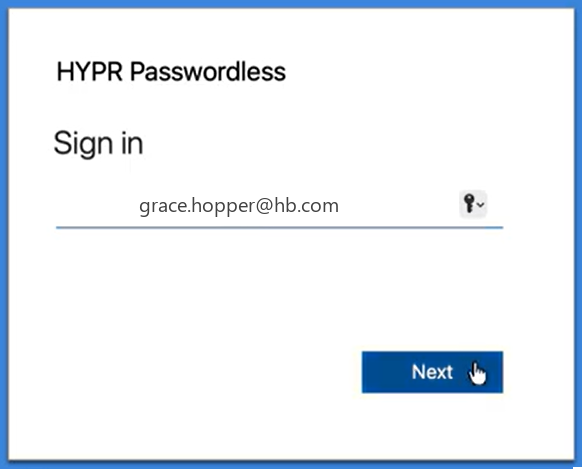
The AD FS sign-in page first asks whether the user is signing in to this site or to another, and then for their name.
The user then chooses how to authenticate. HYPR Authentication replaces username and password; Sign in using your username and password remains available.
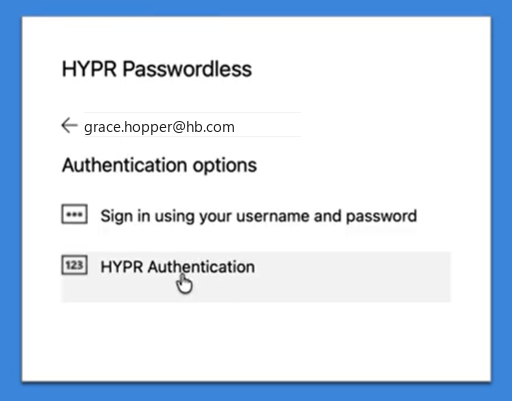
What the user sees next depends on whether they already have a device registered with HYPR. A user who does continues to Signing in with a registered device. A user who does not is sent to Device Manager to register one before authentication can proceed — registering is not something the user selects here, it is where the plugin routes them.
Registering a first device
A user with no HYPR-registered devices is presented with Device Manager to register their first device. Because this happens before authentication, HYPR AD FS Plugin requires a magic link to authorize the registration; direct users to Registering Users with a Magic Link if they need one.
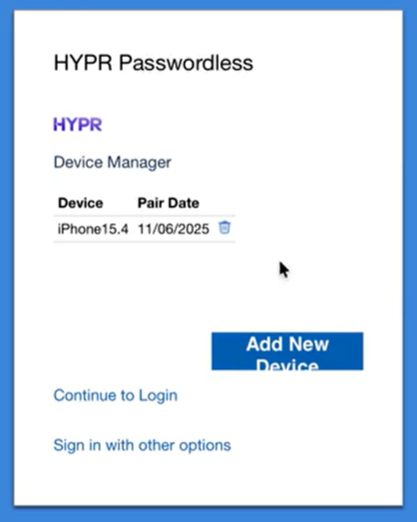
Add New Device offers a smartphone, a security key, or the computer the user is working on. HYPR validates the magic link at that point, and against the user name as well as the link itself, so an invalid or expired link surfaces an error there rather than when Device Manager opens.
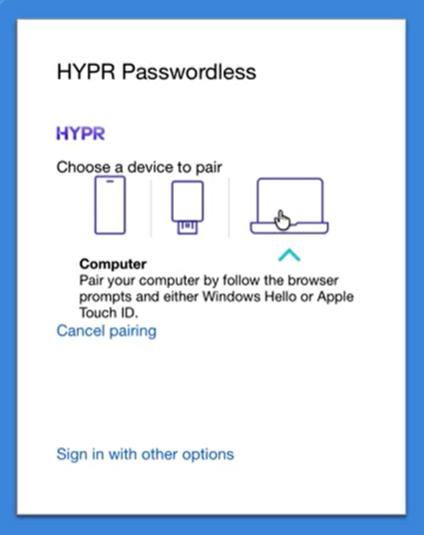
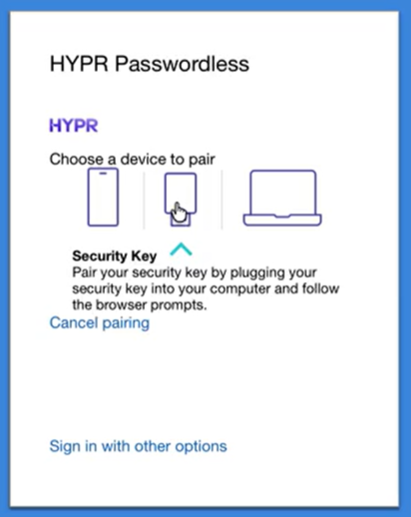
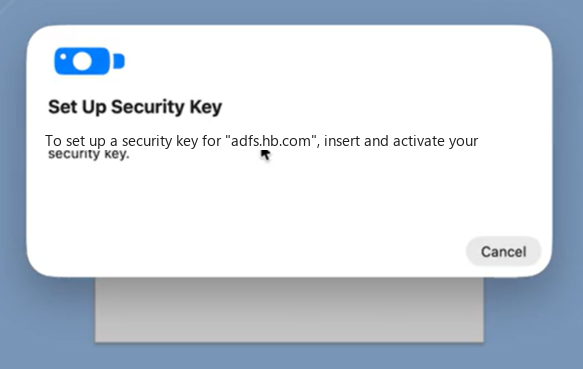
Choosing a security key or the computer hands over to the browser, which prompts the user to set the passkey up against the AD FS domain.
Each registered device appears in the list with the date it was paired, and Continue to Login completes the sign-in.
On the phone
When the user pairs the HYPR Mobile App, Device Manager displays a code. In the app the user opens the scanner and frames it. Enter Code Manually is offered where the camera cannot read the code.
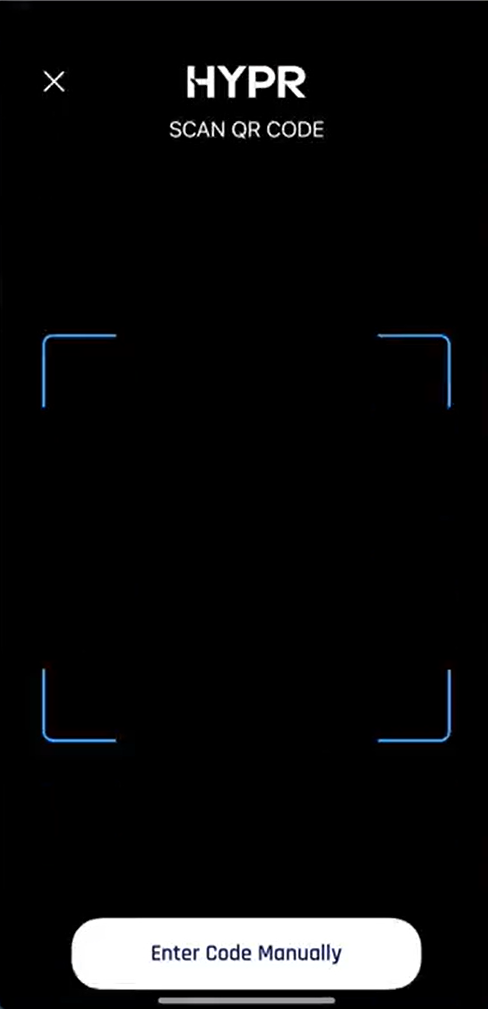
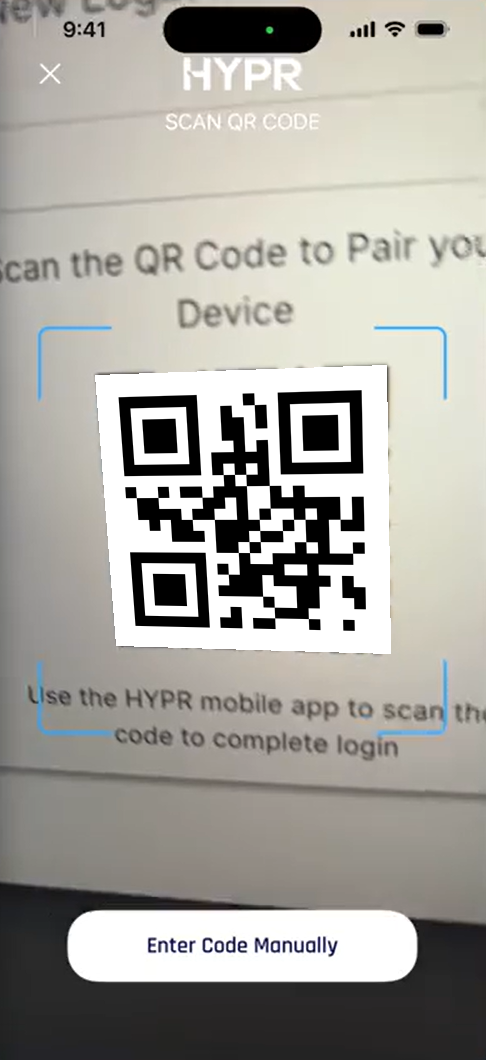
The app then completes the pairing, and the user confirms with the authentication method they want to use for this account. The methods offered depend on the device.

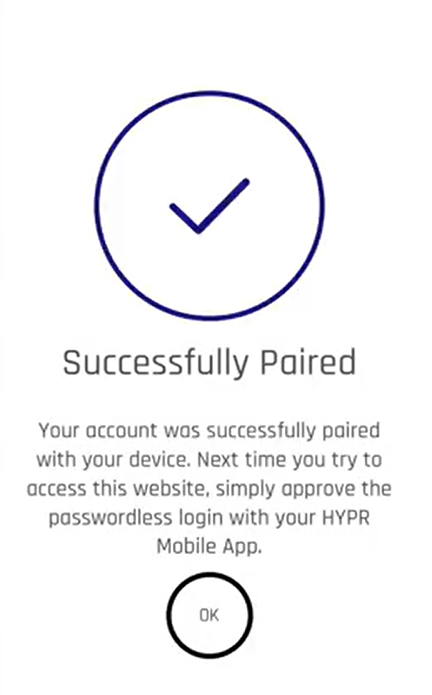
From then on the user approves sign-ins for this site from the HYPR Mobile App, and the account is listed under My Web Accounts.
The pairing steps themselves are documented in Device Manager:
-
Adding a Device — the HYPR Mobile App
-
Pairing a Security Key Passkey — a roaming authenticator such as a security key
-
Pairing a Device Biometric Passkey — a platform authenticator such as Windows Hello
Signing in with a registered device
The plugin asks Control Center which devices that user has registered and shows them, then waits for the user to pick one rather than starting authentication straight away — that pause is what makes the Pair another device after authentication link reachable. Sign in with other options returns the user to username and password.
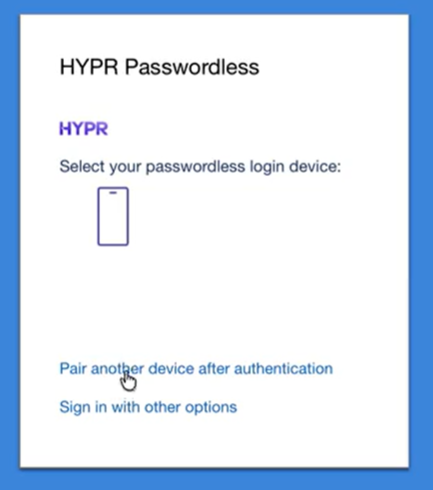
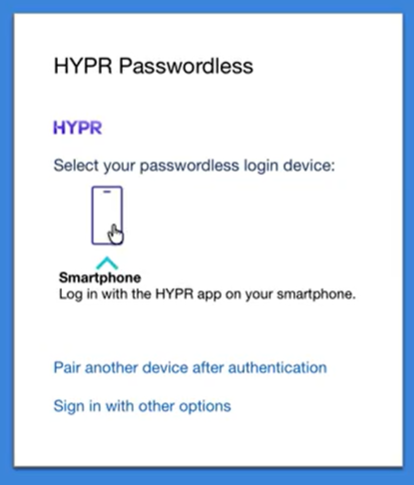
With the HYPR Mobile App
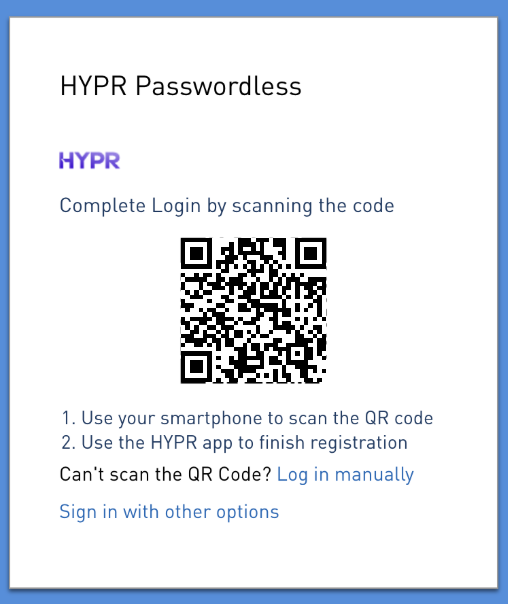
The installed template sets qrAuth to true (see Configure hypr.json), so the sign-in page displays a code. The user scans it from My Web Accounts in the HYPR Mobile App and approves the request on the phone with their biometric. Log in manually appears only where qrFallback is enabled, and lets the user enter the code by hand rather than scanning it.
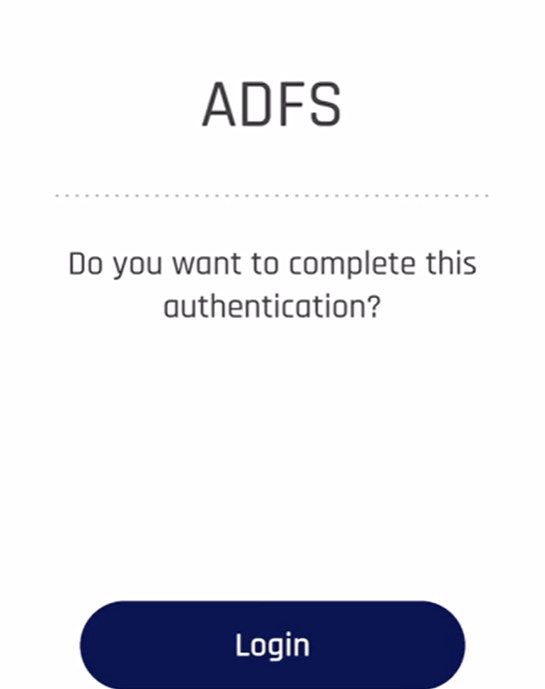
For the full sequence, see QR Login with the HYPR Mobile App.
With a FIDO2 device or security key
The user selects their registered FIDO2 device and the browser takes over, prompting for the passkey — a security key, or a platform authenticator such as Windows Hello.
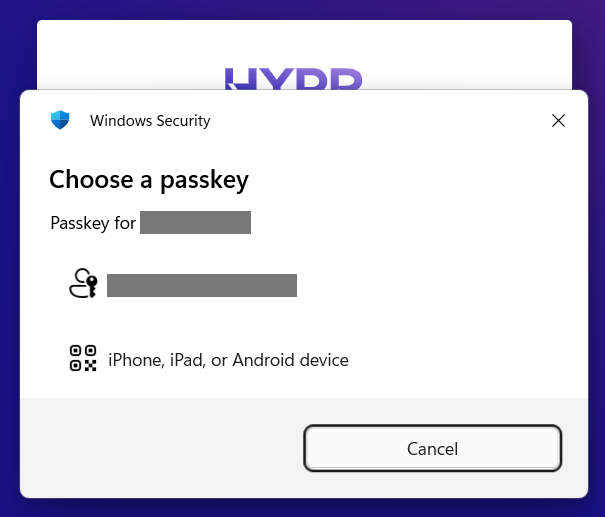
That prompt may also offer a phone or tablet as the passkey, which the browser handles over Bluetooth, independently of the HYPR Mobile App.
The exchange happens on the AD FS domain, which is why Client Origin URL on the application must match it. A user who is prompted correctly but cannot complete registration or authentication is usually hitting that mismatch rather than a problem with their authenticator.
Managing devices later
Once a user has at least one registered device, they can register further Mobile or FIDO2 devices, or remove existing ones, from the Pair another device after authentication link. That link opens Device Manager only after the user has authenticated successfully, never before — which is why a user who has lost access to every registered device cannot resolve it themselves, and the sign-in page directs them to contact an administrator. The administrator removes the inaccessible device, after which the user can register a new one.
Uninstalling HYPR AD FS Plugin
The HYPR AD FS Plugin can be removed by running the uninstall PowerShell script, as follows:
-
Login to the AD FS server as an administrator.
-
Verify the AD FS server is running the Active Directory Federation Service.
-
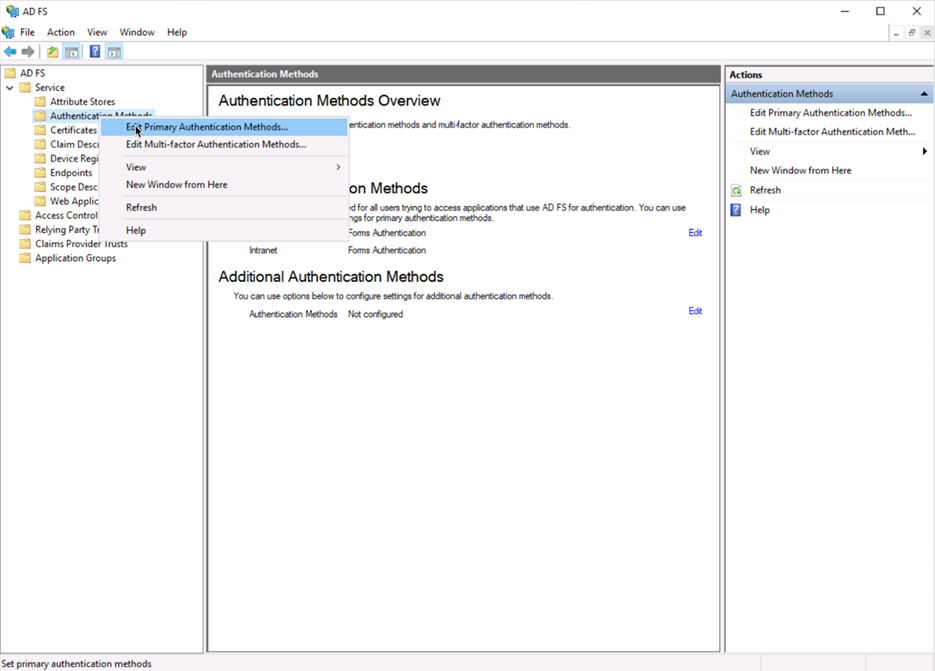
In the AD FS Server Manager, right-click Service > Authentication Methods and choose Edit Primary Authentication Methods….
-
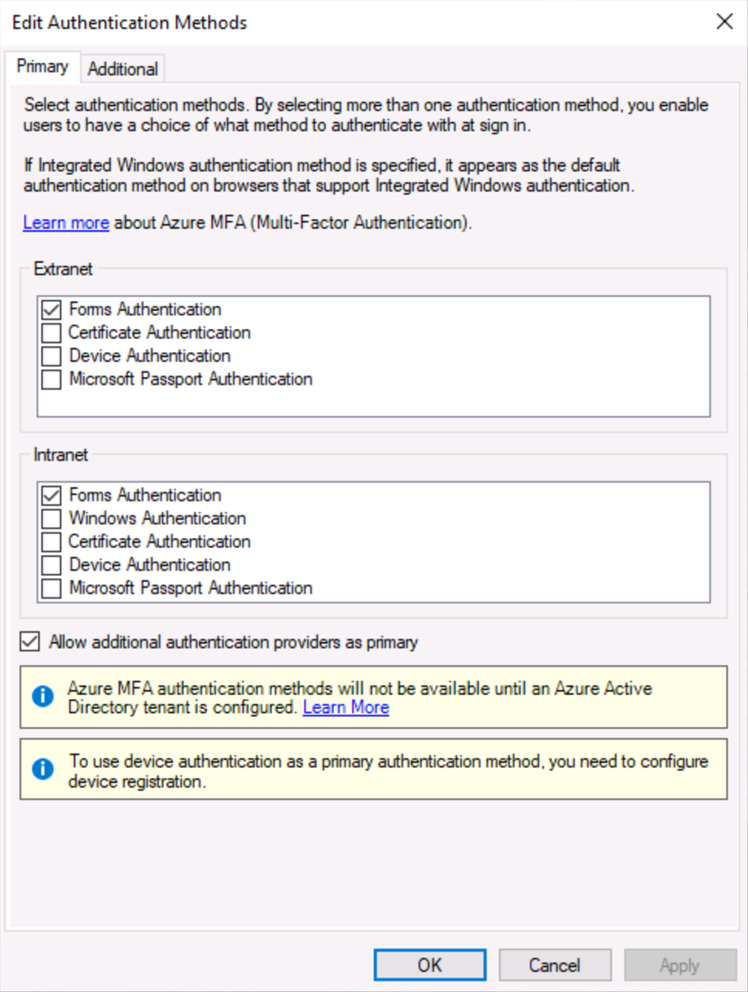
Uncheck HYPR Authentication in the listings, so the plugin is no longer used.
-
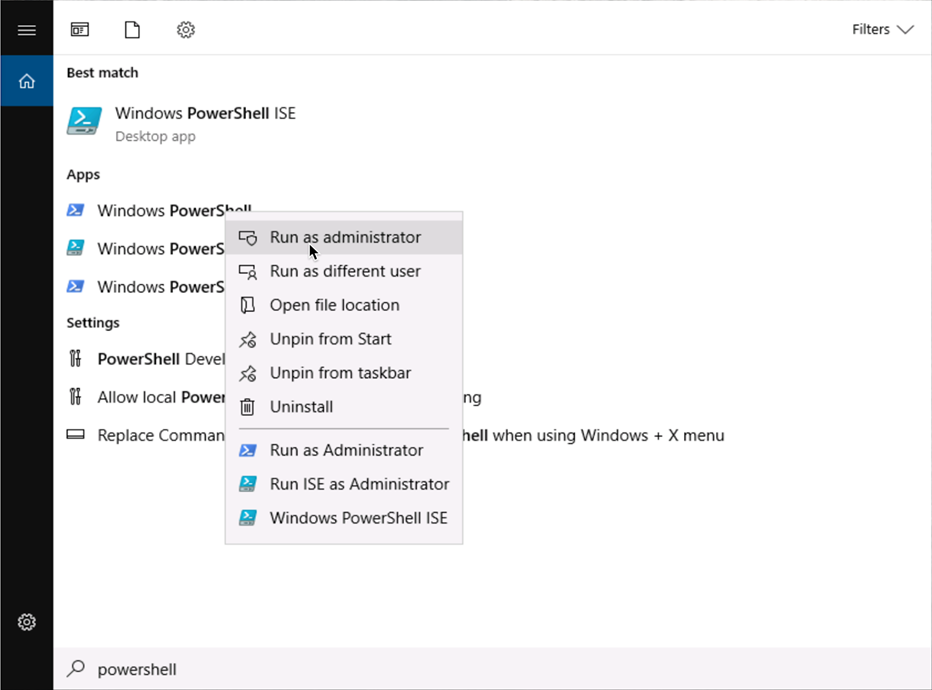
Open a PowerShell terminal as an administrator.
-
Change directory to
C:\HyprADFSand run the uninstall script:PS C:\Users\Administrator> cd C:\HyprADFS
PS C:\HyprADFS> .\Install\UninstallADFSHyprProvider2019.ps1
Please modify this script for your particular ADFS deployment.
=================================================================================
Are you Sure You Want To Proceed:: y
=================================================================================
=================================================================================
1. Unregistering HYPR Authentication ...
=================================================================================
Confirm
Are you sure you want to perform this action?
Performing the operation "PS0061: Remove external authentication provider: 'HYPRAuthentication'." on target
"HYPRAuthentication".
[Y] Yes [A] Yes to All [N] No [L] No to All [S] Suspend [?] Help (default is "Y"): A
WARNING: PS0103: The authentication provider was successfully unregistered from the policy store. Restart the AD FS
Windows Service on each server in the farm.
Microsoft (R) .NET Global Assembly Cache Utility. Version 4.0.30319.0
Copyright (c) Microsoft Corporation. All rights reserved.
Assembly: HyprADFSPlugin2019, Version=1.1.2.2162, Culture=neutral, PublicKeyToken=3cab6fe929ebf634, processorArchitecture=AMD64
Uninstalled: HyprADFSPlugin2019, Version=1.1.2.2162, Culture=neutral, PublicKeyToken=3cab6fe929ebf634, processorArchitecture=AMD64
Number of assemblies uninstalled = 1
Number of failures = 0
=================================================================================
2. Restarting ADFS service ...
=================================================================================
The Active Directory Federation Services service is stopping.
The Active Directory Federation Services service was stopped successfully.
The Active Directory Federation Services service is starting...
The Active Directory Federation Services service was started successfully.
=================================================================================
3. Removing HYPR registry ...
================================================================================= -
Confirm the registry entry has been removed. When the plugin is installed, you will see
Computer\HKEY_LOCAL_MACHINE\SOFTWARE\HYPR\HYPRAuthentication\Config.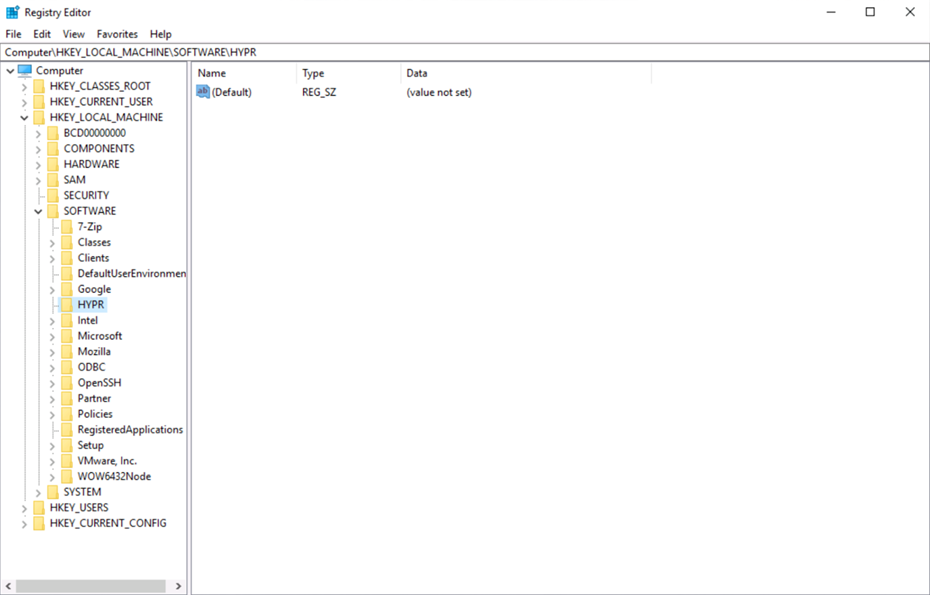
Troubleshooting
It is important to note the location of the log files for HYPR AD FS Plugin, as they are currently the primary method of troubleshooting. The log files can be found at the path defined in the hypr.json file. The default path is C:\HyprADFS\HyprADFS.log.
HYPR Audit Trail Events will log normally through the HYPR AD FS Plugin.
In Windows Explorer, go to C:\Users<your USERNAME>\AppData\Local\Temp. The name of the new log file will be random, it will begin with 'msi' and have the file name extension as .log. You can further identify it by the date.
To set the log file location manually:
-
Make sure that your AD FS service is running.
-
Run the following command as an administrator:
CMD msiexec -i \<MSI file path\> -l*v "path to log file"