Okta: OIDC Integration for HYPR Affirm Helpdesk
The HYPR Affirm Helpdesk portal uses OpenID Connect (OIDC) to authenticate helpdesk agents. This article describes how to configure Okta as the OIDC provider, drive each agent's Helpdesk role from their Okta group membership, and connect the integration in HYPR Control Center.
When configuration is complete, helpdesk agents navigate to the Helpdesk portal URL and are redirected to Okta to sign in. HYPR reads the role claim from the returned token and grants the agent either Viewer or Editor access to the Helpdesk portal.
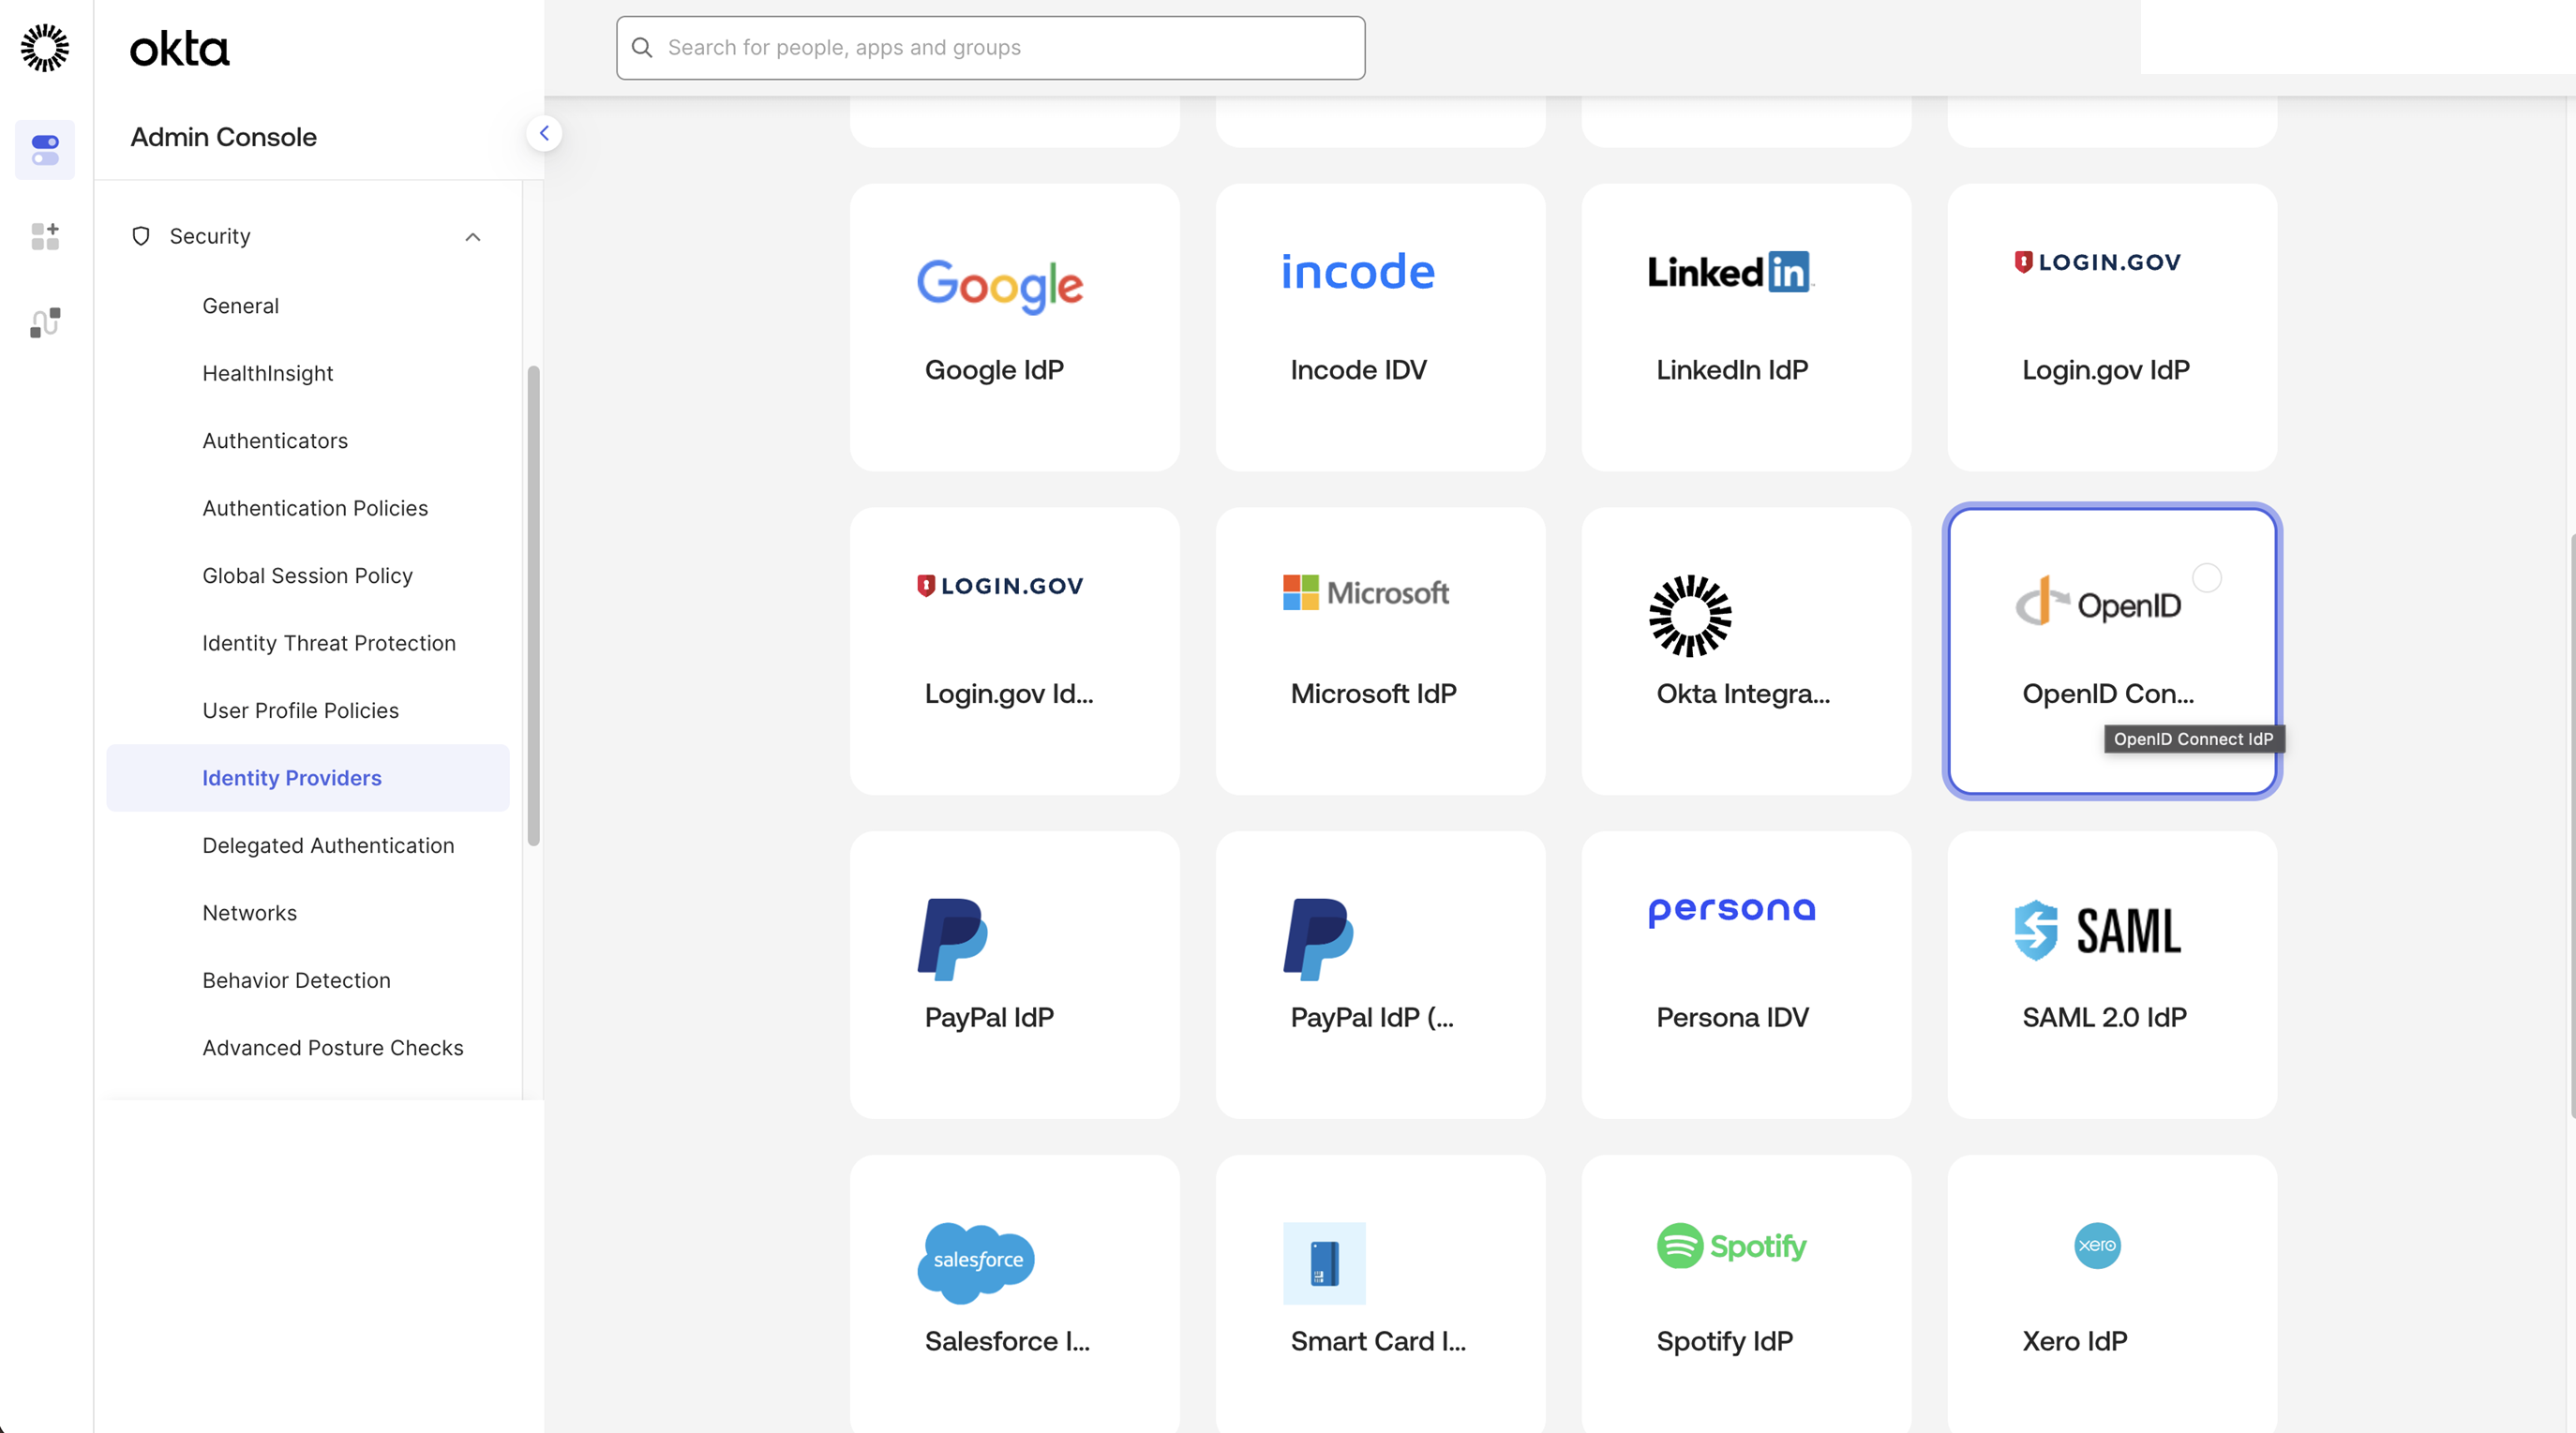
Adding the integration in Control Center returns error E0000015, "You do not have permission to access the feature you are requesting", when the Okta org is not able to create OpenID Connect identity providers:
{"errorCode":"E0000015","errorSummary":"You do not have permission to access the feature you are requesting","errorLink":"E0000015","errorId":"...","errorCauses":[]}
Okta returns this error, not HYPR, and it appears even when the Okta Portal Application Name, Okta Tenant URL, and Okta API Token are all correct.
To confirm the capability is available, sign in to the Okta Admin Console and go to Security > Identity Providers > Add identity provider. OpenID Connect IdP should be listed among the provider types. If it is not, your Okta org cannot create OIDC identity providers yet — ask your Okta administrator or Okta support to enable that capability, then add the integration in Control Center again.
The HYPR Affirm Helpdesk portal requires the Affirm Helpdesk capability. Contact your HYPR representative to enable it on your tenant before proceeding.
Most of the work happens in Okta. Only the IDP Management fields and the Helpdesk RP app assignment are configured in HYPR Control Center.
Prerequisites
- Okta super administrator access
- Users in your Okta directory
- A HYPR Control Center account with HYPR Affirm deployed
Helpdesk Agent Roles
The Affirm Helpdesk portal supports two roles. HYPR reads the affirm_helpdesk_role claim from the token and grants the matching role.
| Role | Claim value | Access |
|---|---|---|
| Viewer | affirm_helpdesk_viewer | View verification workflows and activity records |
| Editor | affirm_helpdesk_editor | View and initialize verification workflows |
How the claim value is interpreted:
- The value is not case-sensitive —
affirm_helpdesk_editorandAFFIRM_HELPDESK_EDITORare equivalent. - A
HYPR_prefix is optional, soHYPR_AFFIRM_HELPDESK_EDITORis also accepted. - If an agent's token carries both roles, Editor takes precedence.
An agent whose token carries no affirm_helpdesk_role value — or a value other than the two above — is denied access to the Helpdesk portal and sees an Access Not Allowed page. There is no default role. To remove an agent's access, remove them from the Helpdesk groups you create below.
Create the Helpdesk Groups in Okta
Each agent's role comes from their Okta group membership, so create the groups first.
-
In the Okta Admin Console, go to Directory → Groups and select Add group.
-
Create a group named
Affirm Help Desk Editors. -
Create a second group named
Affirm Help Desk Viewers.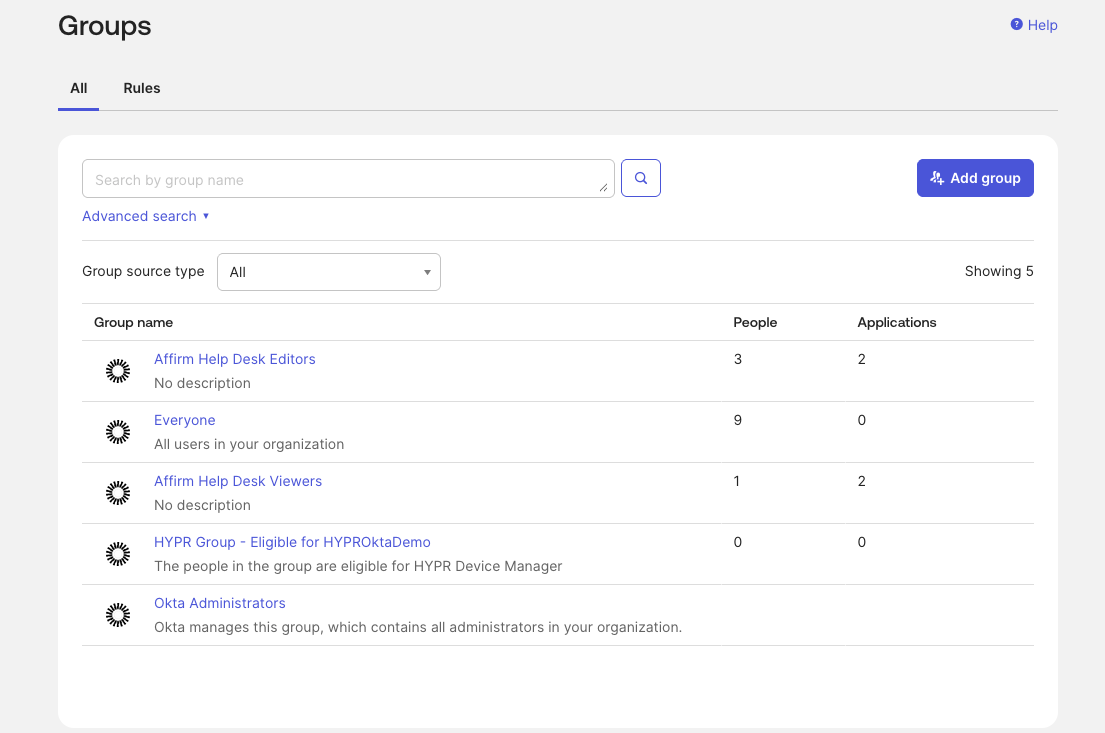
-
Assign your agents to whichever group matches the access they need.
Create an Okta OIDC Web Application
-
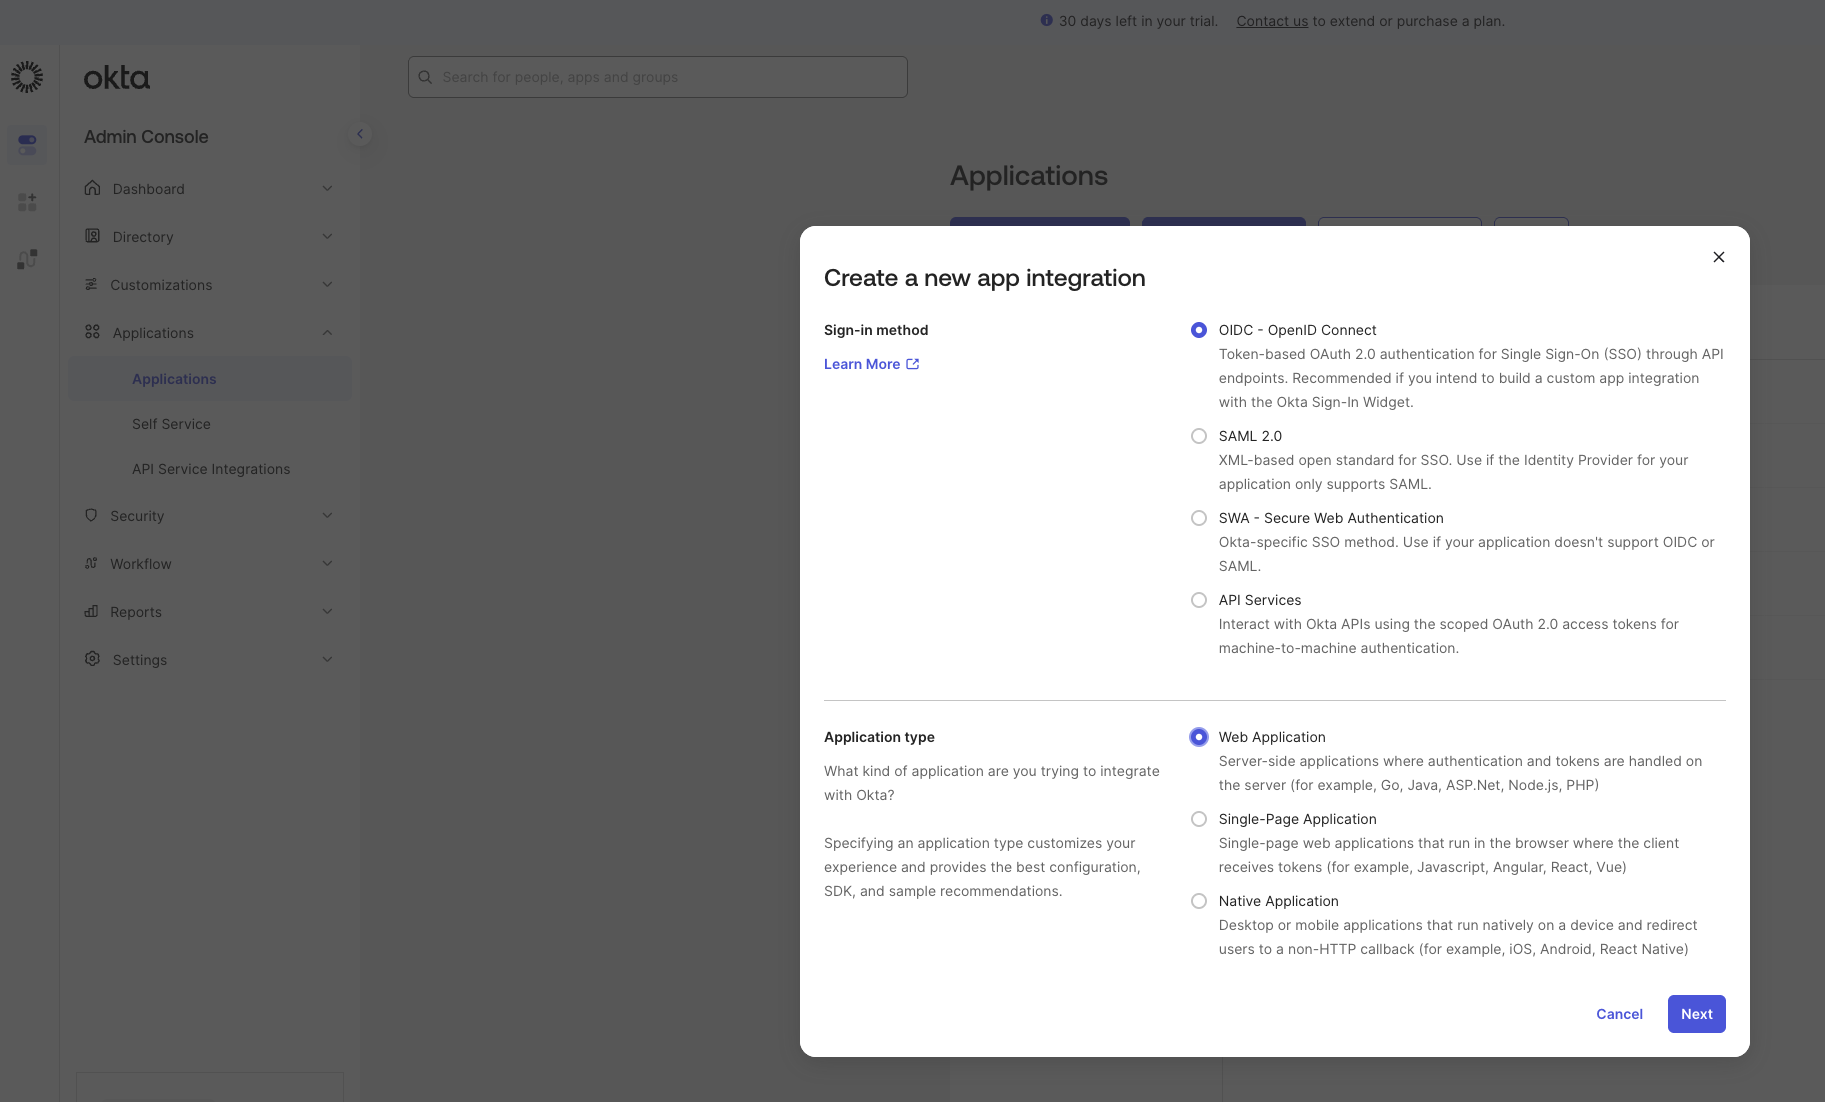
Go to Applications → Applications and select Create App Integration.
-
Select OIDC - OpenID Connect as the sign-in method and Web Application as the application type, then select Next.
-
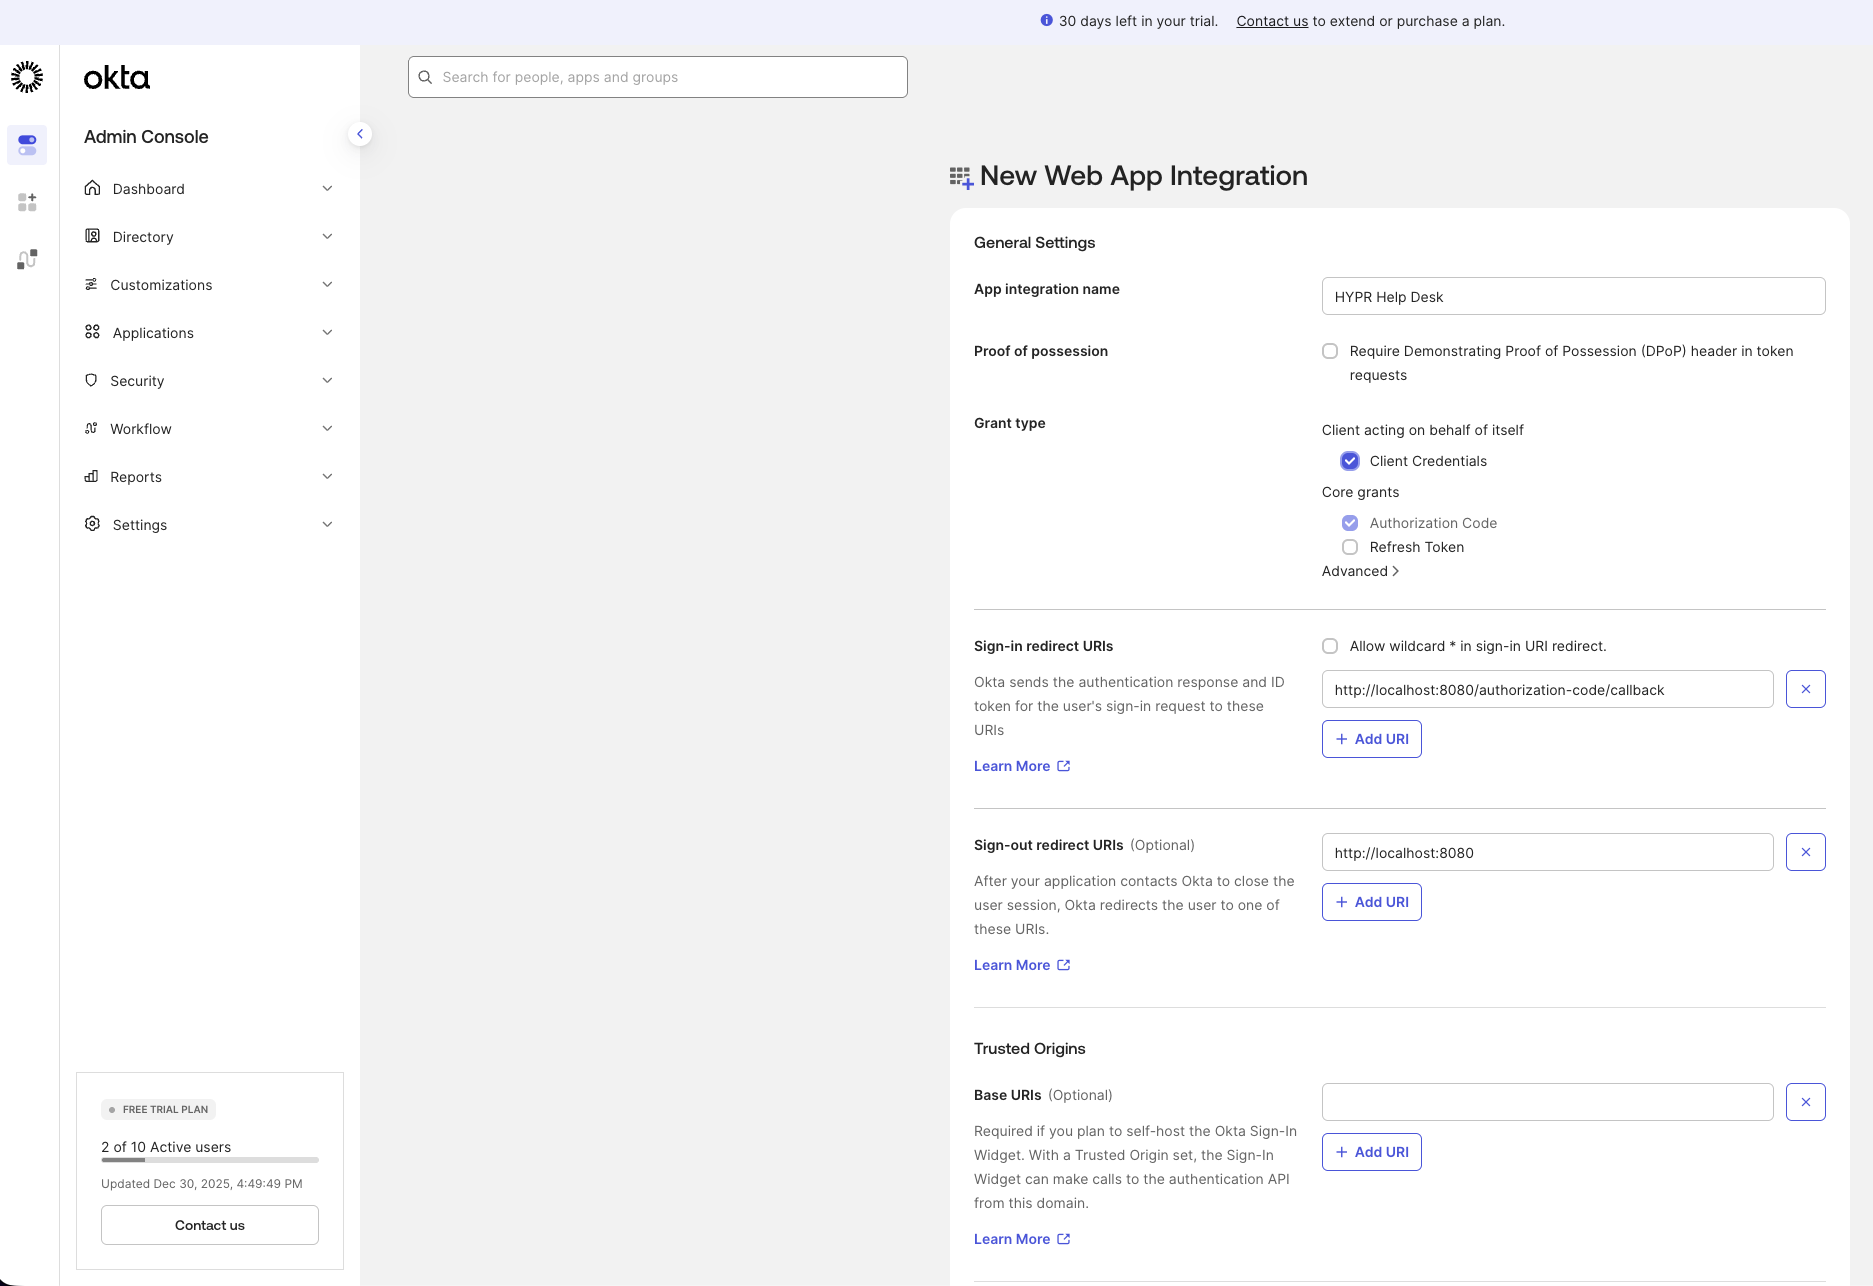
Enter a name for the application.
-
Scroll to the Login section before saving, and continue with the next section.
Configure the Application Login Settings
In the Login section of the new OIDC application:
-
Set Sign-in redirect URIs to:
{HYPR_TENANT_URL}/login/oauth2/idv/support/code/{HYPR_RELYING_PARTY_APP}Replace
{HYPR_TENANT_URL}with your HYPR tenant URL and{HYPR_RELYING_PARTY_APP}with the name of the Helpdesk relying party application. If you use the default web application, that value isHYPRDefaultApplication; if you create a dedicated Helpdesk app as described in Create the Helpdesk Relying Party Application, use the application name you chose there. -
Set Initiate login URI to:
{HYPR_TENANT_URL}/cc/ui/idv/support/helpdesk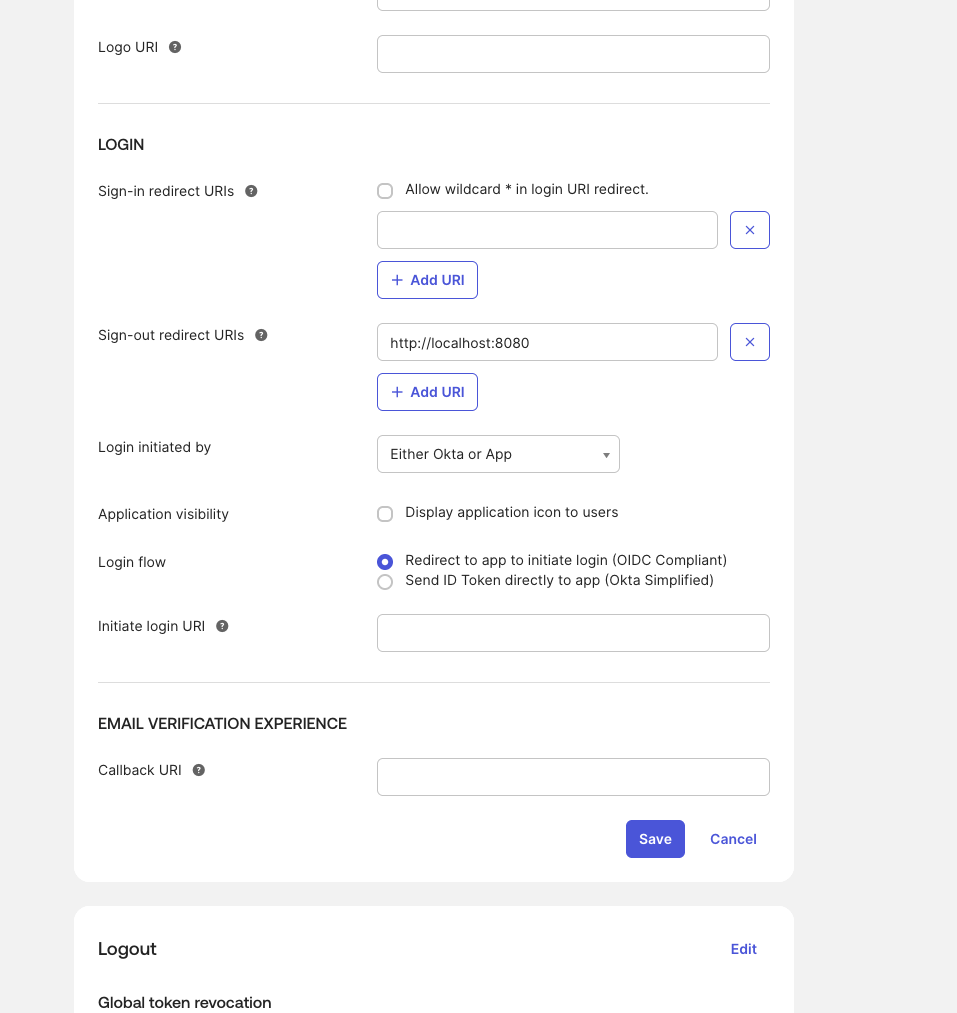
-
Save your changes.
-
From the application's General tab, copy the Client ID and Client secret. You need these values when configuring HYPR Control Center.
Add the Role Claim
Add a custom claim that maps each agent's group membership to their Helpdesk role.
-
Go to Security → API → Authorization Servers.
-
Select the authorization server you want to use, for example default.
Using a custom authorization serverIf you use a custom authorization server rather than the default, its ID becomes part of every endpoint URL you enter in Control Center later — for example
{OKTA_TENANT_URL}/oauth2/{AUTH_SERVER_ID}/v1/authorizeinstead of{OKTA_TENANT_URL}/oauth2/v1/authorize. See Configure IDP Management in HYPR Control Center. -
Go to the Claims tab and select Add Claim.
-
Configure the claim with the following values:
Field Value Name affirm_helpdesk_roleInclude in token type ID Token, Always Value type Expression Include in Any scope Set Value to an expression that returns the role for each group:
isMemberOfGroupName("Affirm Help Desk Editors") ? "affirm_helpdesk_editor" : (isMemberOfGroupName("Affirm Help Desk Viewers") ? "affirm_helpdesk_viewer" : "")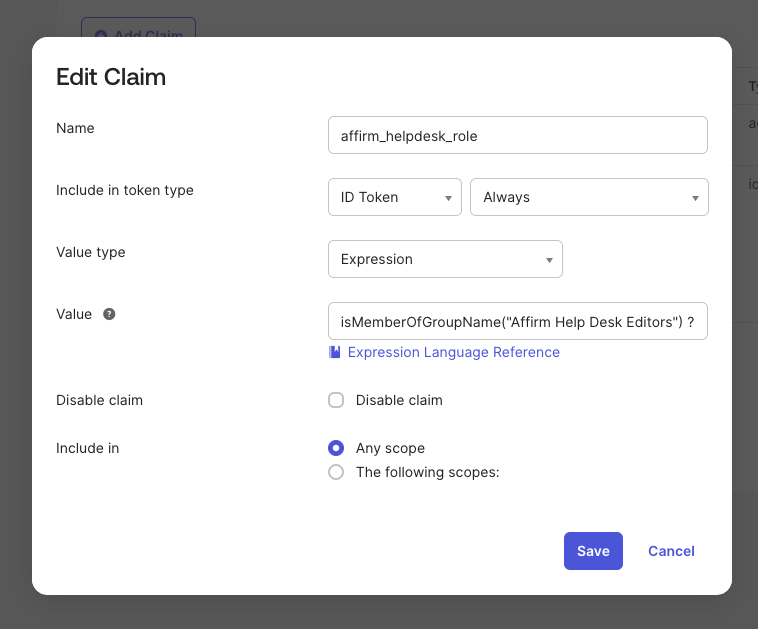
-
Select Create.
An agent in neither group receives an empty value and is denied access to the portal, as described in Helpdesk Agent Roles.
Add an Access Policy Rule
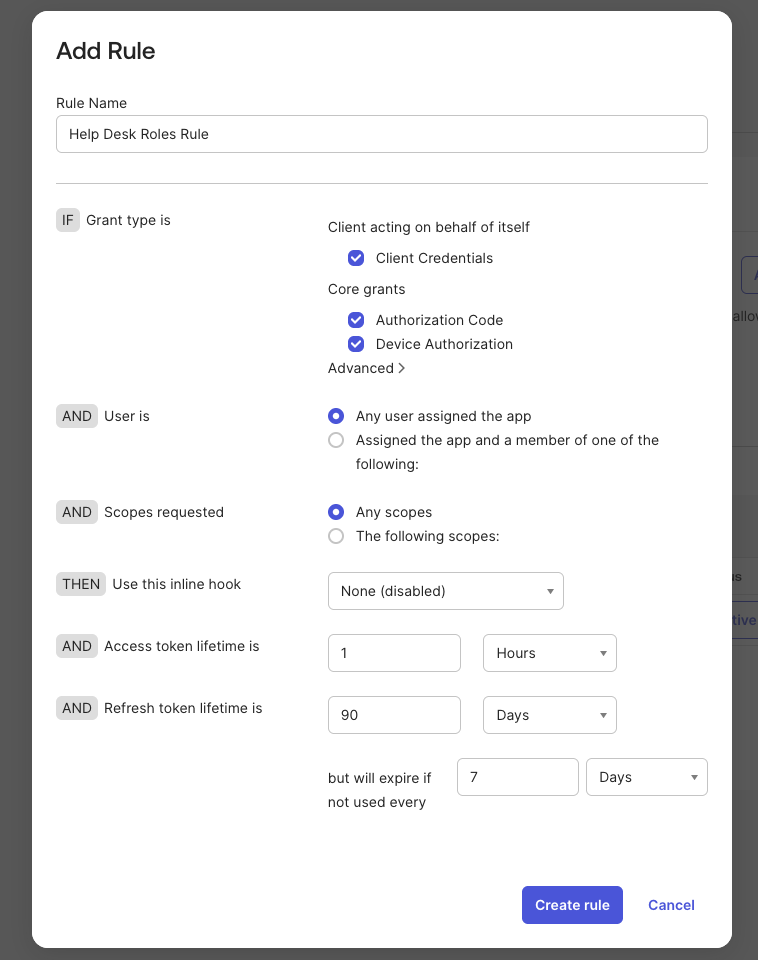
The authorization server needs an active access policy with at least one rule, otherwise token requests fail.
-
On the authorization server, go to Access Policies.
-
Select the policy that applies to your application, then select Add Rule.
-
Name the rule, leave the grant types and scopes at values appropriate for your organization, and create it.
Verify the Claim
Confirm the claim reaches the token before configuring Control Center.
-
On the authorization server, go to the Token Preview tab.
-
Set the following, then select Preview Token:
Field Value OAuth/OIDC client Your Helpdesk application Grant type Authorization Code User An agent assigned to one of the two Helpdesk groups Scopes openid,profile -
In the id_token payload, confirm
affirm_helpdesk_roleis present and carries the value for that agent's group.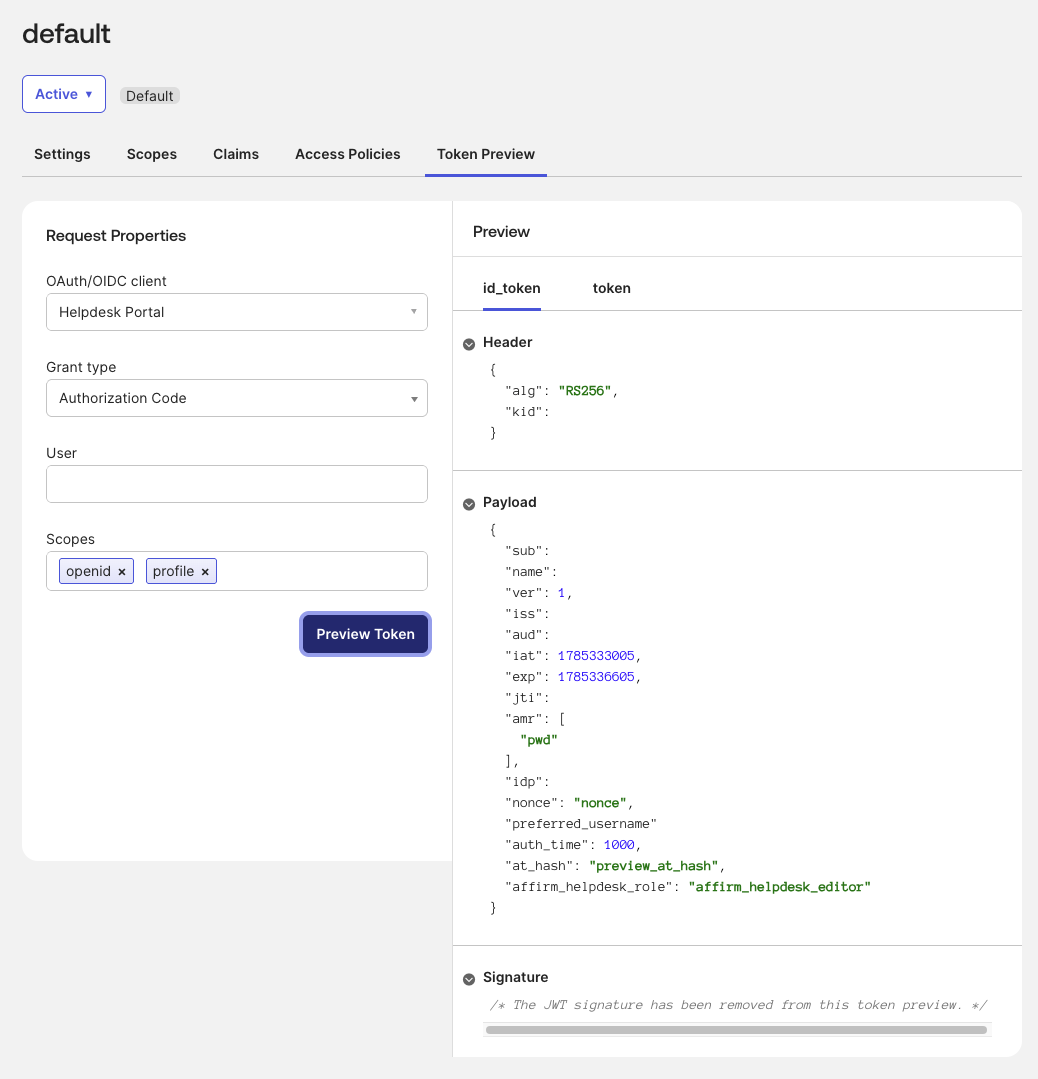
Create the Helpdesk Relying Party Application
Create a dedicated relying party application in Control Center for the Helpdesk portal. The application name you set here is the relying party name used in the Okta sign-in redirect URI.
-
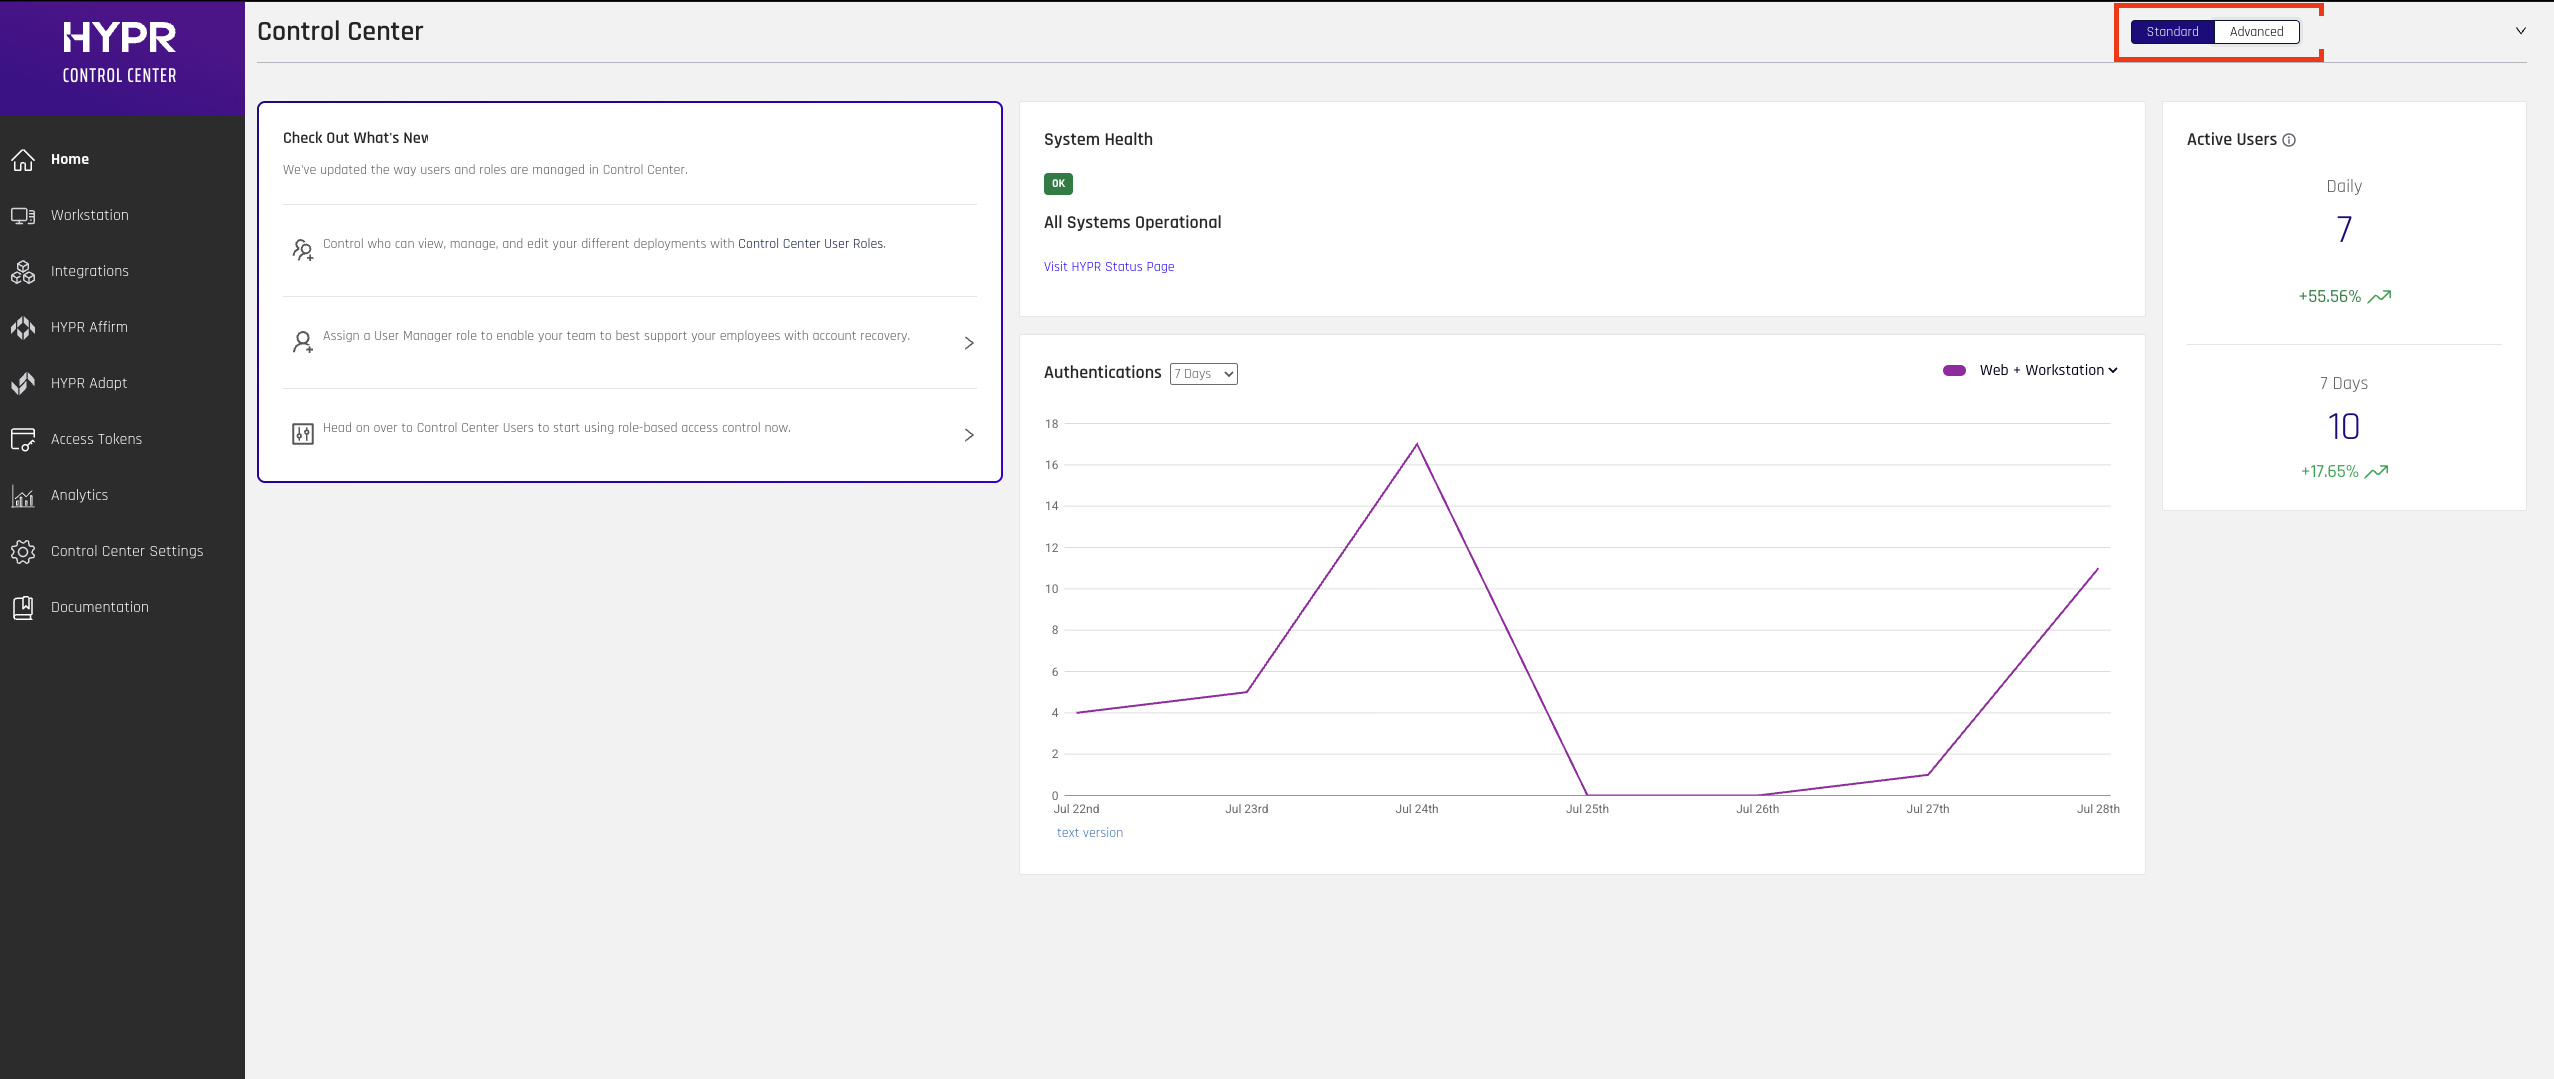
In HYPR Control Center, switch to Advanced mode using the toggle in the upper right corner.
-
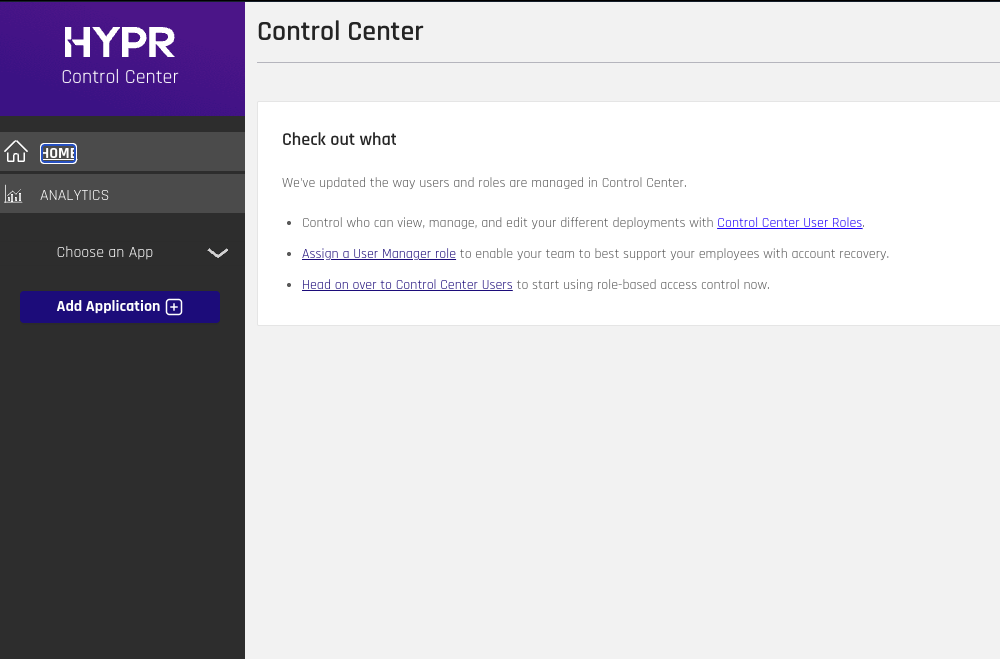
Select Add Application.
-
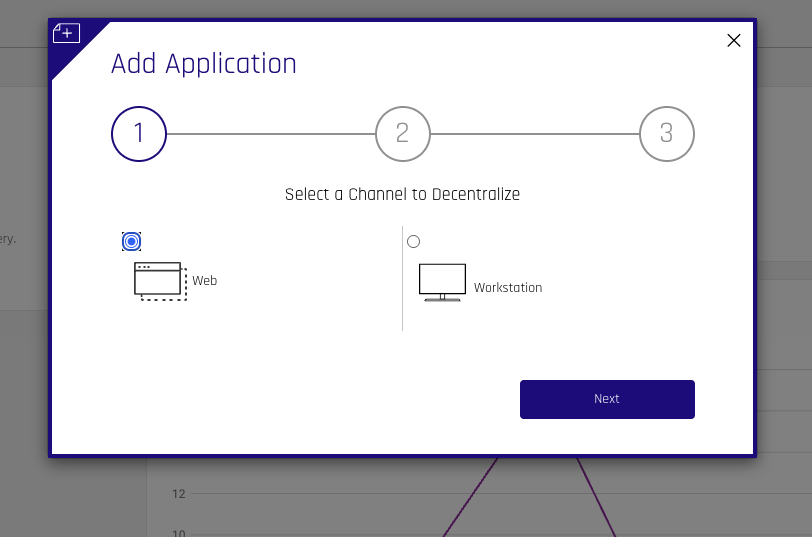
Select Web as the channel to decentralize, then select Next.
-
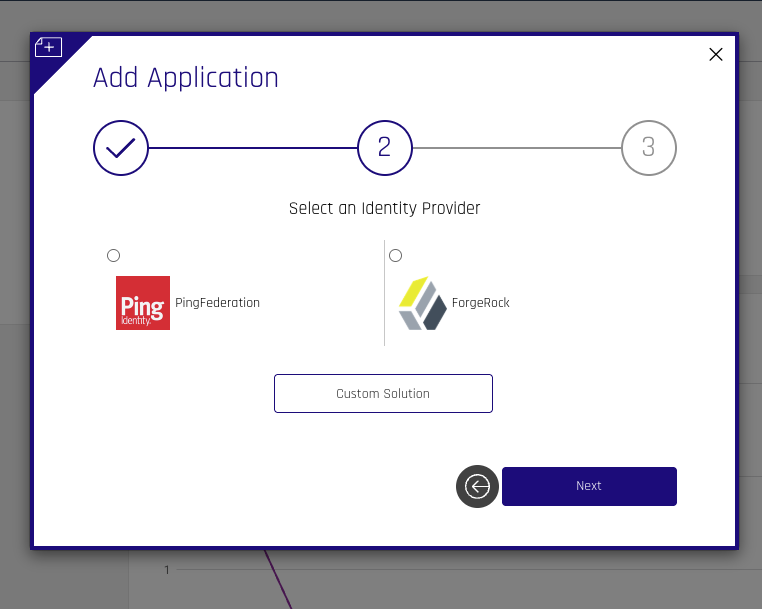
Select Custom Solution, then select Next.
-
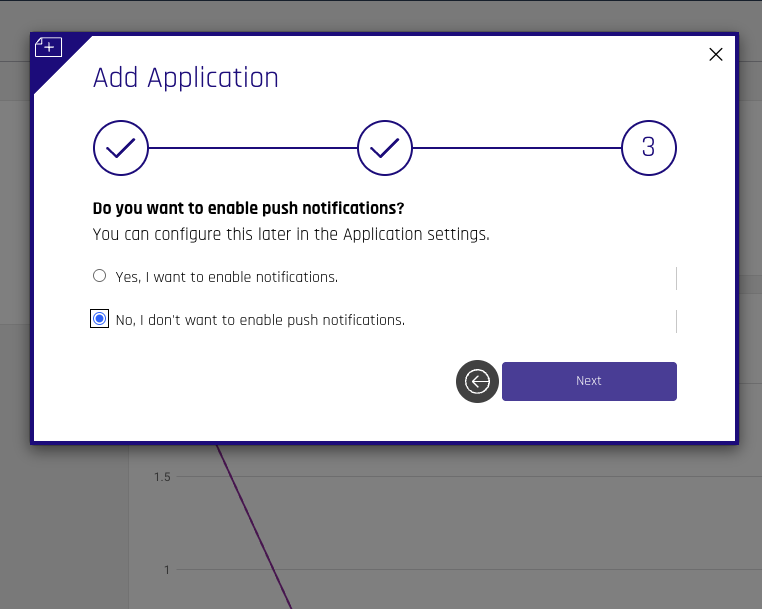
Select No, I don't want to enable push notifications, then select Next.
-
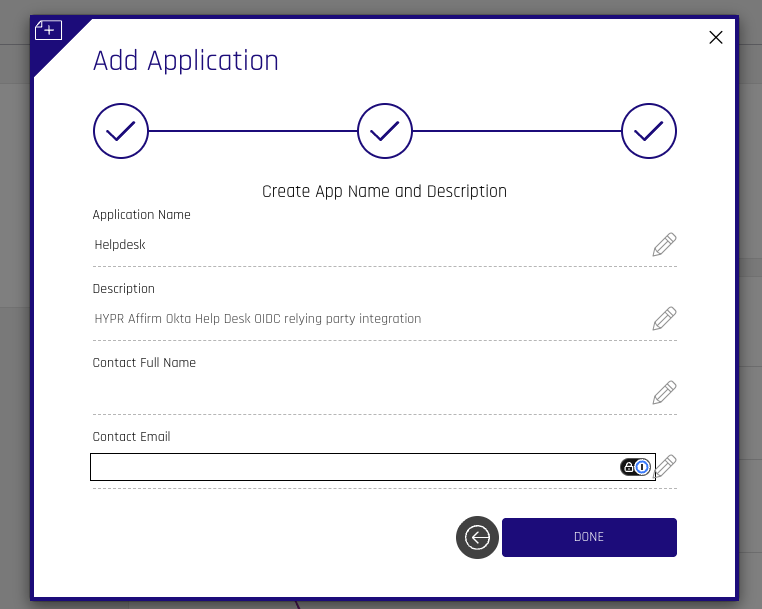
Enter the application name, description and contact details, then select DONE.
 Match the redirect URI
The application name becomes the relying party name in the Okta Sign-in redirect URIs value. If you have already saved the Okta application, update that URI so its final path segment matches this name.
Configure IDP Management in HYPR Control Center
-
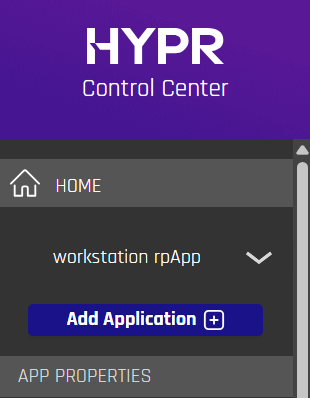
Select your Helpdesk application from the application list.
-
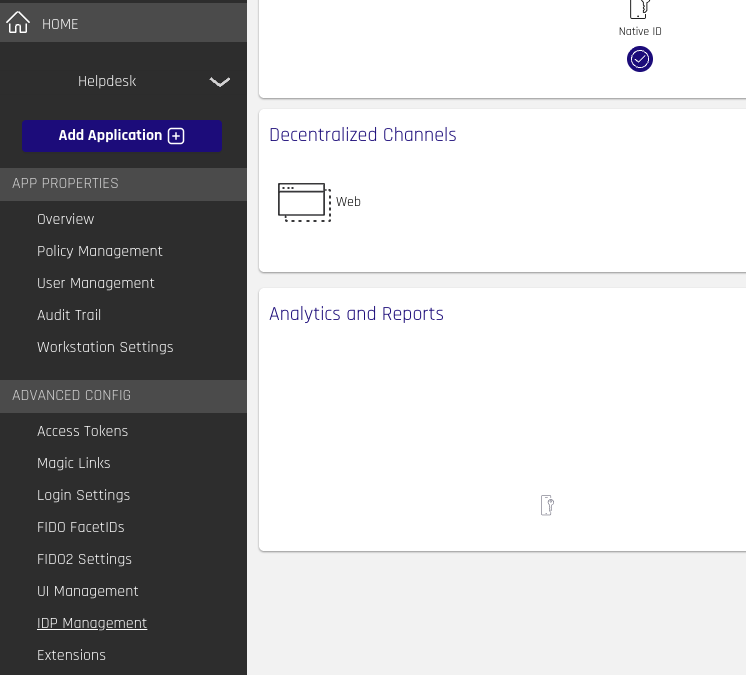
Under Advanced Config, select IDP Management.
-
Enter the following values, replacing
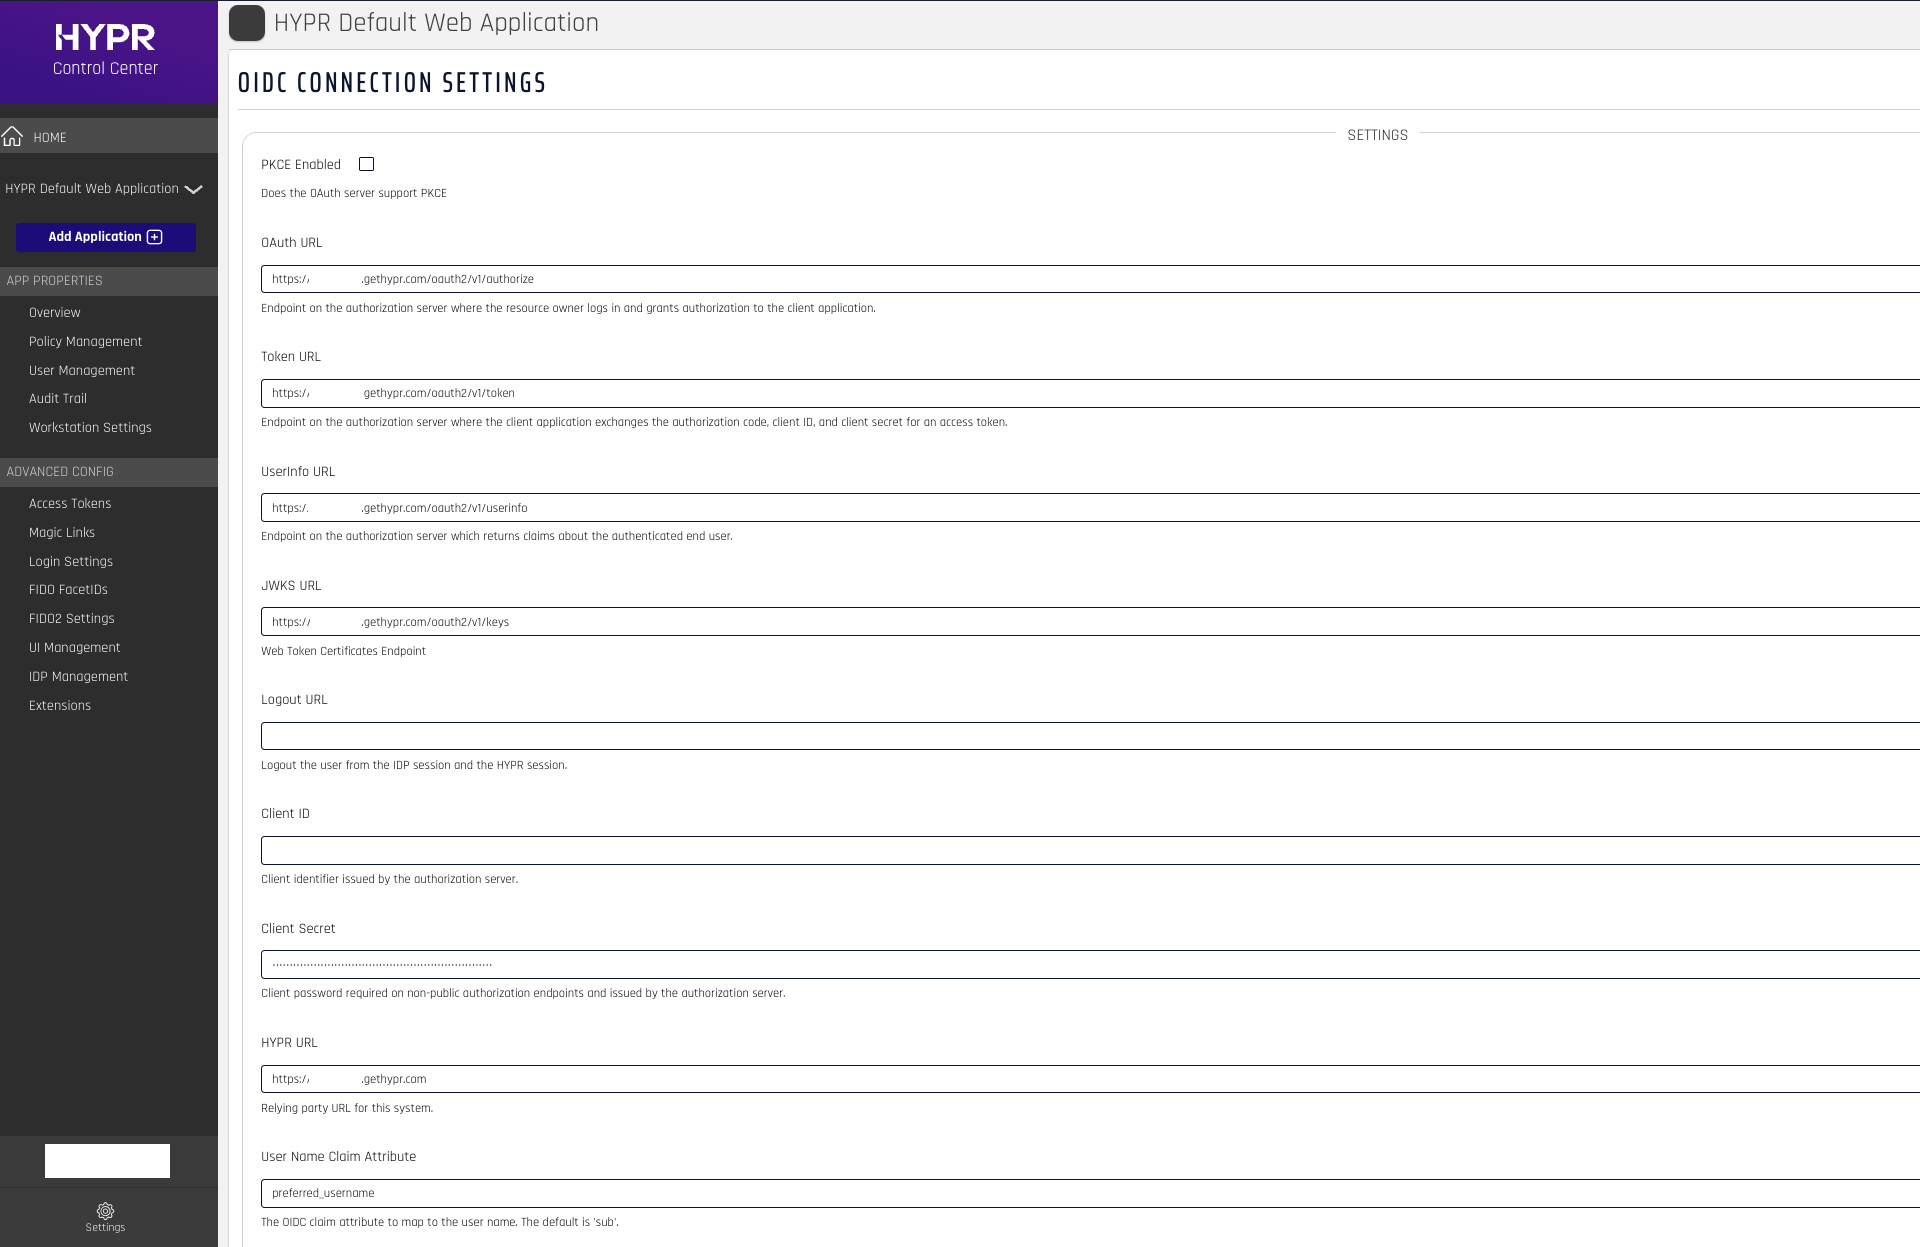
{OKTA_TENANT_URL}with your Okta tenant base URL. If you use a custom authorization server, include its ID in the path as shown in the second column.Field Default authorization server Custom authorization server OAuth URL {OKTA_TENANT_URL}/oauth2/v1/authorize{OKTA_TENANT_URL}/oauth2/{AUTH_SERVER_ID}/v1/authorizeToken URL {OKTA_TENANT_URL}/oauth2/v1/token{OKTA_TENANT_URL}/oauth2/{AUTH_SERVER_ID}/v1/tokenUserInfo URL {OKTA_TENANT_URL}/oauth2/v1/userinfo{OKTA_TENANT_URL}/oauth2/{AUTH_SERVER_ID}/v1/userinfoJWKS URL {OKTA_TENANT_URL}/oauth2/v1/keys{OKTA_TENANT_URL}/oauth2/{AUTH_SERVER_ID}/v1/keysHYPR URL {HYPR_TENANT_URL}{HYPR_TENANT_URL}User Name Claim Attribute preferred_usernamepreferred_usernameSet Client ID and Client Secret to the values generated by the Okta OIDC application.
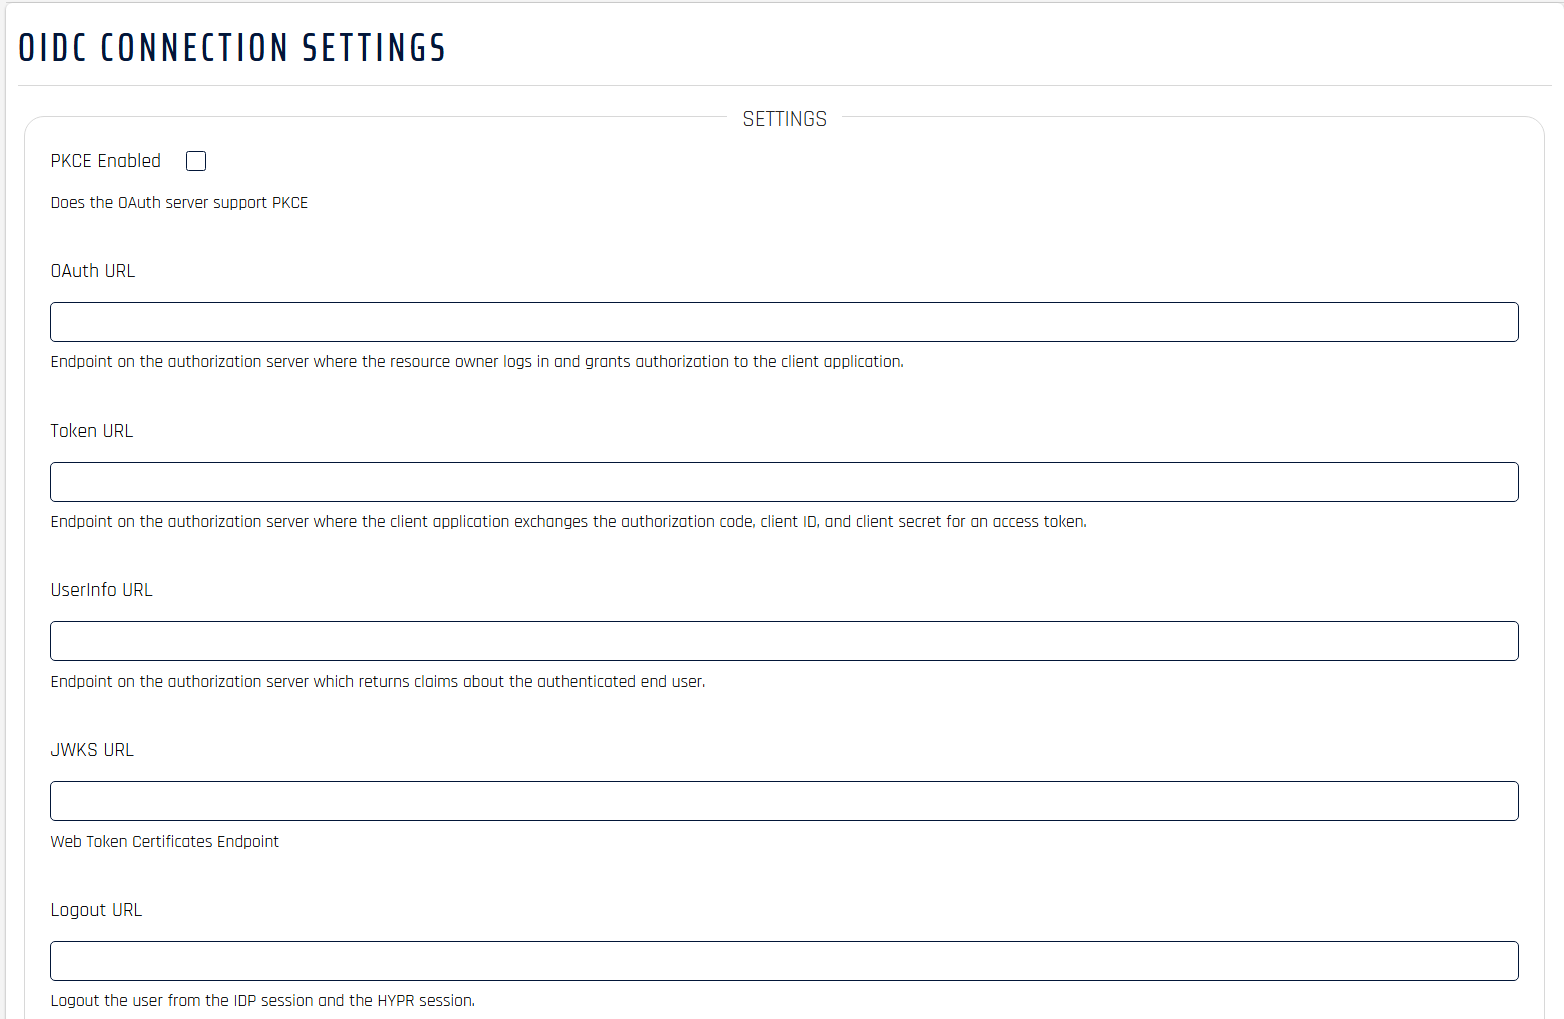
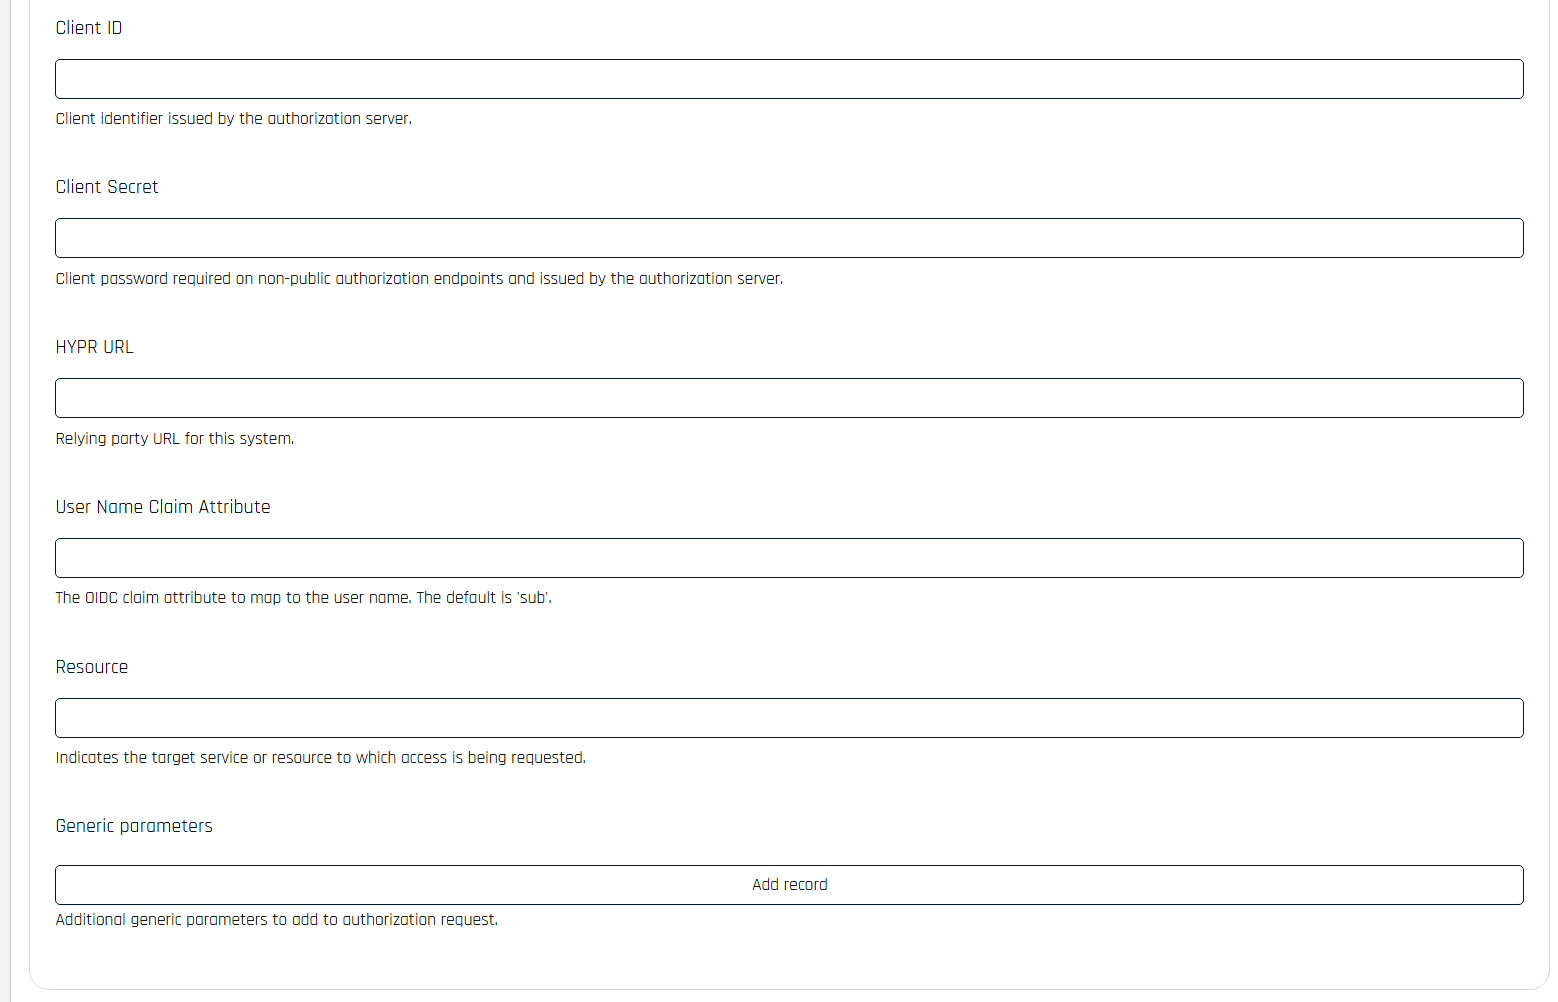
A completed configuration looks like this:
-
Select Save Config.
Assign the Relying Party Application to the Helpdesk
-
Switch back to Standard mode.
-
Go to HYPR Affirm → Helpdesk Settings.
-
Under Universal Configuration, set RP App Assignment to the relying party application you configured.
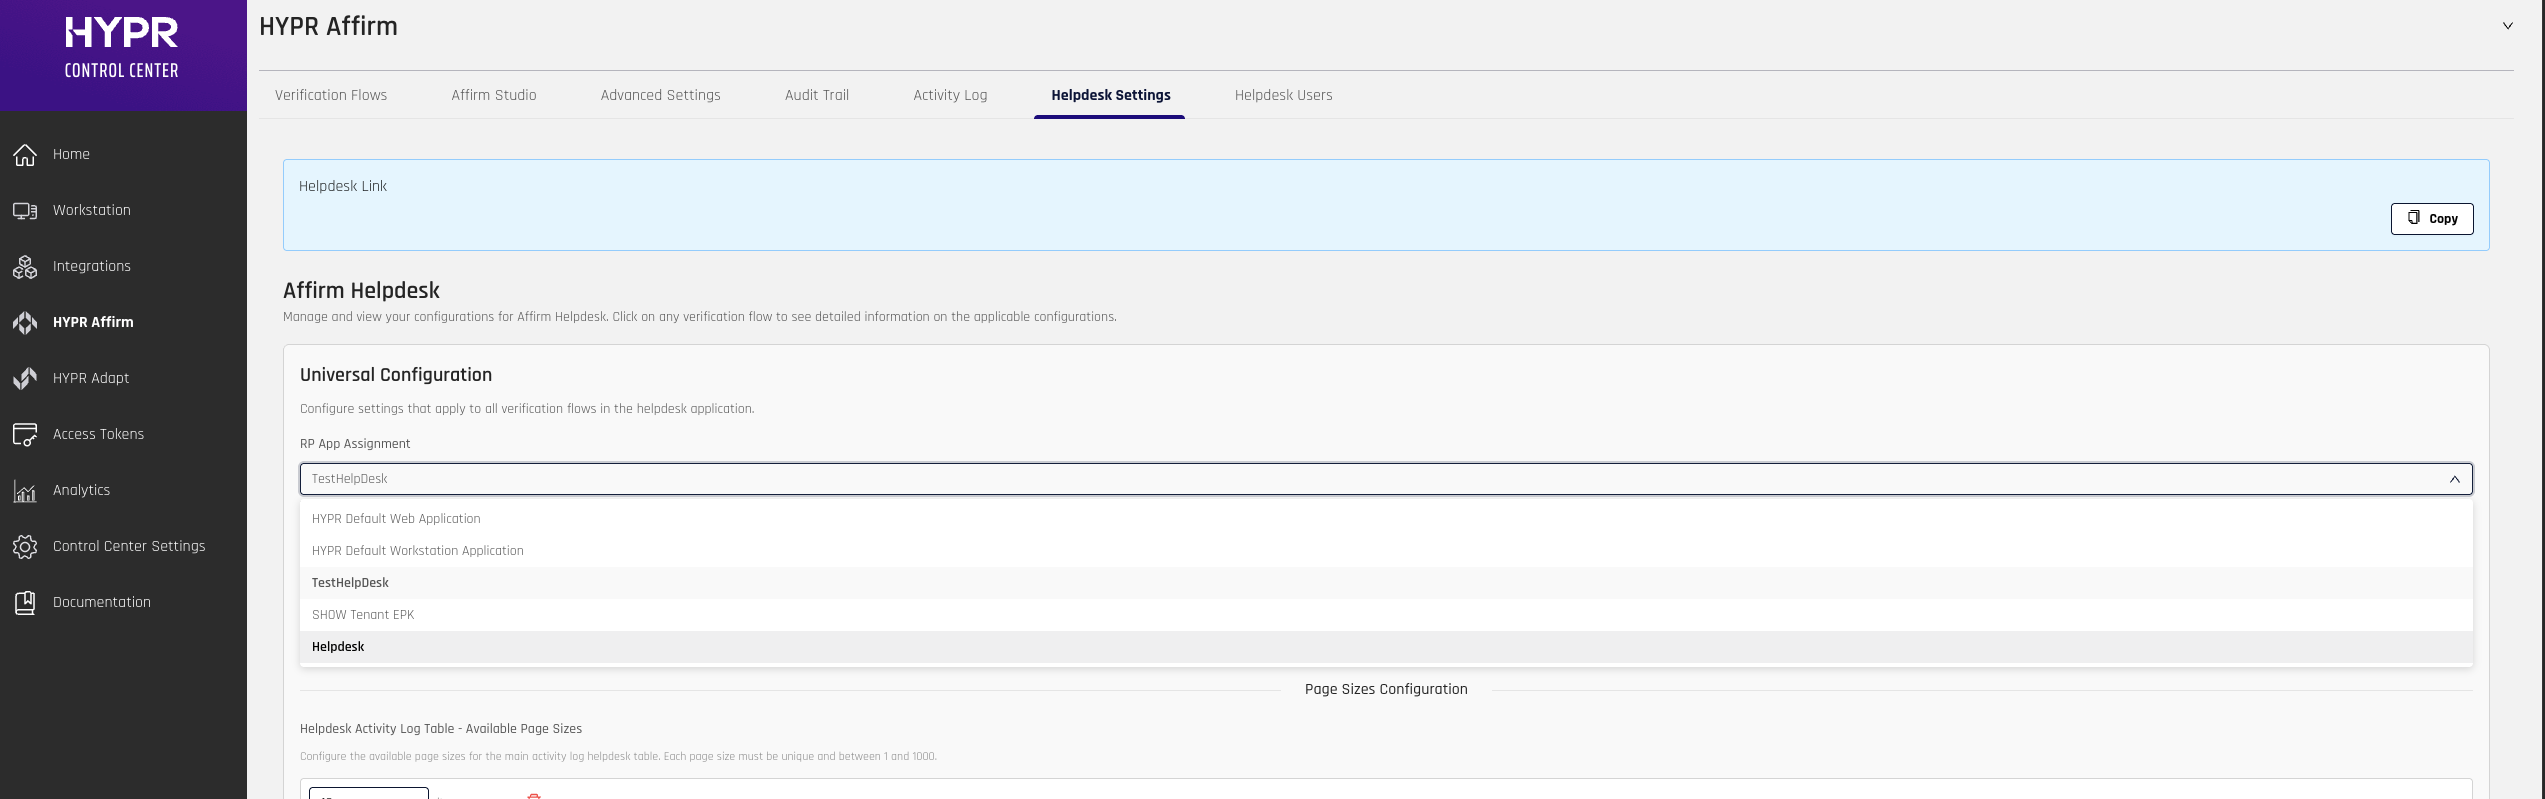
For the remaining Helpdesk settings on this tab, see HYPR Affirm Helpdesk Support.
Add Helpdesk Users in Control Center
After saving the IDP configuration, add the agents who need access to the Helpdesk portal.
-
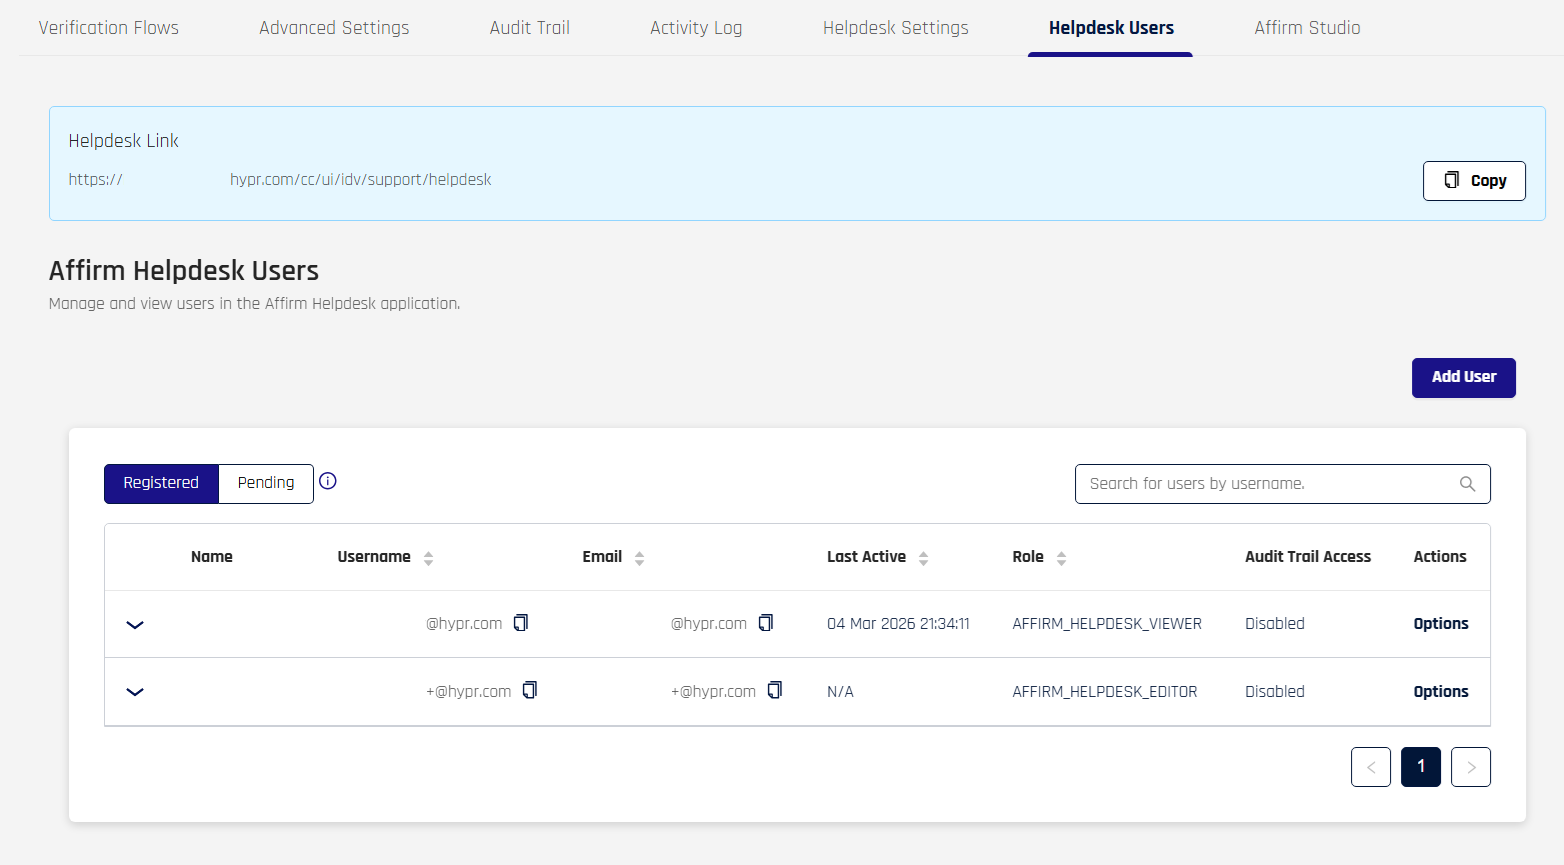
In HYPR Control Center, go to HYPR Affirm → Helpdesk Users.
-
Select Add User, enter the agent's details, and assign the appropriate Helpdesk role.
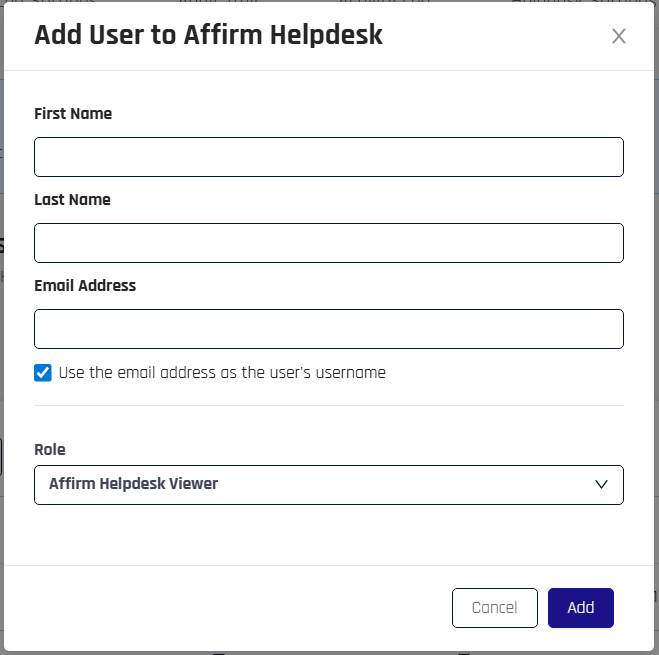
For full instructions on managing Helpdesk users and configuring Helpdesk settings, see HYPR Affirm Helpdesk Support.
Access the Helpdesk Portal
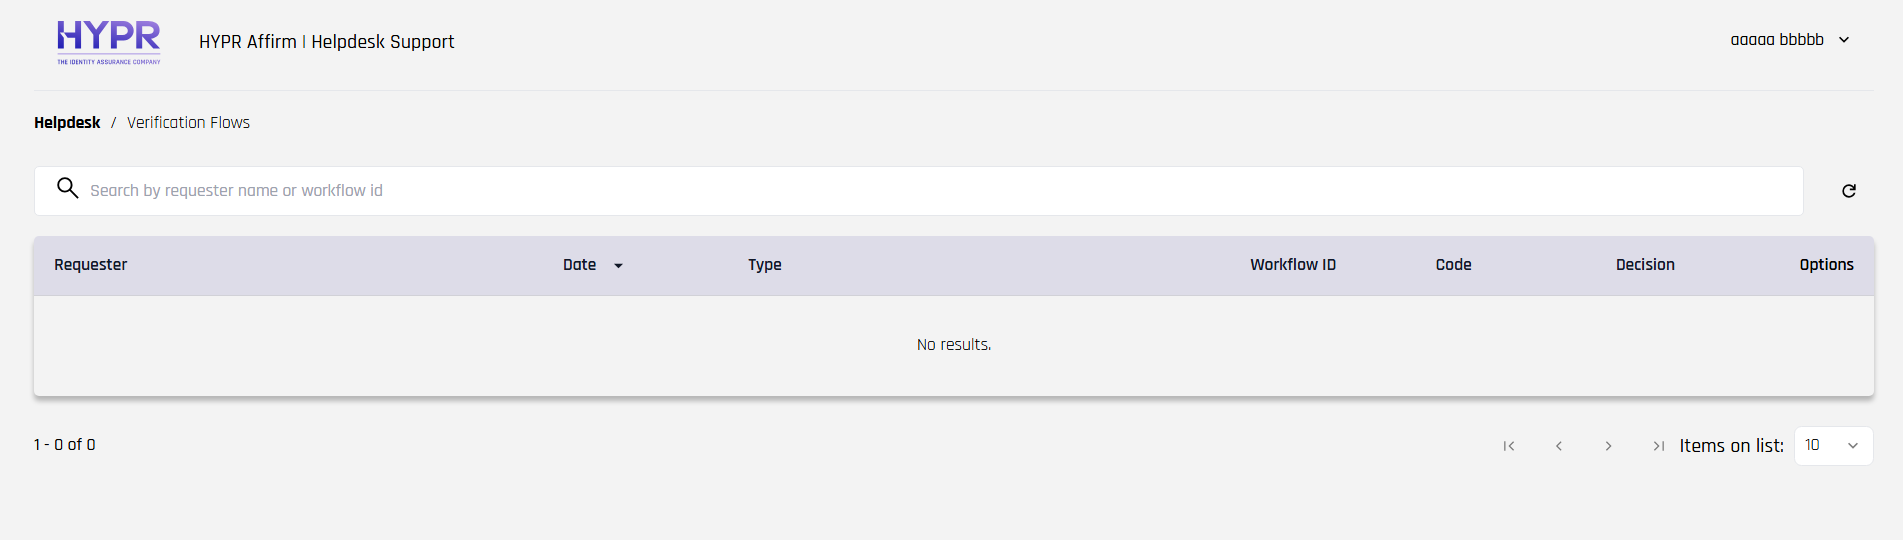
Once configuration is complete, helpdesk agents access the portal at:
{HYPR_TENANT_URL}/cc/ui/idv/support/helpdesk
Navigating to this URL redirects agents to the Okta sign-in page. After authenticating, HYPR reads the affirm_helpdesk_role claim and grants access with the matching Viewer or Editor role.
Troubleshooting
Invalid redirect URI
Okta reports that the redirect URI is invalid.
This happens when the redirect URI in the Okta application does not match the relying party the HYPR OIDC integration points at. Confirm that:
- The Client ID and Client secret in the relying party's IDP Management match the Okta application.
- Helpdesk Settings → RP App Assignment points at the relying party you configured.
- The final path segment of the Okta Sign-in redirect URIs value matches the relying party application name.
- The relying party uses the authorization server whose endpoints you entered in IDP Management.
Access not allowed
The agent authenticates with Okta, then sees an Access Not Allowed page.
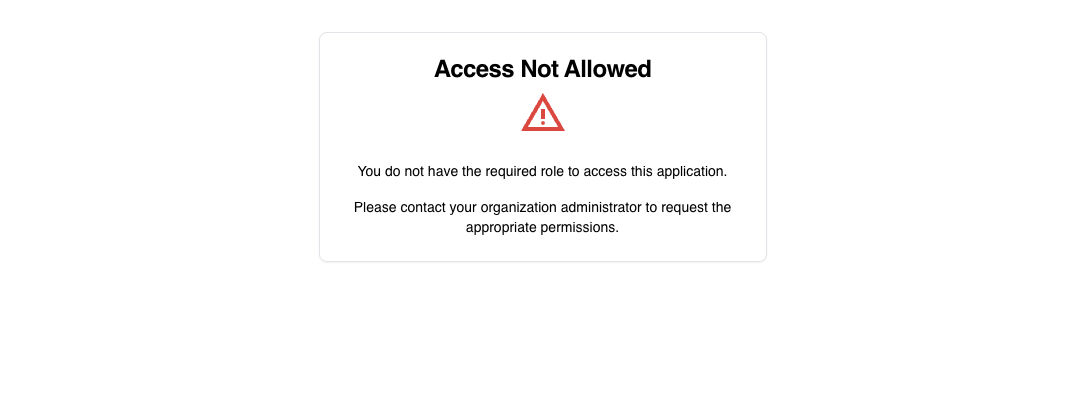
This happens when the role claim is missing, empty, or carries a value other than the two Helpdesk roles. Confirm that:
- The agent belongs to
Affirm Help Desk EditorsorAffirm Help Desk Viewers. - The claim reaches the token, using Token Preview as described in Verify the Claim.
- The claim name is
affirm_helpdesk_roleand it is included in the ID token.
User is not assigned to the client application
Okta reports that the user is not assigned to the client application.
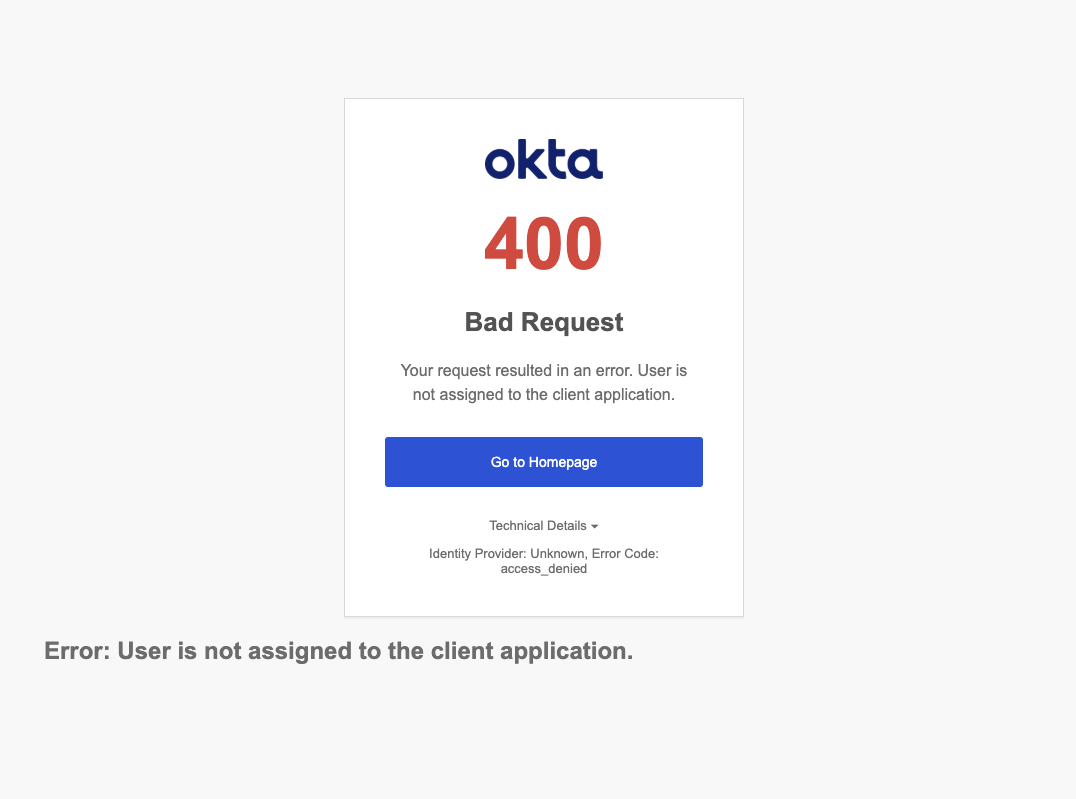
Assign the agent — or a group containing them — to the Okta OIDC application from its Assignments tab.
Policy evaluation failed
Okta returns a 400 Bad Request stating that policy evaluation failed.
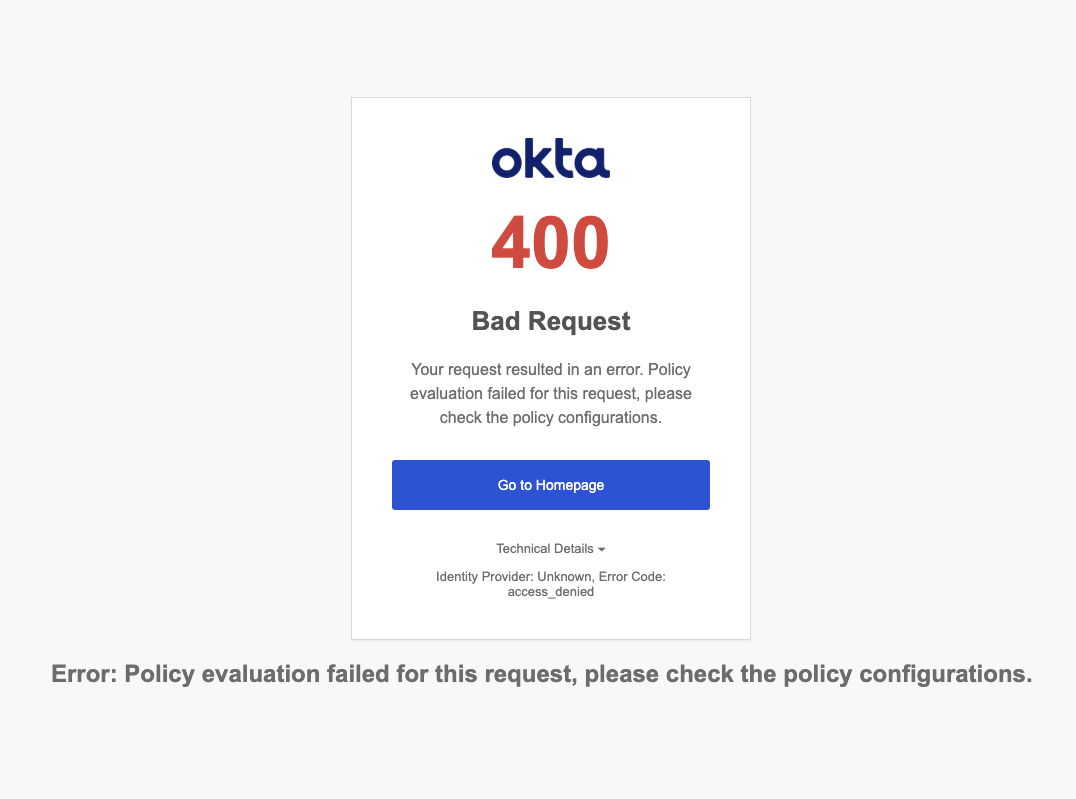
This happens when the authorization server cannot evaluate a policy for the request. Confirm that:
- The authorization server is Active.
- The server has an access policy, and that policy is active.
- The policy has at least one active rule, as described in Add an Access Policy Rule.
- The policy and rule apply to the Helpdesk application rather than being restricted to other applications.