Entra ID: OIDC Integration for HYPR Affirm Helpdesk
The HYPR Affirm Helpdesk portal uses OpenID Connect (OIDC) to authenticate Helpdesk agents. This article describes how to configure Microsoft Entra ID as the OIDC provider, define role-based access for agents and connect the integration in HYPR Control Center.
When configuration is complete, Helpdesk agents go to the Helpdesk portal URL and are redirected to Entra ID to sign in. HYPR reads the role claim from the returned OIDC token and grants the agent either Viewer or Editor access to the Helpdesk portal.
The HYPR Affirm Helpdesk portal must be enabled on your tenant. Contact your HYPR representative to enable it before proceeding.
If you already have a HYPR application registered in Entra ID (for example, the registration used for Control Center sign-in or HYPR Enterprise Passkey), you can add the Helpdesk role and claim to that same application instead of creating a new one. Adding the affirm_helpdesk_role claim does not affect the tokens issued for the existing integration.
Prerequisites
Before you begin, make sure you have the following:
- Entra ID administrator access (Global Administrator) on an account in your
*.onmicrosoft.comtenant - Users in your Entra ID directory, and at least one group or a plan for assigning Helpdesk editors
- A HYPR Control Center account with HYPR Affirm deployed
- A dedicated Helpdesk relying party application configured in HYPR Control Center
Helpdesk Agent Roles
The Affirm Helpdesk portal supports two roles. HYPR reads the affirm_helpdesk_role claim from the OIDC token to assign the corresponding role to each agent.
| Role | Accepted Claim Values | Access |
|---|---|---|
| Viewer | AFFIRM_HELPDESK_VIEWER or HYPR_AFFIRM_HELPDESK_VIEWER | View verification workflows and activity records |
| Editor | AFFIRM_HELPDESK_EDITOR or HYPR_AFFIRM_HELPDESK_EDITOR | View and initialize verification workflows |
HYPR applies the following fallback behavior:
- If
affirm_helpdesk_roleis not present, HYPR checks forhypr_roleas a secondary claim. - If neither claim is present, the user is not authorized for the Helpdesk portal and sees the Access Not Allowed page.
- When a user is assigned both roles, Editor takes precedence and all Editor authorities apply.
Authenticating with Entra ID is not sufficient on its own. The token must carry a valid affirm_helpdesk_role (or hypr_role) value, or the user is denied access to the Helpdesk portal and sees the Access Not Allowed page. To grant access, assign the user one of the Helpdesk app roles so the claim is populated; to revoke access, remove their app role assignment in Entra ID.
Register an Application in Entra ID
-
Sign in to the Microsoft Entra admin center as an administrator.
-
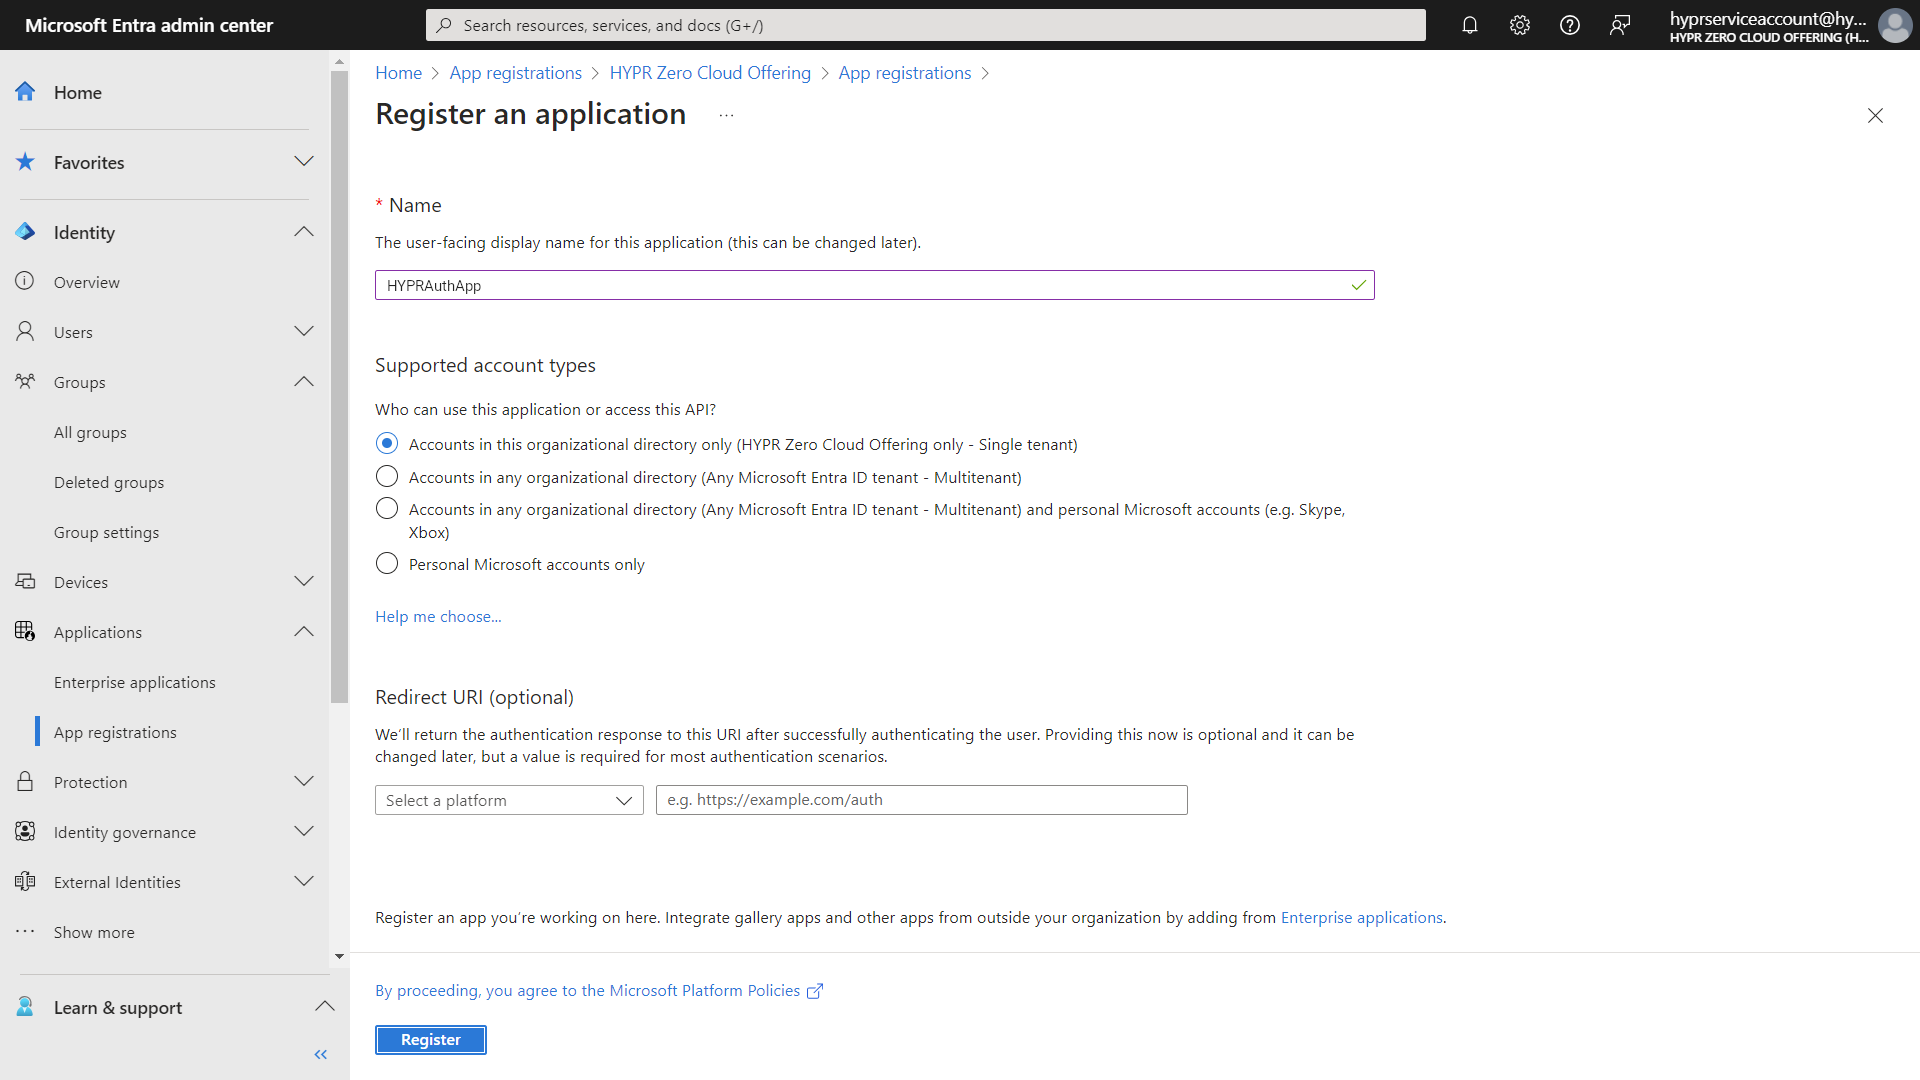
Go to App registrations and click + New registration.
-
Enter a name for the application (for example, HYPR Affirm Helpdesk), select Accounts in this organizational directory only (single tenant), and click Register.
-
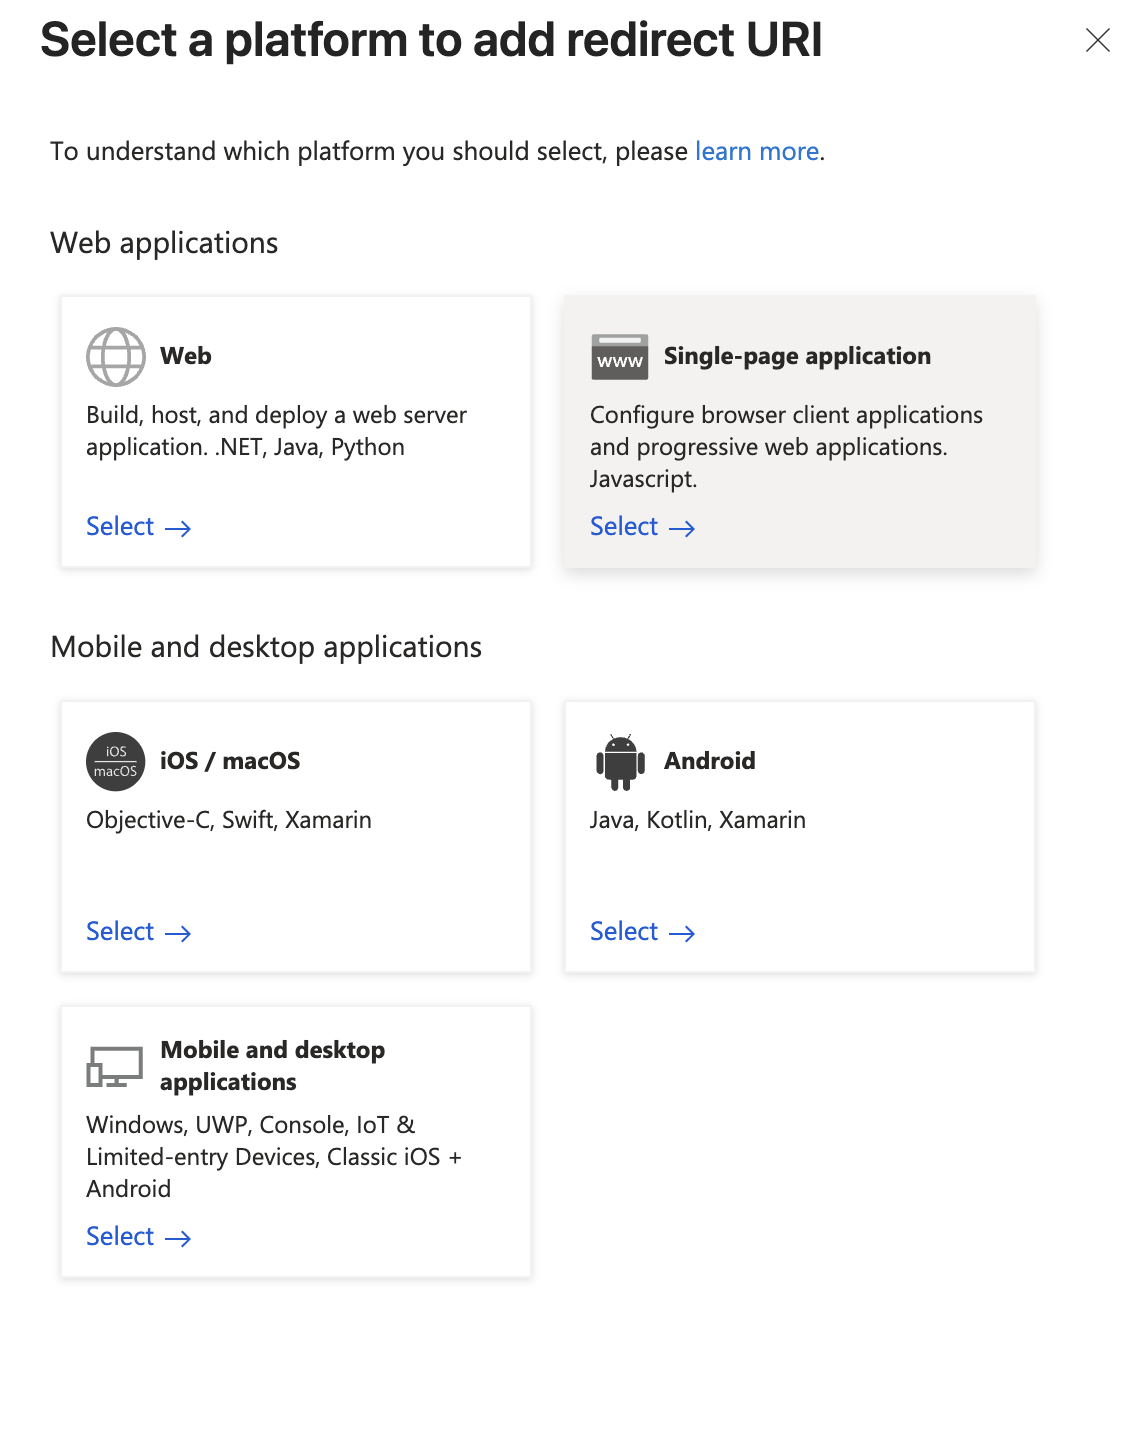
Go to Authentication → + Add a platform and select Web.
-
In the Web platform panel, enter the following values, leave the implicit-grant token options unchecked, and click Configure:
- Redirect URI:
{HYPR_TENANT_URL}/login/oauth2/idv/support/code/{YOUR_RELYING_PARTY} - Front-channel logout URL:
{HYPR_TENANT_URL}/login
Replace
{HYPR_TENANT_URL}with your HYPR tenant URL. Replace{YOUR_RELYING_PARTY}with the name of your integration as configured in HYPR Control Center, with spaces removed — for example, an integration named HYPR Passkeys becomesHYPRPasskeys.
- Redirect URI:
-
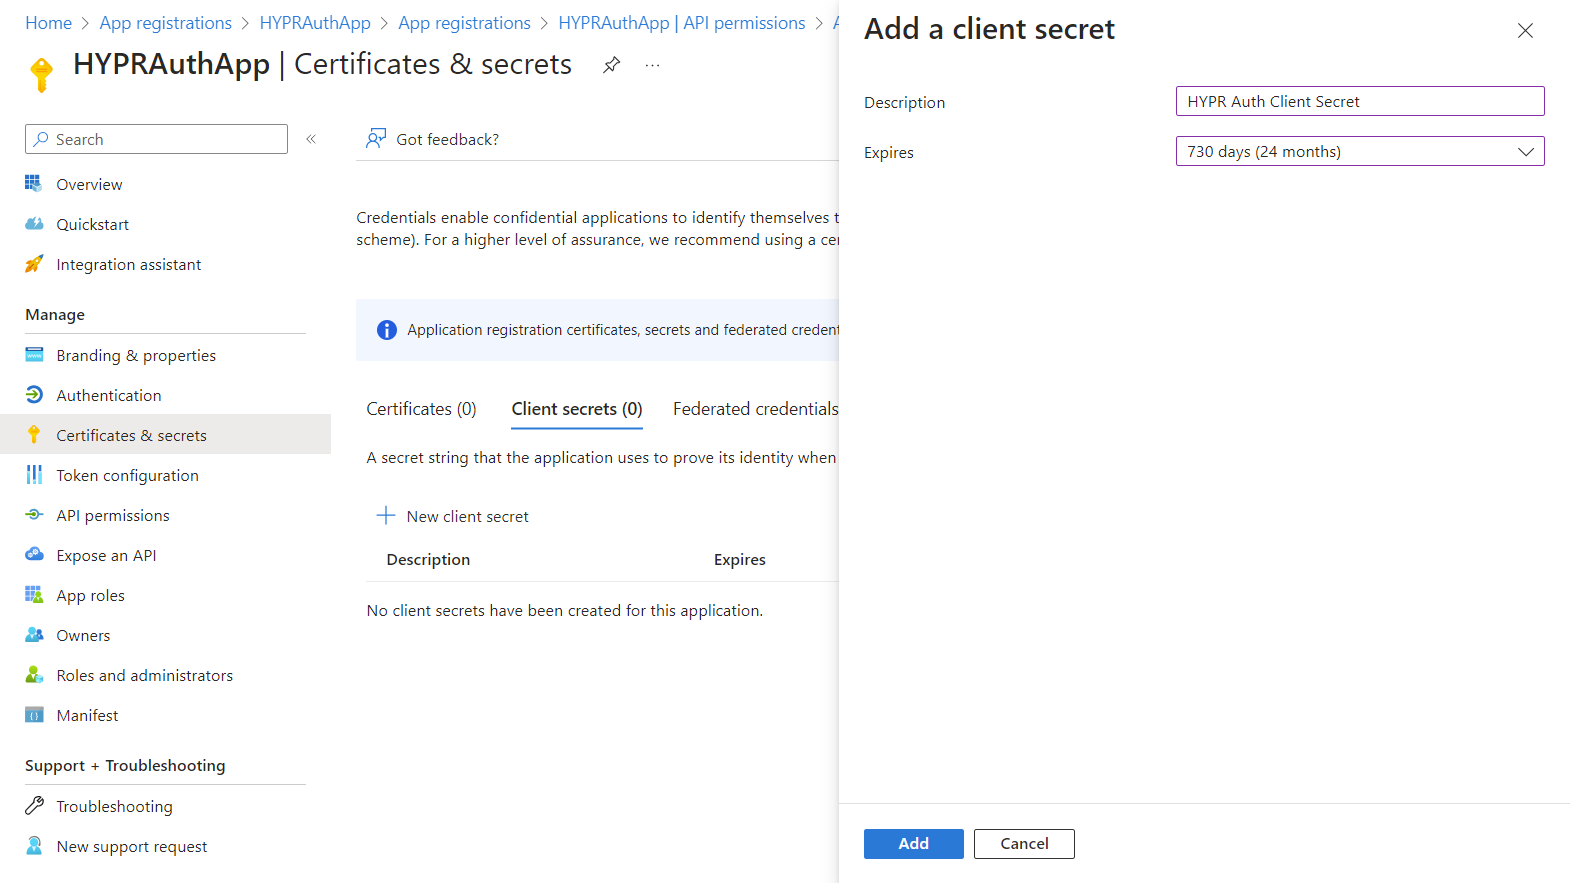
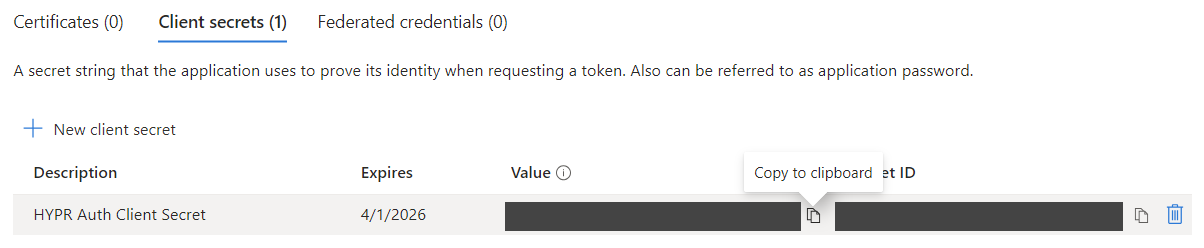
Go to Certificates & secrets → + New client secret, create a secret, and copy its Value to a secure location. You need it when you configure HYPR Control Center.
Add App Roles
The Helpdesk role values are delivered as Entra ID app roles. In your application, go to App roles and click + Create app role.
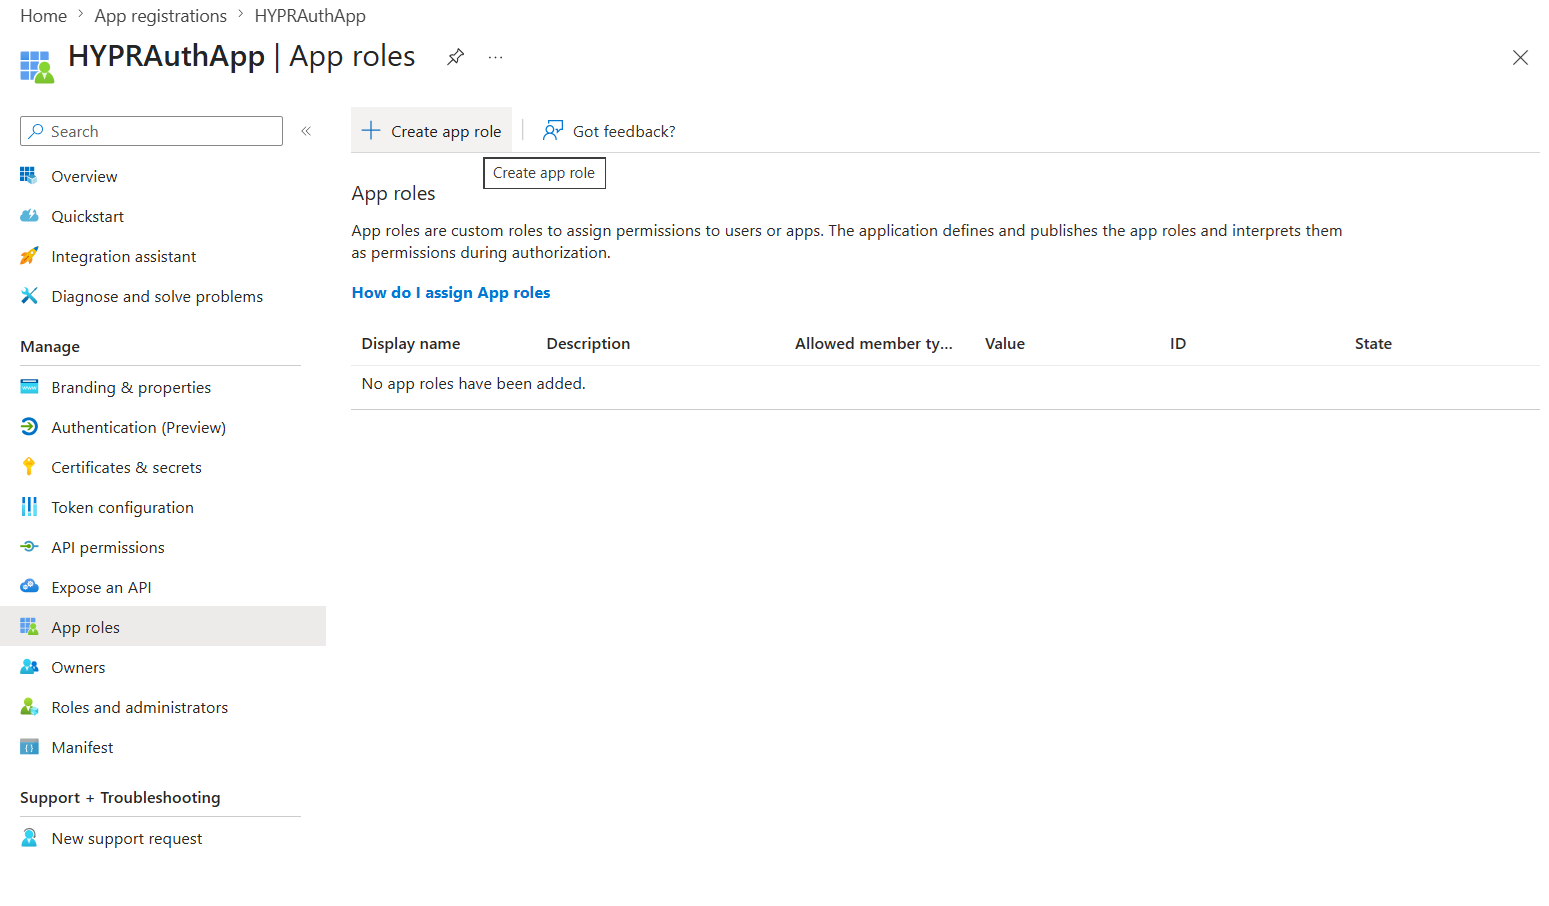
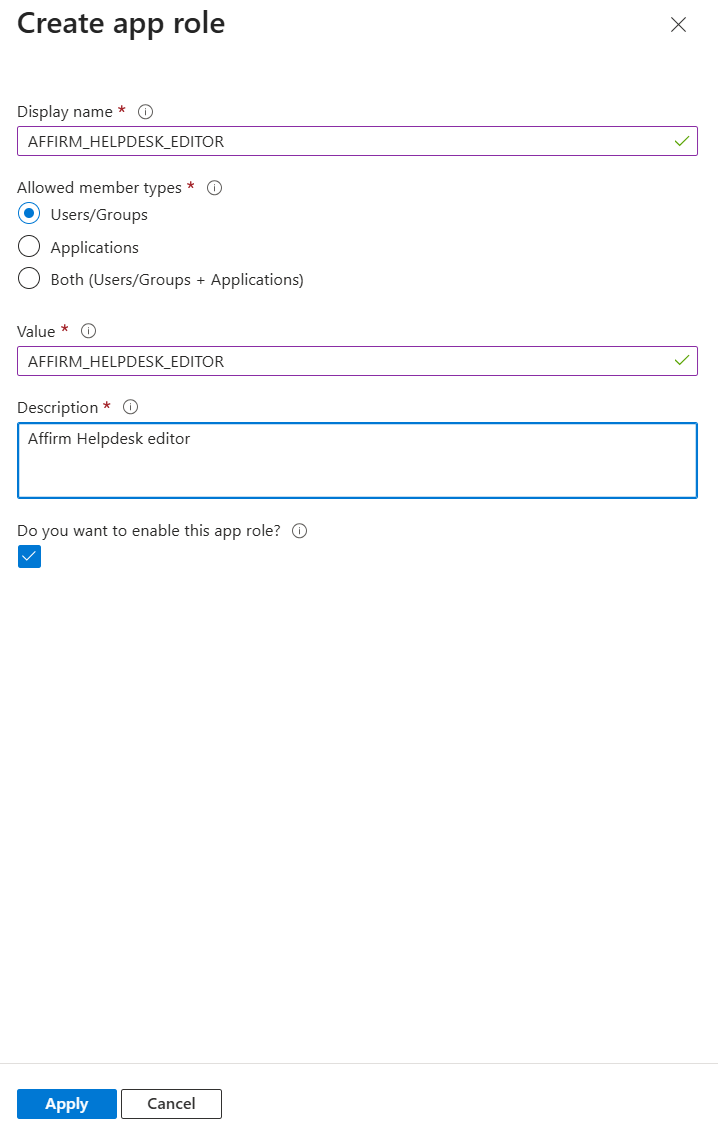
Create the following roles, setting Do you want to enable this app role? to enabled for each. Enter the Value exactly as shown, because it is the string delivered in the affirm_helpdesk_role claim.
| Display Name | Value | Allowed Member Types | Description |
|---|---|---|---|
AFFIRM_HELPDESK_EDITOR | AFFIRM_HELPDESK_EDITOR | Users/Groups | HYPR Affirm Helpdesk Editor |
AFFIRM_HELPDESK_VIEWER | AFFIRM_HELPDESK_VIEWER | Users/Groups | HYPR Affirm Helpdesk Viewer |
Allow Mapped Claims in the App Manifest
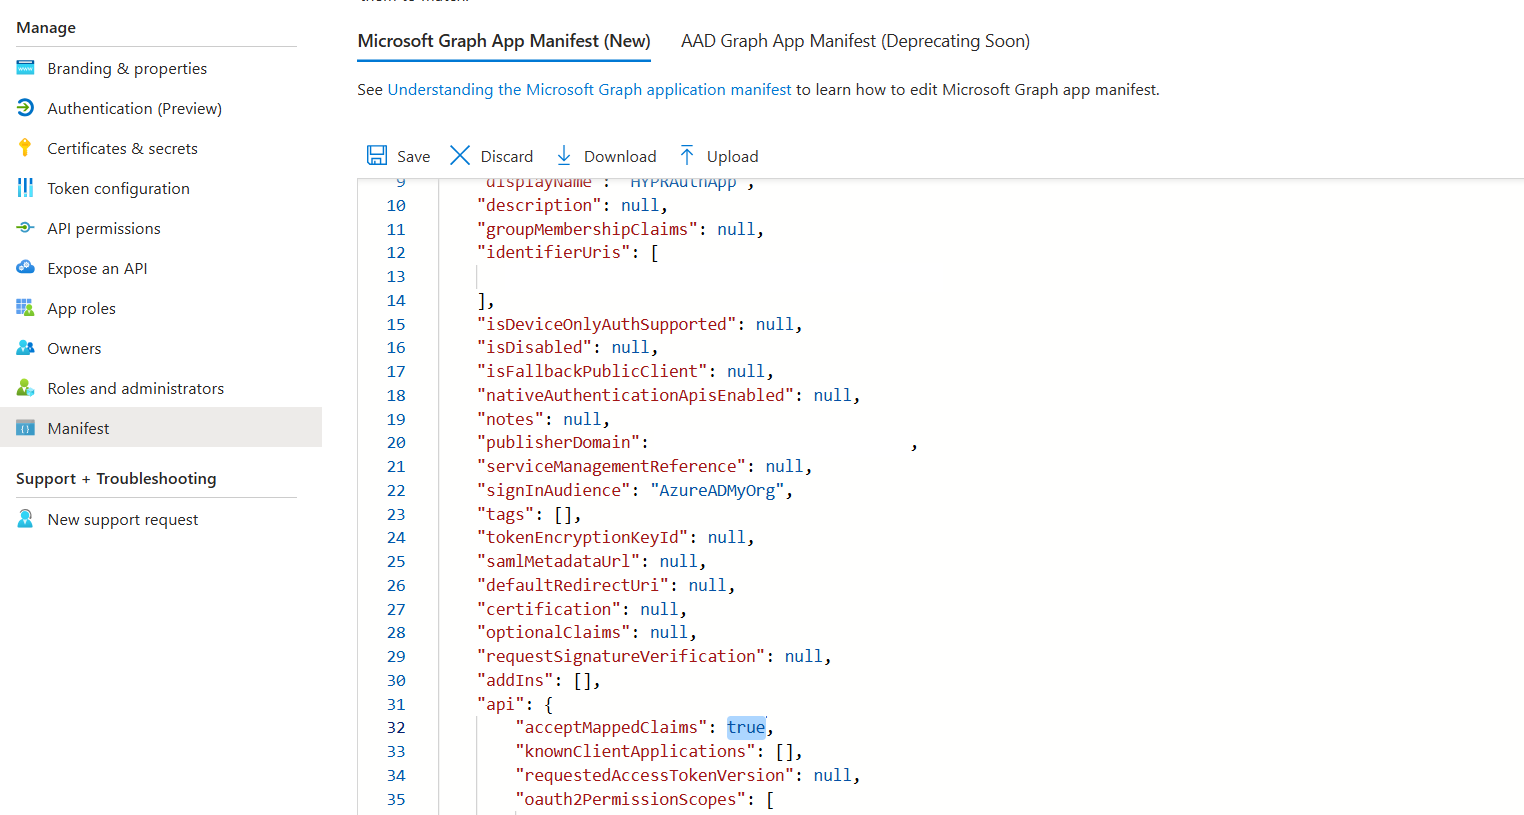
To deliver the app role values under the custom affirm_helpdesk_role claim name, allow mapped claims in the application manifest.
-
In your application, go to Manifest.
-
Set
acceptMappedClaimstotrue. In the Microsoft Graph App Manifest this key is inside theapiobject; in the older manifest format it appears at the root. -
Click Save.
Assign Users and Groups to Roles
App role assignments are made on the Enterprise application (the service principal), not on the app registration.
-
In Entra ID, go to Enterprise applications and select your HYPR application.
-
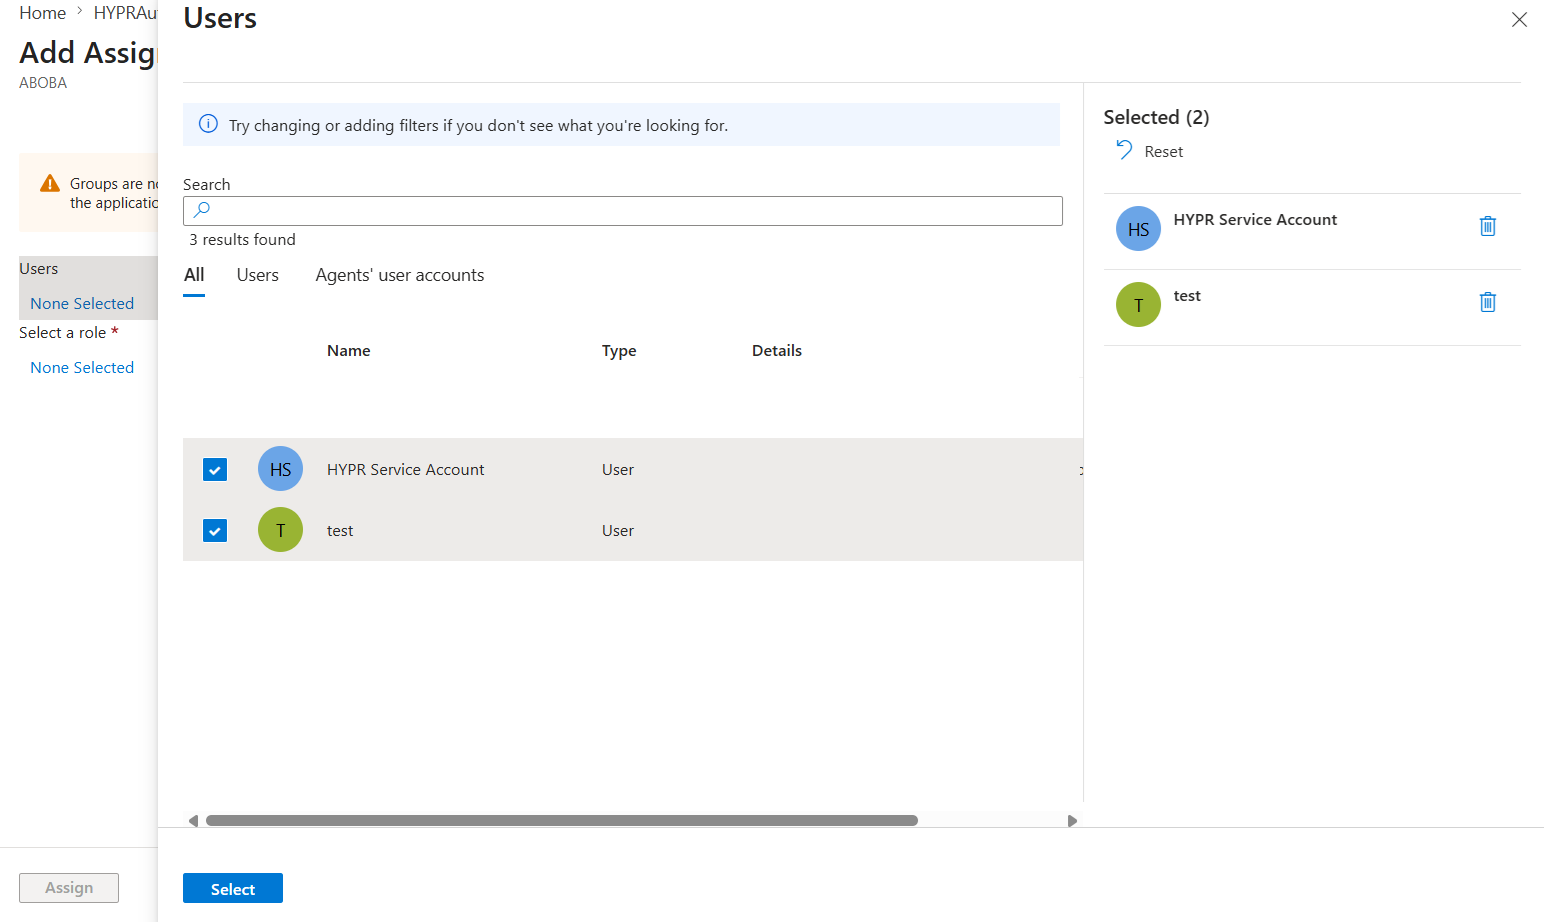
Select Users and groups, then click + Add user/group.
-
Under Users, click None Selected, choose the users (or groups) who need Helpdesk access, and click Select.
-
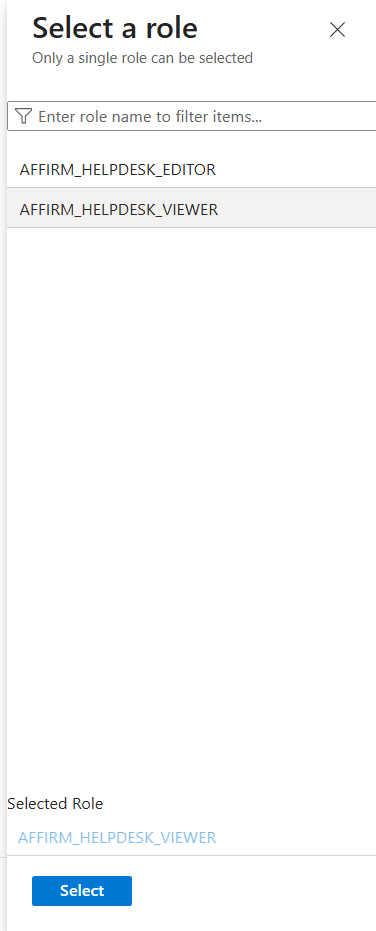
Under Select a role, click None Selected, choose AFFIRM_HELPDESK_EDITOR or AFFIRM_HELPDESK_VIEWER, and click Select. Only one role can be selected per assignment.
-
Click Assign. A confirmation appears when the assignment completes.
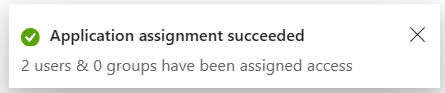
The assigned role determines the value delivered in the affirm_helpdesk_role claim.
Add the Role Claim to the Token
Add the affirm_helpdesk_role claim so the assigned role values are included in the OIDC ID token.
-
In the same Enterprise application, select Single sign-on.
-
In the Attributes & Claims section, click Edit.

-
Click + Add new claim.
-
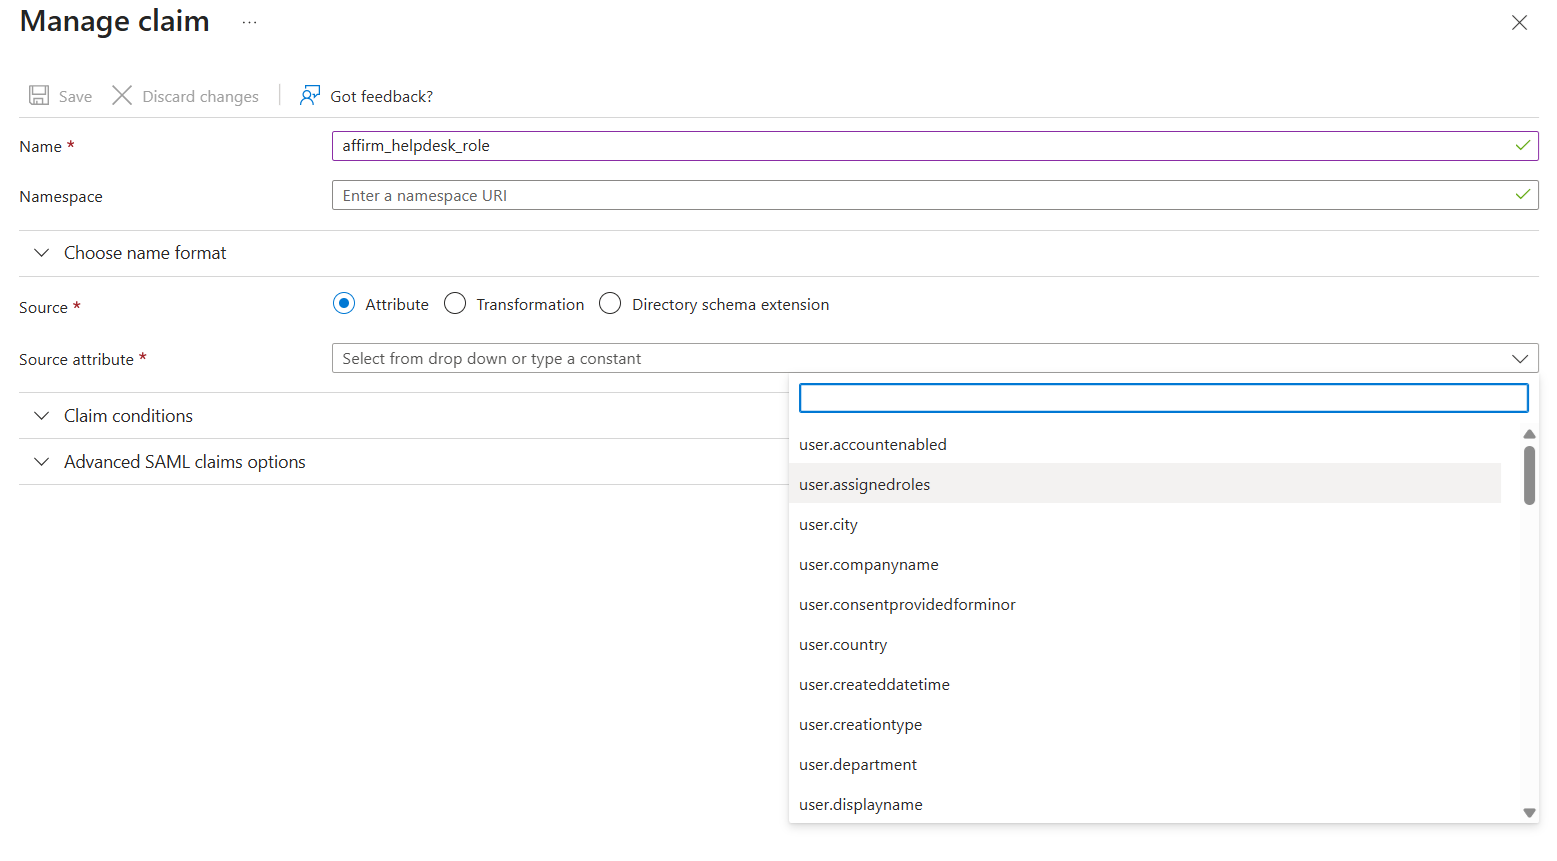
Enter the claim details:
- Name:
affirm_helpdesk_role - Namespace: leave blank so the claim is emitted as exactly
affirm_helpdesk_role - Source: Attribute
- Source attribute:
user.assignedroles
- Name:
-
Click Save at the top of the Manage claim panel. The
affirm_helpdesk_roleclaim now appears in the Attributes & Claims list.
Restrict Access to Assigned Users
To limit sign-in to only the users and groups you assigned:
-
In the Enterprise application, go to Properties.
-
Set Assignment required? to Yes and save.
When this is set to No, any user in the directory can sign in to the application.
Retrieve the Entra OIDC Endpoints
-
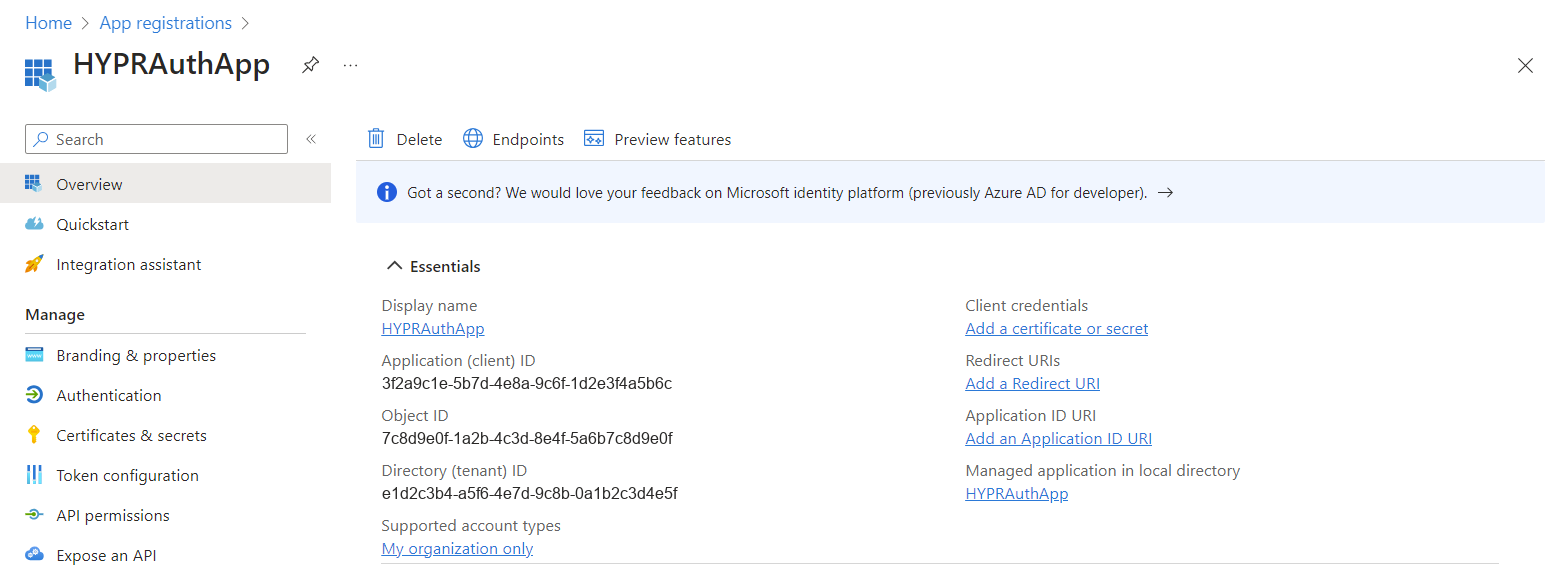
In your Entra ID tenant, open the application from the previous sections and click Endpoints at the top of the Overview page.
-
Copy the OpenID Connect metadata document URL and open it in a browser. This document lists the endpoint values you enter in HYPR Control Center:
authorization_endpoint,token_endpoint,userinfo_endpoint,jwks_uriand (optionally)end_session_endpoint.
Configure IDP Management in HYPR Control Center
-
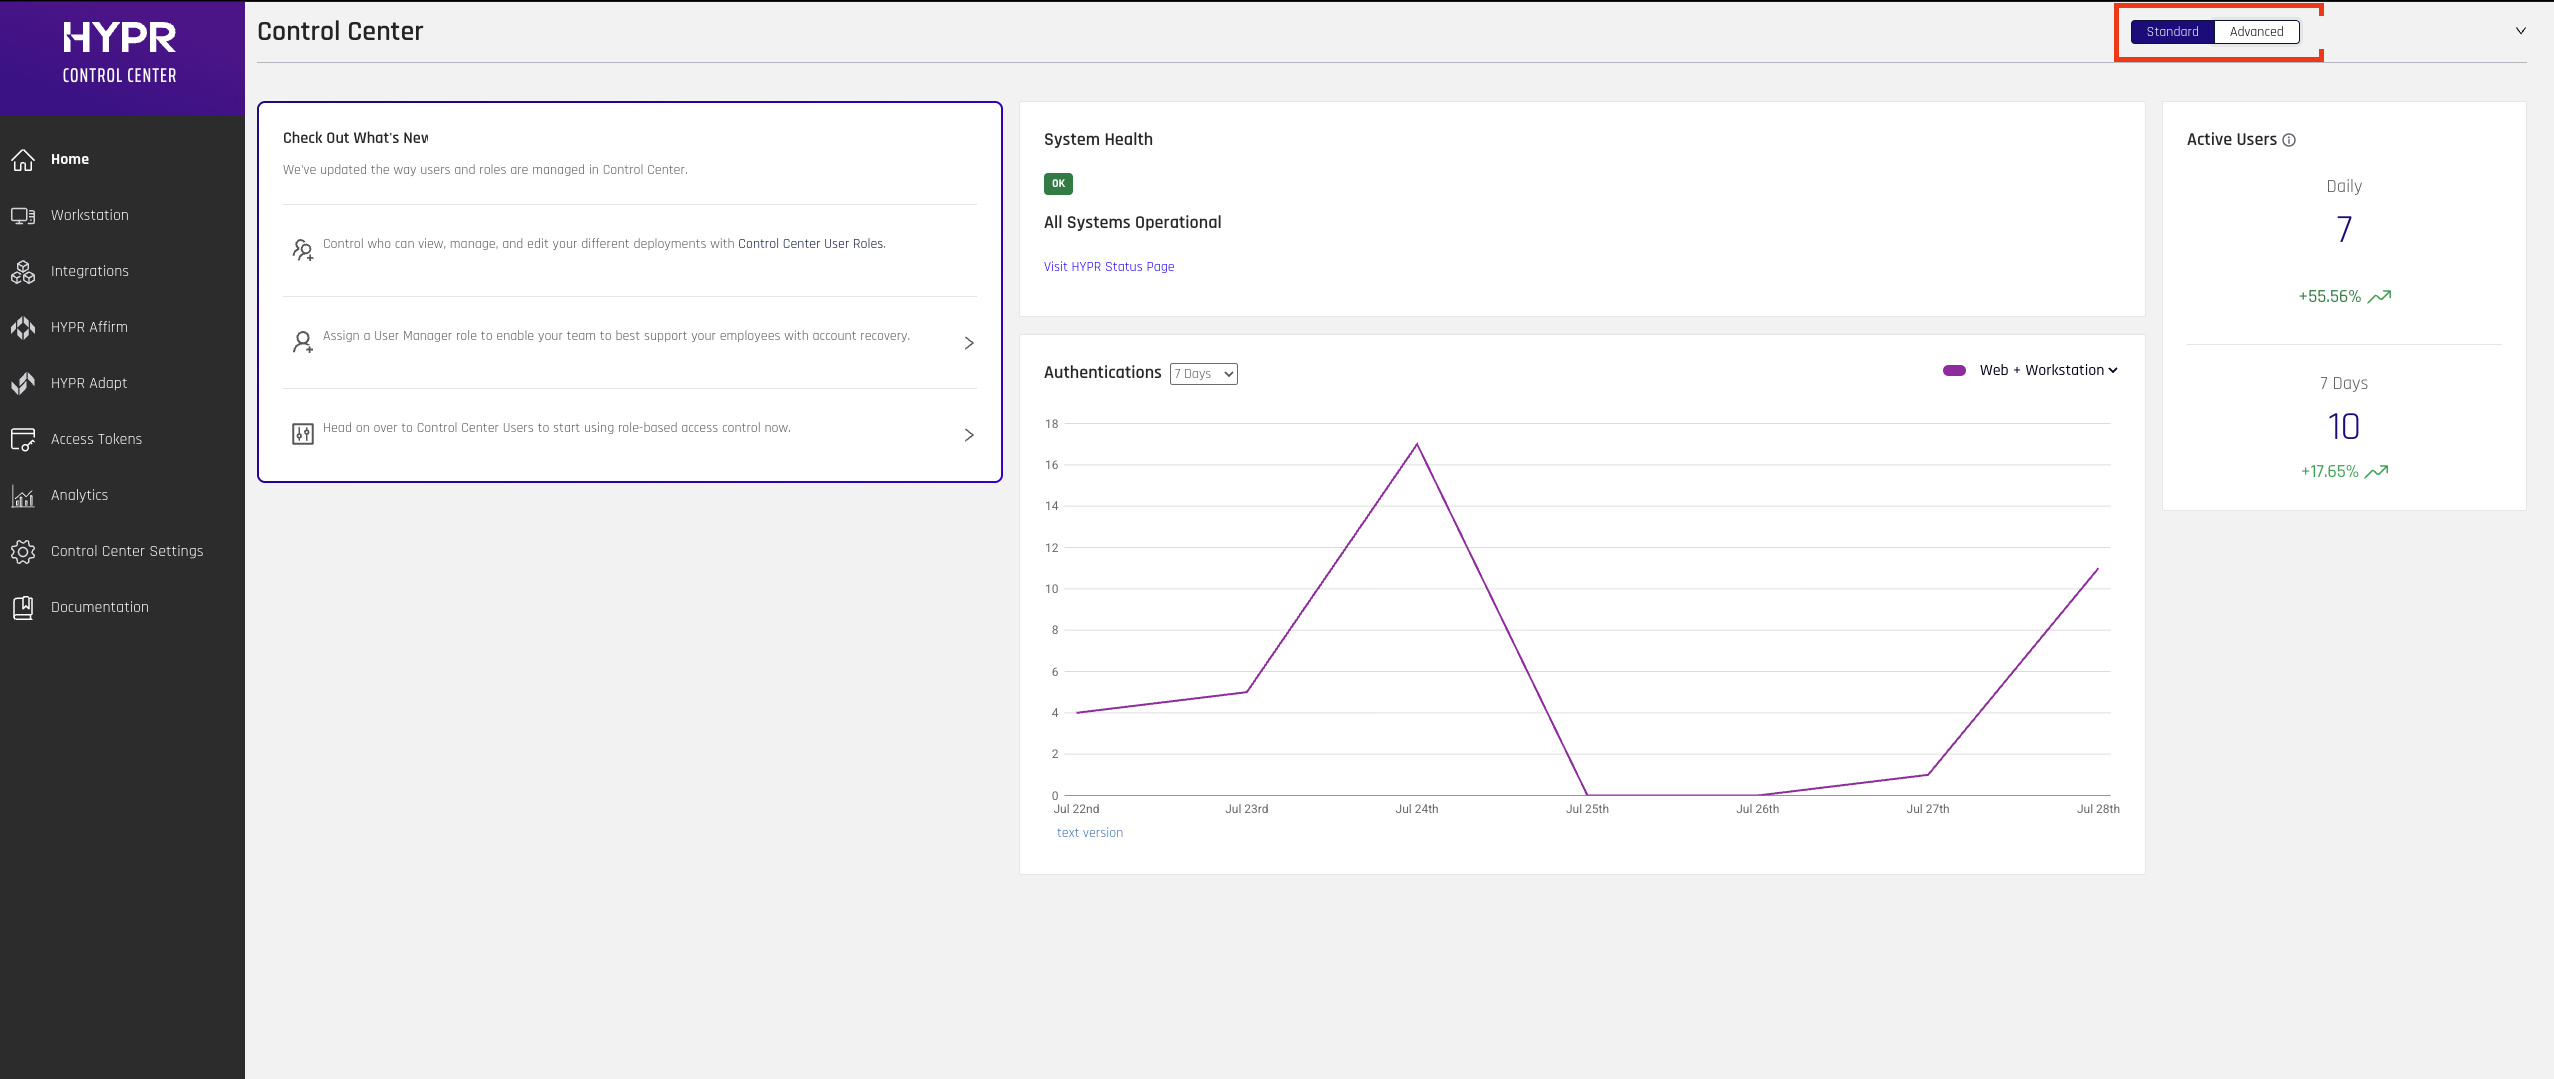
In HYPR Control Center, switch to Advanced mode using the toggle in the upper right corner.
-
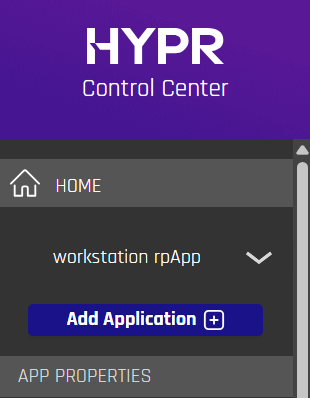
In the left navigation, select your Helpdesk relying party application.
-
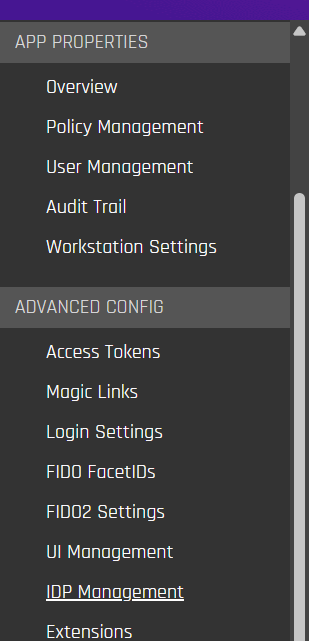
Under Advanced Config, select IDP Management.
-
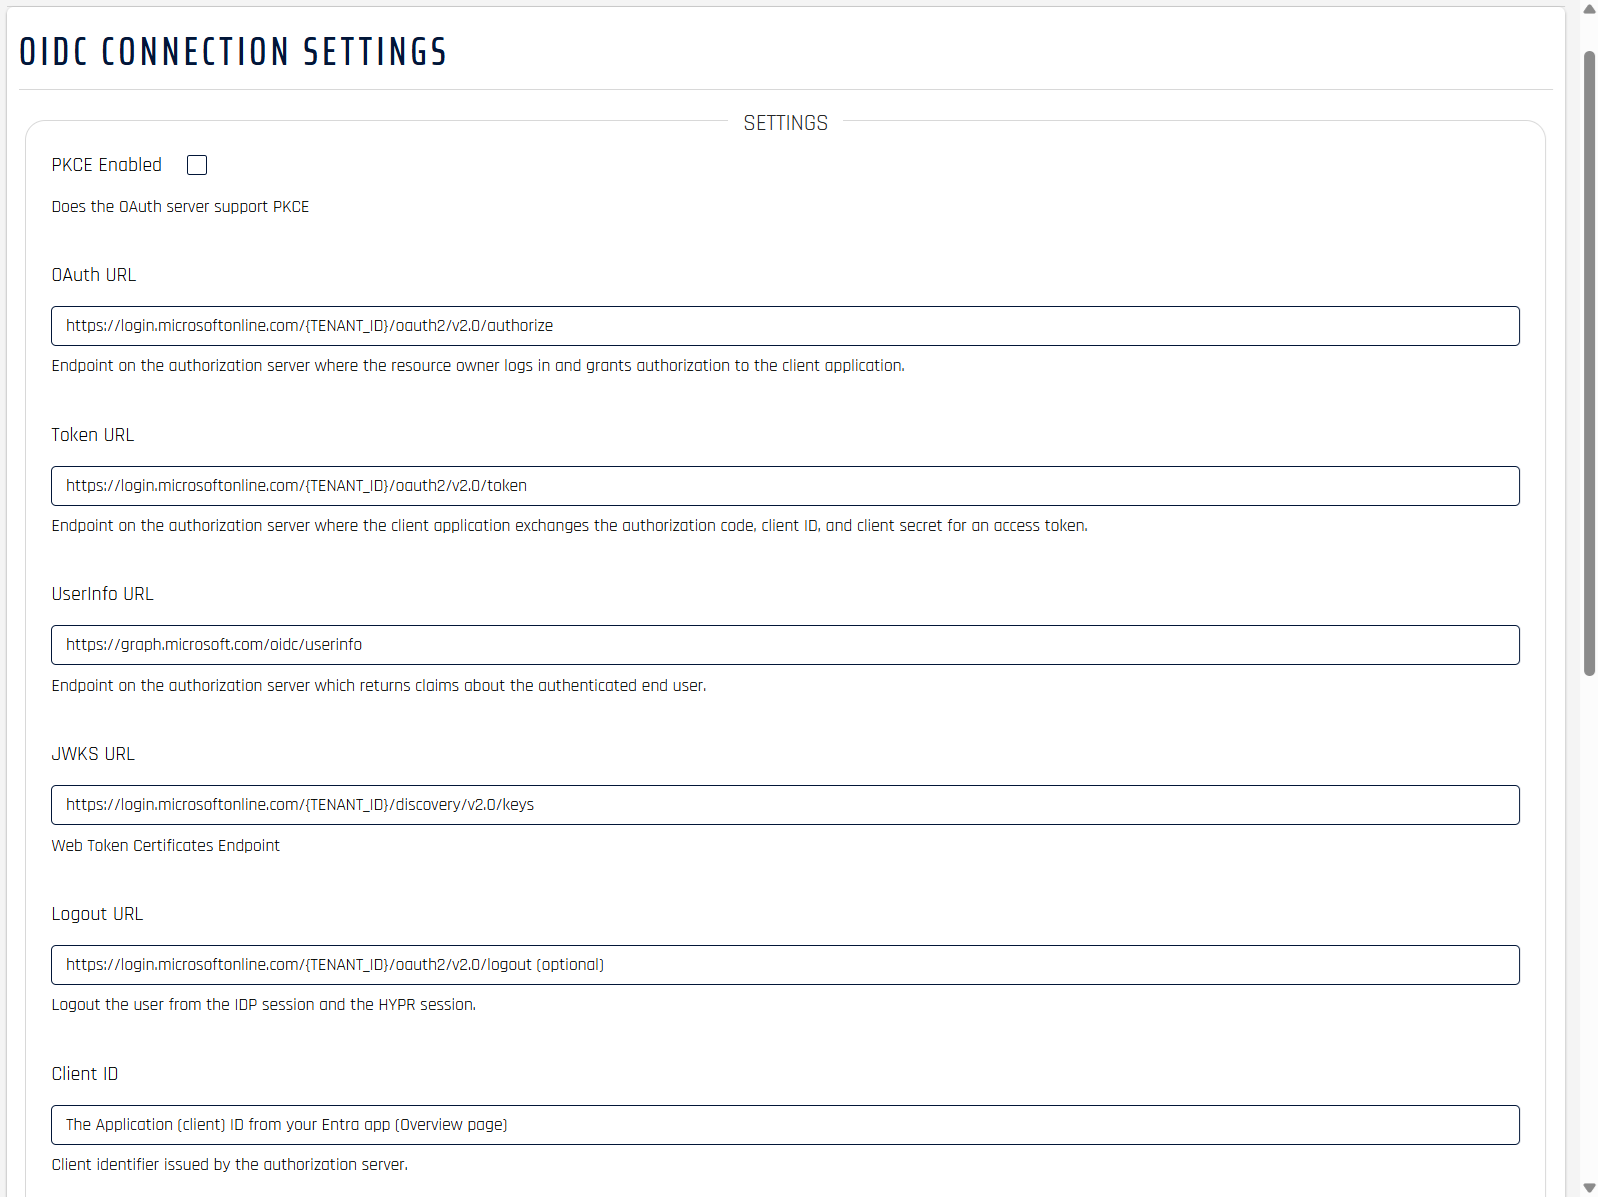
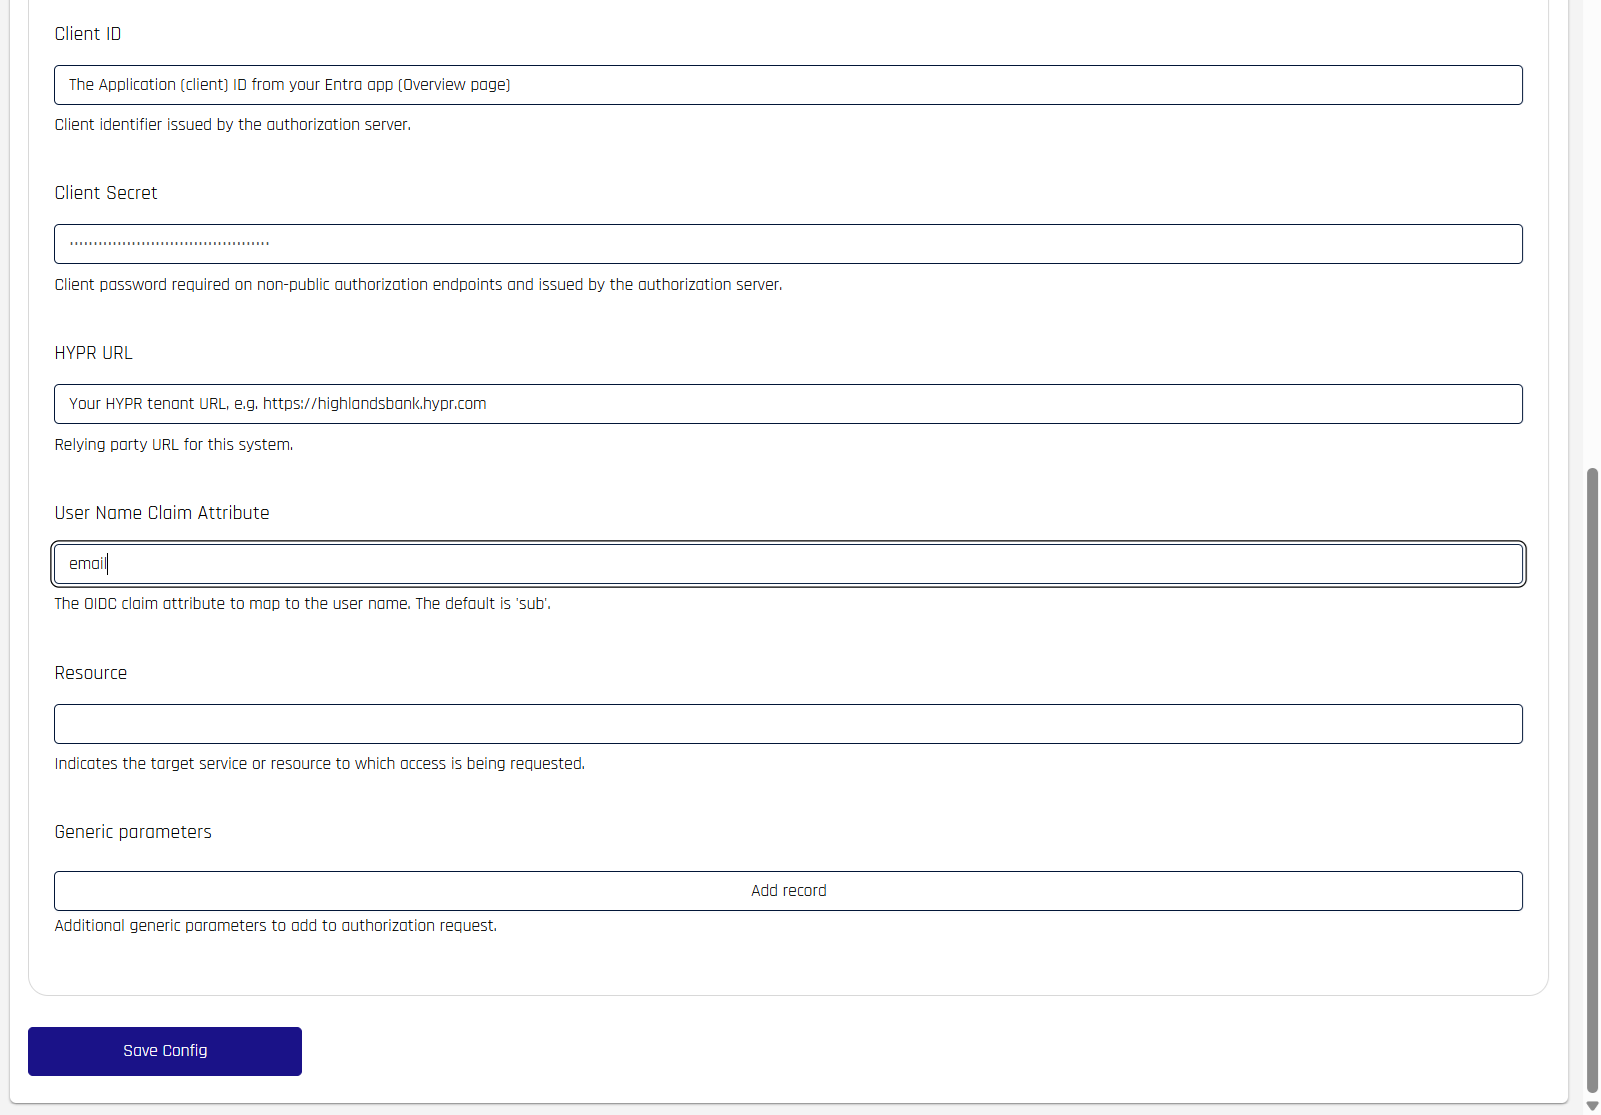
Enter the following values. The endpoint URLs match the Entra OpenID Connect metadata document. Replace
{TENANT_ID}with your Entra Directory (tenant) ID:- PKCE Enabled: leave unchecked
- OAuth URL:
https://login.microsoftonline.com/{TENANT_ID}/oauth2/v2.0/authorize - Token URL:
https://login.microsoftonline.com/{TENANT_ID}/oauth2/v2.0/token - UserInfo URL:
https://graph.microsoft.com/oidc/userinfo - JWKS URL:
https://login.microsoftonline.com/{TENANT_ID}/discovery/v2.0/keys - Logout URL:
https://login.microsoftonline.com/{TENANT_ID}/oauth2/v2.0/logout(optional) - Client ID: the Application (client) ID from your Entra application
- Client Secret: the client secret Value you copied from Entra
- HYPR URL: your HYPR tenant URL
- User Name Claim Attribute:
email - Resource: leave blank
-
Click Save Config.
Access the Helpdesk Portal
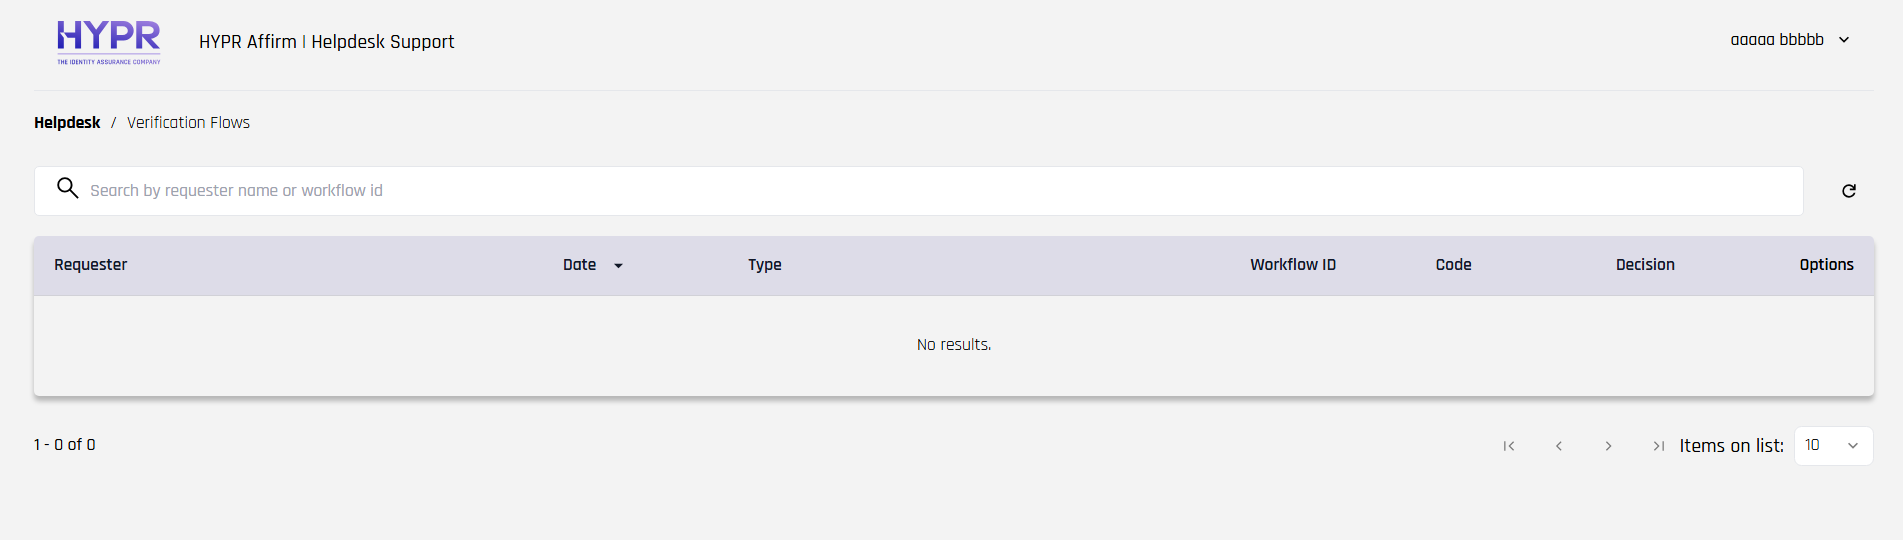
When configuration is complete, Helpdesk agents access the portal at the following URL:
{HYPR_TENANT_URL}/cc/ui/idv/support/helpdesk
Navigating to this URL redirects agents to the Entra ID sign-in page. After authenticating, HYPR reads the affirm_helpdesk_role claim and provisions the agent just in time with the appropriate Viewer or Editor role. No manual user setup is required. An agent whose token carries no valid role claim is redirected to the Access Not Allowed page.
Related
- Okta: OIDC Integration for HYPR Affirm Helpdesk — the same integration using Okta as the OIDC provider
- HYPR Affirm Helpdesk Support — managing Helpdesk users and settings