Entra ID Application Setup for HYPR Affirm
When HYPR Affirm uses Entra ID-based outcomes or requires Entra as a directory source, it calls Microsoft Graph through an Entra app registration. The permissions required depend on which Affirm features you are enabling.
If HYPR Enterprise Passkey is already deployed in your organization, an Entra integration and app registration likely already exist. You can reuse that registration or create a purpose-built one for Affirm. The Enterprise Passkey app registration includes permissions for FIDO2 credential provisioning and group management that Affirm alone does not need. A separate, purpose-built registration limits the scope of access to what Affirm requires.
If Enterprise Passkey is not deployed, create an Entra app registration before configuring any Entra-based Affirm outcomes.
When multiple Affirm integrations require Entra access, you can use a single app registration covering all required permissions or create separate registrations scoped to individual features. See App registration patterns for common approaches including read/write separation and full separation of duties.
Prerequisites
- A Microsoft Entra tenant
- An administrator account with permission to register applications and grant admin consent
Register an Entra application
These steps apply regardless of which Affirm integration you are configuring.
- Sign in to the Microsoft Entra admin center.
- Go to Entra ID > App registrations.
- Click New registration.
- Enter an application name such as
HYPRAffirm. - Select Accounts in this organizational directory only.
- Complete the registration.
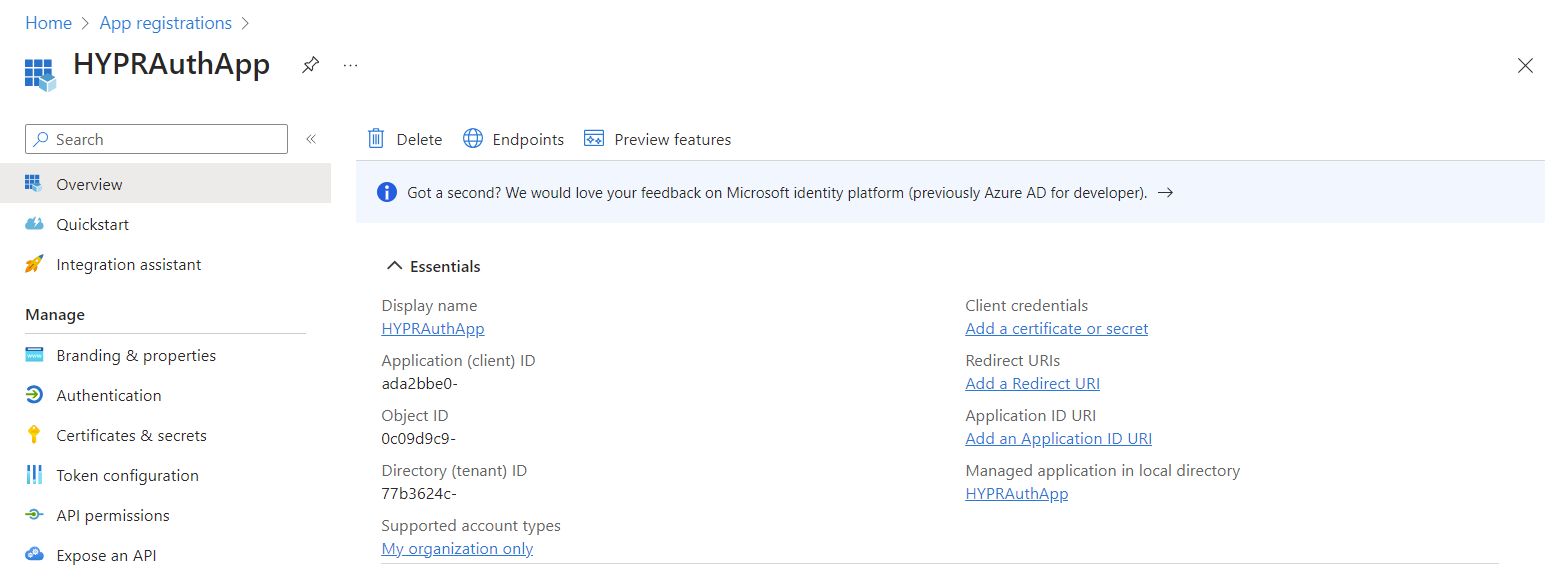
- On the application Overview page, note the Application (client) ID and Directory (tenant) ID. You will enter these values in HYPR Control Center when adding the integration.
API permissions by integration
The default User.Read (Delegated) permission is present on all new app registrations and must be retained. The additional permissions required depend on which Affirm feature you are configuring.
To add permissions, open the app registration, go to API permissions, retain the default User.Read (Delegated), and click + Add a permission. For each permission listed in the sections below, select Microsoft Graph, then select Delegated permissions or Application permissions as indicated in the table, find the permission, and click Add permissions. Delegated and Application permissions must be added in separate + Add a permission flows.
After adding all required permissions, grant admin consent. Entra Verified ID permissions use a different path — see Entra Verified ID below.
Directory source
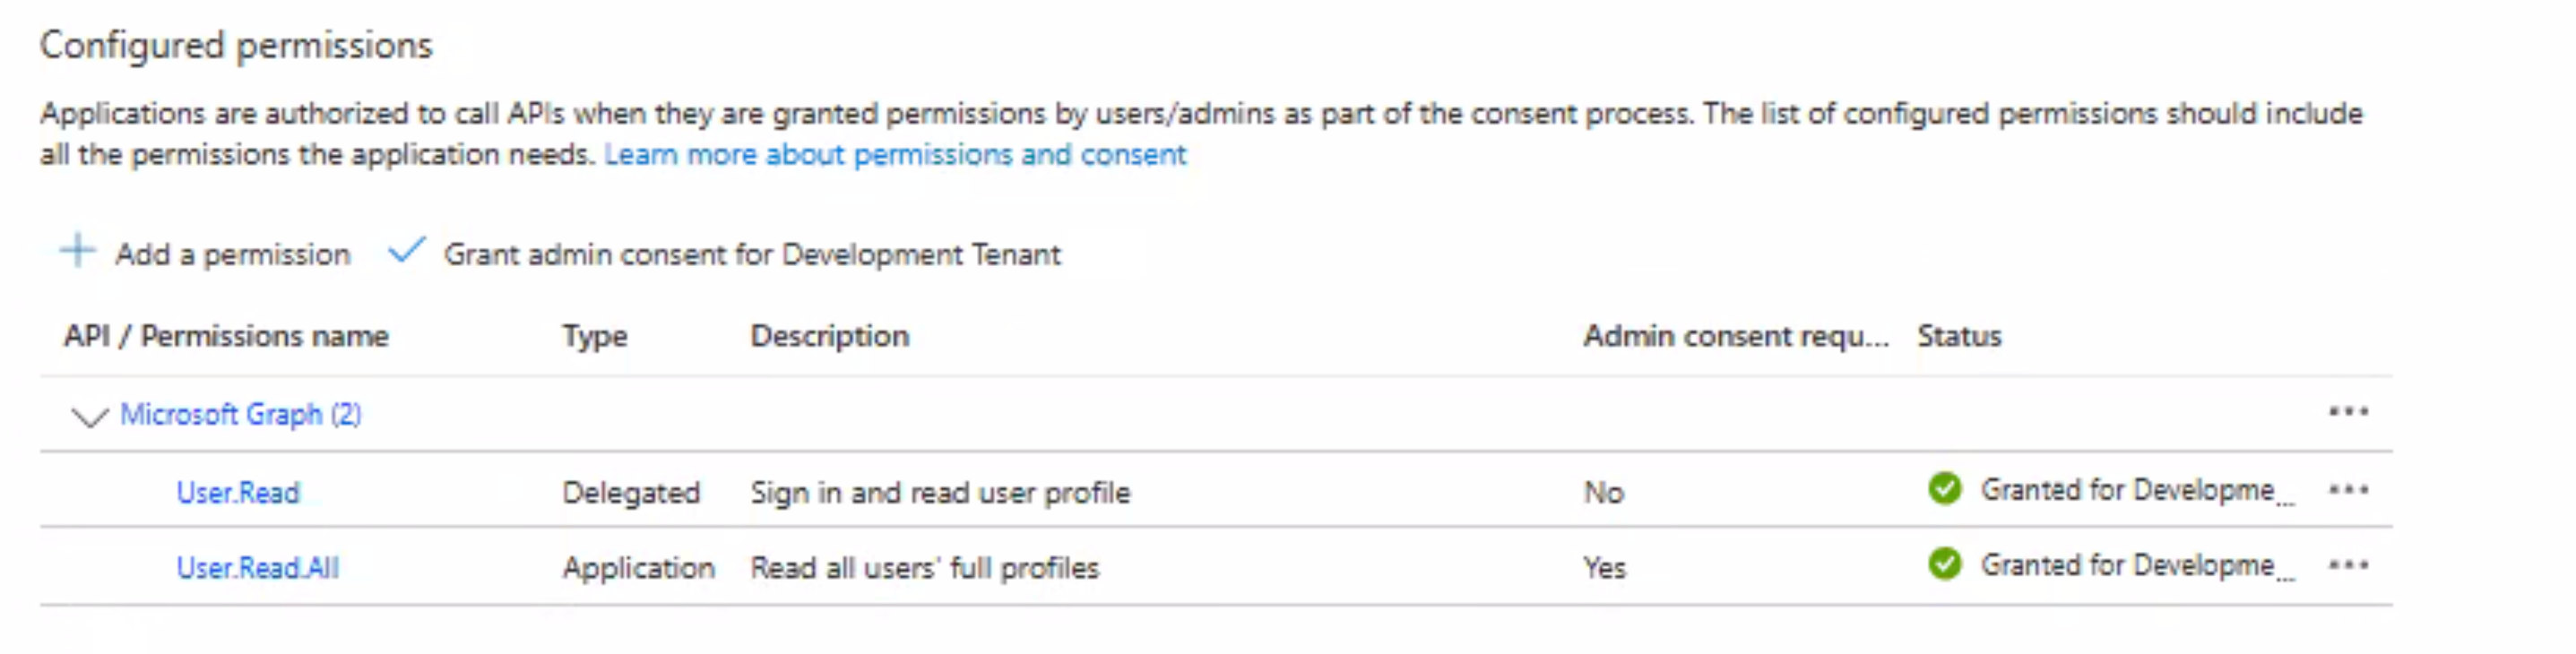
For Affirm to retrieve user profile data from Entra, the app registration requires the following permissions.
| Permission | Type | Purpose |
|---|---|---|
User.Read | Delegated | Sign in and read user profile |
User.Read.All | Application | Read all users' full profiles |
Temporary Access Pass outcome
For Affirm to issue a Temporary Access Pass, the app registration requires the following permissions in addition to User.Read.
| Permission | Type | Purpose |
|---|---|---|
Directory.Read.All | Delegated | Read directory data |
User.Read.All | Application | Read all users' full profiles |
UserAuthenticationMethod.ReadWrite.All | Application | Read and write all users' authentication methods |
Because Directory.Read.All is Delegated and the remaining permissions are Application, these must be added in two separate + Add a permission flows. Add Directory.Read.All first as a Delegated permission:
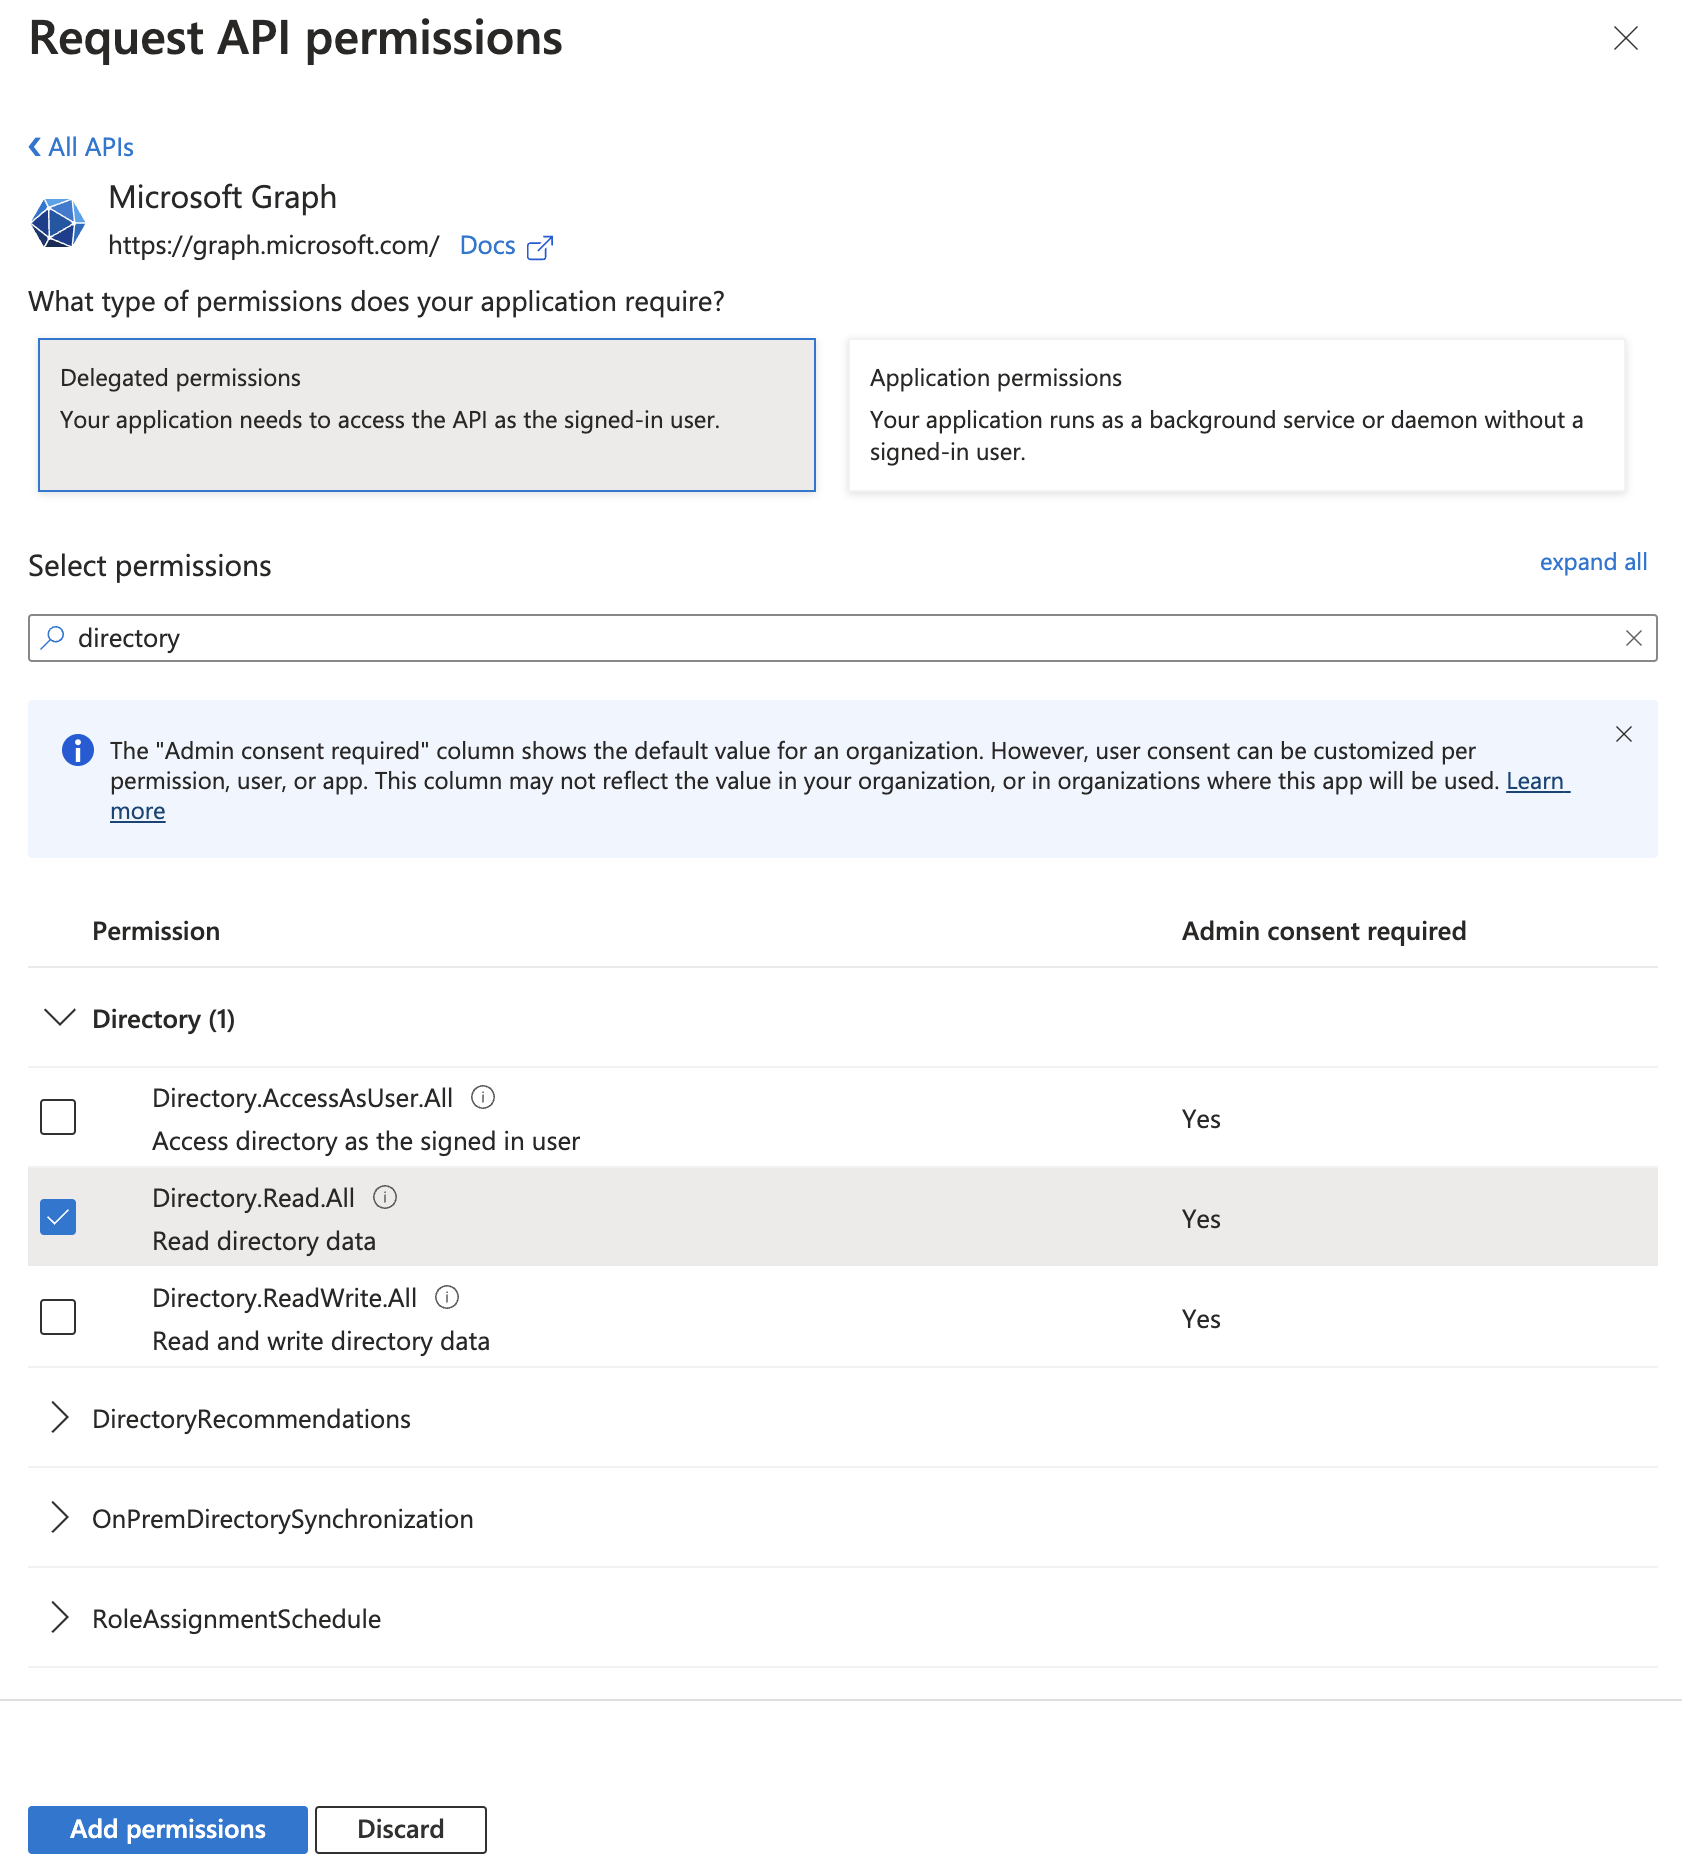
Then add User.Read.All and UserAuthenticationMethod.ReadWrite.All as Application permissions.
Entra ID sometimes skips the permission-type selection screen and assumes Delegated. If this happens, confirm the permission type after admin consent is granted.
If the same app registration will also be used for the Password Reset outcome, add these Application permissions as well:
User-PasswordProfile.ReadWrite.AllUserAuthMethod-Password.ReadWrite.All
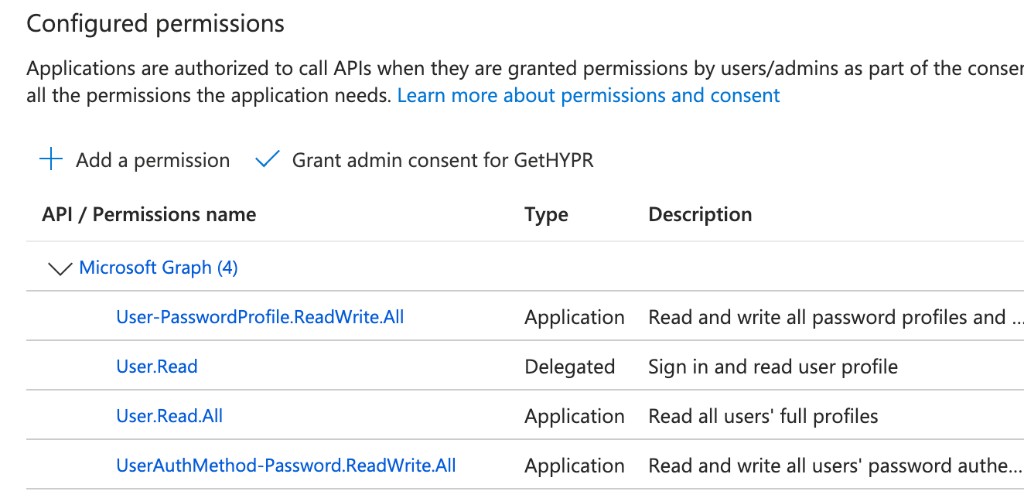
The following shows a configured app registration for TAP with Password Reset permissions also included.
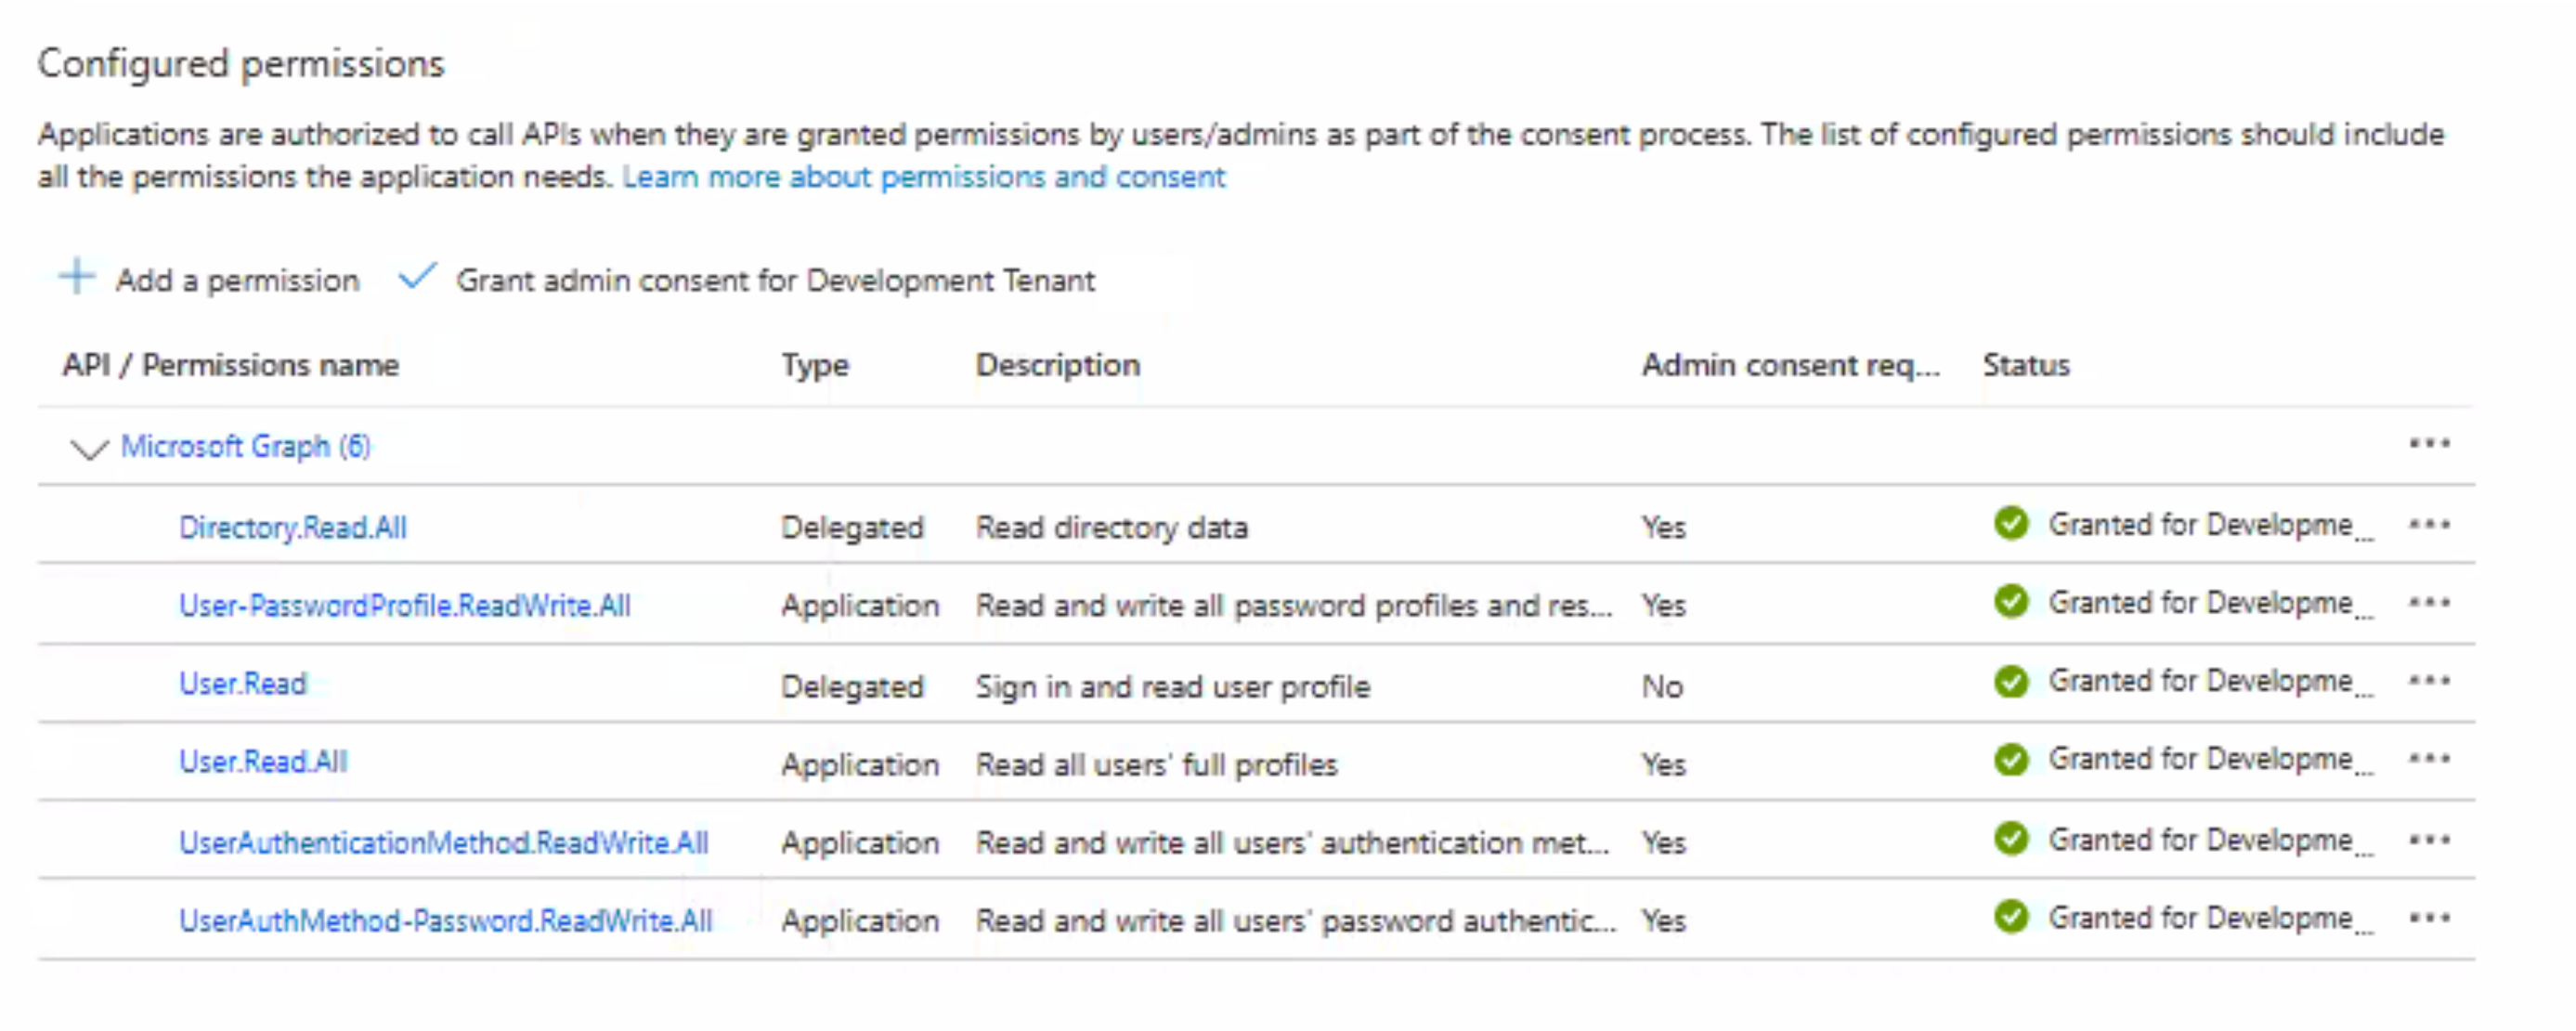
For the complete TAP setup including enabling the TAP policy and HYPR Control Center configuration, see Entra ID Temporary Access Pass (TAP) for HYPR Affirm.
Password reset outcome
For Affirm to reset user passwords, the app registration requires the following permissions in addition to User.Read.
| Permission | Type | Purpose |
|---|---|---|
User.Read.All | Application | Read all users' full profiles |
User-PasswordProfile.ReadWrite.All | Application | Read and write all password profiles |
UserAuthMethod-Password.ReadWrite.All | Application | Read and write all users' password authentication methods |
Entra Verified ID
The required permission depends on which Entra Verified ID action the Affirm outcome performs.
For Affirm to issue Entra Verified ID credentials, the app registration requires:
| Permission | Type | Purpose |
|---|---|---|
VerifiableCredential.Create.IssueRequest | Delegated | Issue Verified ID credentials |
For Affirm to present (verify) Entra Verified ID credentials as a verification step, the app registration requires:
| Permission | Type | Purpose |
|---|---|---|
VerifiableCredential.Create.PresentRequest | Delegated | Present Verified ID credentials |
Both permissions are found under Verifiable Credentials Service Request in the APIs my organization uses tab — not under Microsoft Graph. To add them:
- Open the app registration and go to API permissions.
- Click + Add a permission.
- Click the APIs my organization uses tab.
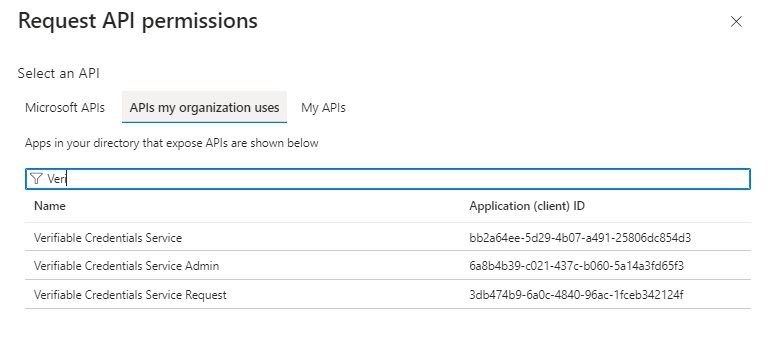
- Use the filter to locate Verifiable Credentials Service Request and click it.
- Select Delegated permissions.
- Select VerifiableCredential.Create.IssueRequest, VerifiableCredential.Create.PresentRequest, or both depending on your workflow, then click Add permissions.
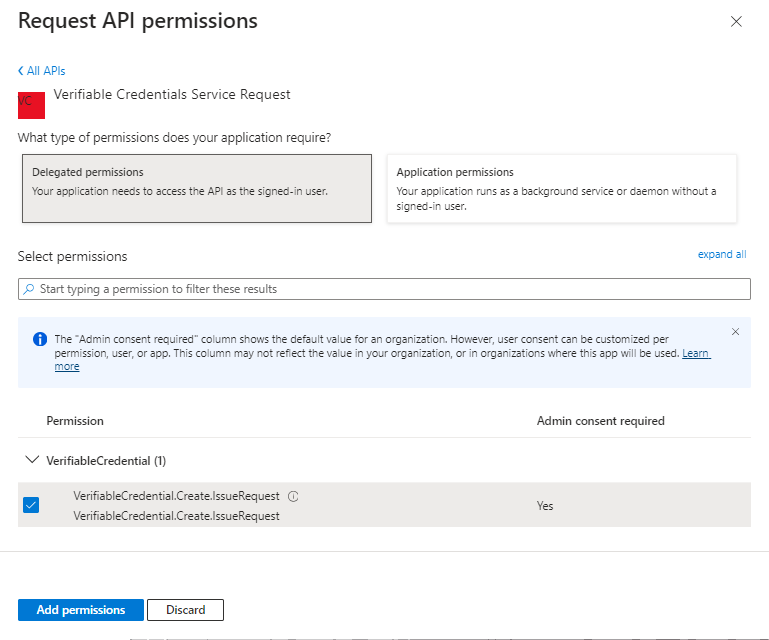
If a workflow both issues and presents credentials, grant both. The following shows a fully configured app registration with Verifiable Credentials permissions.
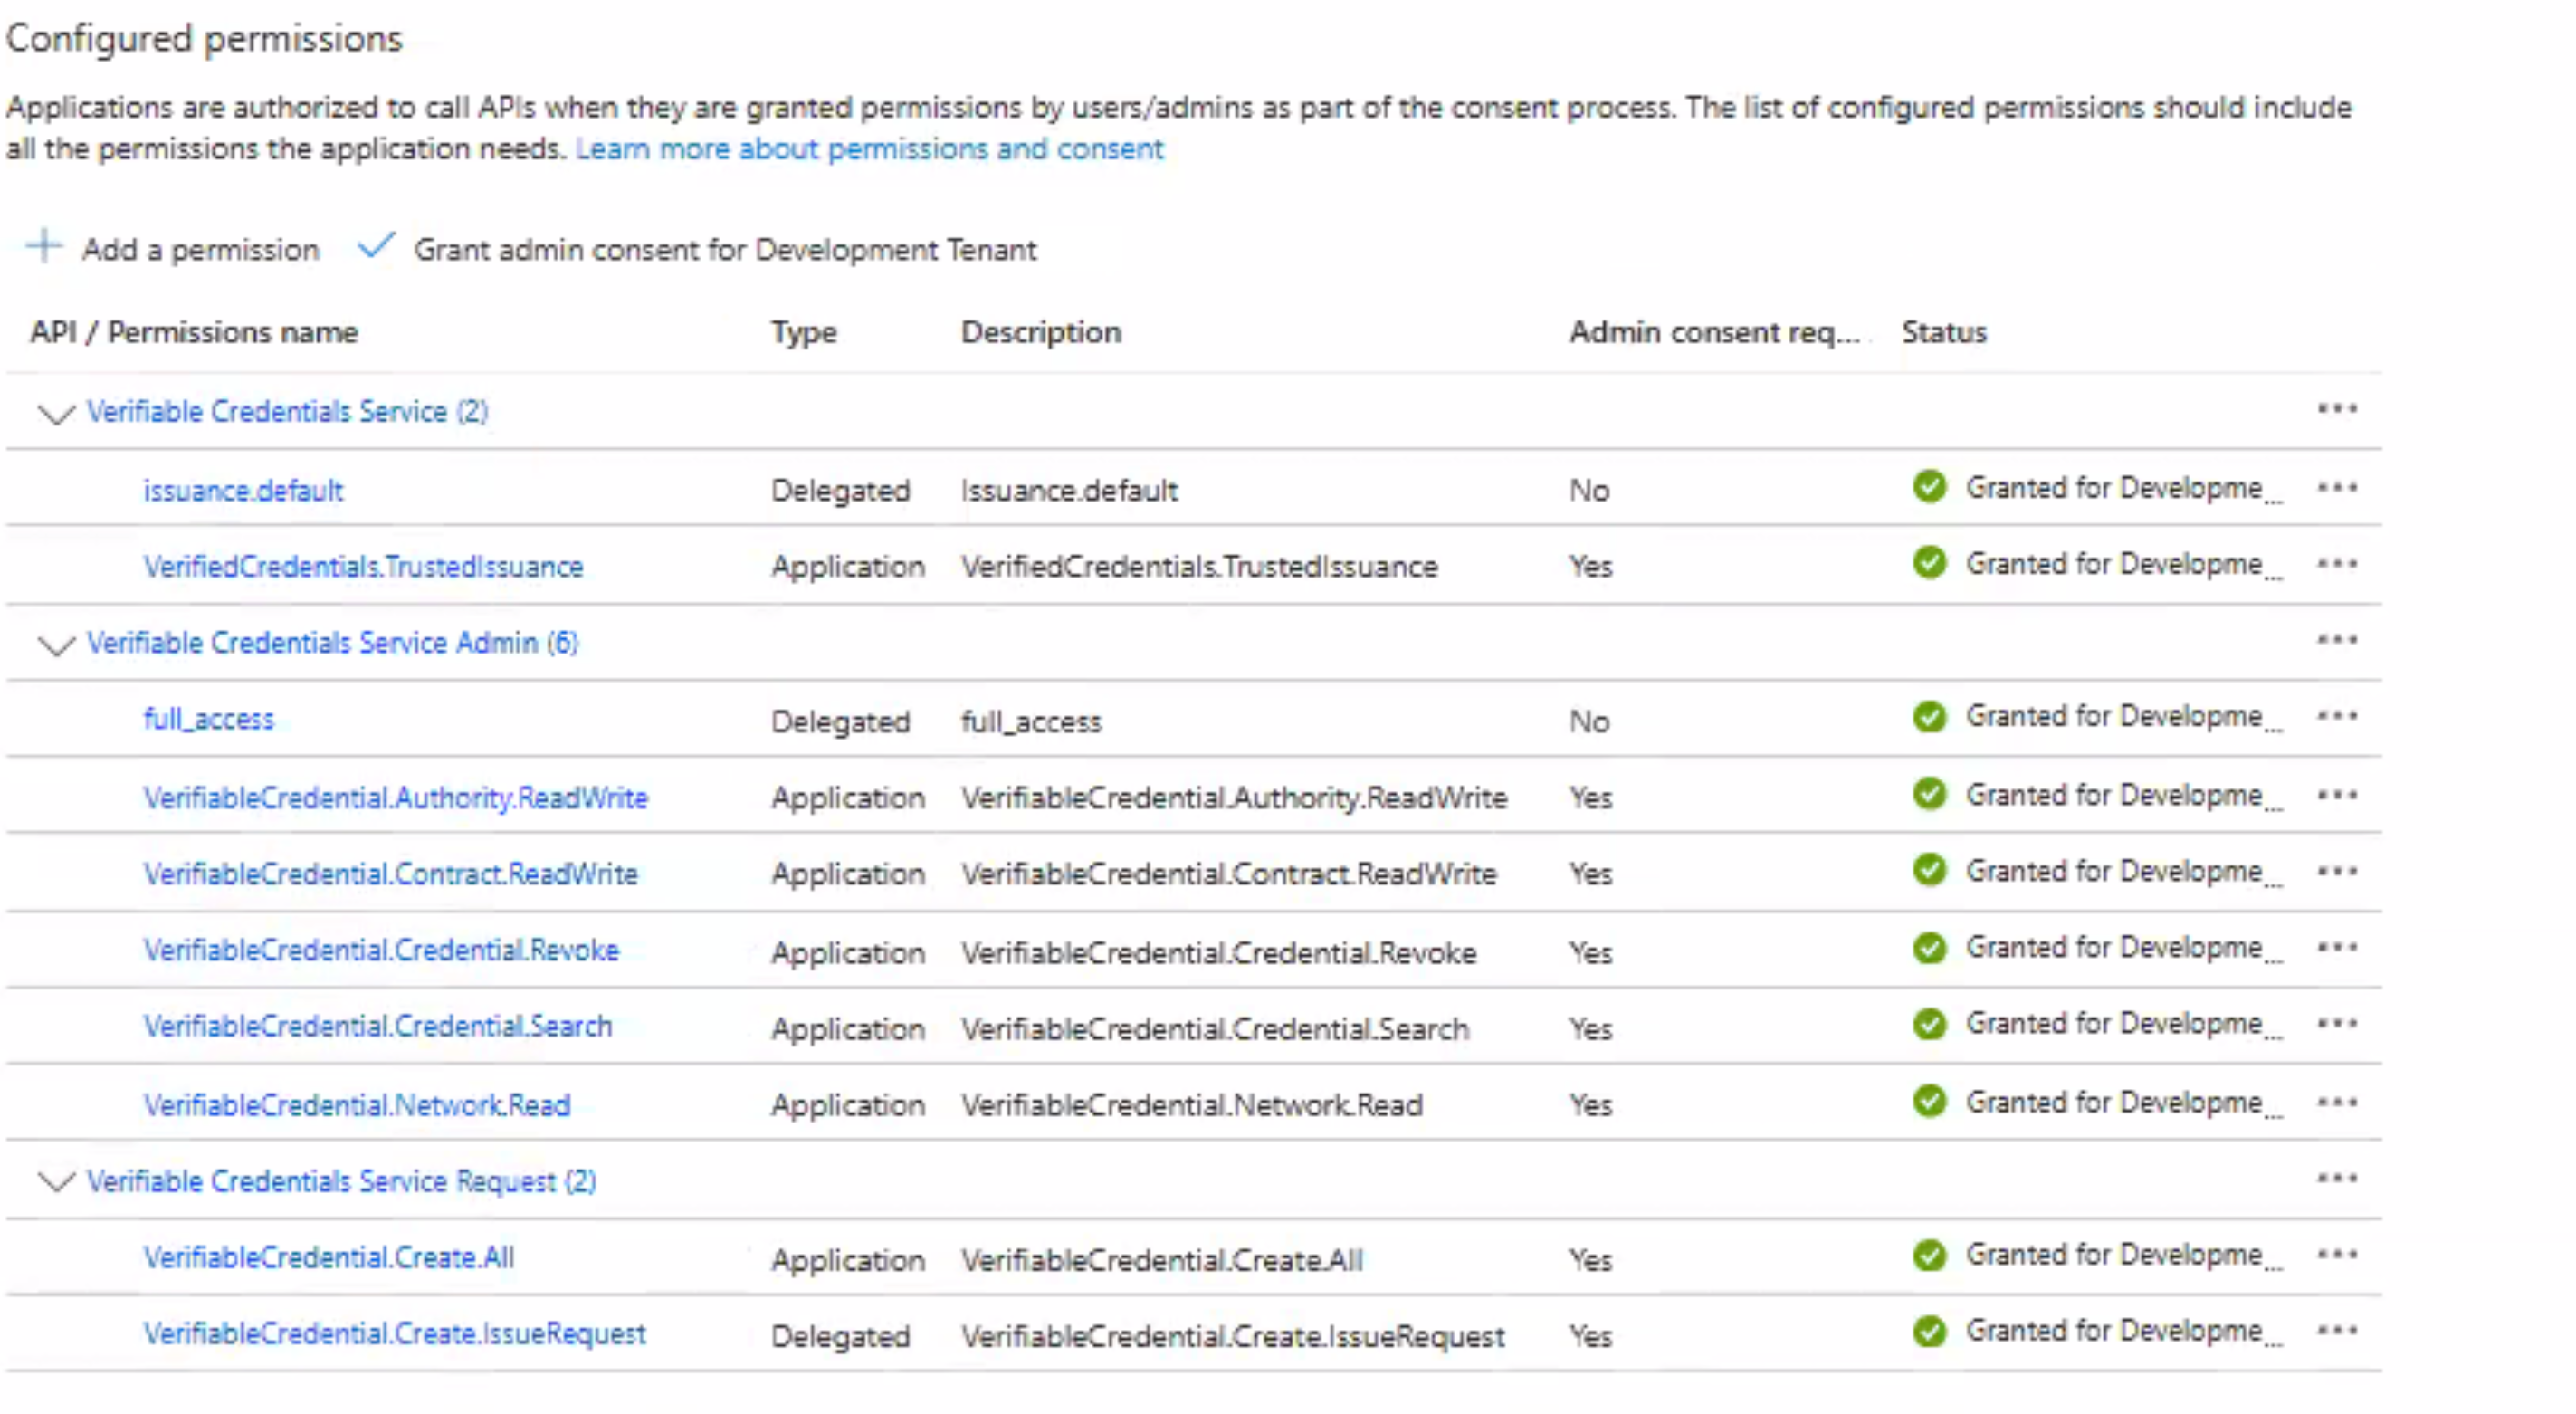
For issuing credentials as an Affirm outcome, see Entra Verified ID for HYPR Affirm. For presenting credentials as a verification step, see Identity Verification via Verified Credentials.
Grant admin consent
After adding all required permissions:
- On the API permissions page, click Grant admin consent for [tenant name].
- Confirm the prompt.
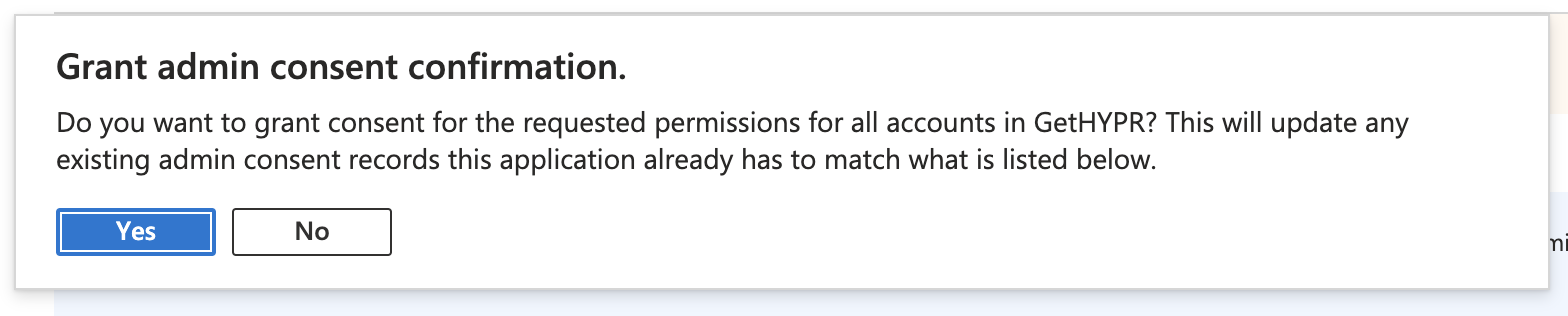
Permissions marked Yes in the Admin consent required column take effect only after admin consent is granted.
Create a client secret
HYPR can authenticate to Microsoft Graph using either a client secret or a client certificate.
- Open the app registration.
- Select Certificates & secrets.
- Click New client secret.
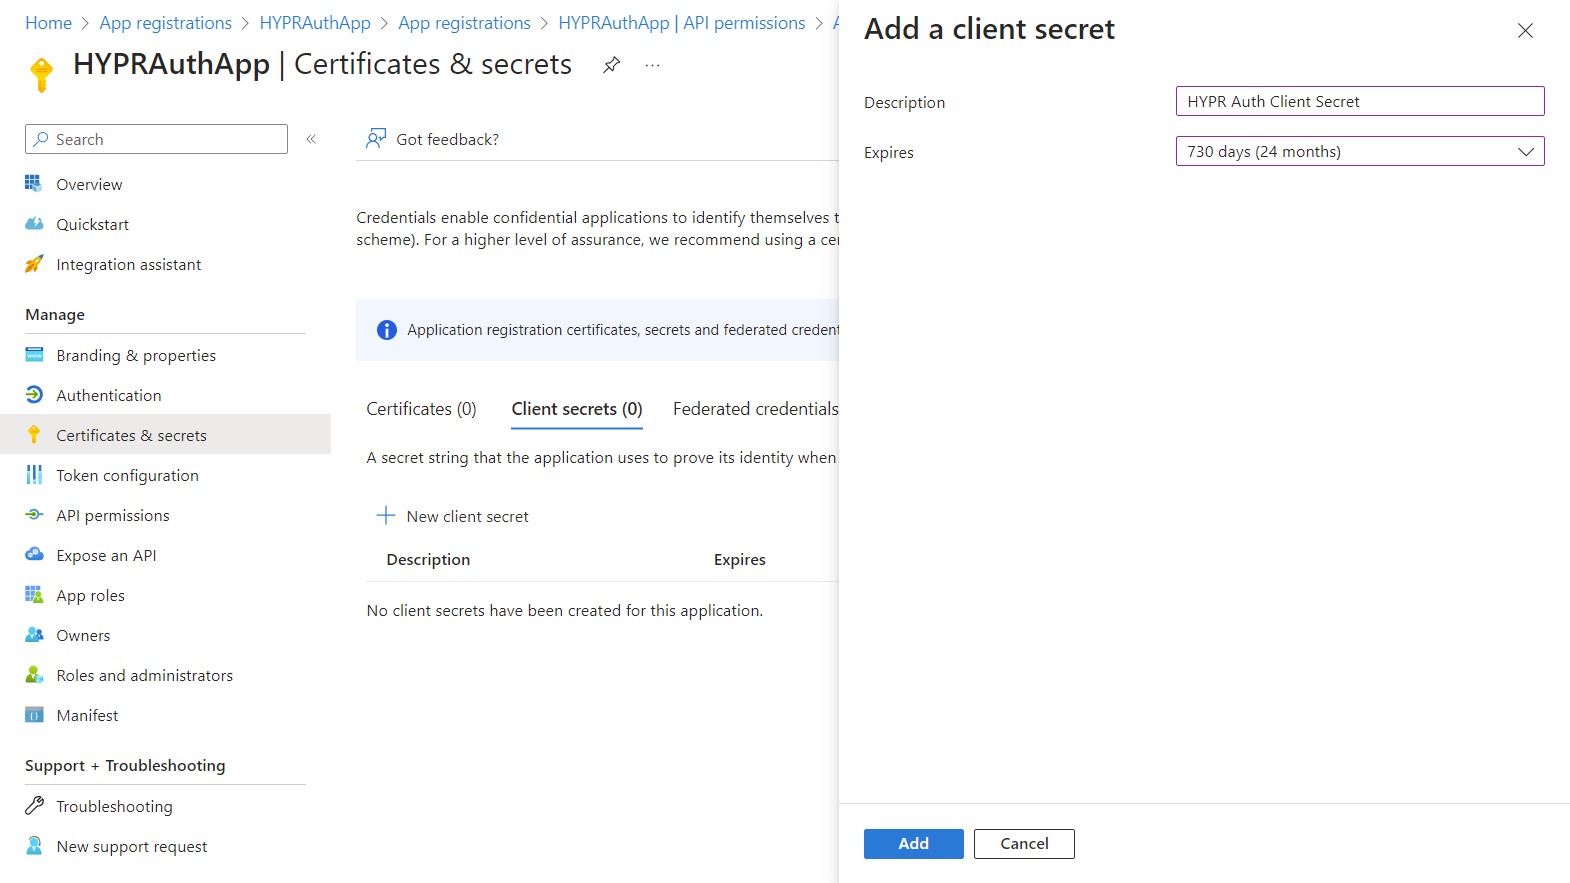
- Enter a description and choose an expiration period.
- Click Add.
- Copy and save the secret value immediately.
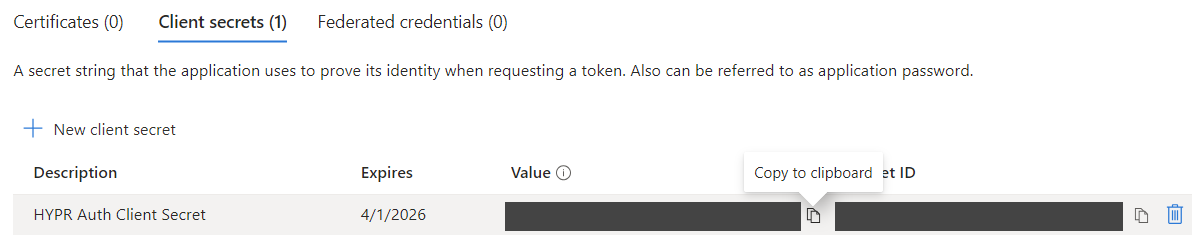
The secret value is only visible immediately after creation. If you navigate away, you must create a new secret.
App registration patterns
When HYPR is deployed without Enterprise Passkey, or when strict permission scoping is required, create separate app registrations for different Affirm operations. The following patterns describe common approaches.
Regardless of which option you choose, any app registration used by HYPR Affirm to retrieve user profile data requires:
User.Read(Delegated)User.Read.All(Application)
Option A: Two app registrations (read and write)
| App name | Permissions | Purpose |
|---|---|---|
HYPRAffirmRead | User.Read (Delegated), User.Read.All (Application) | Retrieve user profile data |
HYPRAffirmWrite | User.Read (Delegated), User.Read.All (Application), Directory.Read.All (Application), UserAuthenticationMethod.ReadWrite.All (Application), User-PasswordProfile.ReadWrite.All (Application), UserAuthMethod-Password.ReadWrite.All (Application), VerifiableCredential.Create.IssueRequest (Delegated), VerifiableCredential.Create.PresentRequest (Delegated) | Issue TAPs, reset passwords, issue and present Entra Verified ID credentials |
The following shows the configured permissions for HYPRAffirmRead.
Option B: Separate Entra Verified ID from TAP and Password Reset
| App name | Permissions | Purpose |
|---|---|---|
HYPRAffirmRead | User.Read (Delegated), User.Read.All (Application) | Retrieve user profile data |
HYPRAffirmTAP | User.Read (Delegated), User.Read.All (Application), Directory.Read.All (Application), UserAuthenticationMethod.ReadWrite.All (Application), User-PasswordProfile.ReadWrite.All (Application), UserAuthMethod-Password.ReadWrite.All (Application) | Issue TAPs, reset passwords |
HYPRAffirmVC | VerifiableCredential.Create.IssueRequest (Delegated), VerifiableCredential.Create.PresentRequest (Delegated) | Issue and present Entra Verified ID credentials |
The following shows the configured permissions for HYPRAffirmTAP.
Option C: Full separation of duties
Create a separate app registration for each distinct Affirm operation.
| Operation | Permissions |
|---|---|
| Retrieve user profile data | User.Read (Delegated), User.Read.All (Application) |
| Issue a Temporary Access Pass | Directory.Read.All (Delegated), UserAuthenticationMethod.ReadWrite.All (Application) |
| Reset a user password | User-PasswordProfile.ReadWrite.All (Application), UserAuthMethod-Password.ReadWrite.All (Application) |
| Issue an Entra Verified ID credential | VerifiableCredential.Create.IssueRequest (Delegated) |
| Present an Entra Verified ID credential | VerifiableCredential.Create.PresentRequest (Delegated) |
Related
- Entra ID Temporary Access Pass (TAP) for HYPR Affirm — enabling the TAP policy, HYPR Control Center setup, and Affirm workflow configuration
- Entra Verified ID for HYPR Affirm — configuring Entra Verified ID credentials as an Affirm outcome
- Verified Credentials as a verification step — presenting Entra Verified ID credentials inside an Affirm flow
- Configuring HYPR Affirm — author and configure verification flows