Signing In to the Console
Everyone who uses the HYPR AgentPass™ console signs in first. The role attached to their identity then decides what they can do. See Roles and Permissions.
There are two ways in:
- Sign in with SSO, through your own identity provider, using OpenID Connect (OIDC). This is how your team signs in day to day.
- Recovery administrator, a username and password held by the gateway itself. It exists so you can reach the console to set SSO up, and so you still have a way in if your identity provider is unreachable or SSO gives you the wrong role.
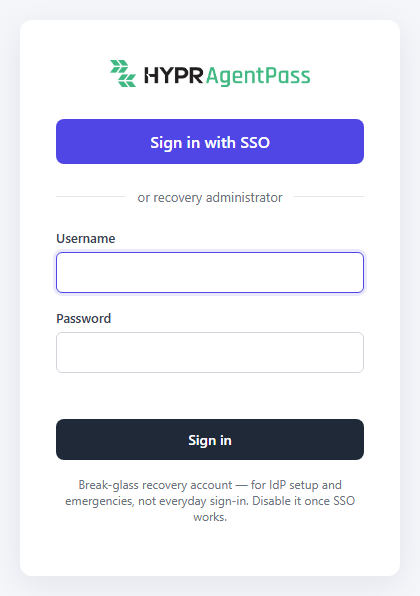
The sign-in page follows your tenant's default theme. See Themes.
Once you are signed in, the Help menu in the top bar shows the build your tenant runs. See Help and Update Notices.
Recovery Administrator
The recovery administrator signs in under or recovery administrator. The page describes it as a break-glass account, for IdP setup and emergencies, not everyday sign-in. On the Console SSO (OIDC) card, the console calls the same account the bootstrap local admin login. Its credentials come from the invitation that set up your tenant. See Sign In for the First Time.
Repeated failed sign-ins temporarily pause recovery administrator sign-in, both for the account and for the source of the attempts. The pause lifts by itself, and successful sign-ins never count toward it. While it is in effect, the sign-in and password-change pages show Too many failed attempts.
The recovery administrator works in the Admin role, and stays available after you turn on SSO. Once SSO is working, keep its credentials in a protected break-glass location.
Sign In for the First Time
When HYPR sets up your tenant, its first administrator receives an email inviting them to administer the tenant on AgentPass. Accepting the invitation creates your tenant's recovery administrator account, which you use to set up SSO.
- In the email, click Review invitation. The link works once, and expires after 7 days.
- Click Accept invite.
- Click Copy credentials, and save the username and password in your organization's password manager. AgentPass generates them, and shows the password only once.
- Click Configure IdP. The sign-in page opens.
- Under or recovery administrator, enter the username and password, and click Sign in. Until SSO is on, this is the only way in, so the page shows no SSO button.
You are now signed in as Admin. Next, connect the console to your identity provider, so your team can sign in with SSO.
If the page says This invite link isn't valid, the link has expired, was already used, or a newer invitation replaced it. Ask whoever sent it for a new one. The credentials from an earlier invitation keep working until you accept the new one.
Connect the Console to Your Identity Provider
You configure console SSO in the console itself, with no restart and no configuration files. AgentPass works with any provider that supports OpenID Connect. For a walkthrough with Microsoft Entra ID, see Console Sign-In With Microsoft Entra ID.
You need Settings: Edit to change these settings, and Roles: Manage to map role values. The Admin role has both.
A new tenant starts with no role mappings. Anyone who signs in with SSO before a value is mapped to a role gets the default role, Supervisor, and cannot reach Settings or the Roles tab. That includes you. Map your administrators' identity provider value to the Admin role first, while you are still signed in as the recovery administrator. If SSO already gave you the wrong role, see Recover Access After SSO.
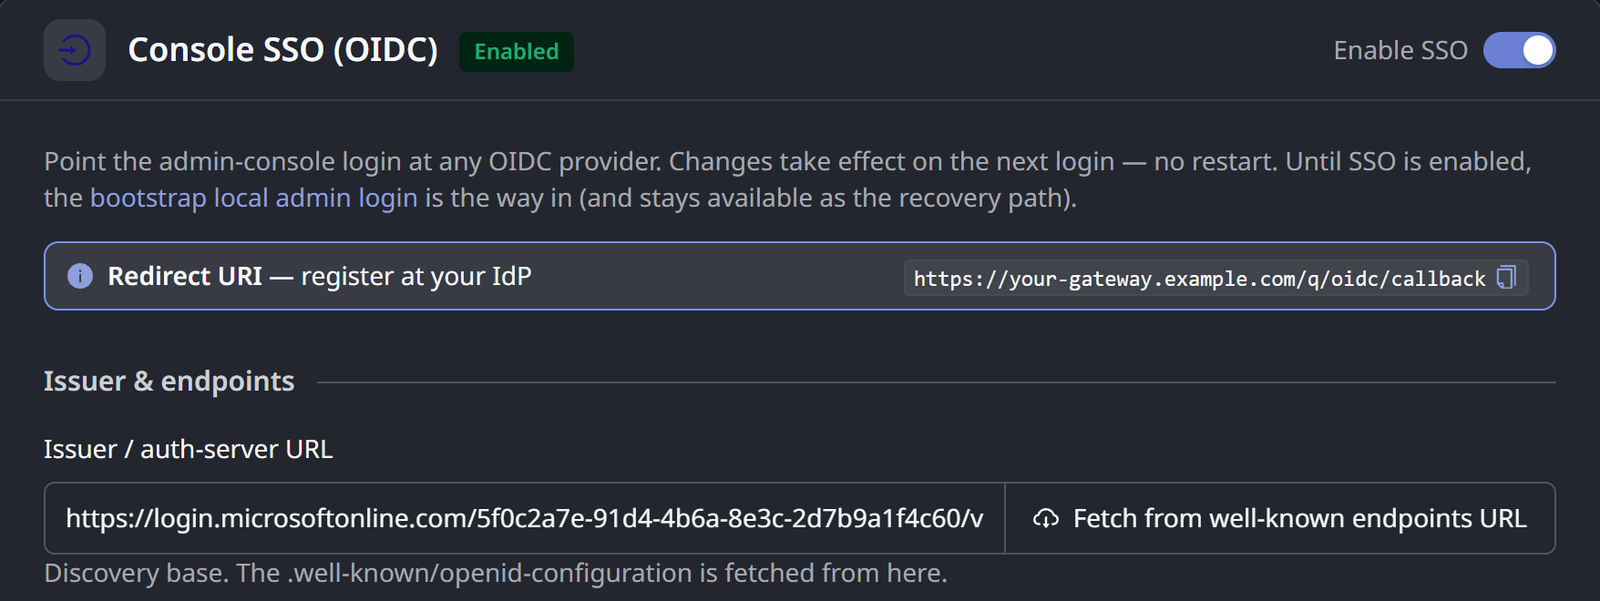
- Open Settings → Gateway settings, click the Authentication tab, and find Console SSO (OIDC).
- Register the redirect URI. The card shows the Redirect URI the gateway uses. Register that exact URI with your provider, as an allowed redirect for the application you create there. The provider refuses the sign-in otherwise.
- Enter the Issuer / auth-server URL. AgentPass reads the provider's published configuration from it, and fills in the authorization, token, userinfo, JWKS and end-session endpoints. Deployments behind a proxy that rewrites those addresses can enter the endpoint fields directly. If the provider is on your internal network, turn on Allow private network addresses. See Allow a Private Network Address.
- Enter the Client ID and Client secret of the registered application. The secret is stored encrypted and write-only, and saves independently of the other fields. A public client using PKCE needs no secret. Leave PKCE required on for providers that expect it.
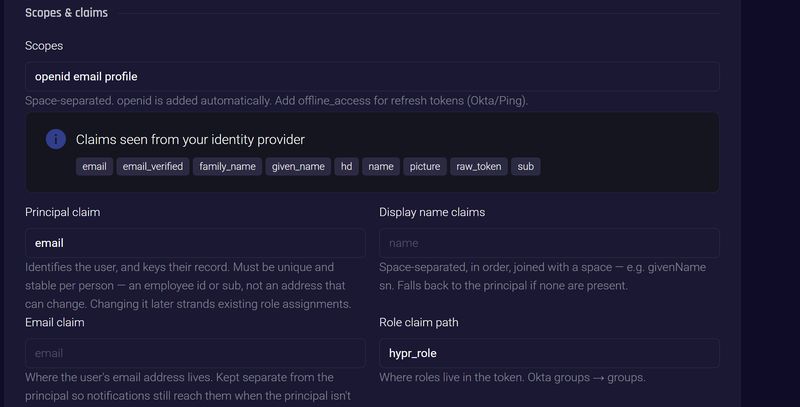
- Set scopes.
openidis added for you. Addoffline_accessif sessions should renew without a fresh sign-in. See Session Length. - Map the claims that describe the person signing in. The claim settings are described in the following table.
- Click Save settings.
- Map your administrators' role value to the Admin role. On the Roles tab of People, click View on the Admin role, and under Identity provider, add the value your provider sends for administrators, such as the name of their directory group. Click Save in that section. See Populate Roles From Your Identity Provider.
- Turn on Enable SSO. It becomes available once the issuer URL, client ID and client secret are saved, or the issuer URL and client ID with PKCE required on. AgentPass checks the provider before it enables SSO.
| Setting | What it does |
|---|---|
| Principal claim | Identifies the user, and keys their record in AgentPass. The default is email. Choose something unique and stable per person, such as an employee ID or sub, not an address that can change |
| Display name claims | The claims whose values make up the name shown in the console, in order, joined with a space |
| Email claim | Where the email address lives. Kept separate from the principal, so notifications reach a mailbox even when the principal is not an address |
| Role claim | The claim that carries each person's roles or groups. See Populate Roles From Your Identity Provider |
Request only the scopes your provider permits for the application. A strict provider rejects the whole sign-in, not just the one scope. Decide on the principal claim before you roll out SSO. Changing it later strands the role assignments keyed to the old identifier.
To confirm the setup, sign out, click Sign in with SSO, and check that the account menu shows the Admin role.
After a successful sign-in, AgentPass lists the claims it observed in the token, so you can pick claim names from what your provider sends.
Populate Roles From Your Identity Provider
Set Role claim to the claim that carries each person's roles or groups, such as groups, or a nested path such as realm_access/roles. The default is hypr_role.
Then map the claim's values to roles, on each role's page. A person gets every role one of their values is mapped to. Matching is exact and case-sensitive. See Map Identity Provider Values to a Role.
Two rules settle a disagreement between the token and the console:
- Roles assigned in the console win. Later sign-ins do not change an administrator's direct assignment.
- Anyone else with no mapped value gets the default role, Supervisor, so a new person can sign in and be useful before a directory change lands.
On upgrade, AgentPass maps each existing role to its own name, exactly as written. People whose identity provider sends a role name in different capitalization get the default role until you add that value to the role.
Recover Access After SSO
If you signed in with SSO and the console gives you only the Supervisor role, your identity provider value is not mapped to the Admin role yet. Use the recovery administrator to fix it:
- Click your name at the top right, and click Sign out.
- On the sign-in page, under or recovery administrator, enter the recovery administrator's username and password, and click Sign in.
- On the Roles tab of People, click View on the Admin role.
- Under Identity provider, add the value your provider sends for administrators, and click Save in that section.
- Sign out, and sign in again with Sign in with SSO.
The account menu now shows the Admin role. If it still does not, check the Role claim setting and the exact value your provider sends: matching is case-sensitive. After a successful sign-in, the Console SSO (OIDC) card lists the claims it observed.
Session Length
Maximum session length caps how long a console session lasts before the user signs in again. Sessions can end sooner if your provider issues no refresh token, which is why offline_access matters for providers that require it.
Compatibility and Troubleshooting
Leave these settings alone unless your provider needs them.
| Setting | When to use it |
|---|---|
| Client authentication method | How the client secret is sent. Several providers expect client_secret_basic |
| Token audience | When your provider verifies an audience value on the access token |
| Extra authorization params | Extra values your provider expects on the authorization request, such as an audience or prompt behavior |
| Token issuer override | When the provider's issuer value differs from the issuer URL, as in some proxied deployments |
If a sign-in fails, turn on Log login request/response bodies. The gateway records the exchange in its logs, with sensitive values redacted. Turn it off again once you are done.
Related
- Roles and Permissions — what each role can do once someone is signed in
- Console Sign-In With Microsoft Entra ID — the same setup, step by step, for Entra ID
- Gateway Settings — every tab of the settings page, including Authentication
- Themes — brand the sign-in page and the console