Console Sign-In With Microsoft Entra ID
This page connects the HYPR AgentPass™ console to Microsoft Entra ID, so your team signs in with their Entra ID accounts. It applies the general steps in Signing In to the Console to Entra ID.
You need:
- Permission to register applications in your Microsoft Entra ID tenant
- The recovery administrator credentials, to sign in to the console while SSO is off. See Recovery Administrator
A new tenant has no role mappings, so anyone who signs in with SSO before you map a value to the Admin role gets the default role, Supervisor. Map the value before you turn on SSO. If you are already locked out of Settings, see Recover Access After SSO.
Register AgentPass in Entra ID
- Copy the redirect URI from the console. Open Settings → Gateway settings, click the Authentication tab, and find the Redirect URI under Console SSO (OIDC). It has the form
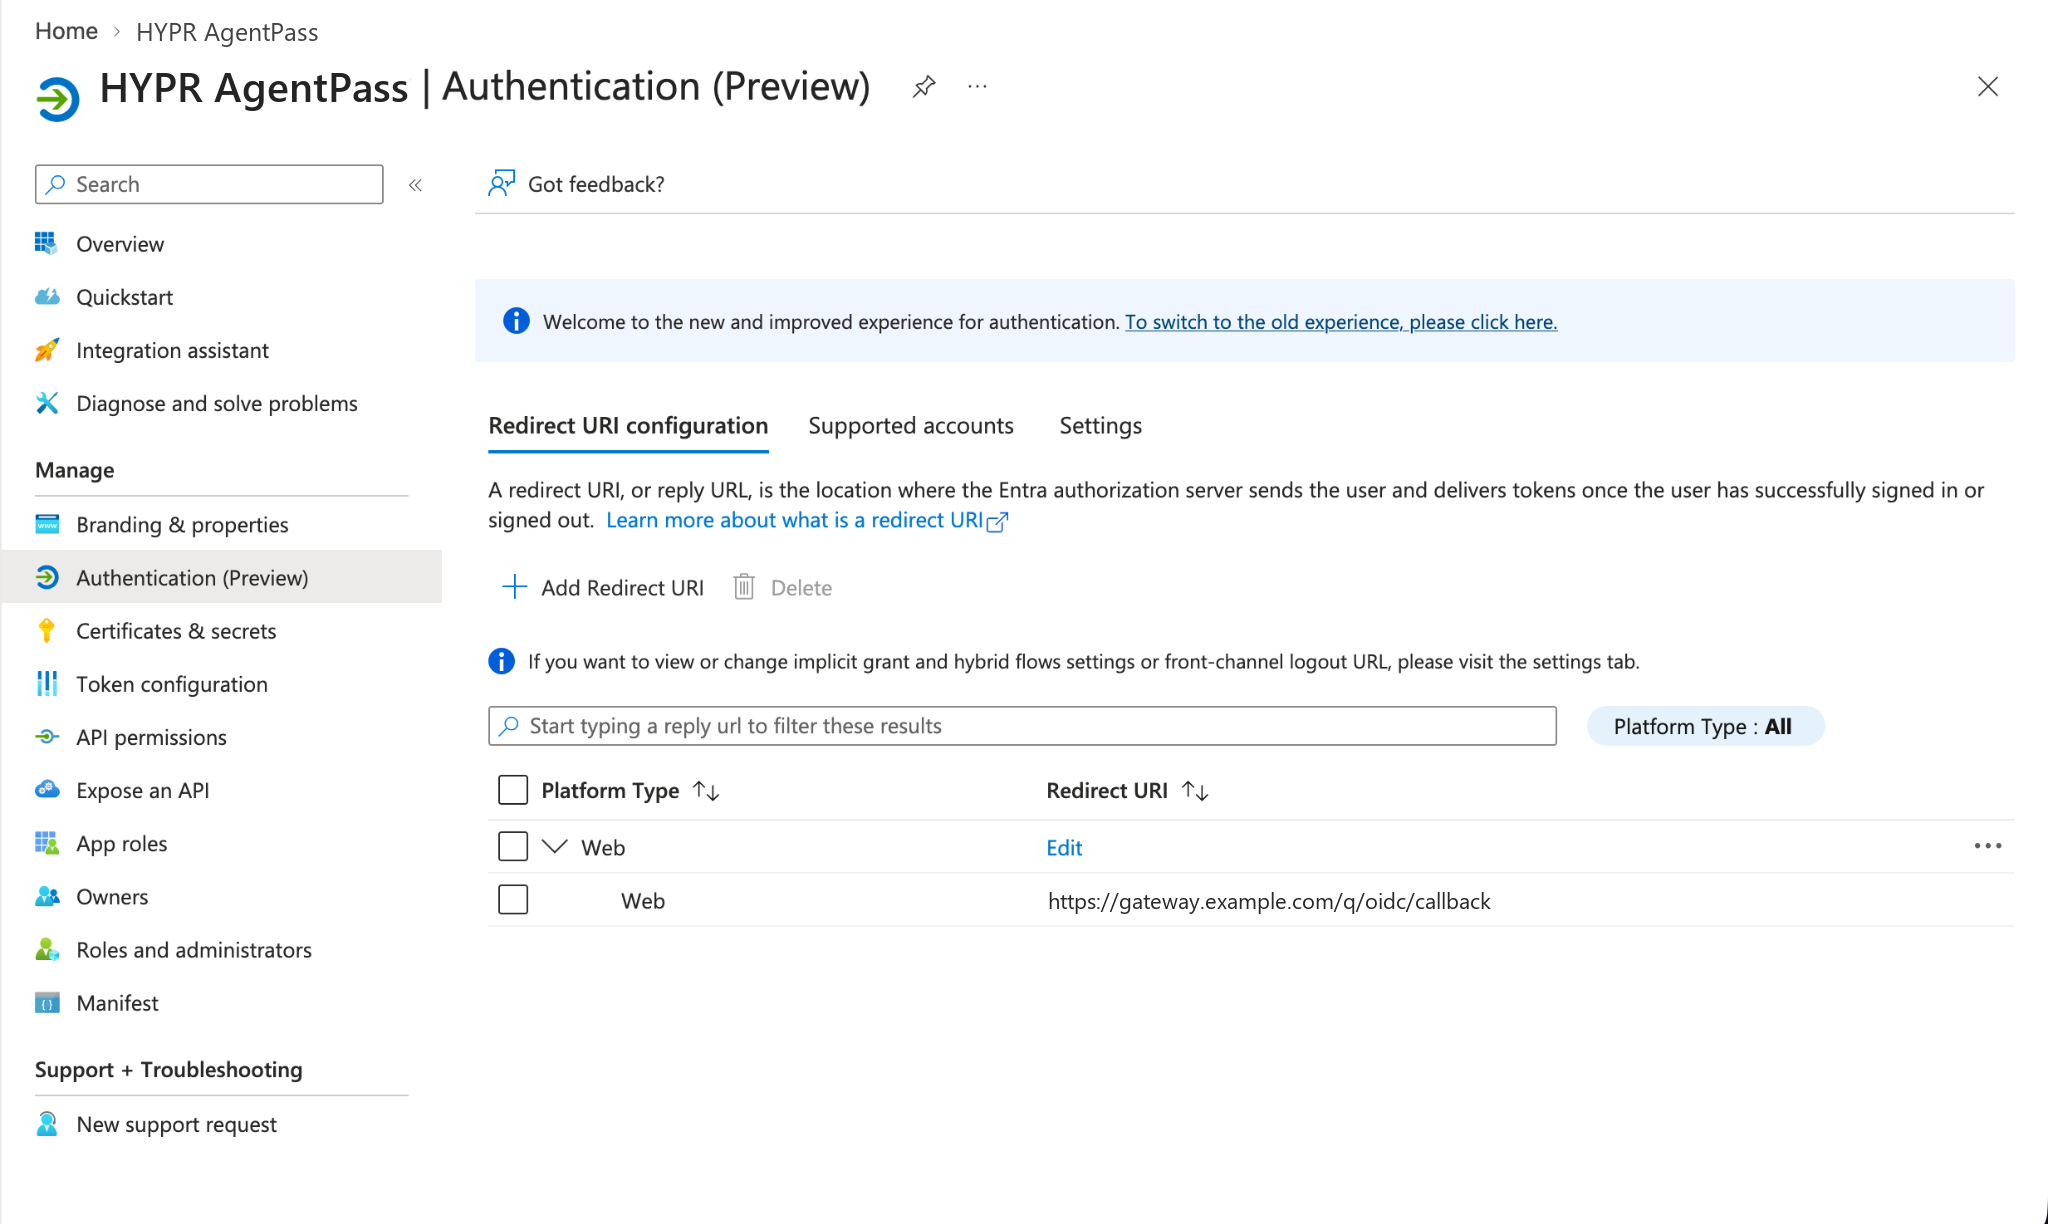
https://<your-gateway-host>/q/oidc/callback. - In the Entra ID portal, go to Entra ID → App registrations → New registration.
- Name the app, for example
HYPR AgentPass. - For Supported account types, choose Accounts in this organizational directory only.
- Under Redirect URI, choose the Web platform, and paste the redirect URI from the console.
- Click Register.
- On the app's Overview page, copy the Directory (tenant) ID and the Application (client) ID.
Add the Email Claim
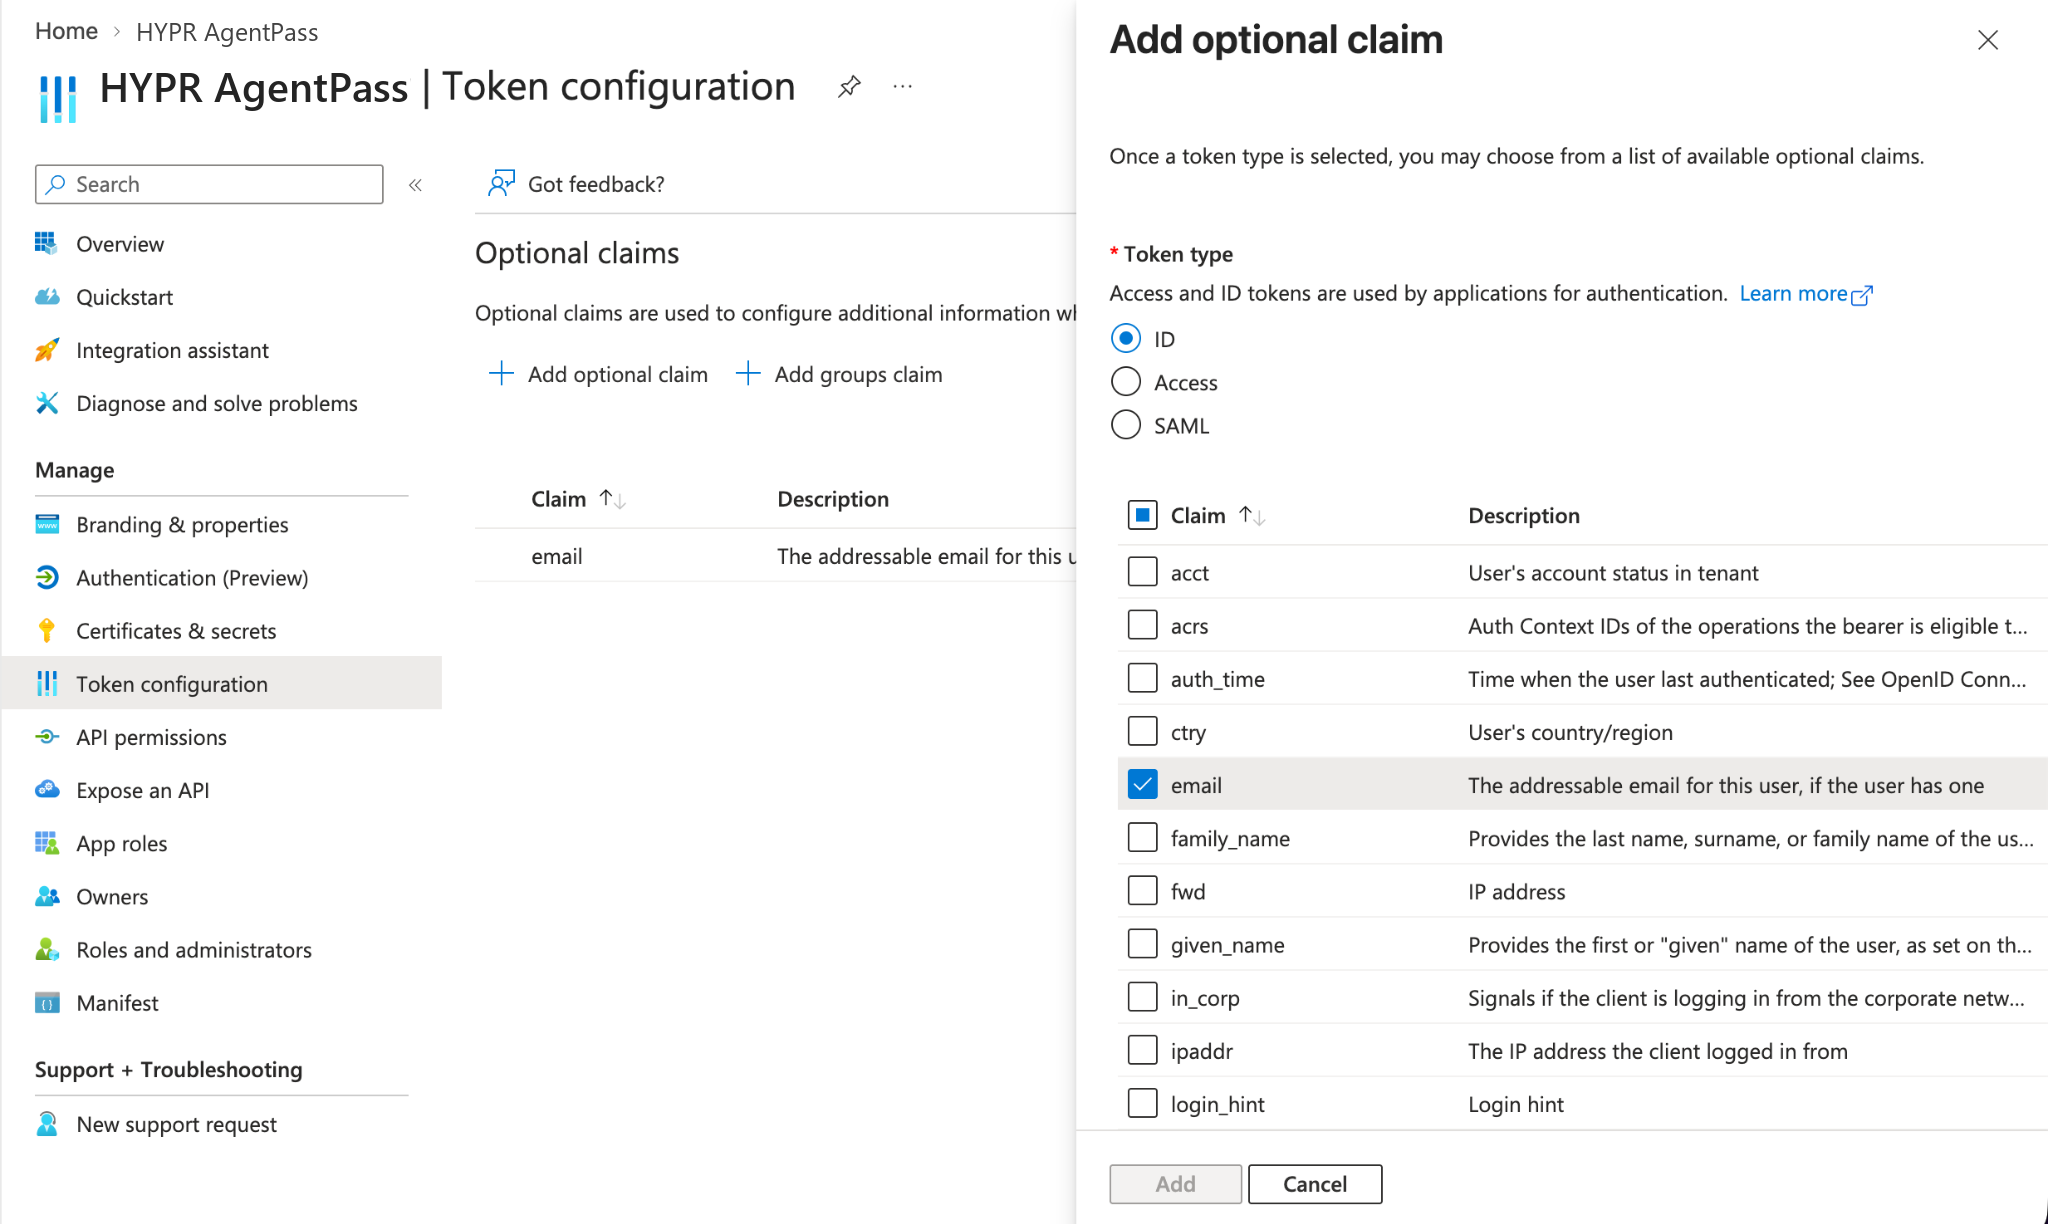
AgentPass identifies the person signing in by the console's Principal claim, and sends their email to the address in its Email claim. Both are email until you change them. Entra ID adds the email claim to the ID token only when you ask for it, so add it even if you choose a different principal claim later.
- In the app, go to Token configuration and click Add optional claim.
- For Token type, choose ID.
- Select email, and click Add.
Create a Client Secret
- In the app, go to Certificates & secrets → Client secrets → New client secret.
- Enter a description, choose an expiry, and click Add.
- Copy the secret's Value. Entra ID shows it only once.
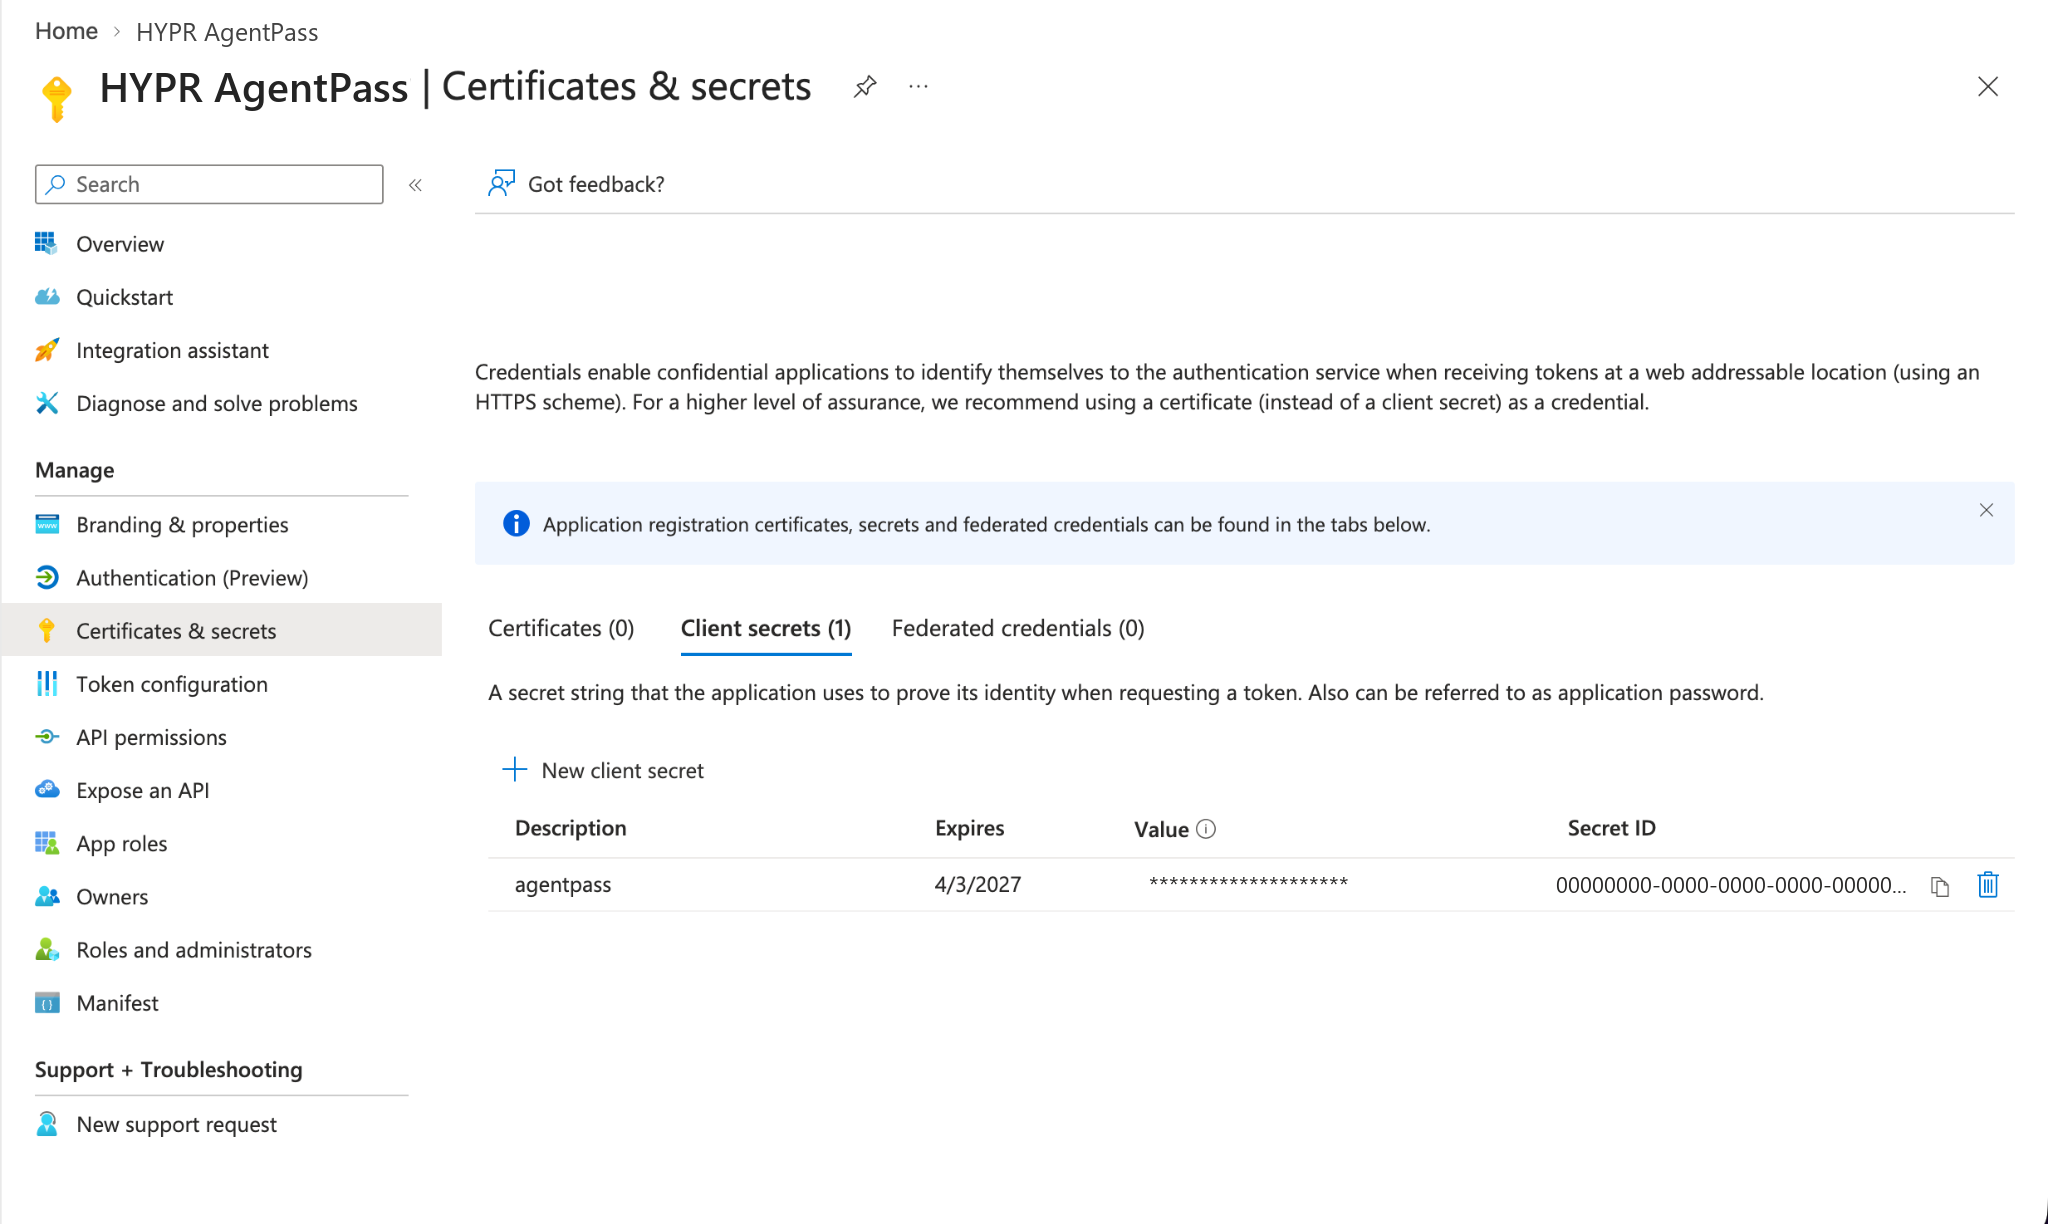
The secret stops working when it expires. Before then, create a new one in Entra ID, and replace it in the console.
Connect the Console
- In the console, open Settings → Gateway settings, click the Authentication tab, and find Console SSO (OIDC).
- In Issuer / auth-server URL, enter
https://login.microsoftonline.com/<directory-tenant-id>. - Click Fetch from well-known endpoints URL. AgentPass fills in the Entra ID endpoints.
- In Client ID, enter the application (client) ID.
- In Client secret, paste the secret value, and click Save secret.
- Check the claims. Email claim
emailand Display name claimsnamematch Entra ID. For Principal claim, choose an identifier that stays the same for each person, such assub, before your team starts signing in. See Connect the Console to Your Identity Provider. - Click Save settings.
- Set Role claim to the Entra ID claim that carries your administrators' group or role, and map its value to the Admin role. See Connect the Console to Your Identity Provider.
- Turn on Enable SSO.
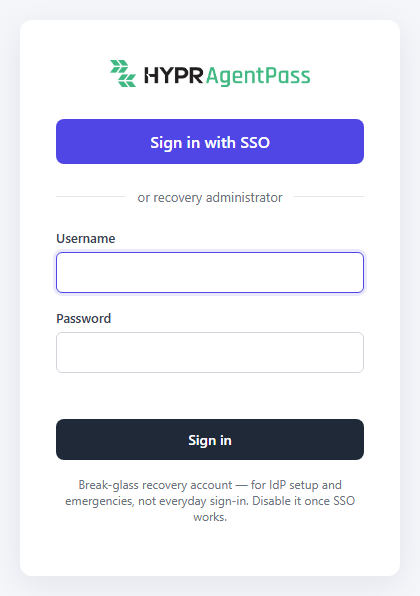
The sign-in page now offers Sign in with SSO. Sign in with an Entra ID account to confirm the connection before your team uses it. The recovery administrator stays available if Entra ID is unreachable.
Next Steps
- Give people roles. Each person gets the default role, Supervisor, until you map role values from Entra ID or assign roles in the console. See Populate Roles From Your Identity Provider.
- Set how long a console session lasts. See Session Length.
Related
- Signing In to the Console — every console SSO setting, for any OpenID Connect provider
- Gateway Settings — every tab of the settings page, including Authentication