Creating and Managing Verification Flows
Verification Flows
Affirm verification flows define what happens when a requester is asked to prove their identity — the sequence of verification steps, which applications the flow applies to, and how outcomes are handled. This guide walks through creating a workflow, managing existing workflows, assigning applications, and configuring workflow-level retry limits.
Creating a Workflow
-
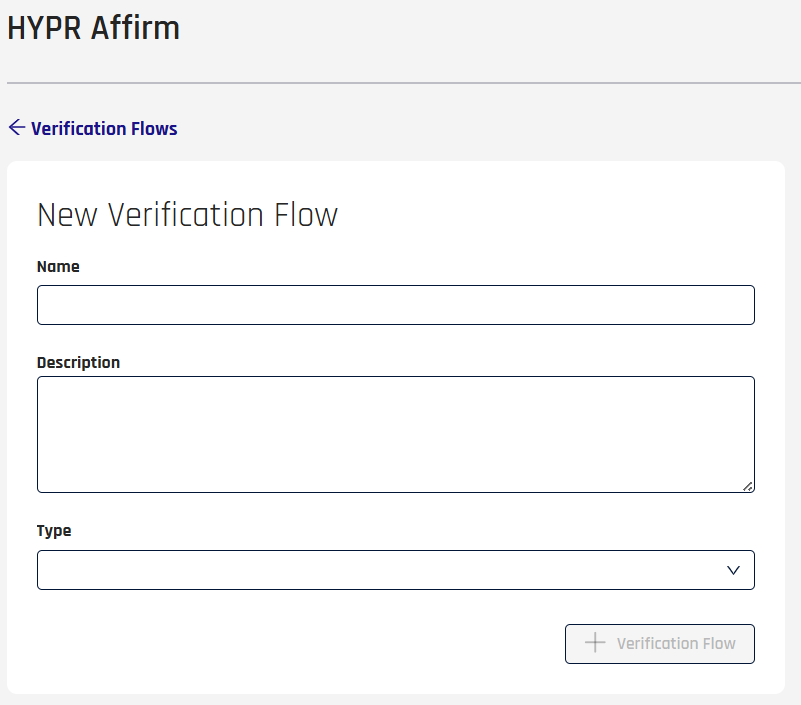
Click the + Verification Flow button at the top right. The New Verification Flow dialog opens.
-
Give the workflow a Name and add a Description (optional).
Not Too DescriptiveThe Description field accepts alphanumeric characters and the following special characters: `~!@#$-_+.,
-
Select a workflow Type.

- Onboarding — new employee verification
- Recovery Flow — verify existing employees who have a new device
- CC Admin — assign to administrators to Affirm their access to Control Center
- Only one CC Admin workflow can exist at a time
- CC Admin must use Redirect to Device Manager to register a new login method as an outcome
- New members of CC Admins will be forced into an Affirm flow (assuming Affirm is enabled)
- Custom — for flows that don't fit the three standard types; allows free choice of outcome and assigned application
-
Click + Verification Flow to save. Control Center returns to the Affirm Verification Flows tab with the new flow listed.
Managing Workflows
The Verification Flows tab lists every workflow configured for the tenant. From here you open individual flows, copy the flow URL given to requesters, and see active vs inactive status at a glance.
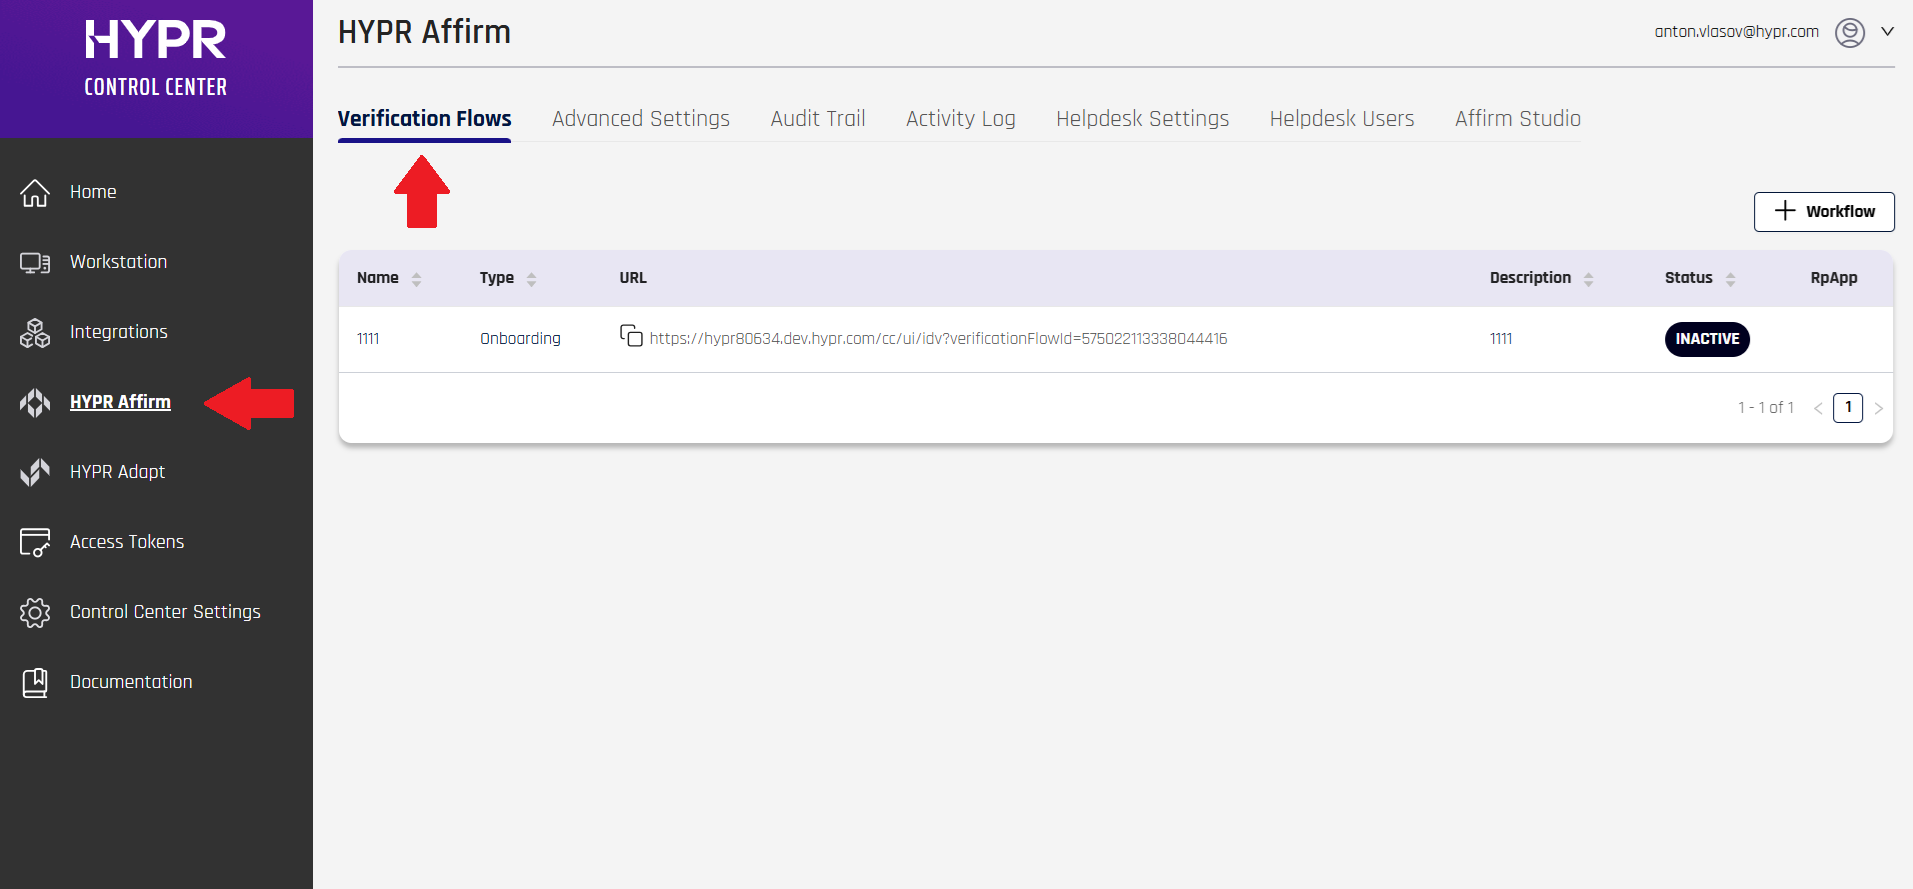
The columns shown in the list:
| Field | Description |
|---|---|
| Name | The name of the workflow. |
| Type | The type of workflow. [ Onboarding | Recovery | CC Admin ] If CC Admin is chosen, the only acceptable Outcome is Redirect to Device Manager to register a new login method. |
| URL | The link to be given to requesters; typically it is <tenant_URL>/ui/idv/?verificationFlowId=<verificationFlowId>.A handy copy icon helps you grab this URL for distribution. |
| Description | The Description field as entered when the workflow was created. |
| Status | An icon indicating the current status. [ Enabled | Disabled ] |
| RpApp | The HYPR Relying Party Application associated with this policy; typically this is the RP App associated with the integration being used. Only one RP Application can be associated to a policy. |
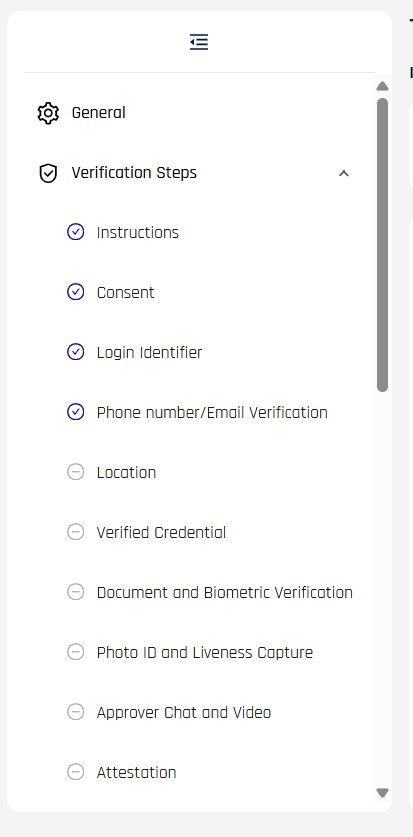
To manage a workflow's configuration, click the row where it is listed. The workflow editor opens with the General tab in view and a left sidebar listing every configurable section.
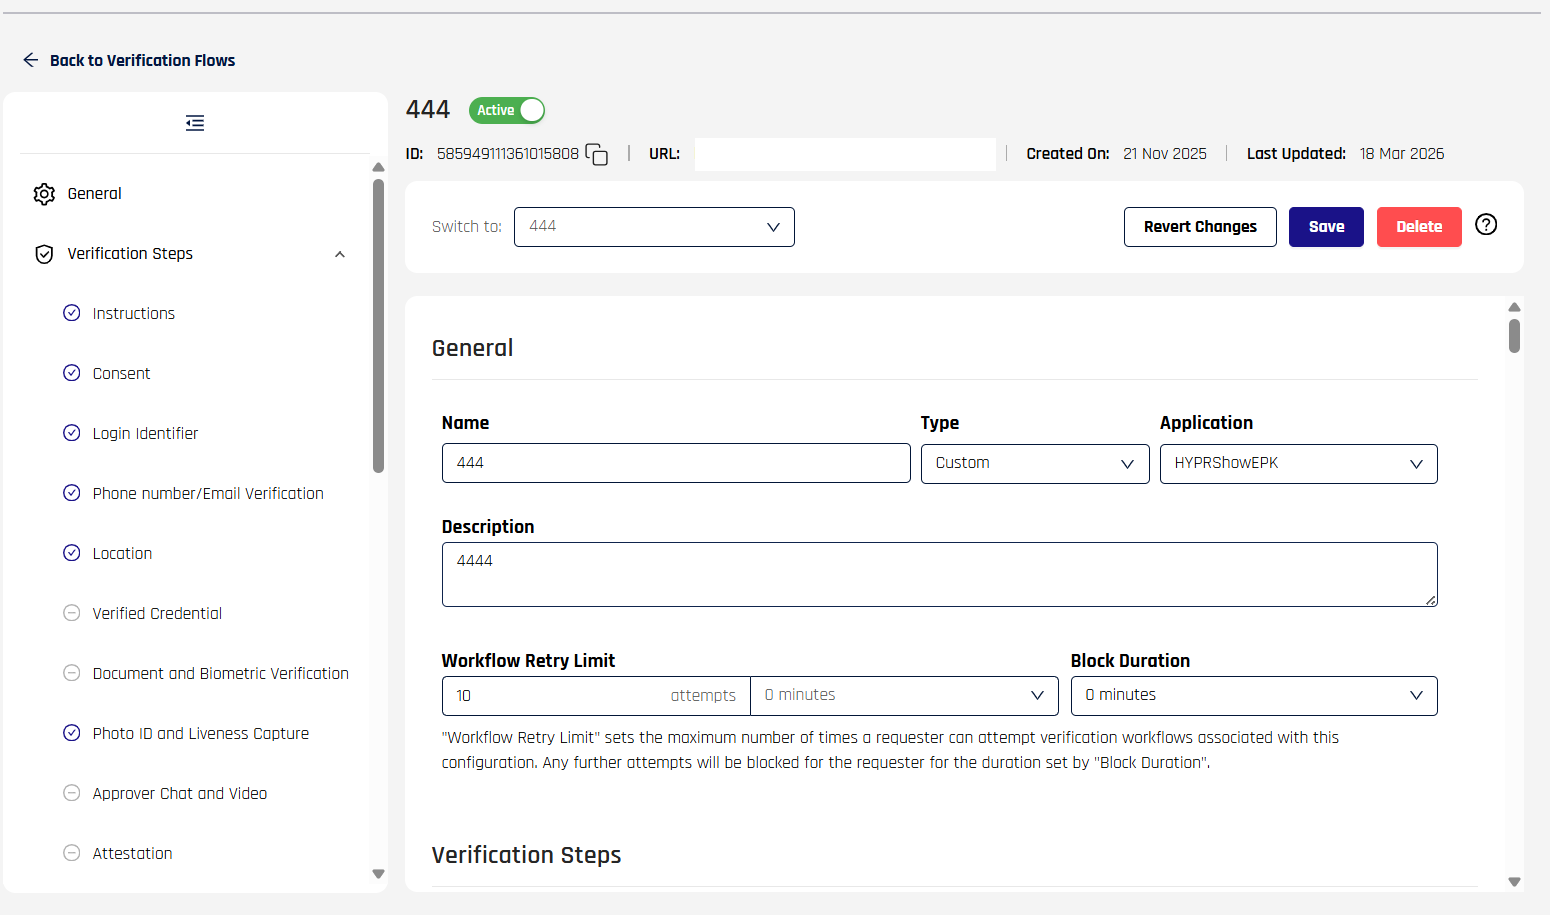
The General tab shows the workflow's unique identifier, the URL used by requesters, creation and last-updated timestamps, and the mutable fields — Name, Type, Application, Description, Workflow Retry Limit, and Block Duration. Use the top-right buttons to Save, Revert Changes, or Delete the workflow.
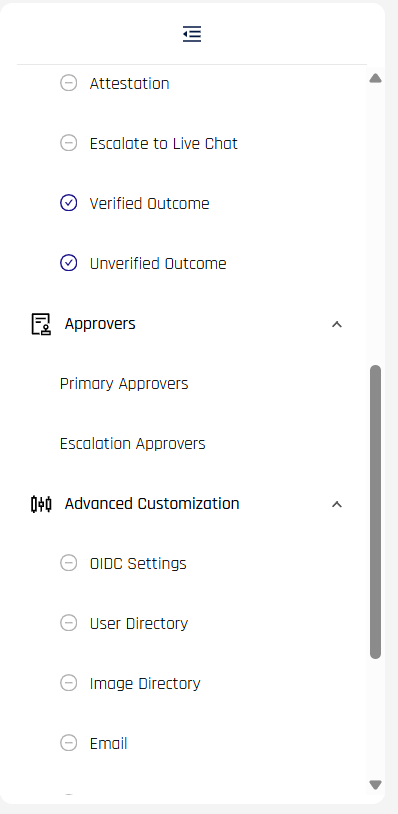
The left sidebar groups the workflow's configuration into three collapsible sections: General, Verification Steps, and Approvers, plus the Advanced Customization group at the bottom. Click any item to scroll directly to that section in the editor.
Click Save at the top right when you are satisfied with the settings, or Revert Changes to discard unsaved edits.
Applications
In the General tab, the Application field assigns this workflow to a specific HYPR Relying Party Application. Use the dropdown to pick from applications available on the tenant.

Selecting No Application leaves the workflow unassigned (useful for testing or for flows invoked exclusively via API).
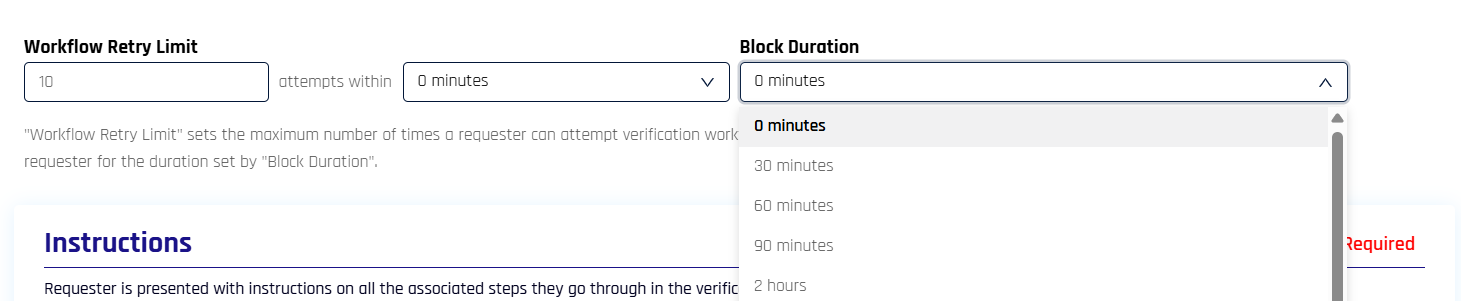
Workflow Retry Limits
Configure overall workflow attempt limits and blocking duration to prevent abuse and protect against repeated failed verification attempts.
-
Workflow Retry Limit: Set the maximum number of verification attempts a requester can make within a specified time window. Enter the number of attempts and select the time window (in minutes) from the dropdown.
-
Block Duration: Configure how long requesters are blocked from attempting verification after exceeding the retry limit. Select the duration from the dropdown (options include 0 minutes, 30 minutes, 60 minutes, 90 minutes, 2 hours, and longer intervals).
When a requester exceeds the workflow retry limit, they are blocked for the configured block duration and receive a message indicating when they can try again.
For per-step retry limits and step-level outcomes, see Injectable Outcomes & Retry Limits.
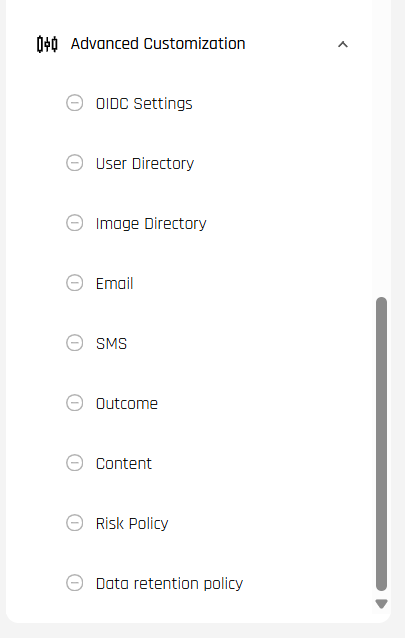
Advanced Customization
The Advanced Customization section at the bottom of the workflow editor lets you assign customizations that override default Affirm behavior for this specific workflow. The customizations themselves are defined in Affirm Customizations (Code Customization API); the workflow editor is where you pick which existing customization applies.
The panel groups the assignment slots into the following areas:
OIDC Settings and User Directory
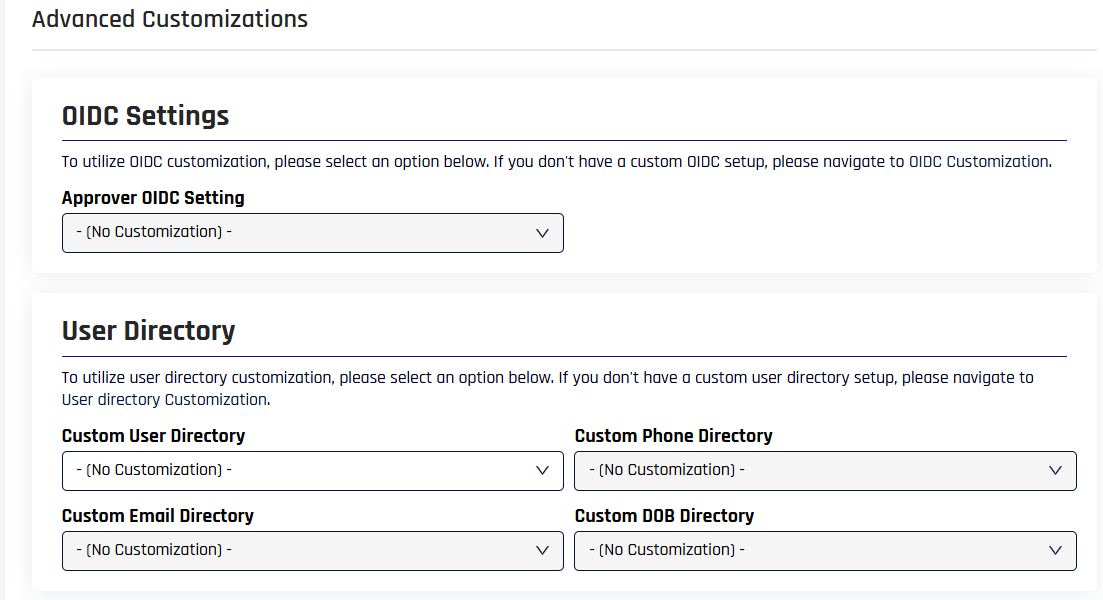
- Approver OIDC Setting — override the OIDC client used for approver invitations
- Custom User Directory, Custom Phone Directory, Custom Email Directory, Custom DOB Directory — fetch the corresponding requester attribute from a custom source instead of the default integration
Image Directory (anchor image and writeback)
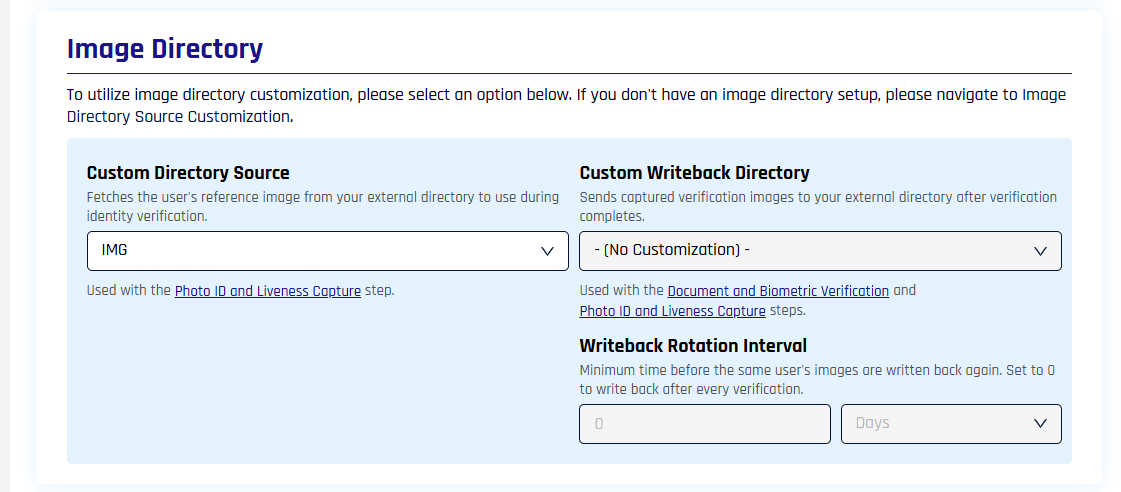
- Custom Directory Source — fetches the requester's reference image from an external directory for use during identity verification (used by the Photo ID and Liveness Capture step)
- Custom Writeback Directory — sends captured verification images to an external directory after verification completes (used by the Document and Biometric Verification and Photo ID and Liveness Capture steps)
- Writeback Rotation Interval — minimum time before the same user's images are written back again; set to
0to write back after every verification
For full Directory Image Writeback details, see Directory Image Writeback.
Email, SMS, and Outcome
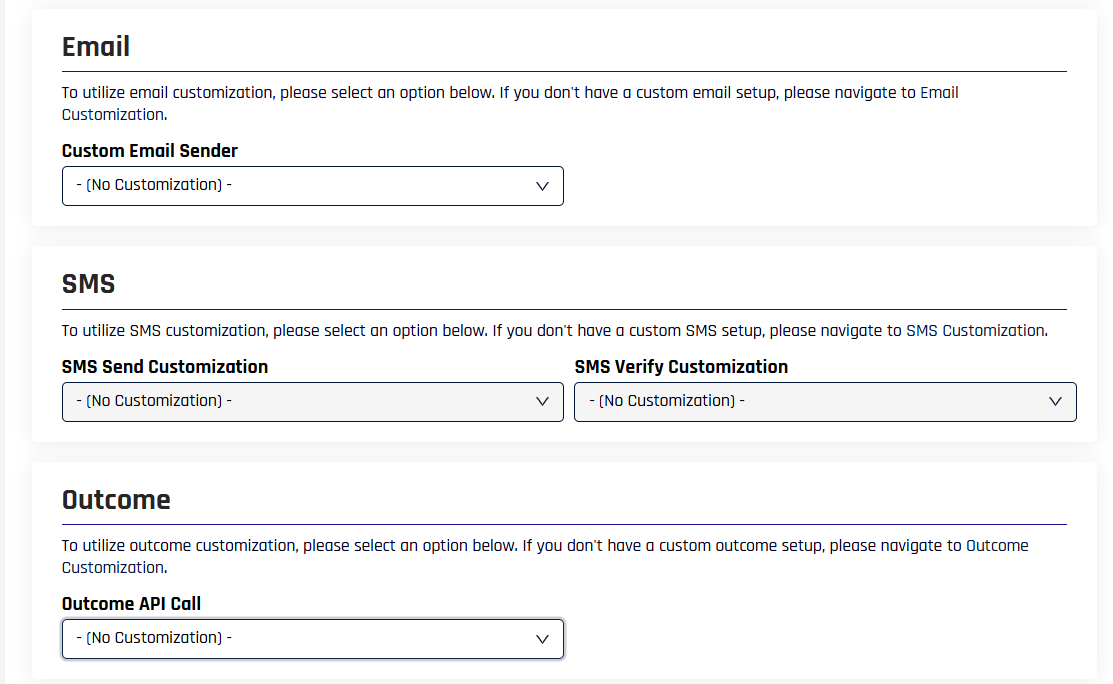
- Custom Email Sender — send Affirm emails via a custom SMTP service instead of HYPR's default
- SMS Send Customization / SMS Verify Customization — send and verify SMS via a custom transport
- Outcome API Call — execute a custom API call before the configured outcome fires
Content and Risk Policy
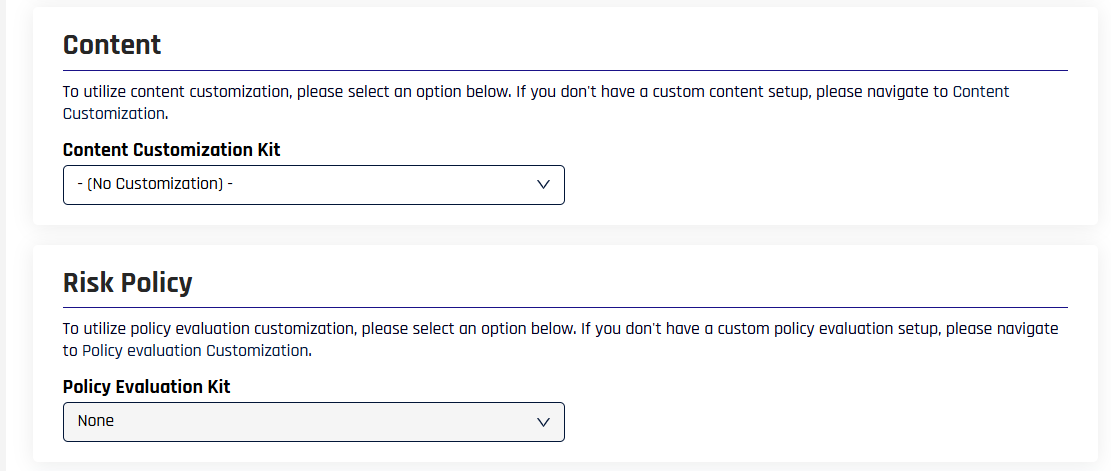
- Content Customization Kit — apply a per-screen content customization to this workflow (see Affirm Studio)
- Policy Evaluation Kit — apply a kit built in the Affirm Risk Policy Builder that drives per-action Pass/Fail decisions based on risk signals
Related
- Injectable Outcomes & Retry Limits — per-step retry and outcome configuration
- Configure Verification Steps — per-step configuration and outcomes
- Approvers and Escalation Approvers — approver assignment, chains, and escalation
- Advanced Setup — integration prerequisites and IdP attribute requirements
- Activity Log — review verification attempts and decisions