Approvers and Escalation Approvers
Approvers and Escalation Approvers
The Approvers section of the workflow editor groups two configurable areas — Primary Approvers and Escalation Approvers. Use the left sidebar to jump to either area, then add, edit, or reorder approvers inline.
The same chain configuration UI is used for both areas; the difference is when the chain is invoked (every verification for Primary Approvers; only on escalation for Escalation Approvers).
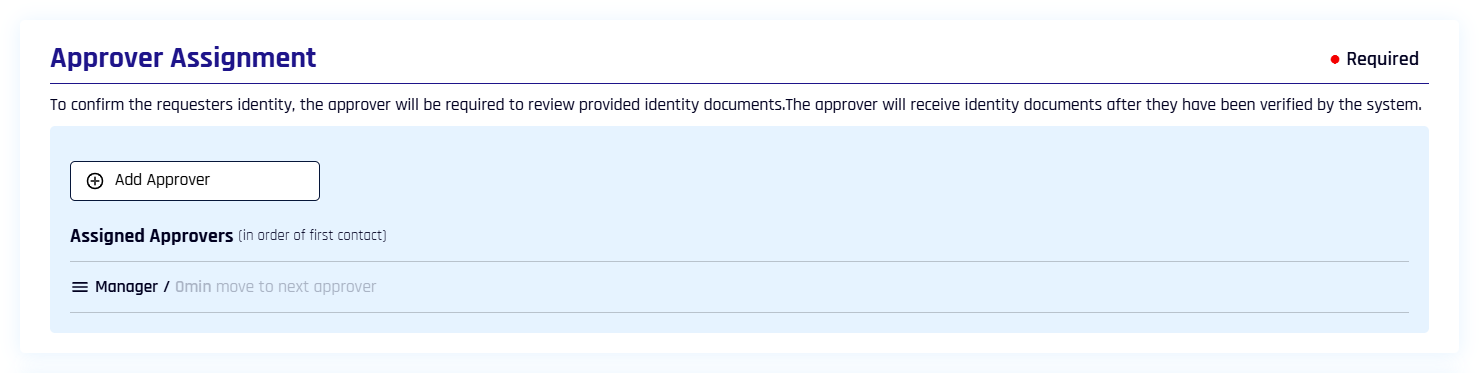
Approver Assignment
Choose whether to send requests using your Integration's defined hierarchy or custom email entries, or a combination of several approvers, with custom time limits for each assignment.
If you are using the Affirm API to create verification flows and user instances, you can provide approvers dynamically on a per-user instance basis. See API documentation for more details
To add a new approver in the Affirm UI:
-
Click + Approvers to open Approver Assignment in the Approver Management dialog.
-
Click Add Approver and select the type of approver to create a new assignment from the following options:

- Manager: HYPR Affirm uses the IdP Manager assignment to determine who will be the approver
- Other: Enter a custom email address or a list
- Dynamic: The approver is provided per-verification at flow initialization time via the Affirm API — useful when the approver depends on the requester's context (department, ticket assignee, on-call rotation, etc.)
- HYPR (automated approval): Allow HYPR Affirm to automatically approve or deny a requester based on their results; approval is only given if all enabled steps pass
-
Select a Timeout in minutes. [
1 min|\2 min|\3 min|\5 min]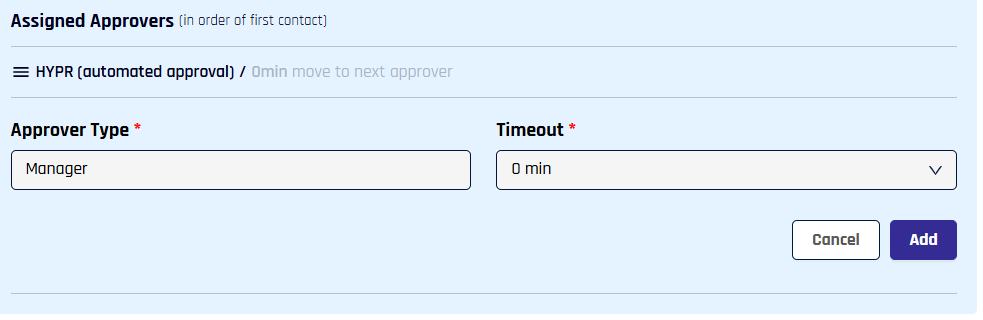
-
Each new assignment starts as the final approver in the chain, and will be greyed out here with a timeout of 0 min; to change it, move it up the chain and Edit the approver
-
The Timeout for HYPR (automated approval) will be 5 min when it is not last in the chain
-
-
Click Add when you are finished, and you are returned to Approver Assignment.
Multiple Approvers
You can assign multiple approvers for a given flow. When the assigned timeout lapses, the current approver's invite is revoked and the next approver is invited.
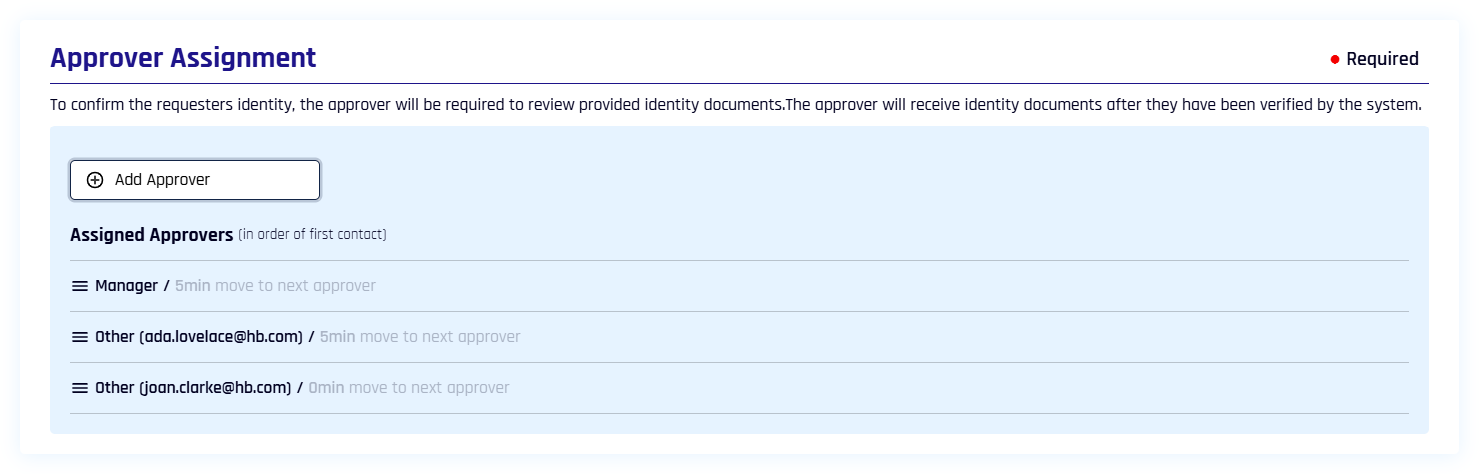
Add as many approvers as you like to the chain of approval.
Managing Approvers
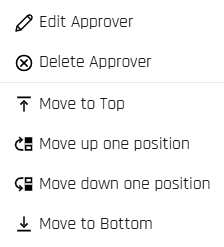
Clicking the three lines to the left of a listed approver offers the following options:
-
Edit Approver: Opens a dialog to change the email address of Other entries and the Timeout for any entry that is not the last one in the chain; click Save when finished editing the approver
-
Delete Approver: Removes the approver from the list instantly
-
Move to Top/Bottom; Move up/down one position: Use these to order the approver chain
Time OutApprovers begin in the final position in the chain with a default Timeout value of 0 min. When multiple approvers are assigned, if an approver is moved from the final position to any other position, the approver's Timeout will reset by default to 5 min. If you want this value to be different thatn 5 min, the timeout for that user will need to be reset to the desired value and Saved.
Likewise, moving any approver to the final position in the chain will result in its Timeout being reset to 0 min.
Escalation Approver Assignment
The Verification Step Escalate to Live Chat must be disabled to use this functionality.
With the exception that in Workflow Management you click + Escalation Approvers to access this pane of the Approver Management dialog, functionality for this section is identical to that of Approver Assignment — with one difference: HYPR (automated approval) is not available for escalation. The escalation chain handles cases that require human review, so an automated approval slot would defeat the purpose.
When no escalation approvers are assigned, the section shows the prerequisite reminder:
After at least one escalation approver is assigned, the section displays the active chain:
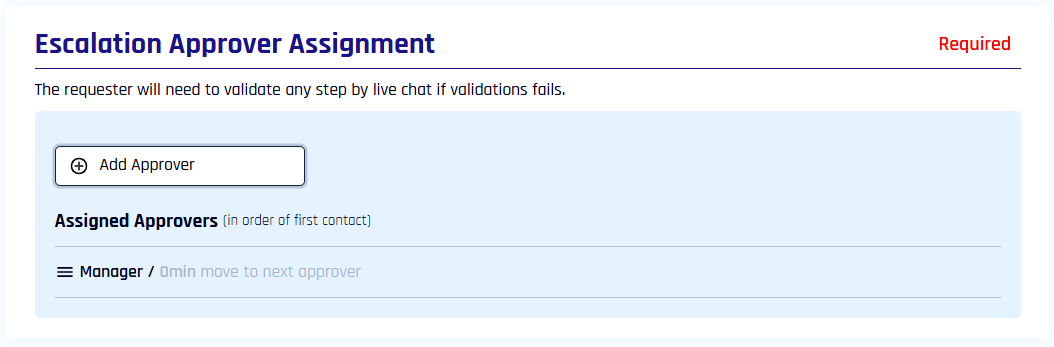
The Add Approver dropdown for escalation offers only Manager, Dynamic, and Other:

Save and Revert
Don't forget to Save once you are finished configuring the Approver Management tab; or, if you want to undo all of your changes, click Revert Changes.
To exit without saving, click Close in the lower left corner.
Related
- Create and Manage Verification Flows — workflow creation, applications, retry limits
- Configure Verification Steps — individual verification steps including Escalate to Live Chat
- Injectable Outcomes & Retry Limits — per-step retry and outcome configuration