Version: 11.3.0

Photo ID and Liveness Capture

The Photo ID and Liveness Capture step in HYPR Affirm requires the requester to capture or upload a valid photo ID and to take a real-time selfie. Affirm compares the two images to confirm that the person presenting is the person on the ID.
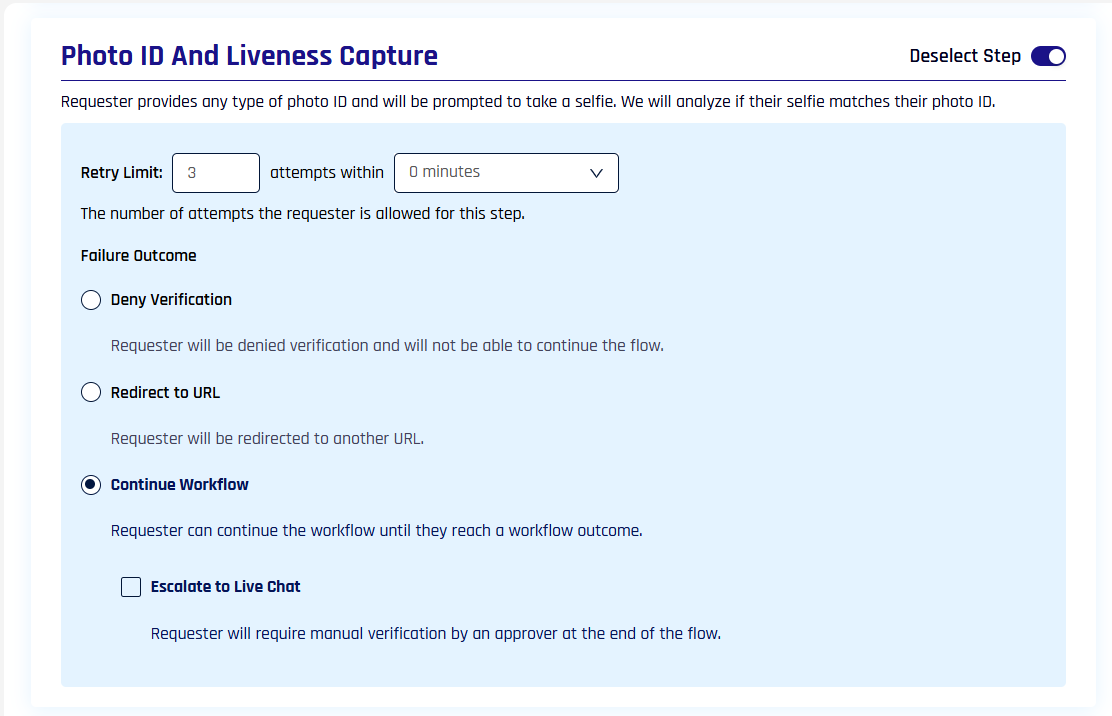
Photo ID and Liveness Capture step in the verification flow editor

This step is a lighter alternative to Document and Biometric Verification. It has no compliance screening and no document authentication.

For how the captured images are handled and how long they are kept, see Biometric Data and the Privacy Notice.

Prerequisites​

  • Profile data: None. The step compares the selfie with the photo ID and reads no profile data from the directory.
  • Camera: The requester needs a device camera for the selfie, and on a phone also for the photo ID.
  • Anchor image (optional): To compare the selfie with a directory photo instead of a photo ID, the flow needs a Custom Directory Source; see Liveness-Only (Anchor Image).

Configure the Step​

Turn on Photo ID and Liveness Capture in the verification flow editor. The step's description reads "Requester provides any type of photo ID and will be prompted to take a selfie. We will analyze if their selfie matches their photo ID."

The following table lists the step's settings.

SettingAllowed ValuesDefault
Retry Limit1 to 10 attempts, within 0 to 60 minutes in 5-minute steps3 attempts within 0 minutes
Failure OutcomeDeny Verification, Redirect to URL (with a Redirect URL) or Continue WorkflowContinue Workflow
Escalate to Live ChatCheckbox under Continue WorkflowCleared

When your tenant uses the Affirm Risk Policy Builder, the Policy Evaluation Kit assigned to the flow sets retries and failure outcomes instead of the Retry Limit and Failure Outcome controls.

The step has no other settings. A flow can also compare the selfie with the requester's directory photo, an anchor image, instead of asking for a photo ID. This applies when the flow's Image Directory has a Custom Directory Source. See Liveness-Only (Anchor Image).

What the Requester Sees​

On the instructions screen, this step is listed as "Verify your biometrics". The step then runs in two parts: the photo ID, then the selfie. The on-screen text in the following tables is the default wording. Administrators can change it on the Document Upload Video Screen of the Photo ID and Liveness Capture Step in Affirm Studio.

Photo ID​

On a computer, the requester uploads an image file of the ID. On a phone, the requester photographs the ID with the camera. Any image format the browser accepts can be uploaded, up to 10 MB.

The following table lists the photo ID screens.

ScreenTitleMessageButtons
Upload, computer"Upload photo document""Upload a photo of your government-issued ID with your face clearly visible. After we verify your document and extract your face, you can continue."Upload
Capture, phone"Capture your ID""Take a clear photo of your ID with your face visible. Hold your phone steady, avoid glare, and keep the full document in the frame."Capture
Preview"Check your image""Make sure your document is visible and unobstructed."Redo, Upload
Face found"Take a selfie""We will compare this with your document."Next
No face found"There was an issue""We couldn't extract your face from that photo."Redo
File over 10 MB"File too large""The file you want to upload is too large."Redo

The upload screen on a computer also shows "Document upload tips:" followed by "Ensure your document photo is well lit and is perpendicular or parallel to the bottom of your phone."

After the requester clicks Upload on the preview, Affirm looks for a face on the ID. The step does not check the document type or whether the document is authentic.

Upload photo document screen with the document upload tips and the Upload button

Selfie​

The selfie is taken live from the device camera. There is no option to upload a stored photo for this part. The browser checks that a face is inside the on-screen outline before the capture button takes the photo.

The following table lists the selfie screens.

ScreenTitleMessageButtons
Camera access"Allow camera access""Please enable camera access to continue. The selfie upload is mandatory to complete this process."Enable camera
CapturingNone"Position your face in the outline. Move closer or adjust lighting if needed."Capture button
No face found within about 10 seconds of capture"Unable to detect face""Please make sure your face is properly positioned and the area is well lit."Capture button
Comparing"Verifying your selfie""Your photo was captured. Please wait while we compare it to your document."None
Match"Thank you!""That is all we need to verify your document photo."Next
No match"These faces do not match.""The recorded face does not match the uploaded document."Retry, or Next on the last attempt
Error"There was an error.""An error occurred."Retry, or Next on the last attempt

While the camera is on, the positioning hint can change to one of these fixed messages. Affirm Studio does not change them: "No face detected yet. Look at the camera and check your lighting.", "Center your full face in the outline.", "Move a little closer so your face fills the outline.", "Center your face within the outline." or "Move further away so your face fits within the outline."

Verifying your selfie screen shown while the selfie is compared with the photo ID Allow camera access screen with the Enable camera button Selfie capture with the face outline turned green and the round capture button

What Data Is Collected​

This step captures two images: the photo ID image and one still photo from the camera. Affirm compares the face on the ID with the face in the selfie.

The result is recorded as Liveness Verified (pass or fail) under Photo ID and Liveness Verification in the Activity Log. The approver's review shows the face taken from the ID and the face taken from the selfie side by side.

The Activity Log and the Audit Trail record the results, not the images. To store the images in your own directory, see Directory Image Writeback. For how HYPR processes and retains biometric data, see the HYPR Affirm Biometric Data Policy and Consent.

Results, Retries and Failure Outcomes​

A photo ID with no detectable face and a selfie that does not match both count as failed attempts. Redo after a failed ID and Retry after a failed selfie both return the requester to the photo ID screen. Each retry therefore captures both images again.

On the last allowed attempt, the retry button reads Next and the flow moves to the step's failure outcome.

This step's defaults are 3 attempts and Continue Workflow. With Continue Workflow, the Verification Unsuccessful screen reads "We are unable to verify your biometrics. You will be taken to the next step momentarily." For what each failure outcome does, including the redirect and escalation to live chat, see Injectable Outcomes and Retry Limits.

Each attempt is recorded in the Audit Trail. AFFIRM_WORKFLOW_DOCUMENT_LIVENESS_START and AFFIRM_WORKFLOW_DOCUMENT_LIVENESS_FINISH mark the start and end of the step, AFFIRM_WORKFLOW_DOCUMENT_UPLOAD shows whether a face was found on the ID, and AFFIRM_WORKFLOW_FACE_MATCH shows the comparison result.

Document Types

Photo ID and Liveness Capture accepts any photo ID in which a face can be found, and it does not check the document type. The list in Supported Documents by Location applies to Document and Biometric Verification.