Configuring Liveness-Only Verification (Anchor Image)
HYPR Affirm can perform high-assurance identity verification using a live selfie compared against an existing anchor image stored in your own directories (for example, Entra ID, Okta, or HR systems), without requiring the requester to upload a government-issued document during the flow.
This topic explains how to configure liveness-only verification based on anchor images, when to use it, and how it behaves alongside traditional document and photo ID flows.
When to Use Liveness-Only Verification
Liveness-only verification is intended for known users whose identities have already been vetted and who have a reliable photo stored in a corporate directory or HR system. Typical scenarios include:
- Step-up authentication for workforce access: Verifying that a user attempting to access a sensitive system matches the person whose account is in the directory.
- Help Desk identity verification: Allowing support staff to confirm a caller’s identity by comparing a live selfie to a directory-sourced photo.
- Ongoing re-verification: Re-validating identity for high-risk operations without repeatedly collecting document images.
In these scenarios, HYPR:
- Fetches a reference image from your configured image repository (anchor image).
- Performs liveness detection and facial comparison between the live capture and the anchor image.
- Avoids storing or persisting the anchor image inside HYPR infrastructure beyond what is needed to complete the verification.
Anchor images remain in your own systems (such as Entra ID, Okta, or HR platforms). HYPR uses the images only as inputs to liveness and face-matching checks and does not create a separate long-term image store.
Prerequisites and Limitations
Before enabling liveness-only (anchor image) verification:
- Directory images must exist and be accessible:
- Your identity provider or HR system must maintain a usable photo for each target user.
- The image should be reasonably recent and high enough quality for facial comparison.
- Custom Image Repository customization is required:
- HYPR uses a User Image Directory Source customization to implement anchor image retrieval logic.
- A developer or system integrator needs to implement and deploy this customization for your environment.
- Image size and format constraints apply:
- Very large or unsupported images can cause retrieval or comparison to fail.
- If the anchor image exceeds the allowed size (for example, images larger than several megabytes), the system may surface an error and follow the configured fallback behavior.
- Scope is limited to internal users:
- Liveness-only is not a replacement for full KYC with document checks for unknown or external users.
If the anchor image cannot be obtained or does not meet quality requirements, HYPR will:
- Surface an appropriate error in the logs and, where configured, to the requester.
- Follow the fallback behavior you configure for the Photo ID and Liveness step.
Configure a custom image repository
Liveness-only verification relies on a custom image repository, implemented as a User Image Directory Source customization (USER_DIRECTORY_FOR_IMAGE_REPOSITORY_SOURCE). This customization tells HYPR how to look up and return an anchor image for a given user.
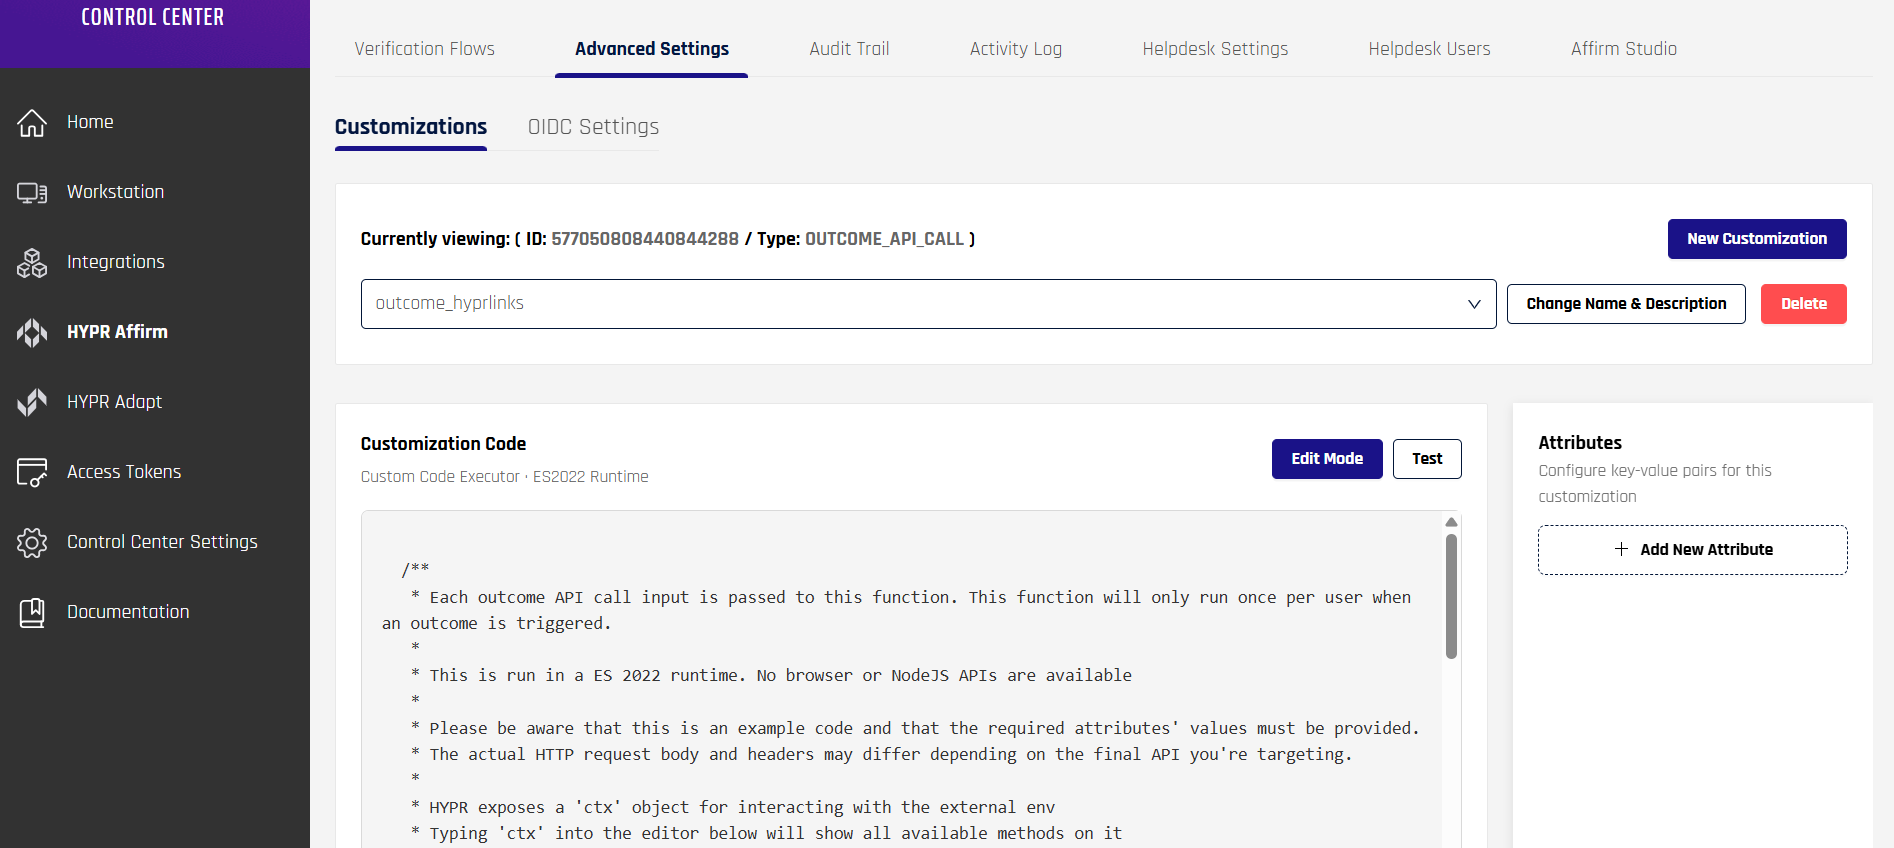
- In HYPR Control Center, go to HYPR Affirm → Advanced Settings → Customizations.
- Click New Customization in the upper right.
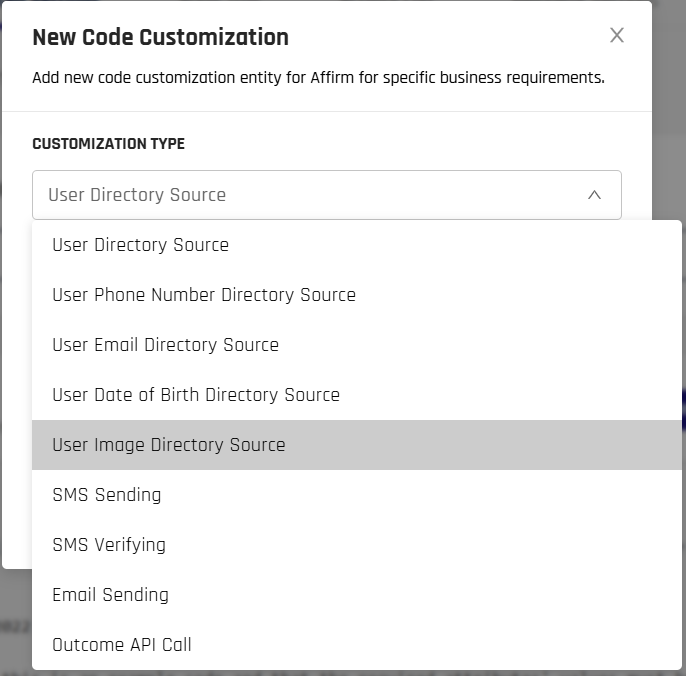
- Select the User Image Directory Source customization type and create a new customization that will act as your Image Repository implementation. Add a name and description for this customization and click Continue.
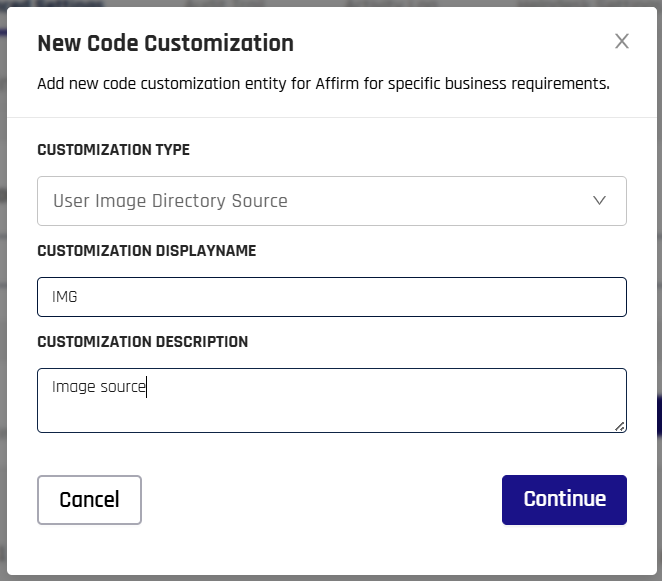
- Use the provided customization code sample script as a starting point. Script logic should do the following:
- Accept the
loginIdentifier. - Query your directory or HR system (for example Entra ID, Okta, Workday, Greenhouse, or a custom source).
- Return the user attributes expected by HYPR Affirm, including the anchor image payload in the field agreed with your HYPR deployment team.
- Accept the
You can click Edit Mode to edit the sample script.
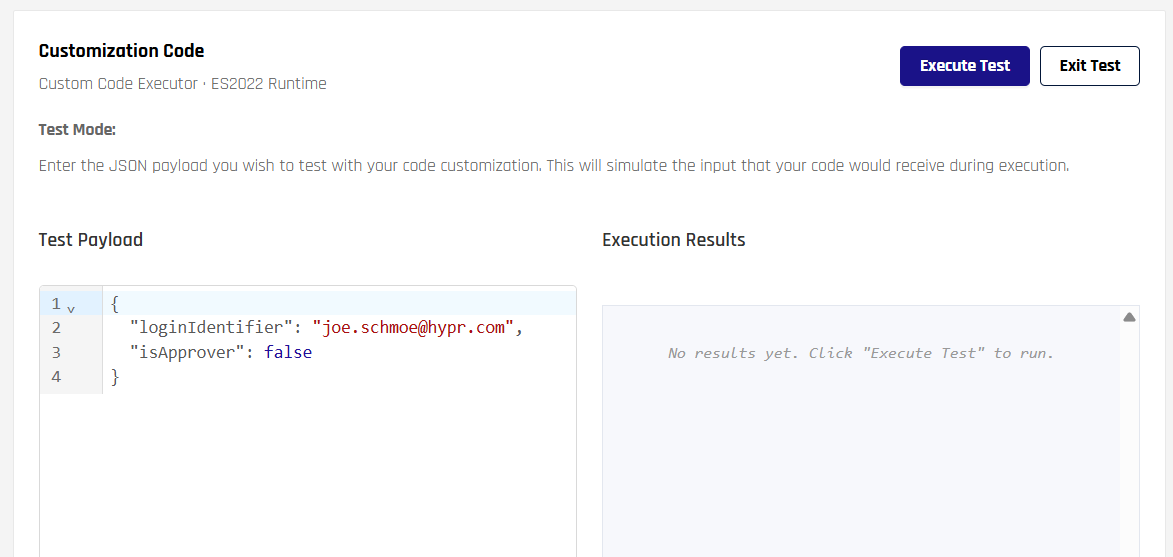
- Save the customization and test it using the Test function in the Customizations UI:
- Click Execute Test to validate that the expected image is returned.
- Confirm what happens when no anchor image is available.
Custom Image Repository Contract (Input/Output)
When implementing the Custom Image Repository code customization, use this baseline contract:
- Input
loginIdentifier
- Output
loginIdentifierimage(string-form image payload)imageSourceType(base64,url, orbinary)
For image, HYPR supports these source patterns:
base64(for example,data:image/png;base64,...)url(retrievable image URL)binary(hex-encoded binary payload, because customization output is string-based)
Supported Image Constraints
- Formats:
PNG,JPEG - Maximum image size:
4 MB
If the image type, payload, or size is invalid, the anchor-image attempt fails and the step follows your configured fallback/retry/failure-outcome behavior.
Attach the image repository to a verification flow
Once your image repository customization is created and tested:
- Assign the User Image Directory Source customization that includes your image repository logic to the desired verification flow:
- Open the appropriate verification flow in the Verification Flows tab.
- In the left navigation pane, scroll down to Advanced Customization and select Image Directory.
- In the Custom Directory Source drop-down menu, select the directory you created.
- Click Save.
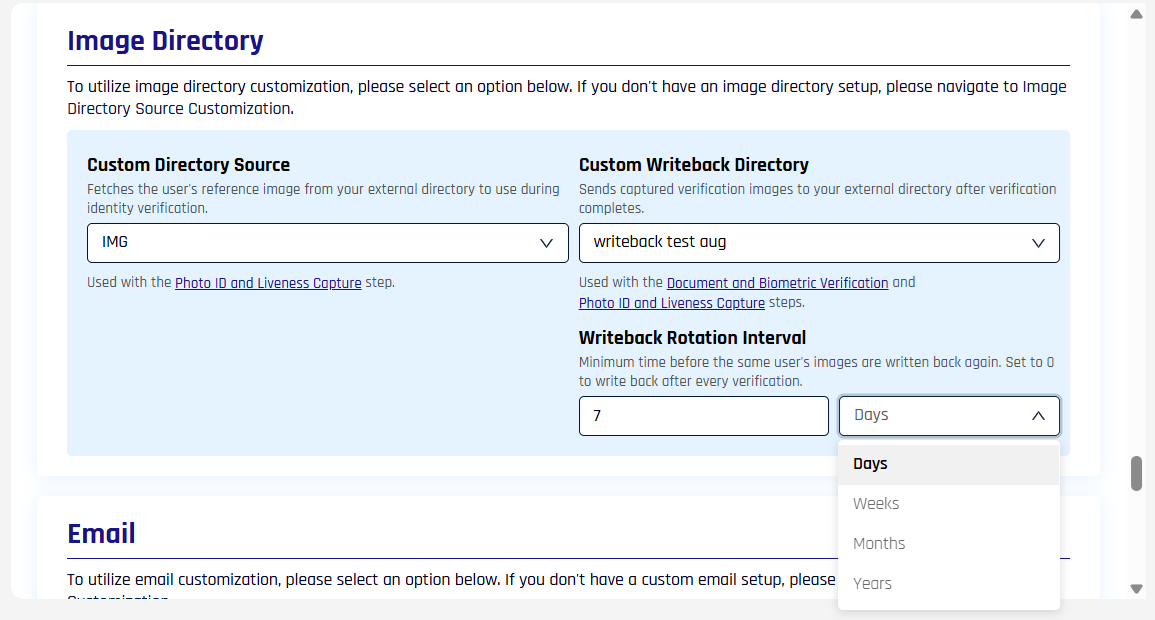
The Image Directory section. Custom Directory Source is the reading half used by this step; Custom Writeback Directory beside it sends captured images out, and is covered in Directory Image Writeback.
-
Open the verification flow in Control Center and edit Photo ID and Liveness Capture.
When the workflow is configured with your custom image directory / image repository, the step will show an Anchor Image section with a with Document Upload fallback checkbox, plus Retry Limit and Failure Outcome.

For more information about User Directory customizations, see Customizations.
Configure the Photo ID and Liveness step
After the image repository customization is in place, configure the Photo ID and Liveness Capture step in your verification flow.
Note: the controls you see here depend on whether your workflow is wired to a custom image directory / image repository.
When wired for anchor-image lookup, the step shows:
- Anchor Image section
- with Document Upload fallback checkbox
- Retry Limit (attempt count + time window)
- Failure Outcome (what happens if the step fails)
- In HYPR Affirm, open the Verification Flows tab and edit your target flow.
- In the Verification Steps list, locate Photo ID and Liveness Capture and open its configuration.
- Under Anchor Image, configure the with Document Upload fallback checkbox:
- Checked: if HYPR cannot use an anchor image for the requester, the requester is prompted to upload a document and complete the selfie so the flow can continue.
- Unchecked: if HYPR cannot use an anchor image for the requester, the step fails according to your configured Retry Limit and Failure Outcome.
- Configure Retry Limit:
- Set the maximum number of attempts.
- Set the time window for those retries.
- Configure Failure Outcome:
- Options in the UI include (for example)
Deny Verification,Redirect to URL, andContinue Workflow(and escalation choices when presented).
- Options in the UI include (for example)
- Save the step configuration, then click Save to apply the changes to the flow.
Test liveness-only flows
After configuration, validate the behavior end-to-end:
- User with anchor image:
- Start a verification flow where the requester has a valid directory photo.
- Confirm that the Photo ID and Liveness Capture step prompts for a selfie and completes successfully when the face matches the anchor image and liveness checks pass.
- User without anchor image:
- Use a requester who does not have a directory photo, or temporarily remove the image from the directory.
- Confirm that:
- With with Document Upload fallback disabled (checkbox unchecked), the step fails according to your Retry Limit and Failure Outcome.
- With with Document Upload fallback enabled (checkbox checked), the flow prompts for a document upload when the anchor image is not available.
Monitoring and Events
When liveness-only / anchor-image flows are enabled, related events appear in the HYPR Audit Trail:
AFFIRM_WORKFLOW_ANCHOR_IMAGEEmitted when an anchor image is captured or associated with an Affirm workflow for visual verification. This event indicates that the liveness step attempted to use a directory-sourced reference image.
For detailed event definitions, see Audit Trail Events.
In addition, review your Activity Log and server logs to monitor:
- Successful vs. failed liveness-only attempts.
- Error codes related to missing or invalid anchor images.
- Any fallbacks to document upload for flows configured with a fallback option.
- Validation failures for image source type, image format, and image size.
Comparing Available Photo and Liveness Options
HYPR Affirm supports several patterns for combining photo, document, and liveness verification:
- Document and Biometric Verification
- Best for high-assurance onboarding and external KYC-like flows.
- Photo ID and Liveness Capture (Document Upload)
- Best for scenarios that rely on visual comparison without full HR data checks.
- Photo ID and Liveness Capture (Anchor Image / Liveness-Only)
- Best for internal workforce scenarios where a trusted directory photo already exists and you want to reduce friction.
Choose the combination that best matches your risk profile and data governance requirements, and document your chosen pattern in internal runbooks so approvers and help desk staff understand how identity is being verified.