Configuring End User Screen Management
This guide provides administrators with a general overview for setting up and configuring the End User Screen Management System for HYPR Affirm.
This article focuses on enabling the feature, managing content through Control Center or API, and applying customizations to workflows. For what users see on each screen, branding guidelines and examples, see User Experience: Affirm Studio.
For general branding customization (logos, backgrounds, colors), see Custom Branding.
Prerequisites
- HYPR Control Center access with Affirm administration permissions
- HYPR 10.7.0 or later (for Control Center UI)
- HYPR 10.3.0 or later (for API-only configuration)
- API access credentials (if using API-based configuration)
Control Center users with the Admin or App Manager role can create, edit, and manage content customizations. Users with the Viewer or User Manager role can view them but not change them.
Creating Content Customizations
Content customizations can be created and managed through the Control Center user interface (HYPR 10.7.0 and later) or via the REST API.
Using Control Center Interface
Navigation:
- Log into HYPR Control Center
- In the left navigation menu, click HYPR Affirm
- Click the Affirm Studio tab in the top navigation bar
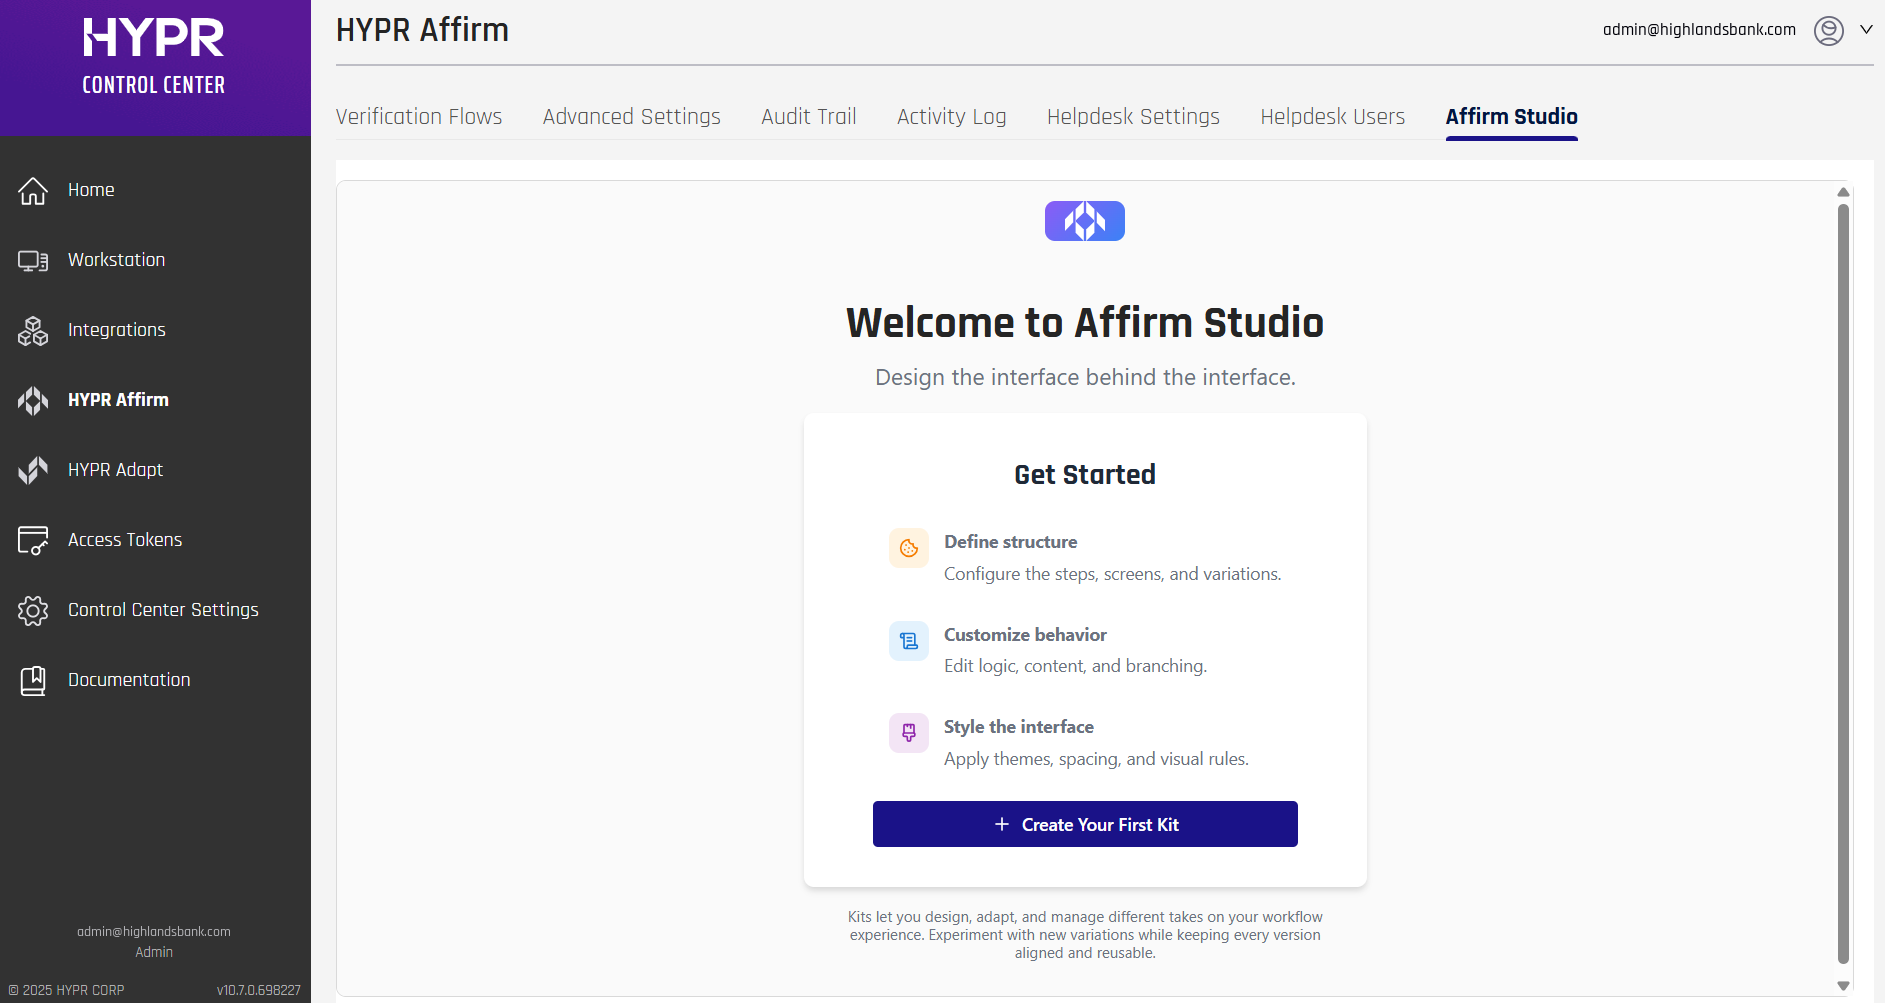
Key Features:
- Kit Management: Create, edit, and delete workflow customization kits
- Step-Based Editing: Edit content for each verification flow step (Instructions, Consent, Login Identifier, OTP, Location, Identity Verification, Outcome, Error)
- Content Editor: Edit Card Header, Card Footer, Button Labels, Error Messages, and Screen Specific Content
- Screen Preview: Review how customized screens will appear to end users (preview functionality)
Workflow:
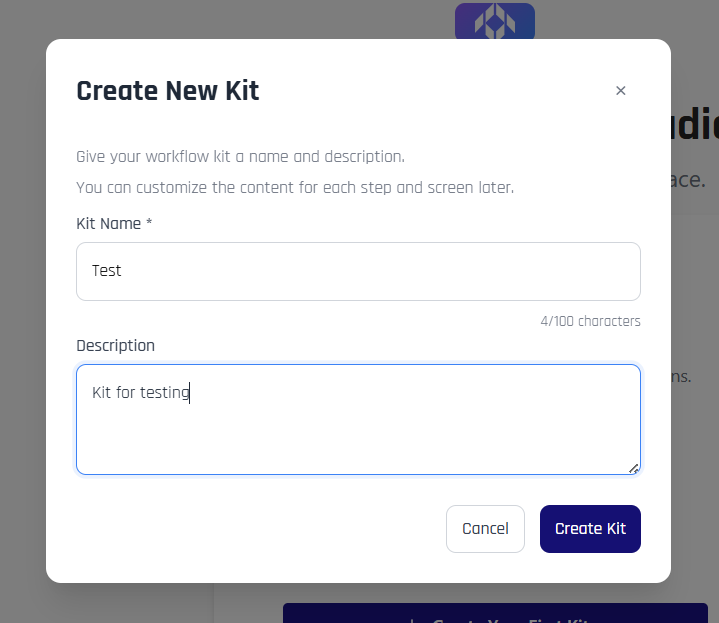
- From the Welcome screen or Kit Management screen, click + Create Your First Kit or + Create New Kit
- Enter a Kit Name and optional Description in the Create New Kit modal
- Click Create Kit to create the kit
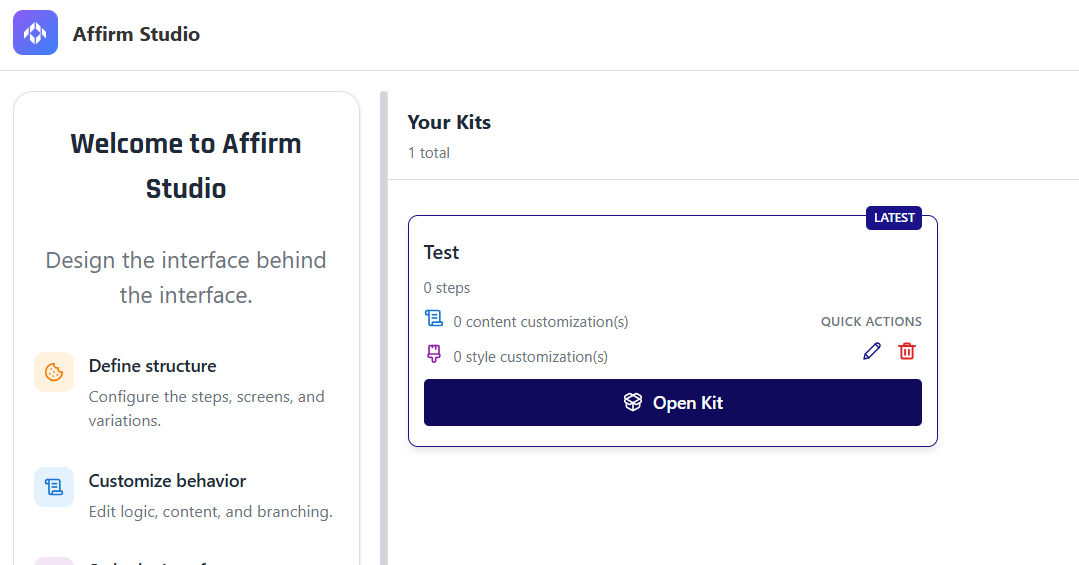
- From the Kit Management screen, click Open Kit on the kit you want to edit
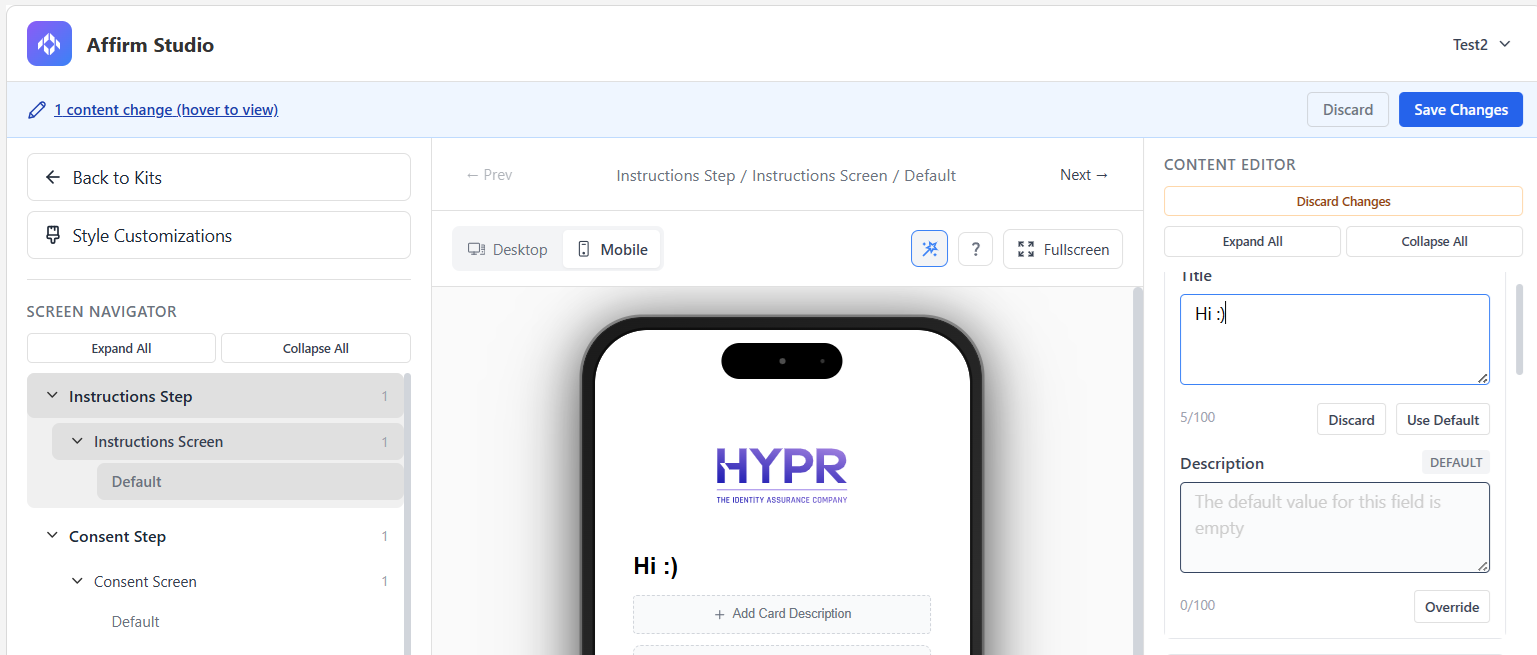
- In the Kit Editing screen, select a step from the verification flow in the left panel.
- Use the Content Editor in the right panel to configure content for each screen type.
- Use the Preview feature in the center panel to review changes as you make them, using the Desktop/Mobile and Wizard/User mode toggles to validate how the screen will look to end users.
- As you edit, Affirm Studio tracks unsaved changes at the kit level and shows a banner when there are pending updates, allowing you to review and either Save or Discard those changes together.
The system validates content input and blocks invalid content (such as invalid HTML). If unsupported content is detected, an "Invalid Content Input" error is triggered.
Using the API
For programmatic configuration, use the REST API endpoints. See Affirm Content Customization API for complete API documentation.
Prepare your content
Before creating content customizations, plan your content strategy:
- Identify Target Screens: Determine which verification screens need customization
- Define Content: Prepare titles, descriptions, instructions, and button labels
- Consider Localization: Plan for multiple languages if needed
- Branding Guidelines: Ensure content aligns with corporate branding
Create the content customization
Use the API to create your first content customization:
POST /content-customization
Content-Type: application/json
Authorization: Bearer YOUR_API_TOKEN

{
  "displayName": "Company Branding",
  "description": "Standard company branding for all verification screens",
  "contentMap": {
    "consentScreen": {
      "cardHeader": {
        "title": "Welcome to [Company Name] Verification",
        "description": "Please review and accept our terms of service"
      },
      "cardContent": {
        "mainContent": "By proceeding, you agree to our verification process and privacy policy.",
        "extraContent": "This process helps us verify your identity securely and efficiently."
      },
      "cardFooter": {
        "caption1": "Secure verification process",
        "caption2": "Powered by HYPR"
      },
      "buttonLabels": {
        "accept": "I Accept",
        "decline": "Decline"
      }
    }
  }
}
Test the configuration
After creating content customizations, test them in your development environment:
- Retrieve Configuration: Use the GET endpoint to verify your setup
- Test Workflows: Run sample verification workflows to see the customizations
- Validate Content: Ensure all text displays correctly and buttons function properly
- Check Localization: If using multiple languages, test each variant
Screen Configuration
Each customizable screen supports the following configuration elements:
Header Content
- Title: Main screen title
- Description: Screen description
Main Content
- Primary Content: Main instructional text
- Extra Content: Additional information
Footer Content
- Caption 1: Primary footer text
- Caption 2: Secondary footer text
Button Labels
- Customize all button text for the screen
Applying to Workflows
Once you have set up a customization, you need to apply it to your workflow in one of two ways.
Using Control Center Interface
- Navigate to HYPR Affirm in the left navigation menu
- Click the Verification Flows tab
- Click the workflow you want to customize
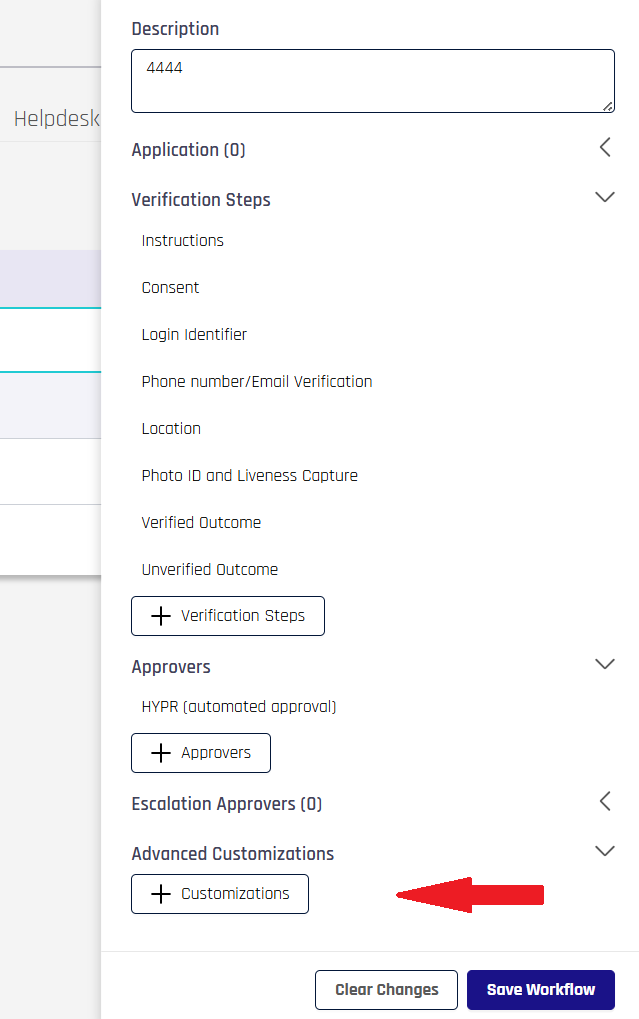
- In the workflow configuration menu pane on the right, scroll down to the Content Customization section and click the + Customizations button
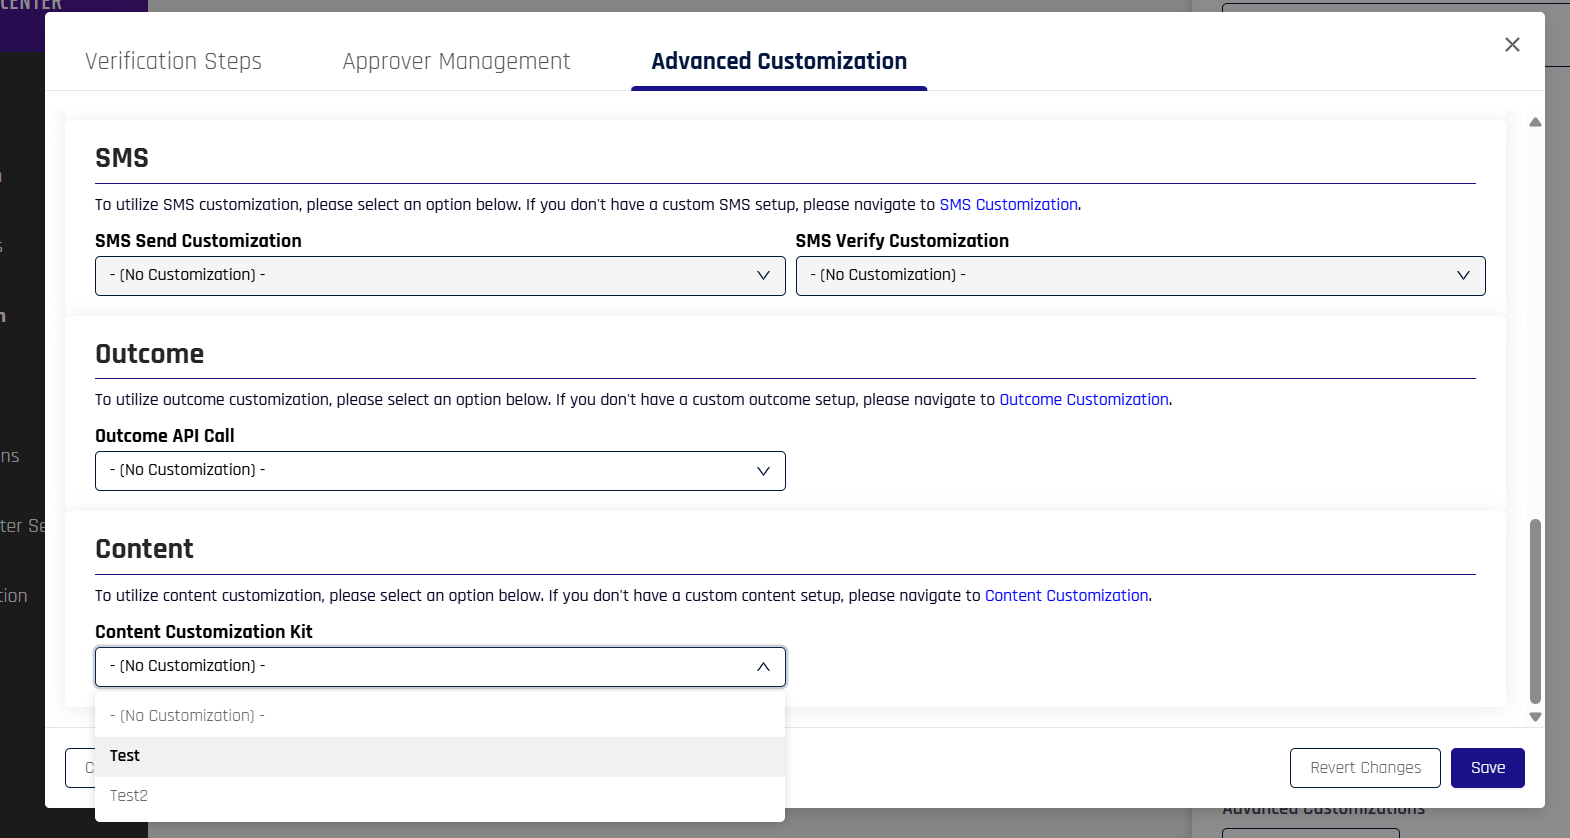
- Scroll down to the Content section
- Select the kit you want to apply from the Content Customization Kit drop-down menu
- Click Save to apply the kit to the workflow
Using the API
- Retrieve Workflow Configuration: Get the current workflow settings
- Update Configuration: Add the
contentCustomizationIdto the workflow - Save Changes: Apply the updated configuration
- Test Workflow: Verify the customizations appear correctly
API Configuration Examples
Basic Company Branding
{
  "displayName": "Company Branding",
  "description": "Standard company branding for all verification screens",
  "contentMap": {
    "consentScreen": {
      "cardHeader": {
        "title": "Welcome to [Company Name] Verification",
        "description": "Please review and accept our terms of service"
      },
      "cardContent": {
        "mainContent": "By proceeding, you agree to our verification process and privacy policy.",
        "extraContent": "This process helps us verify your identity securely and efficiently."
      },
      "cardFooter": {
        "caption1": "Secure verification process",
        "caption2": "Powered by HYPR"
      },
      "buttonLabels": {
        "accept": "I Accept",
        "decline": "Decline"
      }
    }
  }
}
Localized Content (Spanish)
{
  "displayName": "Spanish Localization",
  "description": "Spanish language content for global teams",
  "contentMap": {
    "consentScreen": {
      "cardHeader": {
        "title": "Bienvenido a la Verificación de [Company Name]",
        "description": "Por favor revise y acepte nuestros términos de servicio"
      },
      "cardContent": {
        "mainContent": "Al continuar, usted acepta nuestro proceso de verificación y política de privacidad.",
        "extraContent": "Este proceso nos ayuda a verificar su identidad de manera segura y eficiente."
      },
      "cardFooter": {
        "caption1": "Proceso de verificación seguro",
        "caption2": "Desarrollado por HYPR"
      },
      "buttonLabels": {
        "accept": "Acepto",
        "decline": "Rechazar"
      }
    }
  }
}
Multi-Screen Configuration
{
  "displayName": "Complete Workflow Branding",
  "description": "Comprehensive branding for all verification steps",
  "contentMap": {
    "consentScreen": {
      "cardHeader": {
        "title": "Welcome to Company Verification",
        "description": "Please review and accept our terms"
      },
      "cardContent": {
        "mainContent": "By proceeding, you agree to our verification process",
        "extraContent": "This process helps us verify your identity securely"
      },
      "cardFooter": {
        "caption1": "Secure verification process",
        "caption2": "Powered by HYPR"
      },
      "buttonLabels": {
        "accept": "I Accept",
        "decline": "Decline"
      }
    },
    "instructionsScreen": {
      "cardHeader": {
        "title": "Verification Instructions",
        "description": "Follow these steps to complete verification"
      },
      "cardContent": {
        "mainContent": "Please follow the instructions carefully to complete your verification",
        "extraContent": "Ensure you have a valid government-issued ID ready"
      },
      "cardFooter": {
        "caption1": "Secure verification process",
        "caption2": "Powered by HYPR"
      },
      "buttonLabels": {
        "continue": "Continue",
        "back": "Back"
      }
    },
    "outcomeScreen": {
      "cardHeader": {
        "title": "Verification Complete",
        "description": "Your verification has been processed"
      },
      "cardContent": {
        "mainContent": "Thank you for completing the verification process",
        "extraContent": "You will receive confirmation of your verification status"
      },
      "cardFooter": {
        "caption1": "Verification complete",
        "caption2": "Powered by HYPR"
      },
      "buttonLabels": {
        "finish": "Finish",
        "contact": "Contact Support"
      }
    }
  }
}
Getting Help
If you encounter issues:
- Check API Documentation: Review the Affirm Content Customization API
- Contact Support: Reach out to HYPR support for assistance
- Review Logs: Check system logs for error details
- Test in Development: Verify configurations in a test environment