Configuring Outcome: Entra ID Temporary Access Pass (TAP)
Workflow outcome configuration for Temporary Access Pass is in Administering HYPR Affirm. For Entra app registration, API permissions, and app registration patterns, see Entra ID Application Setup for HYPR Affirm.
This guide explains how to configure Microsoft Entra ID so HYPR Affirm can issue a Temporary Access Pass (TAP) after a requester successfully completes a verification flow.
The primary setup flow for this article is based on the internal HYPR Affirm-only Entra integration guide and uses Microsoft's TAP documentation as supplemental background for tenant-side TAP policy behavior.
The assumption is that you want HYPR Affirm to issue a Microsoft Entra Temporary Access Pass as the outcome of a successful verification flow, especially when you do not already have a Microsoft Entra integration in HYPR that is being used by another login experience.
What You'll Need
- A Microsoft Entra tenant
- An administrator account in the
*.onmicrosoft.comdomain with Global Admin access - A HYPR tenant with HYPR Affirm enabled
- A decision on whether this Entra integration will be used only for Affirm or shared with other HYPR use cases
Entra must provide the following attributes for all target users: username (UPN), and email address. Depending on the verification flow steps configured, additional attributes may be required: mobile phone number, first and last name, manager, and street address with city, state, postal code, and country code.
Setting Up the Entra ID Tenant
Enable the Temporary Access Pass Policy
Before HYPR can issue a TAP, the Entra tenant must allow TAP for the users or groups that will go through the Affirm workflow.
- Sign in to the Microsoft Entra admin center as an administrator with permission to manage Authentication methods policies.
- Browse to Entra ID > Authentication methods > Policies.
- Select Temporary Access Pass.
- Enable the policy and include the users or groups that should be allowed to sign in with TAP.
- If necessary, select Configure and adjust the policy defaults, such as minimum lifetime, maximum lifetime, default lifetime, passcode length, and whether TAP is one-time use.
- Click Save.
HYPR can create and return a TAP only if the target user is in scope for the Entra TAP policy.
If your requesters will use TAP to enroll a device or complete passwordless registration after the verification flow, review the lifetime and one-time-use settings carefully. Microsoft's guidance notes that one-time TAPs can require tighter timing during passwordless registration, while multi-use TAPs can simplify longer onboarding flows.
HYPR can issue a TAP only for users who are allowed to use TAP in the Entra tenant. For additional details on TAP policy options, onboarding, and lifecycle considerations, review Microsoft's guidance in Configure Temporary Access Pass to register passwordless authentication methods.
With the TAP policy in place, complete the Entra app registration. See Entra ID Application Setup for HYPR Affirm for the full app registration, permissions, admin consent, and client secret steps. Return here to add the integration in HYPR Control Center.
Setting Up the HYPR Tenant
Install the Integration
Once the Entra app registration is complete, add the corresponding integration in HYPR Control Center.
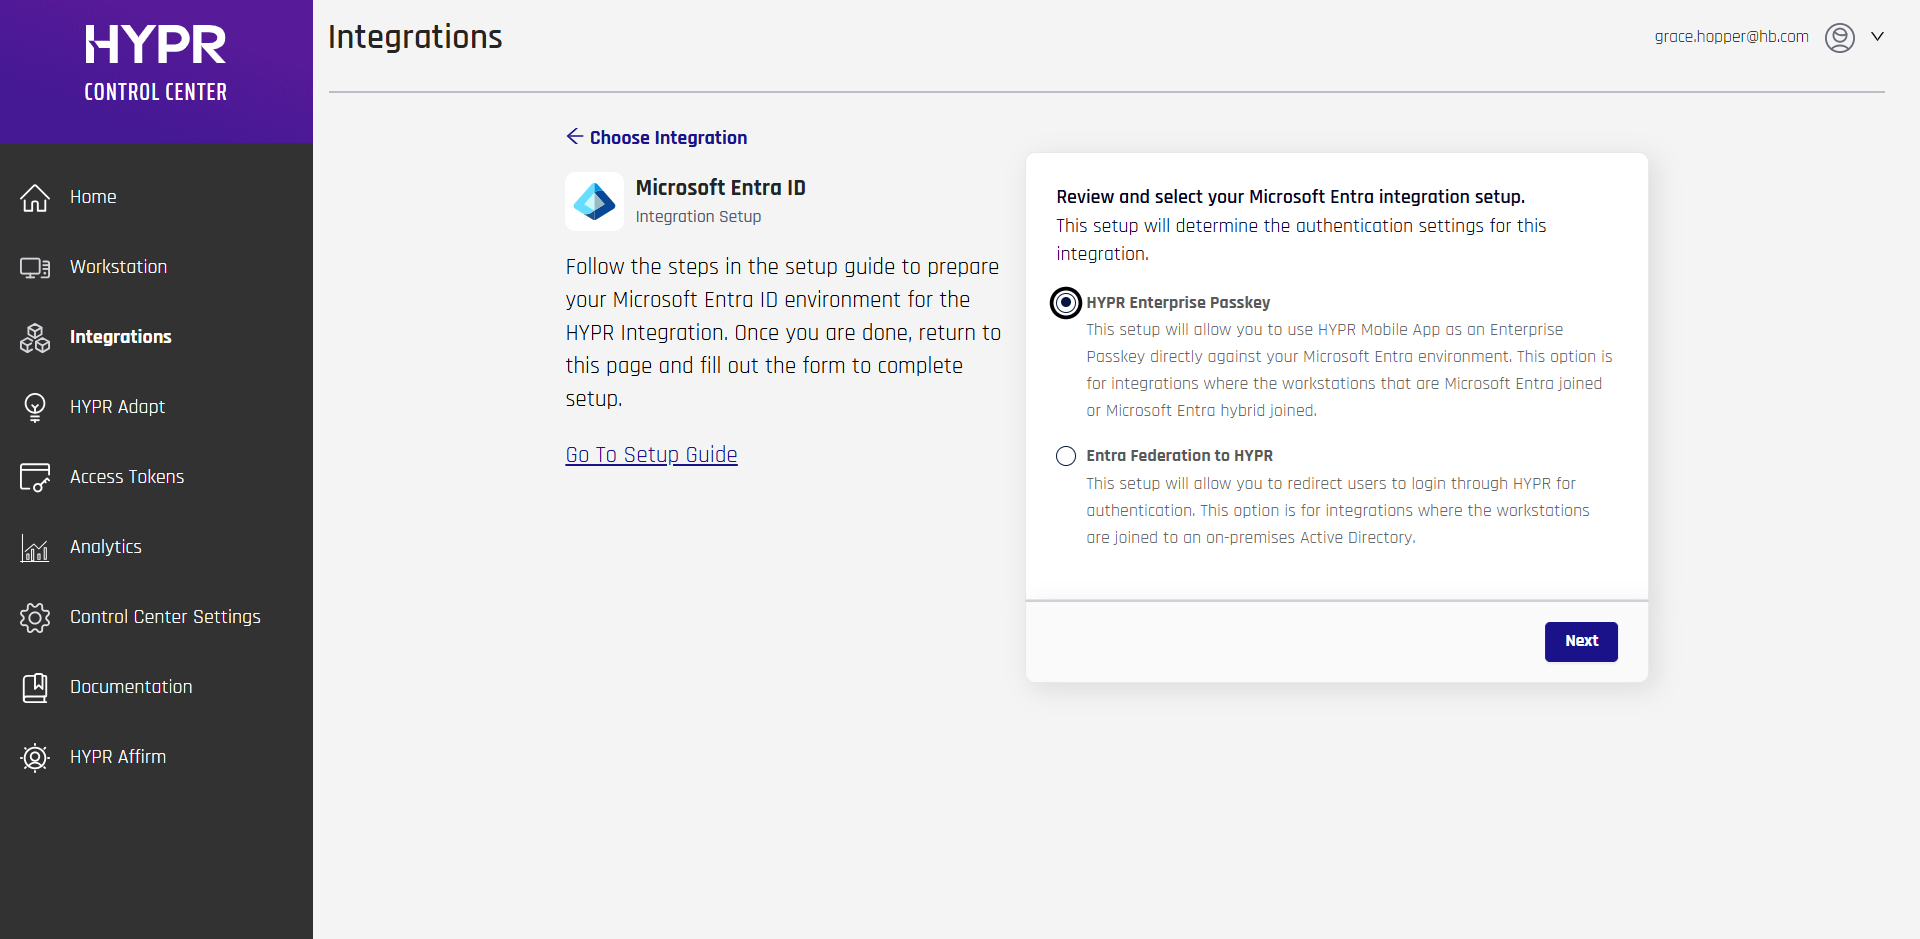
- In HYPR Control Center, go to Integrations > Add New Integrations > Microsoft Entra ID.
- In the setup-choice dialog, select HYPR Enterprise Passkey.
- Complete the setup form using the values noted during app registration:
- Application Name
- Directory (tenant) ID
- Application (client) ID
- Authentication Method: Certificate or Client Secret
- Client Secret (if Client Secret authentication is selected)
- Client Certificate and Client Private Key (if Certificate authentication is selected)
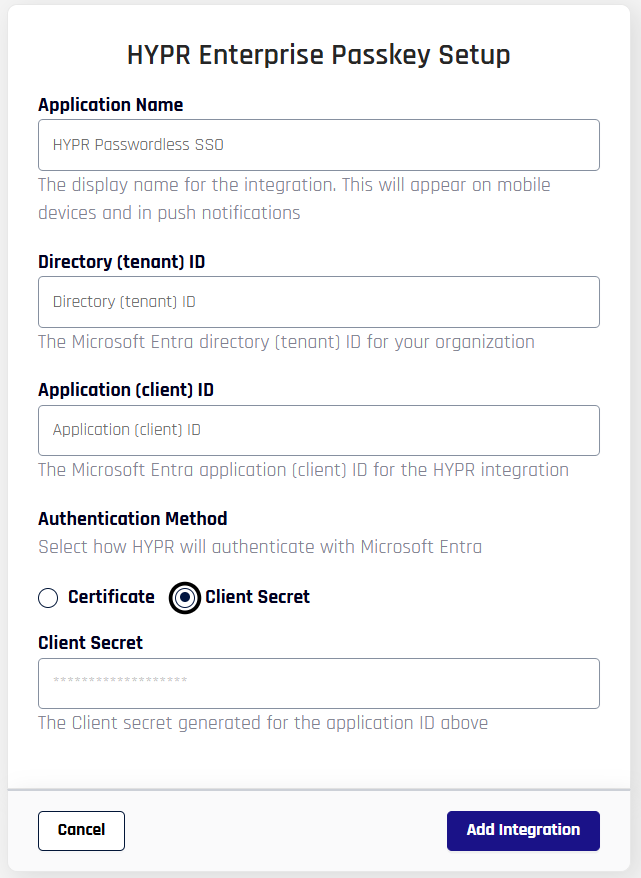
- Click Add Integration. HYPR confirms that the provided values are valid and that it can connect to Entra ID.
- In the post-setup confirmation dialog, click Maybe Later unless you specifically want to continue with self-enrollment.
Selecting HYPR Enterprise Passkey also creates Entra groups used by that integration. If you are creating this integration only to support Affirm TAP outcomes, you do not need to manage those groups directly.
Configure Affirm to Use the Integration
After the Entra integration exists, assign it to the HYPR Affirm workflow that should issue TAPs.
- Open HYPR Affirm in Control Center.
- Open the target verification flow.
- In the Applications section, add the Entra application associated with the integration you created.
- In the workflow Outcome section, select Issue a Microsoft Entra ID Temporary Access Pass (TAP).
- Save the workflow.
For more information about the overall workflow configuration, see Administering HYPR Affirm.
Validate the Configuration
After the workflow is configured, run a test verification against a user who is in scope for the Entra TAP policy.
Successful validation should confirm the following:
- The verification flow completes successfully
- The configured workflow returns the TAP outcome
- The requester receives the Temporary Access Pass result
- The TAP can be used in accordance with your Entra tenant's TAP policy
The requester experience will look similar to this when the TAP outcome is returned:

If you need guidance on how users can use the issued TAP after the Affirm workflow completes, see Microsoft's public TAP documentation: Configure Temporary Access Pass to register passwordless authentication methods.
Related Documentation
- For general HYPR Affirm workflow configuration, see Administering HYPR Affirm
- For Entra app registration, API permissions, and app registration patterns, see Entra ID Application Setup for HYPR Affirm
- For another Entra-based outcome example, see Configuring Outcome: Entra Verified ID
- For requester-side experience, see HYPR Affirm Requester Experience